Home Blog Page 57

Taking a Viking Cruise Along Europe’s Coastlines

0
A stone bridge with an arched entryway leads to a large, rocky hill covered in green foliage.
A view of the coast of Dubrovnik, Croatia.

Frequent TABLE contributor and frequent traveler Stephen Treffinger boarded a Viking cruise ship for a weeklong sojourn to Venice, Croatia, Montenegro, and Greece. Along with our envy, he racked up some incredible memories of some of the world’s most beautiful coastlines.
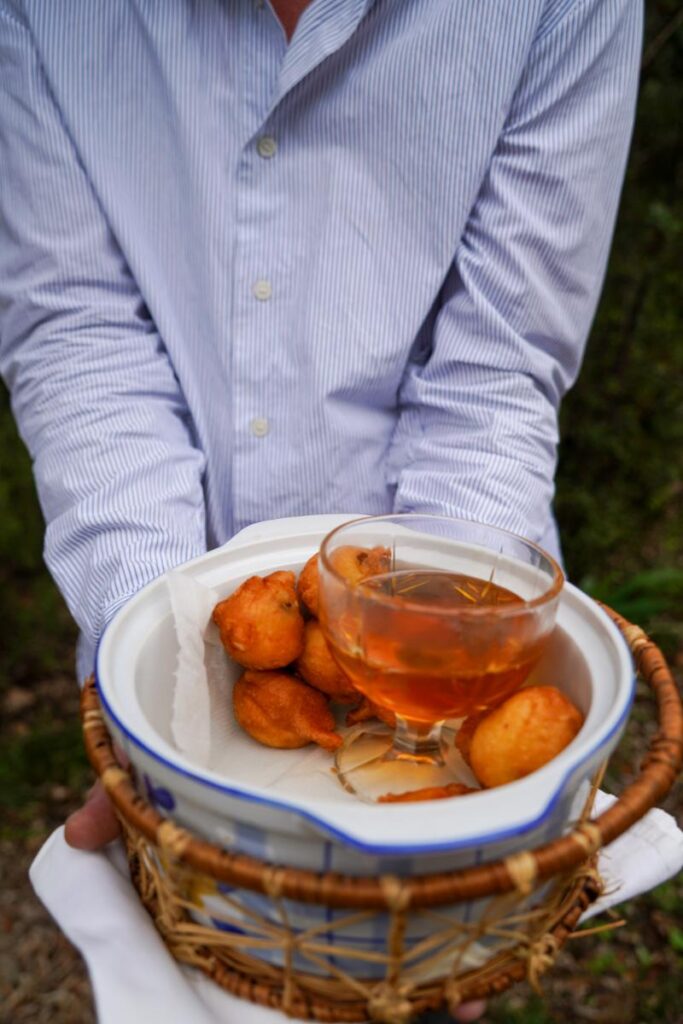
A person holds a plate of small, fried, golden-brown spheres with a glass of amber liquid in the center.
Food tasting excursion near Kotor, Montenegro. Photo by Jessica Kelly.

Cruising Through Europe’s Coastlines with Viking

In centuries past (and in several Merchant Ivory films), the Grand Tour took Europeans on a multi-leg trip that typically included Italy, accompanied by a family member, governess, or tutor. Today, these journeys are usually undertaken on a cruise ship, with arguably less grandeur — but less luggage and more freedom.
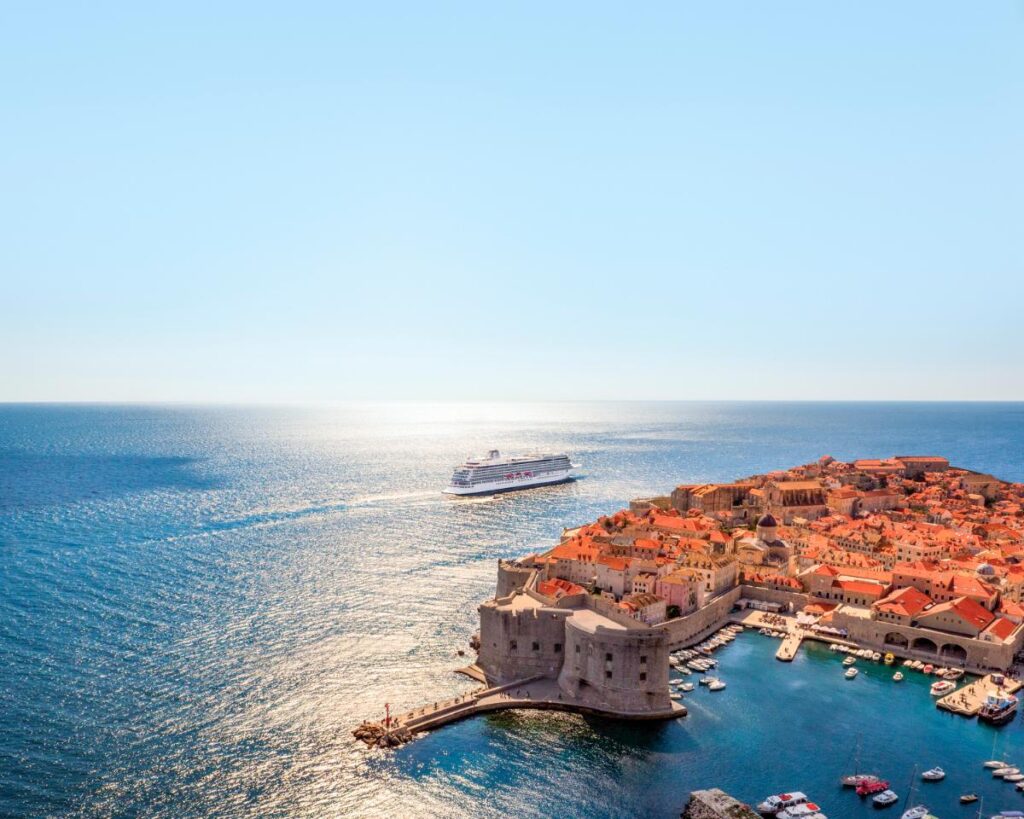
An aerial view captures a large white cruise ship sailing on a blue sea next to a coastal town with red-roofed buildings.
The Viking Venus off the coast of Dubrovnik, Croatia. Photo courtesy of Viking. 

It was thus that I boarded a Viking ship in Italy for a week-long sojourn to Venice, Croatia, Montenegro, and Greece before flying home from Athens. I had done two prior sailings with Viking that took me to Egypt and Antarctica. Both had an intense focus, the former on history and archaeological sites, the latter on snow, penguins, and seals. Now, I was in for a more traditional trip, with a new city or even country each day.
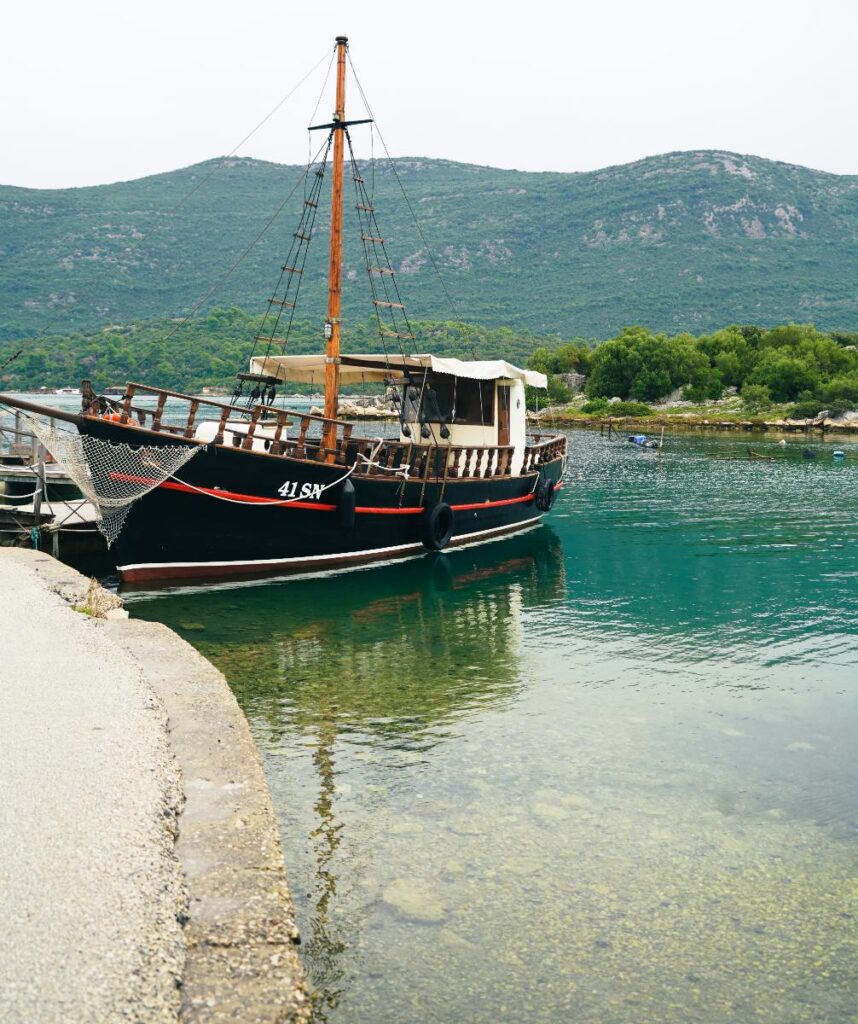

Left: A fishing boat off of Mali Ston, Croatia. Right: The bell tower of the Cathedral of Saint Domnius in Split, Croatia. Photos by Jessica Kelly.

Exploration Through Viking Cruises

Before even stepping on board, I had picked a handful of excursions, mostly food-centric, that would take up the lion’s share of available time in any one place, and left other destinations free for roaming around. This seemed like a sensible approach, and proved to be an interesting way to keep things interesting.
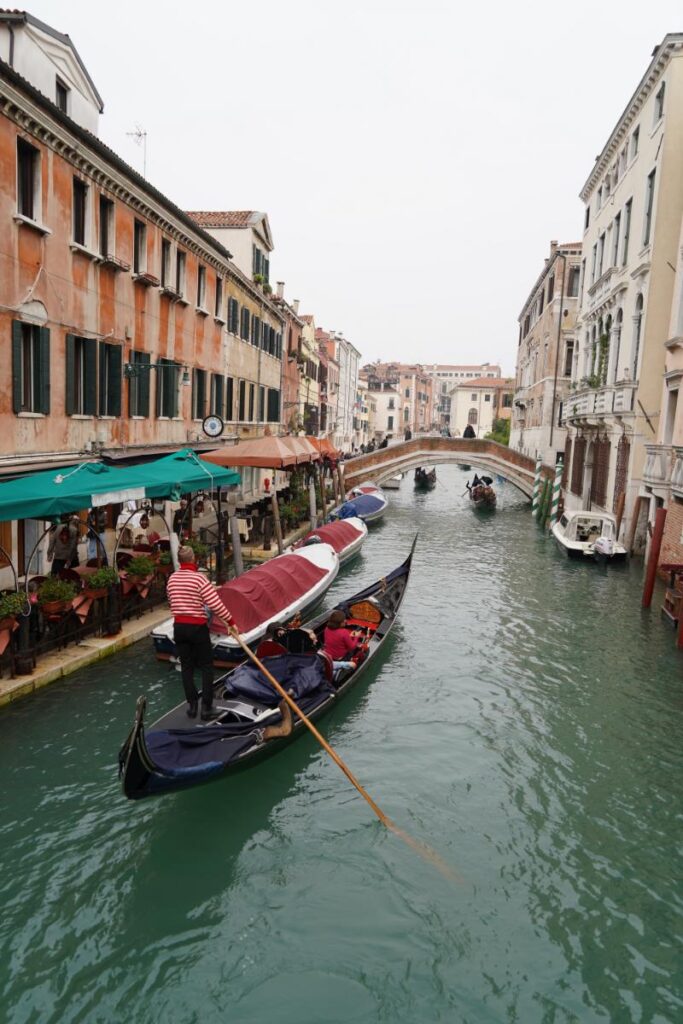
A classic Venetian gondola with a gondolier in a striped shirt and hat is seen from above, moving through a narrow canal lined with historic buildings.
A gondola on the Rio de S. Lorenzo in Venice, Italy. Photo by Jessica Kelly.

Venice

Since I had been to Venice a couple of times before and had toured most of the major draws, I opted to get lost and avoid the crowded center, ducking into an alleyway and drifting, ignoring my phone, for hours. I began with coffee in a place that looked like it had never seen a tourist. Then onto a cicchetti joint for open-faced sandwiches (sardines, salt cod) and a glass of wine at 10 a.m. (When in Venice and all.) I eventually made my way to a favorite painting, Titian’s Assumption of the Virgin that I’d first seen in person over 30 years before, and stood before it, in awe, for a remarkably long time before catching the boat back.
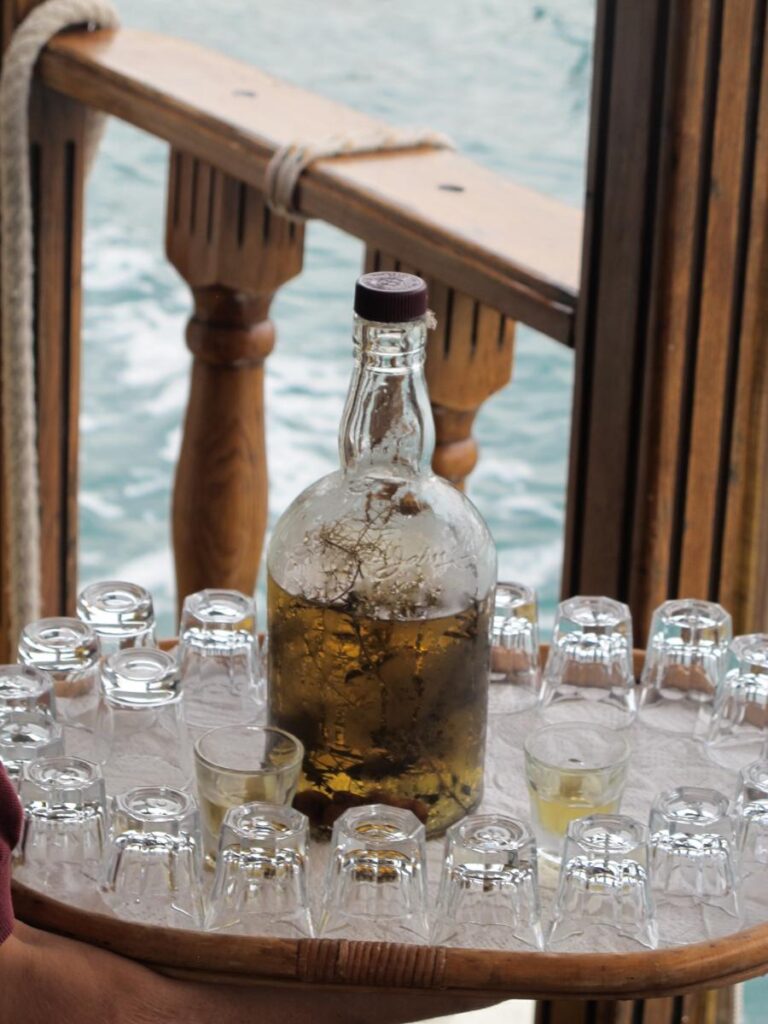
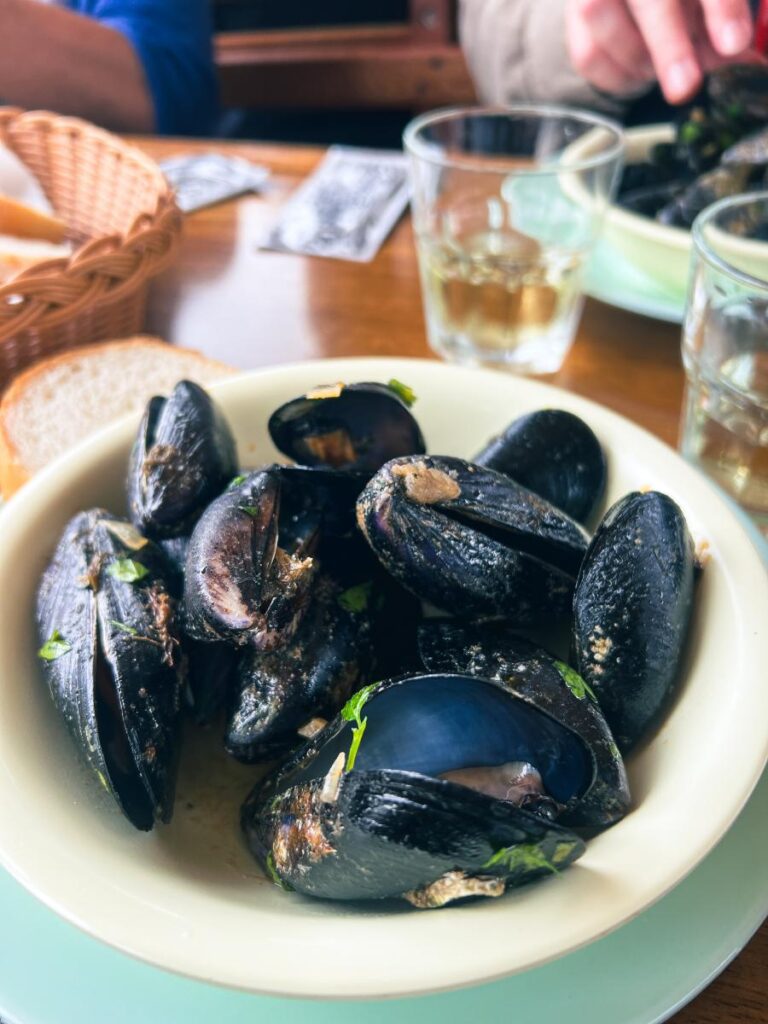
Left: Pre-mussels grappa in Mali Ston, Croatia. Right: Mussels for lunch off the coast of Mali Ston, Croatia. Photos by Jessica Kelly.

Croatia

In Croatia, in addition to some informative olive oil and wine tasting, there was an excursion to Mali Ston, an area near Dubrovnik that produces some of the world’s finest oysters. We motored out to a dock in the middle of the growing beds and watched our host shuck dozens of them in rapid succession as we sipped herb-infused grappa. We were served a handful of the local treasures with bread and white wine. Absolute heaven. The fact that almost none of these gems ever make it out of Croatia only added to our delight. Gilding the lily, the team then plucked ropes of mussels out of the water, cooked and served them in a delicious broth.

A view of St. Mark's Square in Venice, Italy, on an overcast day, showing reflections of the buildings and clock tower in puddles on the square.
Afternoon flooding in St. Mark’s Square, Venice, Italy. Photo by Jessica Kelly.

Montenegro

It was raining when I disembarked in Kotor, Montenegro, where I had decided to again wander. Surrounded by fortresses, it’s an atmospheric place with stone paths and more than a few Catholic churches from its Venetian and Austrian rulers. It was far too slippery to hike up the long, steep stone staircase to St. John’s Fortress for the views. (I ran into some very fit guys from the ship who told me they had turned around-about because it was too perilous.)


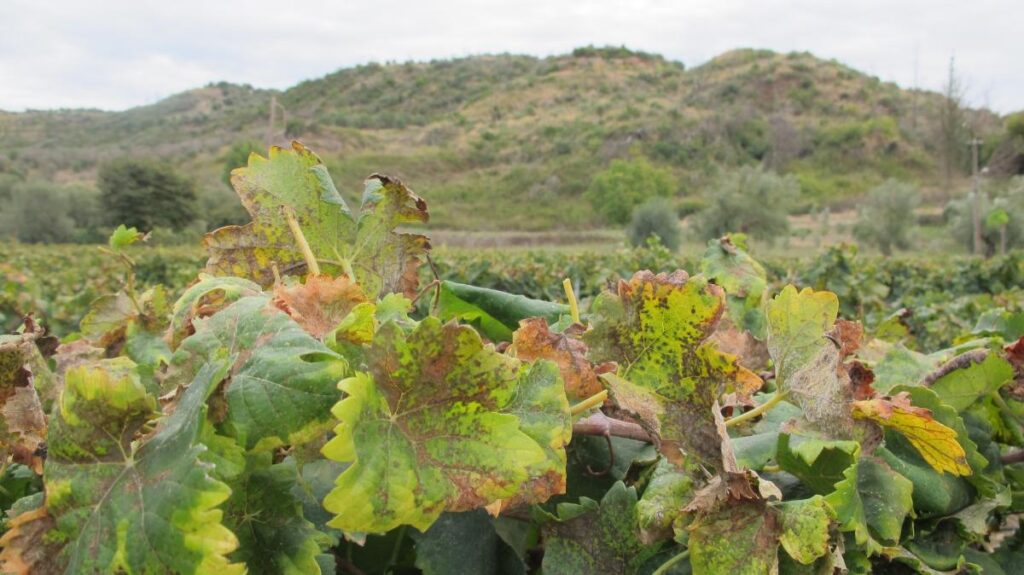
A close-up view of grapevines with green and brown leaves, under a cloudy sky.

Top Left: The Old Fortress in Corfu, Greece. Top Right: Ruins in Olympia, Greece. Bottom: A vineyard in Olympia, Greece. Photos by Stephen Treffinger and Jessica Kelly.

Corfu

In Corfu, on an overcast day, I ducked into a particularly beautiful church and stood in back, taking in an Orthodox service with its long responsoria, a call and repeat between the priest and congregation, and could have stayed there for hours. The next day, it was more olive oil and more wine (the region is lousy with excellent examples of both). Thus fortified and fulfilled, I got back on the ship, which would depart in the middle of the night for Athens.
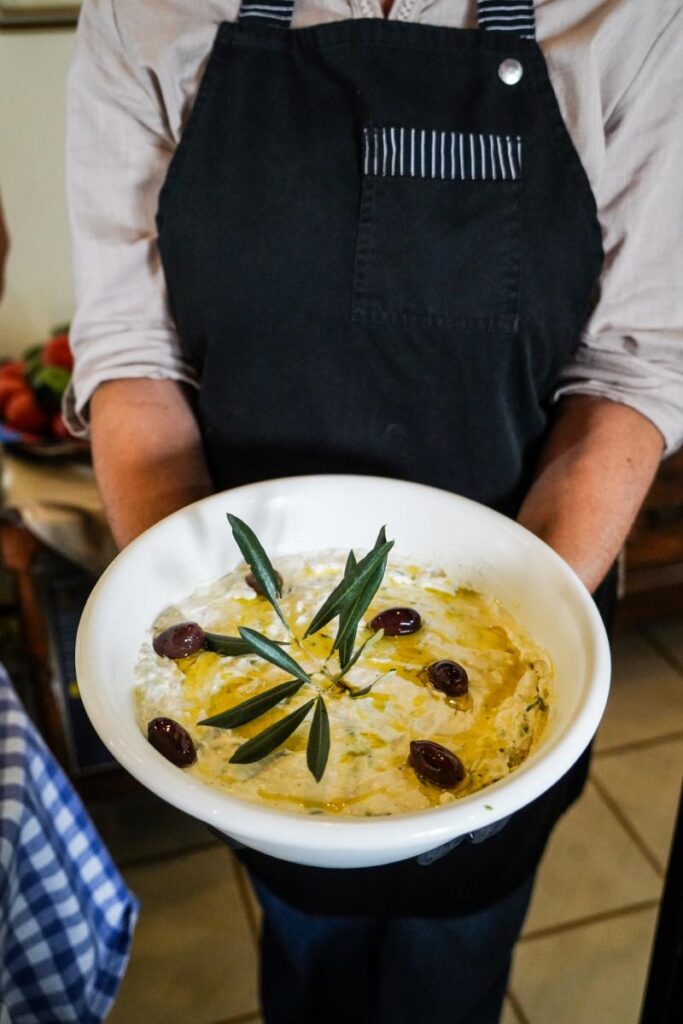
A person holds a white bowl filled with a creamy dish, possibly a dip or soup, garnished with dark olives and green leaves, with a drizzle of olive oil on top.
Cooking class in Corfu, Greece.

Upon returning, I headed to the spa for my now established routine (sauna/cold plunge/steam/cold plunge) then return to my room for a nap in the miraculously comfy bed. I would dress up a little (but not that much) before heading out for an aperitif and dinner at one of several restaurants (variety being the spice of cruise ships), leaving it to chance most nights but almost running into and dining with someone I had met along the way, sharing stories of our day’s adventures while sipping wine and eating remarkably good food before drifting to sleep, only to wake up in another new place.
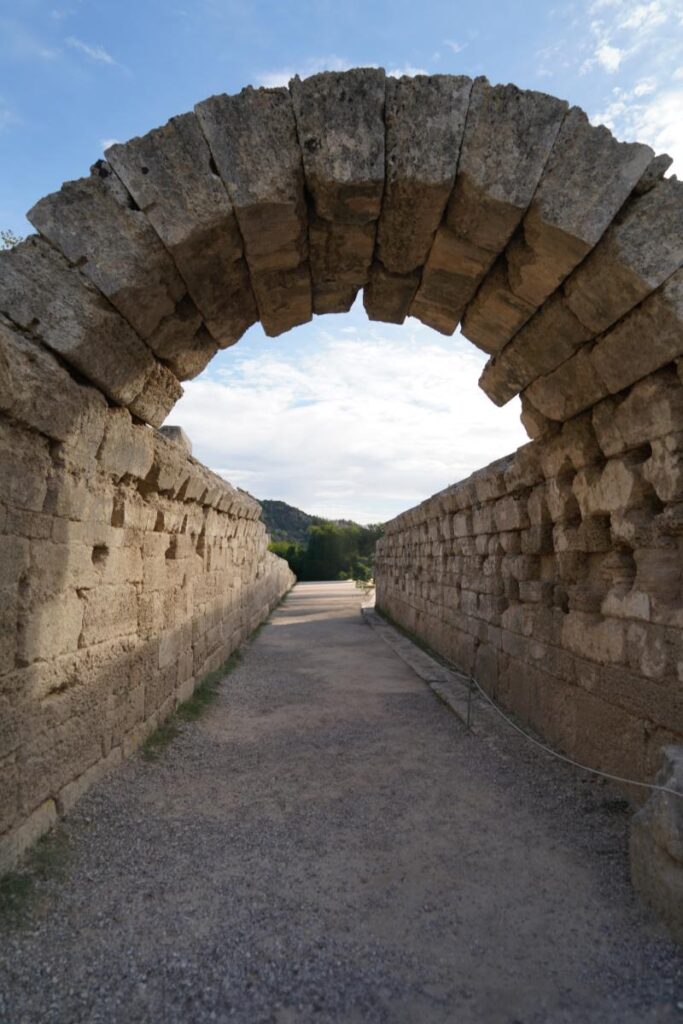
An ancient stone archway opens to a long, unpaved pathway with stone walls on either side, leading to a bright landscape under a partly cloudy sky.
Ruins in Olympia, Greece.

Story by Stephen Treffinger

Photography Courtesy of Viking, Stephen Treffinger, and Jessica Kelly

Subscribe to TABLE Magazine’s print edition.
Cherry Galette

0
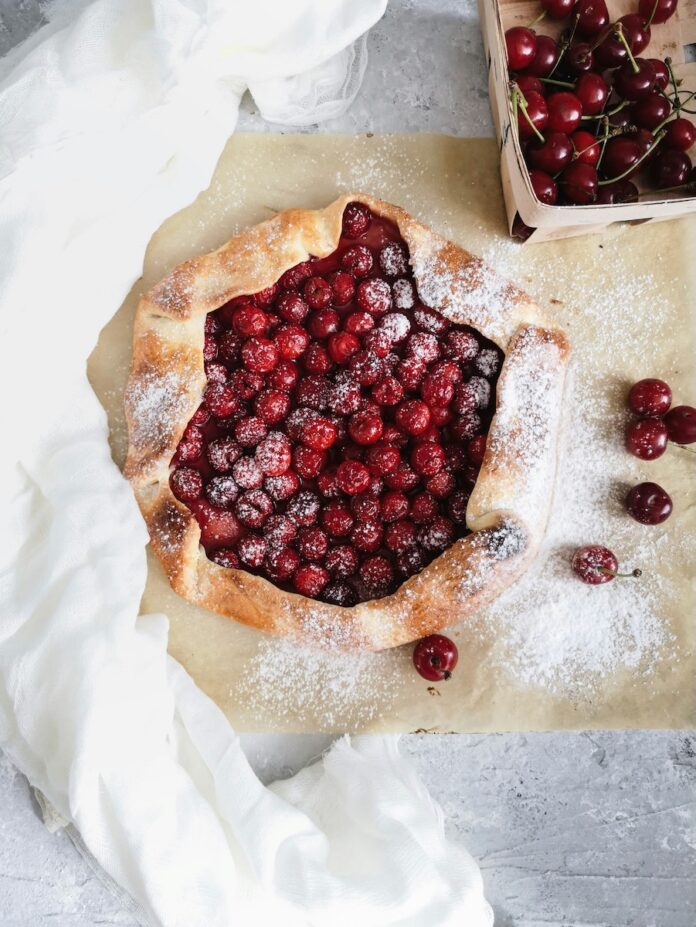
A Cherry Galette sits open faced on a countertop with powdered sugar and cherries everywhere.

Ah, cherries! Nothing says spring and summer quite like ’em. And while we may not be eager to fire up the oven in warmer weather, this Cherry Galette recipe is a sweet little number worth breaking a sweat for. Galettes are perfect for any day of the week; this one is no exception. Picture it: a flaky, buttery crust generously filled with fresh, juicy cherries. It’s a crowd-pleaser that’s as easy to make as it is impressive to serve. The sweet and tangy filling and its rustic appearance make this dessert the perfect addition to any summer gathering or a cozy night.

When is Best to Buy Fresh Cherries?

You’ll want to use fresh cherries from your local farmer or grocery store in order to have the most decadent Cherry Galette possible. Cherry season in the United States typically spans from May to July. Though peak availability often occurs in June. While you can sometimes find cherries outside this window due to global imports, fresh cherries from their natural season are generally the most flavorful and juicy. It is good to keep in mind though that different varieties have slightly different peak times. Sweet cherries like Bing and Rainier are best from late May through early July. But, tart cherries like Montmorency ripen later, usually from late June to early August.

Print
clock clock iconcutlery cutlery iconflag flag iconfolder folder iconinstagram instagram iconpinterest pinterest iconfacebook facebook iconprint print iconsquares squares iconheart heart iconheart solid heart solid icon
A Cherry Galette sits open faced on a countertop with powdered sugar and cherries everywhere.

Cherry Galette


  • Author: Gabe Gomez

Description

A homemade dough cradles sweet and tart cherries.


Ingredients

Scale
  • 12-inch pie dough (homemade)
  • 4 cups fresh cherries
  • 1/3 cup sugar
  • 2 tbsp all-purpose flour
  • 1 tbsp fresh lemon juice
  • Pinch of salt
  • 1 tsp finely grated lemon zest
  • 1/2 tsp pure vanilla extract

For the dough:

  • 1 1/4 cups of all-purpose flour
  • 1/4 tsp of salt
  • 1/2 cup of cold unsalted butter, grated
  • 1 beaten egg yolk


Instructions

  1. Heat the oven to 375 degrees. Line a baking sheet with parchment paper.
  2. In a large bowl, combine the cleaned and halved cherries, sugar, flour, fresh lemon juice, lemon zest, vanilla extract, salt. Mix gently. Set aside.
  3. Transfer the rolled-out dough to the prepared baking sheet. Spoon the cherry filling into the center of the dough, leaving a 2-inch border around the edge.
  4. Fold the edge of the dough up and over the filling, overlapping and creating pleats all the way around. Brush the dough with beaten egg yolk.
  5. Bake the galette at 375 degrees for 40-50 minutes or until the crust is golden brown and done on the bottom. Transfer the galette to a wire rack and cool slightly before slicing.

For the dough:

  1. Grate cold butter with a cheese grater, add ingredients to a mixing bowl, and combine. Add two tablespoons of ice water for the dough to gather up.
  2. Ball the dough, cover it in plastic wrap, and refrigerate. The dough can be made a day or two in advance.
  3. Roll out the chilled dough on a floured surface into a 12-inch round.

Recipe by Gabe Gomez
Photography Uliana Kopanytsiayvc

Subscribe to TABLE Magazine’s print edition.

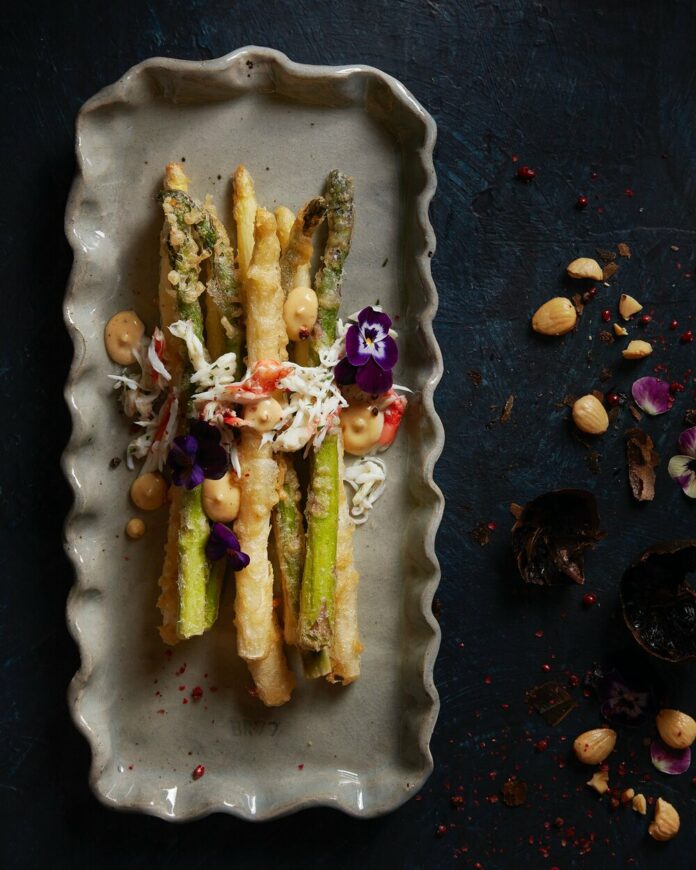
Asparagus Tempura with King Crab Salad

0
Crispy and Delicious Asparagus Tempura on a grey platter with a king crab salad.

Life “on the mountain,” as Kristin Butterworth describes perching high up in the Alleghenies southeast of Pittsburgh, is sweetest in the summer. Lush green woods and meadows are almost all that the eye can see – except for the possible interruption of a patch of sky or a glittering stream far down in a valley. What does a resident of this earthly paradise do? Grow. Cook meals like this Asparagus Tempura. Eat. Relax. Sounds idyllic, doesn’t it?

About This Asparagus Tempura with King Crab Salad Recipe

Crispy Asparagus Tempura meets a delicate, fresh King Crab Salad in this elegant and flavorful dish. We coat tender asparagus spears in an airy batter and fry them to golden perfection. Then, we top this crispy treat with a King Crab Salad, brightened by lemon oil, preserved lemon, and fresh chives. This recipe is a delightful interplay of textures and tastes. It’s a sophisticated appetizer or light main course that beautifully marries summer with the indulgence of seafood.

Print
clock clock iconcutlery cutlery iconflag flag iconfolder folder iconinstagram instagram iconpinterest pinterest iconfacebook facebook iconprint print iconsquares squares iconheart heart iconheart solid heart solid icon
Crispy and Delicious Asparagus Tempura on a grey platter with a king crab salad.

Asparagus Tempura with King Crab Salad


  • Author: Kristin Butterworth
  • Yield: Serves 4-6 1x

Description

A tempura breading makes everything better.


Ingredients

Scale
  • Canola oil for frying
  • 18 medium asparagus stalks, trimmed
  • 1 1/4 cups all-purpose flour
  • 1/4 tsp baking powder
  • 1/4 tsp baking soda
  • 1 1/4 cups club soda
  • 1 tbsp olive oil

For the king crab salad: 

  • 1 cup picked king crab
  • 1 tsp lemon oil
  • ½ tsp preserved lemon
  • ½ tsp sliced chive
  • Salt & pepper as needed


Instructions

  1. In a large heavy saucepan, add enough canola oil to fill just over a third full. Clip a frying thermometer onto the pan and heat the oil over medium heat until oil reaches 375 degrees.
  2. While the oil is heating, in a medium bowl, whisk together the flour, baking powder and baking soda. Add the club soda and the olive oil.
  3. Dip the asparagus stalks into the batter, one or two at a time, then add to the hot oil and fry 3 or 4 stalks at a time for about 70 seconds, until golden brown, turning with tongs to promote even browning. Remove from oil and place on a wire rack placed over a baking sheet.

For the king crab salad:

  1. Combine all ingredients in a bowl and season as needed, serve chilled over the asparagus.

Recipe by Kristin Butterworth
Styling by Keith Recker

Photography by Dave Bryce
Platter by Billy Ritter

Subscribe to TABLE Magazine’s print edition.
Blackberry Cobbler

0
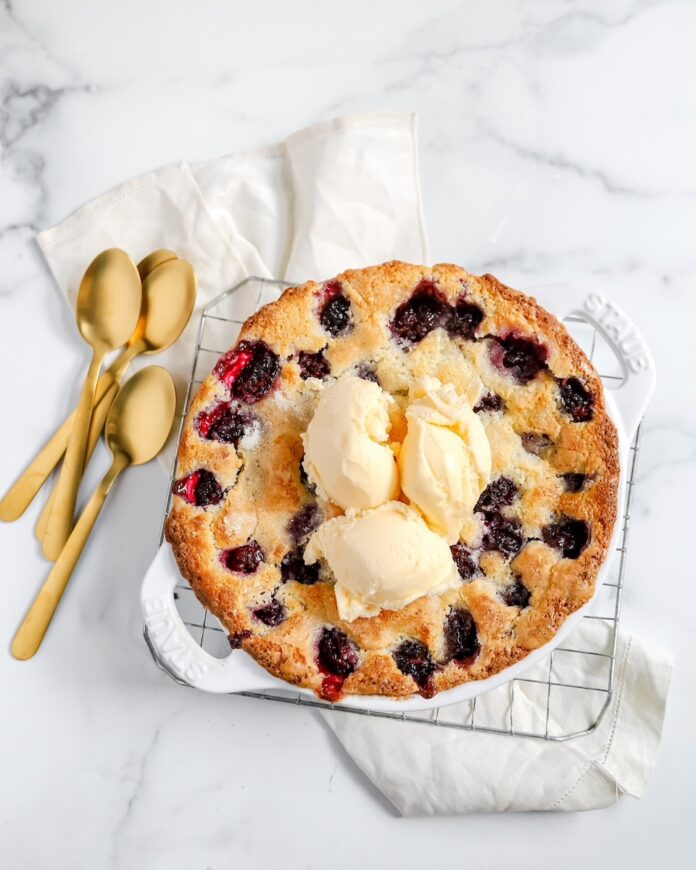
A Blackberry Cobbler with three scoops of vanilla ice cream in a white dish sit beside three golden spoons on a white marble counter.

Food blogger (and college student) Emily Rapp is the creative brains behind Baking with Lemon, and she’s sharing some of her delicious dessert recipes and baking tips with TABLE readers. Below, you’ll find her take on a warm, fruity Blackberry Cobbler.

A Note From Emily on Blackberry Cobbler

I am not sure how common this is, but as a child I hated fruit desserts. Can anyone relate? I would turn my nose up at any pie, any tart, any cobbler. If there wasn’t chocolate, I wasn’t interested. Oh, how naive I was. It honestly was not until high school that I started to enjoy berries. I always liked vegetables more than fruit.

But then I discovered strawberries and blueberries, and I have progressed since there. It was within the past year that I made my first pie, and I adored it. I can now happily announce that I love any and all fruit desserts. So, let me share this one with you: Blackberry Cobbler.

It is a childhood favorite of my dad’s, and it really has grown on me. The mixing of the warm fruit and ice cream is godly, and I will happily eat it any day.

Print
clock clock iconcutlery cutlery iconflag flag iconfolder folder iconinstagram instagram iconpinterest pinterest iconfacebook facebook iconprint print iconsquares squares iconheart heart iconheart solid heart solid icon
A Blackberry Cobbler with three scoops of vanilla ice cream in a white dish sit beside three golden spoons on a white marble counter.

Blackberry Cobbler


  • Author: Emily Rapp

Description

A dessert you can feel good about indulging in thanks to its fruity contents.


Ingredients

Scale
  • 1 cup all-purpose flour
  • 2 1/2 tsp baking powder
  • 3/4 tsp kosher salt
  • 3/4 cup milk (preferably whole)
  • 1/2 cup sour cream
  • 6 tbsp unsalted butter (melted)
  • 3 cups blackberries (fresh or frozen)
  • 3/4 cup granulated sugar


Instructions

  1. Preheat oven to 375°F and lightly grease your 8 x 8 inch pan.
  2. In a small saucepan over the stove or in a microwave, melt the butter. Set aside to cool.
  3. In a large bowl, add the flour, baking powder, and salt. Whisk to combine.
  4. Add the milk, sour cream, and the melted butter to the bowl, and whisk to combine. The consistency should be like cake batter.
  5. Pour this into the 8 x 8 inch pan and smooth out the top, making sure it is evenly in the pan.
  6. Pour the blackberries over the batter. They should cover almost every inch of the batter. Push some into the batter, just a bit.
  7. Sprinkle the sugar over top of the blackberries, making sure to evenly distribute it across the entire pan.
  8. Bake in the preheated oven for 50 minutes or until the fruit is bubbling and the top is slightly browned.
  9. Serve immediately with ice cream. Be careful not to burn your mouth!

Recipe and Photography by Emily Rapp

Subscribe to TABLE Magazine’s print edition.
Cucumber and Yogurt Soup

0
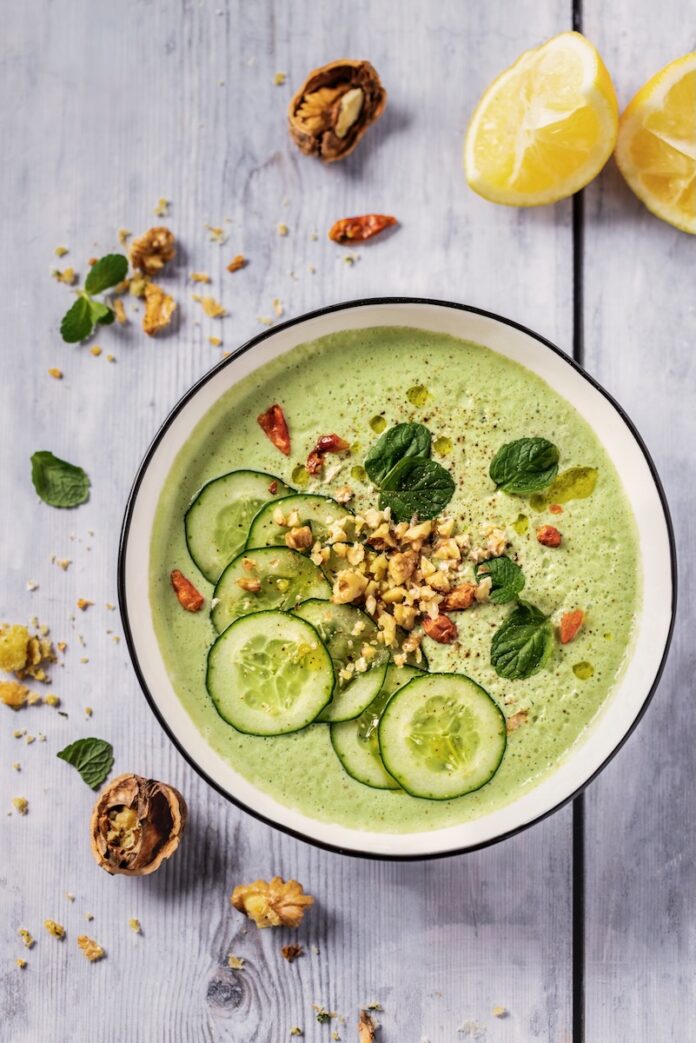
A bowl of green cucumber and yogurt soup with garnishes with seasonings and lemons surrounding the bowl.

Light, refreshing and quick to prepare, this Cucumber and Yogurt Soup is the ultimate summer recipe, perfect for those hot days when you don’t feel like turning on the stove. It whips up in a minute and just uses a few simple ingredients you can get from your local grocery store. For a vegan version, simply substitute the Greek yogurt with a plant-based alternative.

What are Greek Yogurt Alternatives?

Whether you’re looking to skip out on the Greek yogurt due to its dairy content or just simply because you don’t prefer it, there are alternatives to use in our Cucumber and Yogurt Soup recipe. For a dairy-free substitute, coconut milk yogurt sources naturally from coconuts and adds a rich, creamy consistency. Though, you may pick up a little taste of coconut in your finished product. Almond milk yogurt and soy yogurt are also non-dairy and gluten-free options. Each will add a textural and flavorful variety to your recipe. Though if you do not want to use yogurt, you can experiment with pureed silken tofu or blended cottage cheese. Each is creamy and their neutral base takes on the flavors of other ingredients.

Print
clock clock iconcutlery cutlery iconflag flag iconfolder folder iconinstagram instagram iconpinterest pinterest iconfacebook facebook iconprint print iconsquares squares iconheart heart iconheart solid heart solid icon
A bowl of green cucumber and yogurt soup with garnishes with seasonings and lemons surrounding the bowl.

Cucumber and Yogurt Soup


  • Author: Sara Ghedina
  • Yield: Serves 4

Description

Cooling cucumber and yogurt combine in a smooth, creamy gazpacho.


Ingredients

Scale
  • 1 lb cucumbers (some skin left, seeds removed)
  • 2 garlic cloves
  • 3/4 lb Greek yogurt
  • 2 tbsp lemon juice
  • 1/2 tsp ground cumin
  • 1015 basil leaves
  • 810 small mint leaves
  • 1 tbsp extra-virgin olive oil
  • 1/2 chili pepper (optional)
  • 1/2 cup to 1 cup water, depending on desired thickness
  • Salt and black pepper to taste

For serving:

  • 23 tbsp roasted walnuts (or other nuts), coarsely chopped
  • 1/2 cucumber, thinly sliced
  • 12 tbsp extra-virgin olive oil
  • Mint and/or basil leaves


Instructions

  1. Peel cucumbers and remove the seeds, but leave some of their peel on if you’re looking for a more rustic result.
  2. Place all the ingredients, except for the water, in a large blender. Blend until smooth, slowly adding the water until you get the desired consistency.
  3. Let the soup rest in the fridge for at least one hour to allow flavors to blend.
  4. Serve cold, pouring it in individual bowls and topping each one with more olive oil, a few cucumber’s slices, toasted walnuts and a couple of mint or basil leaves.

Recipe, Styling, and Photography by Sara Ghedina

Subscribe to TABLE Magazine’s print edition.
Easy Hot Honey Apple Galette 

0
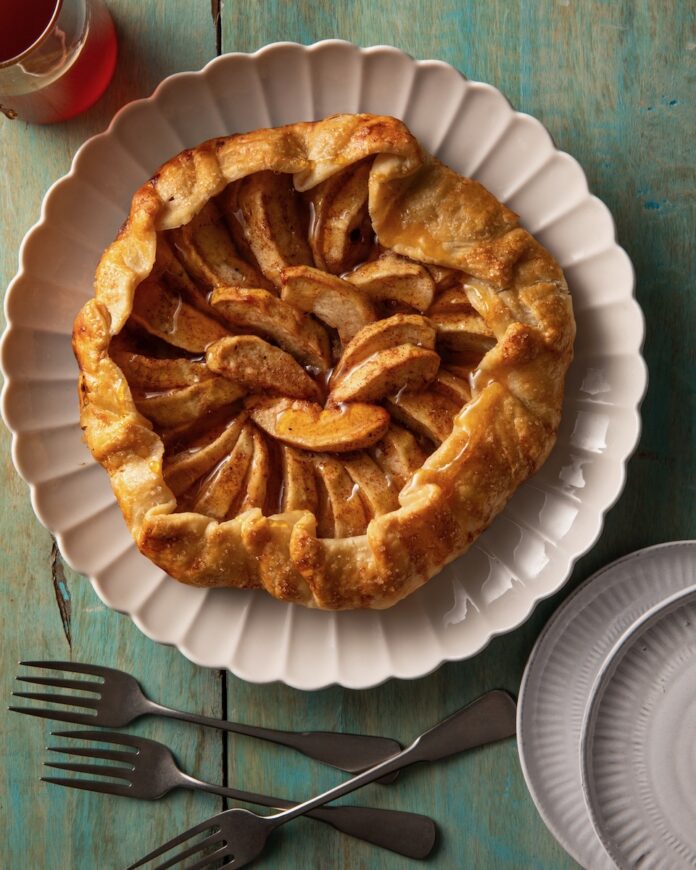
An easy hot honey apple galette sits in a round shape on a white plate with the edges of the galette folded in.

If you’ve never made a galette, you’re missing out on one of the easiest recipes that makes edible elegance simple. Our Easy Hot Honey Apple Galette utilizes a frozen pie crust so you don’t have to spends hours laboring over the mixing bowl. Instead, focus on your apple filling that coats fresh slices in a gooey glaze of hot honey, cinnamon, sugar, nutmeg, cloves, and a touch of lemon juice for acidic balance. Maybe you’ll even serve your warm galette with scoops of vanilla ice cream on top.

What Kind of Apples Should I Use For This Galette?

There are a few different ways you could go with the flavor of your Hot Honey Apple Galette depending on the variety of apples you use. Granny Smith apples, the light green ones, are classically used in baking. They give off a bright, tangy acidity that goes will with sweet glazes like the one in our recipe. Plus, they tend to have a firm texture even after baking. Honeycrisp are going to be your sweeter choice in their short, red and slightly green stature. Or, if you perfer a sweet apple with a little more tenderness, go with a Golden Delicious. If it’s too hard to decide or you want to shake things up, try using 2 to 3 different apple varieties all mixed together.

Print
clock clock iconcutlery cutlery iconflag flag iconfolder folder iconinstagram instagram iconpinterest pinterest iconfacebook facebook iconprint print iconsquares squares iconheart heart iconheart solid heart solid icon
An easy hot honey apple galette sits in a round shape on a white plate with the edges of the galette folded in.

Easy Hot Honey Apple Galette 


  • Author: Keith Recker

Description

The simplicity of this recipe that drizzles a hot honey over warm apples and a crispy crust only increases its deliciousness.


Ingredients

Scale
  • 1 round frozen pie crust (I recommend Dufour)
  • 3 apples, peeled and sliced into 1/4-inch slices
  • 1/4 cup hot honey
  • 3 tbsp sugar (brown or white)
  • 2 tsp lemon juice (fresh is best)
  • 1 tsp cinnamon
  • ¼ tsp nutmeg or cloves (or both!)
  • Pinch of salt

For finishing: 

  • 1 egg
  • 1 ½ tbsp sugar (turbinado or demerara preferred but optional)
  • 3 tbsp heavy cream (optional)
  • ¼ cup hot honey


Instructions

  1. Defrost pie crust according to instructions on package.
  2. Line a baking sheet or pizza pan with parchment paper or a silicone baking mat. Preheat oven to 350.
  3. In a large mixing bowl, whisk together lemon, hot honey, cinnamon and nutmeg and salt until well combined. Peel and slice apples and add them to the bowl. Stir to coat.
  4. Center the pie crust on the prepared baking surface.
  5. Pretend there’s a compass on your pie crust and place one slice of apple at north, south, east, and west positions, about one inch in from the edge of the crust. Now add slices to create a tidy circle.
  6. Fill the empty center with slices.
  7. Drizzle any extra juices left in the bowl on top of the slices.
  8. Fold the edges of the crust up onto the outer ring of apple slices, crimping every 1.5 inches or so.
  9. In a small bowl, beat the egg. With a brush, wash the folded and crimped crust with egg. Sprinkle sugar on the crust…and on the apples, too.
  10. Place in oven and bake for approximately 35 minutes, until crust is golden and crisp.
  11. About 10 minutes before baking is complete, you drizzle 3 tbsp heavy cream over the apples and return galette to oven to bake.
  12. Remove from oven when done. Let cool to room temperature. Loosen galette from surface using a thin spatula. Slide it into a serving plate.
  13. Just before slicing and serving, drizzle ¼ cup hot honey all over the galette. You could add whipped cream or ice cream to each plate as you serve the galette. Enjoy!

Recipe and Styling by Keith Recker
Photography by Dave Bryce

Subscribe to TABLE Magazine’s print edition.
Easy Hot Honey Peach Galette

0
A round Easy Hot Honey Peach Galette sits on a blue plate with a pie spatula sitting beside it.

Transform summer’s sweetest, juiciest bounty into an easy-to-make dessert with this Hot Honey Peach Galette. Forget fussy pies that require tons of patience and handiwork. Instead, this rustic, free-form pastry celebrates creativity and the sun-ripened flavors of peaches. Plus, a drizzle of spicy hot honey only makes things more mouthwatering. It’s a simple yet elegant treat that brings together warm, sweet, and a subtle kick, making it the perfect dessert for any summer gathering.

When are Peaches in Season?

Summer is the time for peaches whenever these fuzzy bulbs of pink and orange ripen. You’ll find this juicy fruit from late May to early October but their peak is from July to August when they are at their most delicious. This all depends though on what region you are in. Those in a warmer region in the southern states may find their peaches harvest earlier, even in April. If you live in a northern state where the winter keeps things cool till practically June, your peak peach season will come later in the summer, sometimes lasting into September.

Print
clock clock iconcutlery cutlery iconflag flag iconfolder folder iconinstagram instagram iconpinterest pinterest iconfacebook facebook iconprint print iconsquares squares iconheart heart iconheart solid heart solid icon
A round Easy Hot Honey Peach Galette sits on a blue plate with a pie spatula sitting beside it.

Easy Hot Honey Peach Galette


  • Author: Keith Recker

Description

The naturally sweet nature of peaches makes a match with sticky and delectable hot honey.


Ingredients

Scale
  • 1 round frozen pie crust (I recommend Dufour)
  • 5 small peaches, peeled and sliced into 1/4-inch slices
  • 1/4 cup hot honey
  • 3 tbsp sugar (brown or white)
  • 2 tsp lemon juice (fresh is best)
  • 1 tsp ginger
  • ¼ tsp nutmeg
  • Pinch of salt
  • 2 tbsp cornstarch

For finishing:

  • 1 egg
  • 1 ½ tbsp sugar (turbinado or demerara preferred but optional)
  • ¼ cup hot honey


Instructions

  1. Defrost pie crust according to instructions on package.
  2. Line a baking sheet or pizza pan with parchment paper or a silicone baking mat. Preheat oven to 350.
  3. In a large mixing bowl, whisk together lemon, hot honey, ginger, nutmeg, salt, and cornstarch until well combined. Peel and slice peaches and add them to the bowl. Stir to coat.
  4. Center the pie crust on the prepared baking surface.
  5. Pretend there’s a compass on your pie crust and place one slice of peach at north, south, east, and west positions, about one inch in from the edge of the crust. Now add slices to create a tidy circle.
  6. Fill the empty center with slices.
  7. Drizzle any extra juices left in the bowl on top of the slices.
  8. Fold the edges of the crust up onto the outer ring of peach slices, crimping every 1.5 inches or so.
  9. In a small bowl, beat the egg. With a brush, wash the folded and crimped crust with egg. Sprinkle sugar on the crust…and on the peaches, too. You could add a sprinkle of nutmeg here, too.
  10. Place in oven and bake for approximately 35 minutes, until crust is golden and crisp.
  11. Remove from oven when done. Let cool to room temperature. Loosen galette from surface using a thin spatula. Slide it onto a serving plate.
  12. Just before slicing and serving, drizzle ¼ cup hot honey all over the galette. You could add whipped cream or ice cream to each plate as you serve the galette. Enjoy!

Recipe and Styling by Keith Recker
Photography by Dave Bryce

Subscribe to TABLE Magazine’s print edition.
Giant Beans with Honey and Dill

0
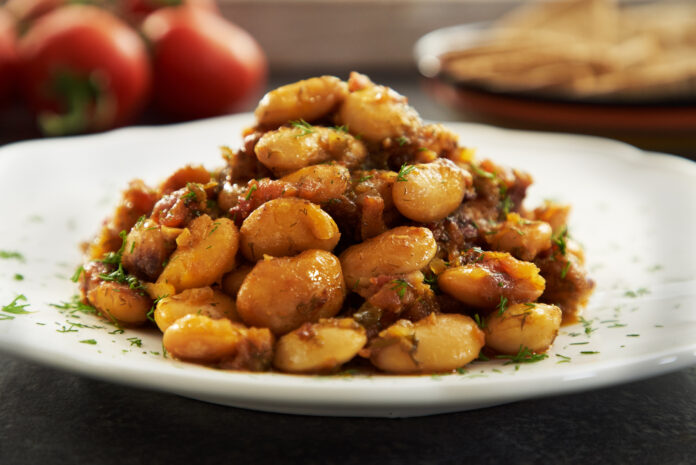
On a white plate sits a mound of GIANT BEANS WITH HONEY AND DILL.

This is a comforting dish in the fall/winter, served hot or warm, but equally satisfying in the spring/summer, served at room temperature. Buy gigantes (giant) beans from a Greek food purveyor and favor fresh chopped tomatoes over canned plum tomatoes for a slightly sweeter, fresher taste. This is one of Diane Kochilas’s most beloved recipes, which she notes can be served as an appetizer, vegetarian main course, side dish or meze, and “marries well with everything from tomatoes to feta to spinach.”

Giant Beans Vs. Regular Beans

Giant beans are big and buttery. They soak up flavor like sponges and add a meaty, satisfying bite to soups, stews, and braises. Meanwhile, regular beans, like black or pinto, are smaller and ideal for quick-cooking. They’re versatile and perfect for everyday dishes like chili and salads.

Print
clock clock iconcutlery cutlery iconflag flag iconfolder folder iconinstagram instagram iconpinterest pinterest iconfacebook facebook iconprint print iconsquares squares iconheart heart iconheart solid heart solid icon
On a white plate sits a mound of GIANT BEANS WITH HONEY AND DILL.

Giant Beans with Honey and Dill


  • Author: Diane Kochila
  • Yield: Serves 68 people 1x

Description

This is a comforting dish in the fall/winter served hot or warm, but equally satisfying in the spring/summer served at room temperature.


Ingredients

Scale
  • 1 lb / 450 g dried Greek giant beans
  • 1/2 cup / 125 ml extra-virgin Greek olive oil, and more as needed or desired 
  • 3 medium-large red onions, chopped
  • 1 garlic cloves, chopped
  • 2 carrots, peeled and whole 
  • 4 bay leaves
  • 3 cups plum tomatoes, peeled, seeded, chopped
  • 4 tbs Ikarian or other Greek pine honey, divided
  • 1 bunch fresh dill, chopped
  • 24 tbs Greek balsamic vinegar, to taste 
  • 2 tbs Santorini or other Greek tomato paste 
  • Salt and freshly ground pepper
  • 23 tbs crumbled feta for garnish


Instructions

  1. Soak the beans overnight in ample water. Drain the next day. Place in a large pot with cold water and bring to a boil. Lower heat and simmer, skimming the foam off the top. Simmer beans for 1-1½ hours, until tender but firm. Remove beans from heat and drain but reserve the water.
  2. Preheat oven to 375 degrees. Place beans in a large baking pan with 6 tablespoons extra-virgin Greek olive oil. Mix the onions, garlic, carrot, bay leaves, and the tomatoes. Stir in about 1½ cups of the bean cooking liquid, just enough to barely cover the beans. Stir in half the honey. Mix thoroughly. Cover the pan with parchment then aluminum foil and bake for about 1 – 1½ hours, or until the beans are tender and the sauce is thick and creamy. Add more water throughout baking, if necessary, to keep the beans from drying out.
  3. 15 minutes before removing from oven, add vinegar, tomato paste, salt and pepper. As soon as the beans come out of the oven, stir in additional honey and vinegar to taste as well as the chopped dill.
  4. Serve hot, warm or at room temperature, sprinkled with crumbled feta if desired and drizzled with additional olive oil.

Recipe and Photography by Diane Kochilas
Story by Cally Jamis Vennare

Subscribe to TABLE Magazine’s print edition.
Fresh Cocktail and Appetizer Recipes at Fallingwater

0
A tray with three glasses of a sparkling cocktail with mint sprigs and ice, with a bottle of champagne and plates of appetizers on a wooden table, in a cozy, sunlit room.

Chef Tom Shuttlesworth knows a lot about what the Kaufmanns ate and drank. As the family that commissioned Fallingwater from revered American architect Frank Lloyd Wright, their preferences and tastes shaped life here. Preserved in anecdotes from Elsie Henderson, the Kaufmanns’ longtime cook, as well as in the archives of the Western Pennsylvania Conservancy, it’s clear that the family liked simple foods prepared with the best ingredients. While Chef Tom follows these lines, he adds his own family recipes, and layers in current day tastes.

Cocktails and Hors d’Oeuvres at Fallingwater

As part of his Forest to Table meal with TABLE Magazine, he shares an archival Hugo cocktail with TABLE readers. Accompanying this cocktail are small plates just right for a sunny autumn afternoon. Recipes for the sumptuous dinner Chef designed to follow this light starting point are here.

Salt-Roasted Fingerling Potatoes, Pickled Ramps, Footprints Farm Smoked Ham, Local Ricotta

This is a very easy appetizer: you can make as many or as few as you like. Before you begin, establish your mis en place. Cook and prepar potato halves. Slice the pickled ramps. Thinly slice the ham. Drain and season the ricotta.

Wash and dry as many potatoes as desired for your appetizers. You should be able to get two apps per potato. In a heatproof dish, pour in a level 1/2-inch layer of kosher salt. Place your potatoes on this layer of salt, and then completely cover them with at least another 1/2-inch of salt. Place dish in a preheated 350-degree oven and bake for approximately 30 minutes, or until cooked through as tested with a small paring knife or toothpick. Allow the potatoes to completely cool (they will cool quicker when removed from the salt). Once cool, the potatoes should first have small slices taken from opposing sides to create a level and stable ‘seating.’ Then split them in half. The halves should be lightly hollowed with a small melon baller.

Ricotta Potatoes:

A fresh, well-made ricotta should be rich, thick and not watery. If your ricotta appears to be thinner or have a lot of moisture, put a cup into a larger, doubled piece of cheesecloth, tie the cheesecloth off and allow to strain in colander until excess moisture is gone. This is best done the day before. Once your ricotta is in order, lightly season with salt, pepper, and the micro-planed zest of a half lemon.

The pickled ramp bulbs can be sliced and diced as desired. As much as I love it – and all cured hams! – refrain from using prosciutto or other air-dried hams and search out a good smoked ham. If you can’t find an American smoked ham, any number of Iberian or Black Forest hams (amongst many others) would fit the bill. The ham should be sliced as paper-thin as one can make it, which makes this often-two-bite appetizer easier to bite.

For assembly, line your potato halves on your work station, spoon in the ricotta filling, and just bulging over the halves, fold your ham into strips across the horizontal plane of the potato and top with sliced ramps.

Seared Foie Gras, Wild Strawberry Preserves, Black Pepper Gastrique, Sautéed ‘French Cakes’

Before you begin, establish your mise en place: Foie gras, individual pieces of the French cakes, preserves, gastrique, whole butter, and salt. Note: for foie gras, I used vacuum-packed, pre-cut slices that I thawed and split into hearty 1-ounce portions.

Preheat in a non-stick pan over medium heat. When the pan is to temp, melt in a tablespoon or so of butter, allowing the butter to melt, then add your French Cakes, keeping an eye on slowly caramelizing both sides to a lovely golden hue.

Preheat a sauté pan over medium-high heat, and make sure your exhaust fan is running! Salt both sides of your foie gras, then add to your dry, heated pan and sauté for about 30 seconds per side. Pull foie gras to a clean fold of towel and lightly dust with a good sea salt. High heat will create lots of smoke, but you are looking for a nice caramelized crust while essentially ‘warming’ the foie gras through. Cooking the foie gras beyond that point begins to render the foie gras, losing the texture, volume, and silken texture we’re looking for.

For Final Preparation and Plating:

For assembly: Start with the French cake as the base to which you add an appropriate amount of wild strawberry preserves; I like about a half to scant tablespoon. Place the hot foie gras on top of the jam, and spoon about a ½-teaspoon of black pepper gastrique on top.

Print
clock clock iconcutlery cutlery iconflag flag iconfolder folder iconinstagram instagram iconpinterest pinterest iconfacebook facebook iconprint print iconsquares squares iconheart heart iconheart solid heart solid icon

Mom’s ‘French’ Cakes


  • Author: Tom Shuttlesworth

Description

Sweet little waffle cakes. 


Ingredients

Scale
  • 2 cups packed brown sugar
  • 1 ¼ cups of sugar
  • 1 lb butter real butter no substitutes
  • 5 eggs
  • 1 tbsp vanilla extract
  • 7 cups flour


Instructions

  1. Cream the brown sugar, sugar and butter for 3 to 4 minutes.
  2. Add eggs one at a time, making sure the egg is well mixed before you add the next one.
  3. Add vanilla.
  4. Add the flour.
  5. Chill in the fridge for 1 hour.
  6. Heat waffle iron. Once waffle iron is hot, place 1 scoop of dough in the center of each square (mine makes 4 waffles, so it makes 4 cookies). You can use a cookie dough scooper for small cookies or an ice-cream scooper for a larger cookie; close waffle iron.
  7. Let it cook for 1 1/2 minutes, for a small cookie or 2 minutes for large cookie.
  8. Remove from waffle iron and cool.
Print
clock clock iconcutlery cutlery iconflag flag iconfolder folder iconinstagram instagram iconpinterest pinterest iconfacebook facebook iconprint print iconsquares squares iconheart heart iconheart solid heart solid icon

Wild Strawberry Jam


  • Author: Tom Shuttlesworth

Description

Homemade is always better.


Ingredients

Scale
  • ·4 cups, cleaned, prepared wild strawberries
  • ·7 cups sugar
  • ½ tbsp butter
  • 1 pouch CERTO fruit pectin


Instructions

  1. Bring boiling-water canner, half-full with water, to simmer. Wash jars and screw bands in hot, soapy water; rinse with warm water. Pour boiling water over flat lids in saucepan off the heat. Let stand in hot water until ready to use. Drain well before filling.
  2. Stem and crush strawberries thoroughly, one layer at a time. Measure exactly 4 cups crushed strawberries into 6- or 8-quart saucepot.
  3. Add sugar; stir. Add butter to reduce foaming. Bring to full rolling boil (a boil that doesn’t stop bubbling when stirred) on high heat, stirring constantly. Stir in pectin. Return to full rolling boil and boil exactly 1 minute, stirring constantly. Remove from heat. Skim off any foam with metal spoon.
  4. Ladle immediately into prepared jars, filling to within 1/4 inch of tops. Wipe jar rims and threads. Cover with two-piece lids. Screw bands tightly. Place jars on elevated rack in canner. Lower rack into canner. (Water must cover jars by 1 to 2 inches. Add boiling water, if necessary.) Cover; bring water to gentle boil. Process 10 minutes. Remove jars and place upright on towel to cool completely. After jars cool, check seals by pressing middle of lid with finger. (If lid springs back, lid is not sealed and refrigeration is necessary.)
Print
clock clock iconcutlery cutlery iconflag flag iconfolder folder iconinstagram instagram iconpinterest pinterest iconfacebook facebook iconprint print iconsquares squares iconheart heart iconheart solid heart solid icon

Black Pepper Gastrique


  • Author: Tom Shuttlesworth

Description

So simple yet so delicious. 


Ingredients

Scale
  • 1 tbsp McCormick Culinary® Black Pepper, ground
  • 1 cup sugar
  • 1 cup apple cider vinegar


Instructions

  1. Make a dry caramel with sugar.
  2. Once caramel is light brown add apple cider vinegar and McCormick Culinary® Black Pepper, ground.
  3. Reduce until viscous, and reserve.
Print
clock clock iconcutlery cutlery iconflag flag iconfolder folder iconinstagram instagram iconpinterest pinterest iconfacebook facebook iconprint print iconsquares squares iconheart heart iconheart solid heart solid icon

The ‘Hugo’ Aperitif


  • Author: Tom Shuttlesworth

Description

This is a delightful, refreshing, and refreshingly low-alcohol aperitif that one can quaff all afternoon, before, during, and after a good repast, without alcohol overload. Simple and classic in flavor, one would think it a venerable standby, but it’s actually a recent invention that has taken Europe by storm. A simple mix of Prosecco – or your own favorite sparkling white – seltzer, elderflower syrup and a sprig of mint and lime to garnish. We usually mix glasses by eye at my house – you really can’t make a bad one.


Ingredients

Scale
  • 2 parts Prosecco
  • 1 part seltzer
  • 1 to 2 tsp elderflower syrup
  • Sprig of mint
  • Lime, sliced thinly (optional)


Notes

I make my own elderflower syrup but it can be purchased at upscale or international food purveyors.

Story and Recipes by Chef Tom Shuttlesworth
Photography by Andrew Burkle
Food Styling by Clare Vredevoogd
Production by Burklehagen
Shot on Location at Fallingwater

Thanks to the Western Pennsylvania Conservancy

Subscribe to TABLE Magazine’s print edition.
More Forest to Table Recipes at Fallingwater

0
A table with two place settings and a small bowl of sauce. Each plate holds a meal with roasted venison, wild garlic polenta, vegetables, and sauce.

Inspired by Fallingwater, Chef Tom Shuttlesworth dove into the delicious food history and recipes of what is considered to be the finest American house of 20th century. Legendary Fallingwater cook Elsie Henderson inspired him! Shuttlesworth drew upon house archives preserved by the Western Pennsylvania Conservancy, from local traditions, and his own family lore. The menu he devised moves from fresh, local salad to venison with an intriguing sauce, polenta and summer vegetables.

Tasting Forest to Table Recipes at Fallingwater

As you can see, Chef Tom’s approach to food is intuitive, bold-flavored, and delicious. Thanks for sharing your gifts with TABLE readers, Chef! You might start this magnificent meal off with Chef Tom’s recommendations for a light aperitif and some small plates.

Dandelion Greens & Red Chard Salad

We happened to have dandelion greens available the day we made this meal, as well as local red chard. You could, however, use any number of different lettuces, or mixes: romaine, radicchio, endive, and kale will all work well. I make my own dried apples at home with our handy dehydrator. However, they can also be purchased at most gourmet shops, natural food shops, or online. We used goat cheese, but any harder, aged cheese that can be grated or peeled into strips would be fine. The possibilities run from a quality Parmesan to a Manchego, and beyond! I usually pre-grate or shave the cheese in preparation for the final salad.

For Final Preparation and Plating:

Before you begin, establish your mise en place: lettuce(s), dressing, walnuts, dried apples, grated or shaved cheese, salt and pepper. Salads need little instruction, but for the inquisitive: I always put all the greens (about 5 to 6 loosely packed cups for four people) in a large bowl, add the dry ingredients and set aside until just before the salad is needed. Dressing too soon will make for a wilted salad. When the time is ready, mix with your dressing, and then add your cheese – it distributes better and clings if you add after the dressing – along with salt and freshly cracked black pepper. Mix well, taste for seasoning, and it’s done.

Roast Venison, Summer Vegetables, Wild Garlic Polenta, Apricot-Chanterelle Cream

The venison I harvest must remain a treat in my own kitchen, as various health codes prevent me from serving wild white-tailed deer, but there are other options should you not have a hunter in the family. Farm-raised venison is available at some specialty shops and online, usually red deer, rather than white-tailed, but the flavor is quite similar. If I were to prepare this dish with something other than venison, I’d likely opt for pork tenderloin or even high-quality chicken.

Before you begin, establish your mise en place complete and at ready. Your venison portioned and seasoned, vegetables all prepped, polenta cakes cut, and sauce finished with reserved sauce.

For four people, I’d want about 24 ounces, or a pound and a half of loin, divided into 4 equal portions. Clean the loin of sinew or silverskin and salt generously. Temperature, of course, is up to individual taste. Deer do not store any intramuscular fat, as opposed to domesticated animals like pork and beef. Whereas a good beefsteak remains fairly moist and tender through a range of cooking temperatures, venison will tend to get tougher at every sequential stage of cooking. I personally like my venison loin seared, finished quite quickly in a 350-degree oven. This is quite rare, but home cooks should cook to the temperature they are comfortable with, referring to a cooking temp chart and a thermometer for the correct internal temp.

Finishing the Dish:

First, begin bringing your sauce back to low temperature, proceeding slowly as high heat will break the cream. Preheat a saucepan to medium-high, add butter or oil to the pan, allow the fat to melt, then add your venison portions and sear on both sides until caramelized, about 3 minutes per side, turning once. Place in the oven and cook to desired temperature, remove loin from pan to rest, deglaze the pan with white wine, toss in the remaining chanterelles and allow wine to reduce to nearly dry. Set these aside.

Finish the vegetables and polenta as outlined below. Plating is an individual approach, but I would begin by slicing the well-rested venison – cutting before meat is well rested causes internal juices to dry, making for a drier, less tender experience. Place the warm polenta cake in the center of the plate, and then arrange the venison across it. Arrange the favas, corn, and squash on the plate around the polenta-venison ‘tower.’ Distribute the reheated chanterelles next, and then sauce the plate. I like a bit of sauce over the ingredients as well as on empty space. A sprinkle of sea salt over the meat, perhaps a few thyme leaves – bon appétit!

Print
clock clock iconcutlery cutlery iconflag flag iconfolder folder iconinstagram instagram iconpinterest pinterest iconfacebook facebook iconprint print iconsquares squares iconheart heart iconheart solid heart solid icon

Maple-Coriander Walnuts


  • Author: Tom Shuttlesworth

Description

A nice treat for while you’re making a multi-course meal. 


Ingredients

Scale
  • 2 tbsp pure maple syrup
  • 1 tsp light olive oil
  • 1 tsp coriander
  • 1/4 tsp salt
  • Pinch cayenne pepper
  • 1 cup walnuts


Instructions

  1. With a rack in the middle of your oven, preheat the oven to 325 degrees. Prepare a baking sheet by lining it with parchment paper or baking mat.
  2. In a medium bowl, combine everything except the walnuts. Whisk together, then add the walnuts. Toss to coat well with the mixture.
  3. Spread walnuts onto the baking sheet in one even single layer. (Works best on a nonstick surface or a silicon-baking sheet, such as a Silpat.
  4. Bake in oven for 10 minutes, then stir and bake for approximately 10 minutes more until walnuts are golden brown. Remove from the oven and let cool completely on sheet.
  5. Serve or store in an airtight container.
Print
clock clock iconcutlery cutlery iconflag flag iconfolder folder iconinstagram instagram iconpinterest pinterest iconfacebook facebook iconprint print iconsquares squares iconheart heart iconheart solid heart solid icon

Apple Balsamic Vinaigrette


  • Author: Tom Shuttlesworth

Description

To use on salads or meats. 


Ingredients

Scale
  • 1 ½ tbsp Dijon mustard
  • 1 shallot, chopped
  • 1 tsp fresh thyme, chopped
  • Salt and pepper, possibly sugar, depending on taste
  • 6 oz walnut oil
  • 4 oz extra-virgin olive oil
  • 2 oz apple balsamic vinegar


Instructions

  1. Put the mustard, shallot, thyme, salt and pepper into blender top. Pulse until smooth.
  2. Put walnut and olive oils into a container that is easy to pour from.
  3. Turning blender to a medium speed, add the oil in a slow steady stream until fully incorporated and homogenous.
  4. Taste, and season accordingly. You may add a little water if the vinaigrette is too thick.
Print
clock clock iconcutlery cutlery iconflag flag iconfolder folder iconinstagram instagram iconpinterest pinterest iconfacebook facebook iconprint print iconsquares squares iconheart heart iconheart solid heart solid icon

Summer Vegetables


  • Author: Tom Shuttlesworth

Description

An easy way to prepare summer veggies. 


Ingredients

Scale
  • 2 ears corn
  • 1 1/12 lb fava beans, in pods
  • 2 cups baby summer squash


Instructions

  1. Bring a sauce or sauté pan up to between medium and medium-high, add a tiny amount of butter then all the corn, beans, and squash. Let them warm up a bit then add about two ounces of stock.
  2. Reduce until nearly dry, remove from heat, add a good tablespoon or so of whole butter and gently but thoroughly mix them together. This should result in a shiny, velvety sheen on the vegetables.
  3. Sprinkle all with chopped thyme and season to taste, reserve for plating.

For the corn (2 ears):

  1. Shuck and clean all corn silk from the ears. From here, it all depends on available equipment.
  2. Slow roast, while constantly turning over an open gas burner to get good charred color and finish in a 350-degree oven for 5 minutes.
  3. Roast on a home grill over medium to medium-high heat – this method should cook the corn completely.
  4. For an oven, preheat at 450 degrees, lightly oil the corn, and then roast on a sheet tray, turning often. Once cool, clusters of corn can be cut from the ears, being careful to try to keep the clusters intact by cutting close to, but not into, the cob.

For the fava beans (1 1/12 lb in pods):

  1. Have a pot of 1 ½ to 2 gallons of heavily salted water coming to a boil, along with a 2 qt container of ice bath and a strainer. Remove fava beans from the long, thick pods. When you have them all, throw them into the boiling water and allow cooking for 2 to 3 minutes.
  2. Use your had strainer or spider to remove the favas and place directly in the ice water to stop them from cooking and cool for the next step. When cool, remove the inner fava bean from the outer casing. Set favas aside for final preparation.

For the baby summer squash (2 cups):

  1. Clean, remove blossoms if intact, and split into bite-sized wedges, usually either quarters or halves.
  2. Sauté with butter over medium-high heat until cooked through. Drain on paper towel and reserve.
Print
clock clock iconcutlery cutlery iconflag flag iconfolder folder iconinstagram instagram iconpinterest pinterest iconfacebook facebook iconprint print iconsquares squares iconheart heart iconheart solid heart solid icon

Wild Garlic and English Thyme Polenta Cakes


  • Author: Tom Shuttlesworth

Description

The final cakes one cuts from the cooled polenta can be re-heated in a number of ways for plating; sautéed in a pan on the stovetop, or warmed in the oven. I often sauté on one side, flip them then put in the oven to heat through.


Ingredients

Scale
  • Butter to sauté the garlic
  • 2 tbsp sliced wild garlic fresh bulbs
  • 7 cups reduced-sodium chicken broth
  • 2 cups quality stone-ground cornmeal
  • 3 oz grated or micro-planed Parmesan
  • 2 tbsp finely chopped English thyme
  • Salt (about 1 tsp) and freshly cracked black pepper, to taste


Instructions

  1. In a large saucepan or Dutch oven, melt butter then sauté the sliced garlic until lightly golden.
  2. Add the stock and a teaspoon of salt and bring to a simmer.
  3. Whisk in the cornmeal and bring to a simmer.
  4. Continue to cook at just-under-boiling temperatures, for 5 minutes or until the mixture is thickened. Be careful, polenta gets very hot and it can cause nasty burns if it gets on your skin!
  5. Pull polenta off the heat, and then mix in the grated cheese and thyme. Season to taste.
  6. Pour the polenta into well-greased flat-bottom dish in about a 1-inch layer (a Pyrex brownie pan is perfect), and cool for at least 2 hours. First hour out on a counter then finish in the refrigerator. This can, and actually should be made the day before, to allow the polenta to properly set and cool.
  7. Once cool, you can either cut the pieces you want out of your pan for removal, or you can try to take all of the polenta out then cut shapes. I usually cut first then remove.
Print
clock clock iconcutlery cutlery iconflag flag iconfolder folder iconinstagram instagram iconpinterest pinterest iconfacebook facebook iconprint print iconsquares squares iconheart heart iconheart solid heart solid icon

Apricot-Chanterelle Cream


  • Author: Tom Shuttlesworth

Description

Real, gelatinous, homemade stock is one of those ingredients I simply cannot live without, professionally or at home. In both scenarios, I generally make chicken stock in large batches and reduce as needed. I would prefer entrée-specific stocks, but it simply isn’t always economical for time, space, and funds. I always reduce stock to varying degrees as soon as I’ve made it so that it doesn’t take up the entire freezer. The starting point of stock is already reduced from around a gallon of good stock down to a few cups. The texture of the chilled stock at that point is a few degrees thicker than Jell-O, or a (clean) finger pressed into it pushes through with some resistance.


Ingredients

Scale
  • 3 medium shallots, sliced thin (1/3 to ½ cup)
  • Butter for sautéing
  • 1 cup dried apricots, sliced thin
  • 1 cup white wine (nearly anything works, but should not be a new oak-aged wine)
  • 2 cups reduced stock
  • 3 to 4 sprigs of thyme
  • 1 bay leaf
  • 1 pound of chanterelles, cleaned
  • ¾ cup heavy cream


Instructions

  1. In a saucepan preheated at medium heat, melt the butter then add the sliced shallots. Cook slowly over medium heat until they are soft and start to caramelize.
  2. Add your sliced apricots and continue to cook together, until the apricots begin to disintegrate and the shallots are golden brown and caramelize. Stir often and be patient, this may take a while.
  3. When this mixture is well caramelized, add your white wine, thyme, peppercorns and bay leaf. Let the wine reduce by half to two-thirds.
  4. Add your stock and continue to reduce slowly until you reach sauce consistency, skimming as needed. Sauce consistency is met when a spoon dipped into the sauce holds its shape when removed. Remove thyme spring and bay leaf, set aside for the next steps.
  5. In a separate sauté pan, preheat over medium-high heat. Add a knob of butter, let it melt then sauté your mushrooms, not overcrowding the pan. The mushrooms should reduce by about half in size. When finished, drain onto paper towels to soak up extra fat. This may take several rounds of sautéing, depending on the size of your pan.  Overcrowding will lead to too much steam and an overly mushy chanterelle.
  6. Add your heavy cream to the sauce base along with half of the chanterelles – reserving the other half for garnish- and slowly reduce, again, to sauce consistency. When it reaches sauce consistency, blend with blender or with an immersion blender. Strain and season.

Story and Recipe by Chef Tom Shuttlesworth
Photography by Andrew Burkle
Food Styling by Clare Vredevoogd
Production by Burklehagen
Shot on Location at Fallingwater thanks to the Western Pennsylvania Conservancy

Subscribe to TABLE Magazine’s print edition.
Create a free account, or log in.

Gain access to read this content, plus limited free content.

Yes! I would like to receive new content and updates.

Table Magazine wants to know your location.

TABLE Magazine operates regional sites - Knowing your location helps us route you to the appropriate site for the best experience.