Home Blog Page 171

Carmella Padilla’s Red Chile and Blue Corn Enchiladas

0
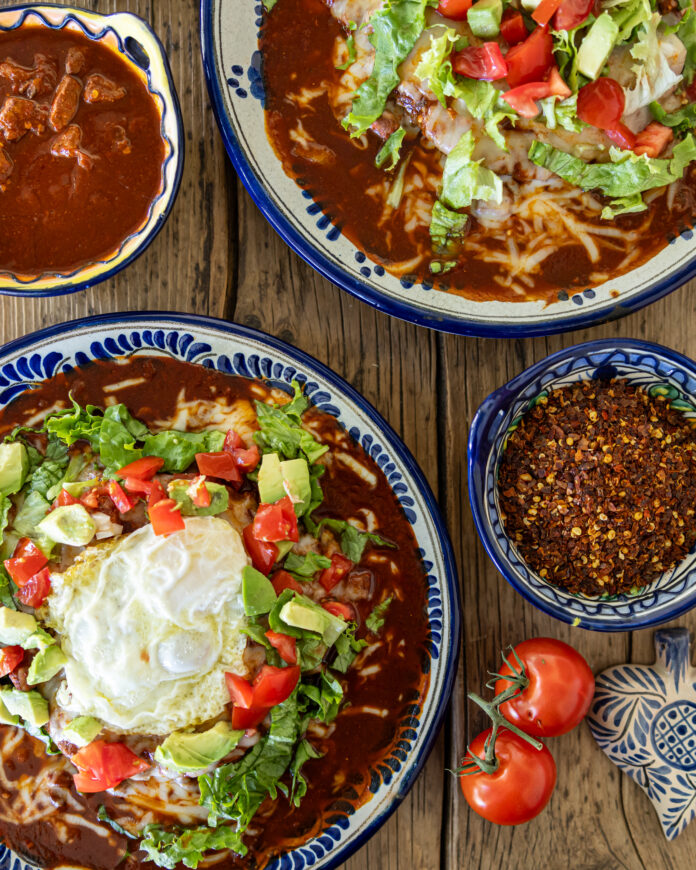
Freshly made Red Chile and Blue Corn Enchiladas by Carmella Padilla sit on a table with a side of beans, salsa, and tomatoes nearby.

Carmella Padilla prepares her enchiladas as her 100-year-old mother always has — flat, or stacked, rather than rolled, with blue corn tortillas. She makes her until-now secret red chile recipe from chile caribe, a coarse-ground type of New Mexican red. The slightly fruity flavor, a good heat, and intense red color are all important. She gets her chile from Harvest Gifts in Tijeras, which can be ordered by mail (505.281.0696). Small pork cubes enrich the sauce, too. She recommends making the chile on the morning of the day you plan to serve it, or even a day ahead, so that the flavors meld fully. Carmella and Luis both enjoy topping each plate of enchiladas with a fried egg, a popular local variation, so feel free to add it. Learn more about the couple’s story and their home once you’ve made the recipe.

Carmella’s Red Chile and Blue Corn Enchiladas Recipe

INGREDIENTS

For Carmella’s Top-Secret Red Chile:

1 cup medium to hot dried chile caribe
Pinch or 2 of salt
Pinch or 2 of garlic salt
Approximately 2 cups water
2-3 tbsp olive oil
1/2-1 white or yellow onion, chopped
2-4 garlic cloves, minced
1 1/2-2 lb pork stew meat, cut into cubes no larger than 1/2 inch

For the blue corn tortillas:

2-3 tbsp olive oil
8 blue corn tortillas (2 tortillas per serving)
About 4 cups grated Monterey Jack
Finely chopped white or yellow onion
Chopped tomato, lettuce, and avocado
Fried eggs, optional

INSTRUCTIONS

  1. In a blender, combine the chile with salt, garlic salt, and about one-half of the water. Blend about 30 seconds then pour in the additional water, and blend again for about a full minute. The chile mixture should become extremely smooth. Stir up from the bottom and blend a bit longer, if needed.
  2. Warm the oil over medium heat. Add the onion and garlic, and sauté until the onion is softened and translucent. Stir in the pork and continue cooking, until the meat has released its juices and is beginning to brown, about 10 more minutes. Pour in the red chile mixture and simmer for about 30 to 40 minutes, until the pork is tender and the mixture reduced somewhat. It should still be very spoonable. Add a little more water, if needed for the proper consistency. Let the chile sit at room temperature for an hour, or refrigerate it for at least several hours, or up to overnight. (If refrigerated, reheat it before using.)
  3. Prepare the tortillas. Warm the oil in a small skillet over medium heat. Dunk each tortilla in the oil and let it soften, a matter of a few seconds. Drain the tortillas on paper towels and reserve.
  4. Shortly before serving the enchiladas, preheat the oven to 350 degrees. Assemble each portion of enchiladas on a separate heatproof plate. On each, spoon out several tablespoons of the red chile. Top with a tortilla. Add a generous 1/2 cup of red chile, fully covering the tortilla, then sprinkle on about a tablespoon of onion, and about 1/2 cup of cheese. Repeat with another tortilla, more chile, onion, and cheese. (Any leftover chile can be kept for up to several days to top or accompany other dishes.) Build the additional enchiladas in the same way.
  5. Bake the plates of enchiladas for about 5 minutes, until the cheese is melted and bubbly in spots. Garnish with tomato, lettuce, and avocado. Serve immediately

Recipe by Carmella Padilla / Story by Cheryl Alters Jamison / Photography by Tira Howard 

A footer photo with a grey and white marble background, three TABLE Magazines and subscribe info and button

Subscribe to TABLE Magazine‘s print edition.
Apple Pie

0
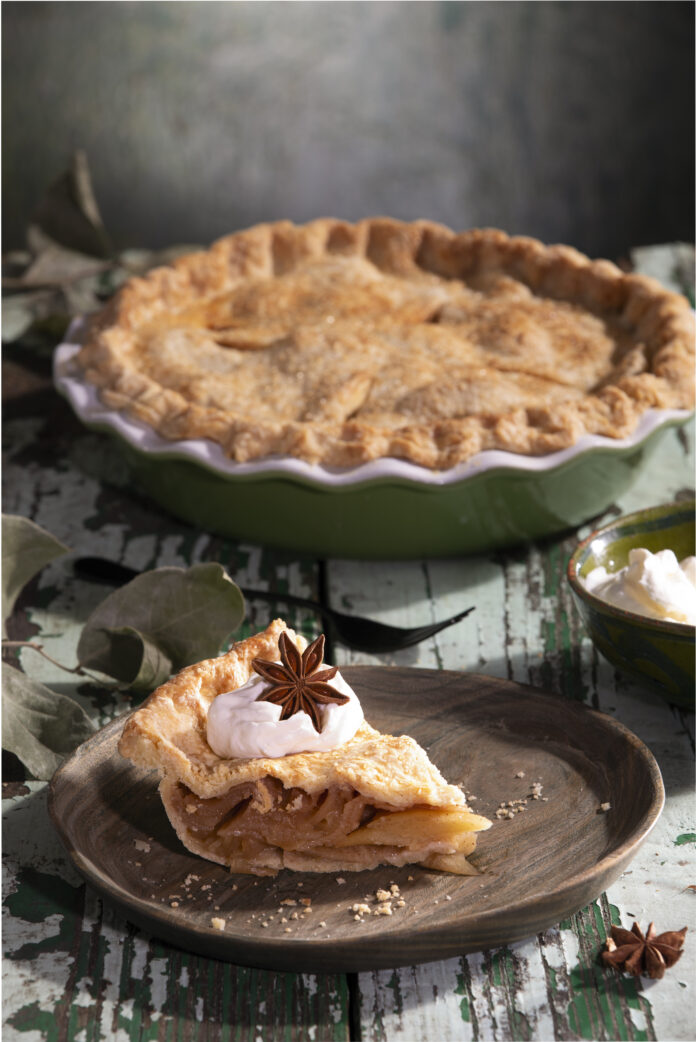
A baked pie sits in a pie tin with a slice of apple pie sitting on a brown plate in front of the pie, topped with an anise star.

The homemade apple pie of my early childhood was enveloped in a flaky lard crust. After my grandmothers retired from baking, my mom—and it seemed like everyone else—succumbed to the ease of grocery store freezer-section pies. For holidays, a local bakery pie might come to the table. None had the flavor and texture of the old days, but I didn’t know what was missing. On my 1977 visit to Santa Fe, I was treated to dinner at the venerable Pink Adobe. The combo plate was satisfying, but the pie dazzled me. Cinnamon-scented apple slices were surrounded by the crust of my childhood. I discovered that lard was the secret adding flakiness and an elusive savoriness to the crust. Most pie recipes say it’s fine to substitute a store-bought crust but it’s not fine. Go to the effort to make your own and find yourself transported.

Print
clock clock iconcutlery cutlery iconflag flag iconfolder folder iconinstagram instagram iconpinterest pinterest iconfacebook facebook iconprint print iconsquares squares iconheart heart iconheart solid heart solid icon
Homemade apple pie with flaky lard crust, cinnamon-scented apples, and golden-brown top crust.

Apple Pie


  • Author: Cheryl Alters Jamison
  • Yield: 9-inch Pie 1x

Description

There’s nothing quite like a classic Apple Pie to end your day.


Ingredients

Scale

For the flaky pie crust:

  • 1¼ cups unbleached all-purpose flour
  • ¾ tsp fine sea salt
  • 2 tbsp unsalted butter, cut in small cubes, well-chilled
  • 4 tbsp lard, well chilled
  • 2 tbsp vegetable shortening, well chilled
  • 34 tbsp ice water

For the apple pie filling:

  • lb apples, preferably a combination of tart and sweet, peeled and sliced thin
  • ¼ cup + tbsp granulated sugar
  • 2 tbsp cornstarch
  • 3 tbsp packed light or dark brown sugar
  • ½ tsp ground cinnamon
  • ¼ tsp ground nutmeg
  • ¼ tsp fine sea salt
  • Juice of ½ lemon, optional
  • 2 tbsp unsalted butter, cut in small bits

For the topping:

  • 2 tbsp milk or 1 egg white, beaten lightly
  • Turbinado sugar or other coarse granulated sugar


Instructions

  1. Grease a 9-inch pie pan.
  2. Prepare the pie crust. In a food processor, pulse together the flour and salt, then scatter the butter over the flour and quickly pulse several times just to submerge the butter. Scoop the lard and shortening into small spoonfuls and scatter them over the flour-butter mixture. Pulse again quickly, several more times, until they disappear into the flour too. Sprinkle in 2 tablespoons of the ice water and pulse again quickly, just until the water disappears.
  3. Dump the mixture onto a pastry board or work surface. Then Lightly rub the dough with your fingers, adding more water, 1 tablespoon at a time, as needed. When the dough holds together if compacted with your fingers, stop. It’s ready. Divide the dough in half and press each half into a fat disk. Wrap dough in plastic and refrigerate for at least 30 minutes.
  4. Roll out each dough disk on a floured surface into a thin round an inch or two larger than the pie pan. Arrange the crust in the pie pan, avoiding stretching it. Even out any ragged edges, leaving about ¾ to 1 inch of dough overhanging the pan. Then refrigerate both crusts for about 15 additional minutes.
  5. Preheat the oven to 375 degrees then form a drip pan for the lower shelf of the oven, turning up the sides of a large piece of foil.
  6. Prepare the filling, first placing the apples in a large bowl. Then combine the granulated sugar and cornstarch, and spoon half of the mixture into the bottom pie crust. Stir the rest of the sugar-cornstarch mixture into the apples, and then mix with the brown sugar, cinnamon, nutmeg, and salt. Spoon the filling into the crust and dot with butter. Top with the second crust and then crimp the edge neatly. Cut several vent holes. Embellish the top crust with any remaining pieces of dough and cut decoratively if you wish. Brush the top with milk, then sprinkle lightly with turbinado sugar. Finally cover the edge of the pie with a strip of foil.
  7. Bake the pie for 10 minutes, then reduce the oven temperature to 350 degrees. Continue baking for 45-50 additional minutes, removing the foil strip when about 20 minutes of baking time remain. The pie is done when the crust is golden brown and flaky. Let the pie cool for at least 1 hour, to allow the juices to be reabsorbed. Slice into wedges and serve.


Recipe adapted from American Home Cooking © 1999 Cheryl Alters Jamison and Bill Jamison

Recipe and Story by Cheryl Alters Jamison / Styling by Merrie O’Donnell and Keith Recker / Photography by Dave Bryce

Subscribe to TABLE Magazine‘s print edition.
Design Story

0
Design Story of James Huniford
Writer Stephen Treffinger shares the story behind his book, James Huniford: At Home. Photo by Matthew Willams.

As design story writers, we classify our subjects into predefined categories: modern, traditional, high-end, and the somewhat elusive “transitional.” Many designers comfortably fit within those boundaries. But when working with Ford to translate his recent work into a book, our challenge and a source of excitement was to approach it in an entirely new manner.

Avoiding the trap of strict categorization, the pitfall I wanted to avoid was creating a long magazine article with the usual well-trodden tropes: breathless descriptions of unusual fabric finishes, complicated floor or wall treatments, and important pieces. Such an approach wouldn’t do justice to Ford’s work, process, or personality. His style embodies a relaxed demeanor while effortlessly maintaining an air of nonchalant elegance, favoring chic over shabby.

James Huniford_1
L: Bridgehampton residence. R: Fifth Avenue residence. Photography by Matthew Williams.

One thing that makes describing Ford and his design process difficult is that he doesn’t have a set formula, a “Huniford style” or “Huniford look.” (I joked with him that it would have been much easier for me as a writer if he did, albeit certainly less interesting for his clients.) So, the idea was, instead, to describe his approach and inner workings. And to get across his personality, which is a big part of the equation.

There isn’t some veil between private citizen Ford and designer Ford; he treats everyone pretty much the same. He is gregarious and the sort of director who effortlessly connects people from the worlds of art, design, theater, finance, and his charitable endeavors with admirable ease. It was important to convey that right from the start, so I chose to describe a small moment representing the larger picture.

How, then, does one describe what someone does if it can’t be immediately expressed in the usual ways? Spending time watching him work was, of course, essential. Long talks about favorite places, rooms, and colors–of course, helped begin to paint a picture. Sometimes, it was more about patience, hanging back, and allowing him to talk in a stream of consciousness until clear patterns began to emerge. It was my job to find the thread and follow it, identifying ways to express a common ground even in projects that––on the surface––look quite different.

James Huniford_2
L: Upper East Side residence. R: West Village residence. Photography by Matthew Williams.

Ford and his team had compiled a list of chapters before I was brought on board. After our initial conversations, we massaged these some and reworked the order. The final lineup included topics including Approaching a Room, Scale, and Proportion, and Exploring Color.

The next step was to sort his projects into chapters–more complicated than it might sound. I was handed an enormous pile of photos and spent many days dividing and pinning them all over the walls of his conference room in giant collages. More sorting and shuffling ensued (right up to the very end), and images––or even whole projects–– were added to or removed from the mix as the book evolved.

One of the chapters Ford had suggested early on was about scale and proportion, an important part of any interior designer’s art, but in his case, arguably more than for some others. It’s rare to find someone who can operate on both macro and micro levels with such confidence.

In putting the book together, we had the luxury of re-shooting nearly every project, all with the same photographer–the immensely talented Matthew Williams. Walking through the spaces rather than only seeing cropped photos was invaluable, allowing me to access information the reader can’t always register, no matter how splendid the photos are. It is a sort of emotional temperature and atmosphere that one picks up in space. It also helps one to draw attention to things someone leafing through might not immediately notice.

James Huniford Woodstock Residence
Woodstock residence. Photo by William Waldron.

Few realize how involved photographing these projects can be, a handful of pictures requiring the participation of several people and an entire day of shooting. Furniture is moved around and around (and, yes, even the writer helps). Flowers are arranged. Pillows are indeed fluffed. Does that table need another book on it? Do we really want to see the back of that chair? Is that too much?

In Ford’s world, rooms don’t contain four seating areas when one or two will do. Walls tend to be one of myriad shades of near-white with a soft-spoken blue or green tint. (The rooms in his own beach home in the Hamptons have painted a shade of his invention called Foggy Summer Squall.) The overall effect owes more to subtle layering and careful juxtaposition than to sparkly bits or jarring colors.

One thing Ford really wanted to get across was the sense of dramatic tension in his work. It is, to be certain, nuanced and often quiet––but germane to what he is all about. It draws you in and makes you feel involved in the space, a participant rather than an observer. It shifts the focus back to the occupant and away from the designer––a generosity that perfectly represents him.

James Huniford: At Home (Monacelli Press, 2020) is available at fine booksellers near you or online.

James Huniford Marin County Residence
Marin County residence. Photo by Max Kim Bee.

Story by Stephen Treffinger / Photography by Matthew Williams, Max Kim Bee, and William Waldron

A footer photo with a black background and subscribe info and button

Subscribe to TABLE Magazine’s print edition.

Cherry Blueberry Pie

0
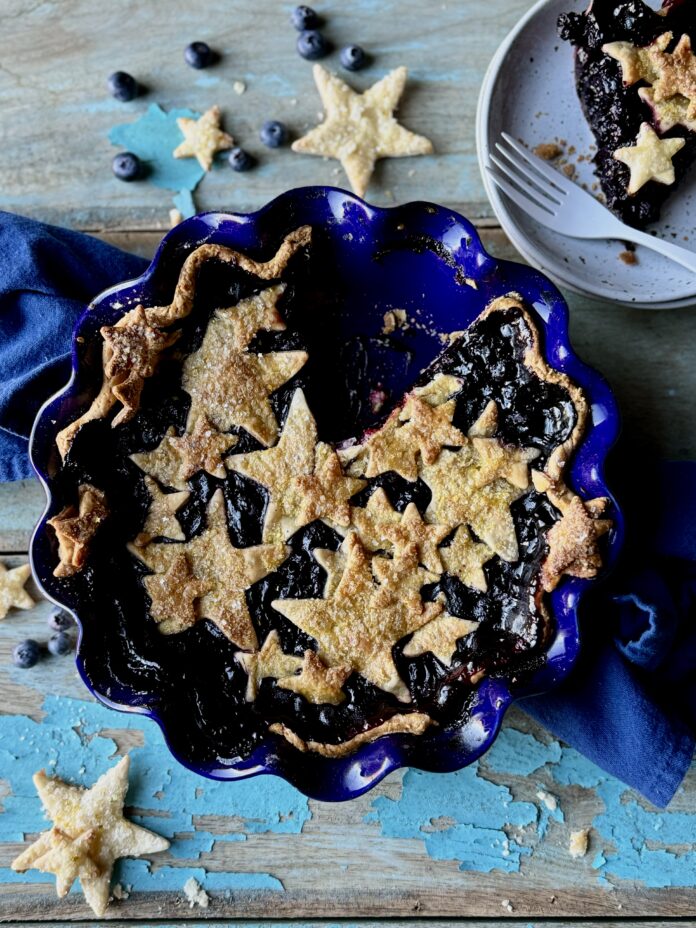
A cherry blueberry pie with stars as a top crust, in a cobalt blue, scalloped edge pie dish sitting on a blue cotton towel on a rustic wooden surface with chipped light blue paint

Whether you’re team cherry, team blueberry, or “just give me the pie,” this Cherry Blueberry Pie explodes with ravishing berry flavor you’re sure to love. More than just a fusion of flavors, this pie presents with a little culinary creativity that finishes with a surprise taste in every bite. Preparing the cherry and blueberry fillings separately allows you to arrange the mixtures so the pie eater enjoys each bite with a surprise burst of flavor. One bite fills the mouth with tart and tangy cherries, and the next with a sweet and juicy bite of blueberries. Sure, you can mix it all together if you’d like, but it’s only five extra minutes of prep time to create a delightful experience with this Cherry Blueberry Pie.

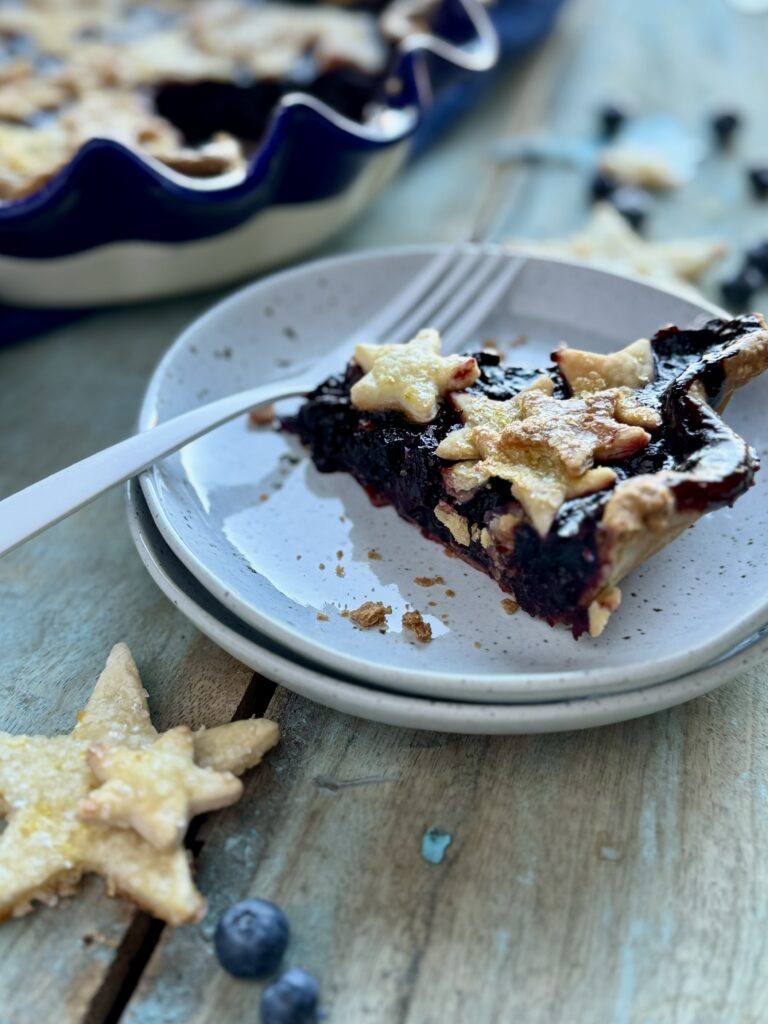
A slice of cherry blueberry pie with star crust on a white plate with a for,

Print
clock clock iconcutlery cutlery iconflag flag iconfolder folder iconinstagram instagram iconpinterest pinterest iconfacebook facebook iconprint print iconsquares squares iconheart heart iconheart solid heart solid icon
A cherry blueberry pie with stars as a top crust, in a cobalt blue, scalloped edge pie dish sitting on a blue cotton towel on a rustic wooden surface with chipped light blue paint

Cherry Blueberry Pie


  • Author: Star Laliberte

Description

This pie not only looks elegant but fills your mouth with fruity flavors.


Ingredients

Scale
  • 16 oz frozen blueberries
  • 16 oz frozen dark sweet cherries
  • 1/2 cup brown sugar
  • 1/2 cup granulated sugar
  • 4 tbsp cornstarch (divided)
  • 1/2 tsp ground cinnamon (divided)
  • 2 pinches of nutmeg (divided)
  • 3 tsp fresh lemon juice (divided)
  • Pillsbury refrigeratored pie crust
  • 1 egg
  • 1 tbsp water


Instructions

For the blueberry filling:

  1. In a medium saucepan, whisk together 1/2 cup brown sugar, 2 tbsp cornstarch 1/4 tsp ground cinnamon, and a pinch of nutmeg. Add the frozen blueberries to the pan and stir until coated.
  2. Add 1 1/2 tsp of fresh squeezed lemon juice and stir.
  3. Over medium heat, stirring occasionally, bring the berry mixture to a boil.
  4. Once boiling, stir constantly for 2-3 minutes or until the mixture begins to thicken.
  5. Remove from heat and allow to cool.

For the cherry filling:

  1. In a medium saucepan, whisk together 1/2 cup granulated sugar, 2 tbsp cornstarch, 1/4 tsp ground cinnamon, and a pinch of nutmeg. Add the frozen cherries to the pan and stir until coated.
  2. Add 1 1/2 tsp of fresh squeezed lemon juice and stir. Over medium heat, stirring occasionally, bring the cherry mixture to a boil.
  3. Once boiling, stir constantly for 2-3 minutes or until the mixture begins to thicken.
  4. Remove from heat and allow to cool.

For the pie:

  1. Once the fillings are cooled to room temperature, preheat the oven to 400 degrees and prepare the bottom crust in a 9″ pie pan according to the instructions on the package.
  2. Alternate adding your fillings. This can be done by spoonful, in a striped pattern, or swirled gently together. Alternating the berry mixture gives the eater a surprise bite of berry each time. You can mix the berries together if you prefer.
  3. After all of the berries are added to the pie, prepare the top crust. Cut stars and stripes, a lattice pattern, or use a traditional top crust with a few slits cut towards the center of the dough for the filling to vent.
  4. Whisk together the egg and water, then brush the egg wash over the crust.
  5. Place the pie on a rimmed baking sheet in the middle of the oven and bake for 25 minutes.
  6. Remove the pie from the oven, cover the outside edges of the crust with foil, and return the pie to the oven to bake for another 30-35 minutes or until the filling is bubbling and the crust is golden brown.
  7. Remove from the oven and cool on a wire rack before serving.

Recipe, Styling, Photography and Story by Star Laliberte

Craving more berries? Why not try our Raspberry Glaze Pie?

Subscribe to TABLE Magazine‘s print edition.

Strawberry Rhubarb Pie Cocktail

0
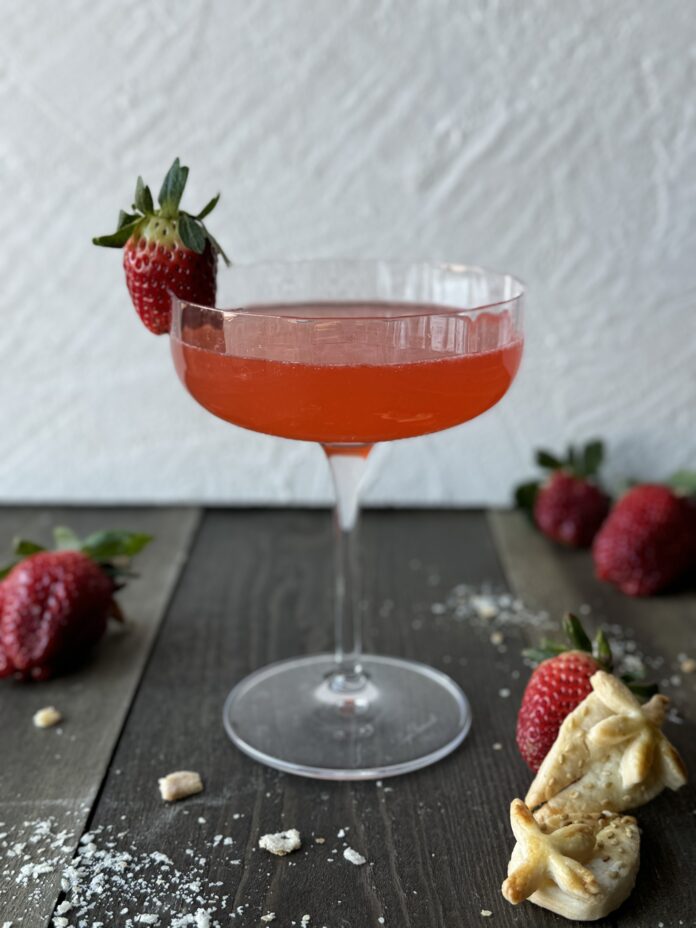
A strawberry rhubarb pie cocktail in a clear glass with pie crust strawberries and fresh strawberry garnish on a wooden surface with a white textured background

Introducing a refreshing libation that encapsulates the essence of strawberry rhubarb pie. Just in time to celebrate Pi Day, it’s our Strawberry Rhubarb Pie Cocktail! This cocktail is a harmonious blend of ripened strawberries and tart rhubarb that will conjure up all the memories of summertime sipping, but easily enjoyable any time of the year. Cheers!

Tips for Making Homemade Strawberry Syrup

That super sweet, artificial strawberry syrup from the stores just simply won’t do for this Strawberry Rhubarb Pie Cocktail. Crafting delicious homemade strawberry syrup hinges on using ripe strawberries at their peak from late may to early June. Plus, you can add or take away the sugar content depending on how sweet you want your syrup to be. The key here is to go low and slow. When simmering, you want the heat as low as possible to slowly thicken the syrup. A rapid boil is the last thing you want. For a smooth result, strain the syrup; otherwise, you can leave it chunky. You can also enhance the flavor with vanilla, mint, or other additions after cooking, but keeping this syrup strictly strawberry will work for this particular recipe.

Print
clock clock iconcutlery cutlery iconflag flag iconfolder folder iconinstagram instagram iconpinterest pinterest iconfacebook facebook iconprint print iconsquares squares iconheart heart iconheart solid heart solid icon
A strawberry rhubarb pie cocktail in a clear glass with pie crust strawberries and fresh strawberry garnish on a wooden surface with a white textured background

Strawberry Rhubarb Pie Cocktail


  • Author: Zack Durkin

Description

Have your pie and drink it too!


Ingredients

Scale
  • 3 oz gin
  • 1.5 oz strawberry syrup (recipe below)
  • .5 oz fresh squeezed lemon juice
  • 2 dashes of rhubarb bitters
  • 1 strawberry (or piece of rhubarb) for garnish

For the strawberry syrup:

  • 8 oz fresh strawberries cleaned, stems removed, hulled and diced
  • 1 cup granulated sugar
  • 1 cup water


Instructions

  1. Pour gin, syrup, lemon juice, and rhubarb bitters into a shaking tin with ice..
  2. Shake for about 15 seconds or until the tin is cold to the touch.
  3. Strain into your favorite stemmed glass and garnish with a strawberry.
  4. Enjoy!

For the strawberry syrup:

  1. Add strawberries, sugar and water to a small saucepan on medium high heat.
  2. Bring to a boil.
  3. Lower the flame and gently mash the strawberries with the back of a spoon.
  4. Let simmer for 15 minutes.
  5. Allow to cool to room temperature.
  6. Strain through a fine mesh strainer.
  7. Store in a sealable container in the refrigerator for up to 2 weeks.

Recipe by Zack Durkin
Styling by Anna Franklin
Photography and Story by Star Laliberte

Subscribe to TABLE Magazine‘s print edition.

Raspberry Orange Galette

0
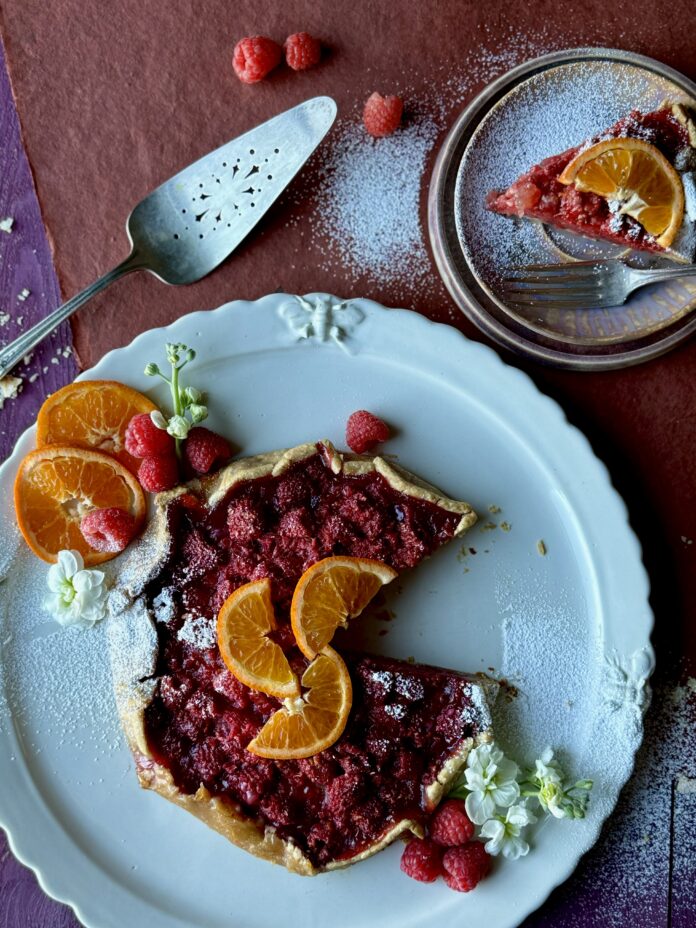
A rustic Raspberry Orange Galette on a round white plate with sliced oranges and white flowers, a pie server and a slice of the galette on a plate in the upper right corner.

Celebrate the vibrant combination of ripe juicy berries and tangy citrus in our Raspberry Orange Galette. It’s a versatile rustic treat that can be served with fresh whipped topping or a scoop of your favorite vanilla ice cream. But two of our favorite ways to enjoy this delightful dessert is after dinner with a tiny glass of Grand Mariner or for breakfast with a piping hot cappuccino.

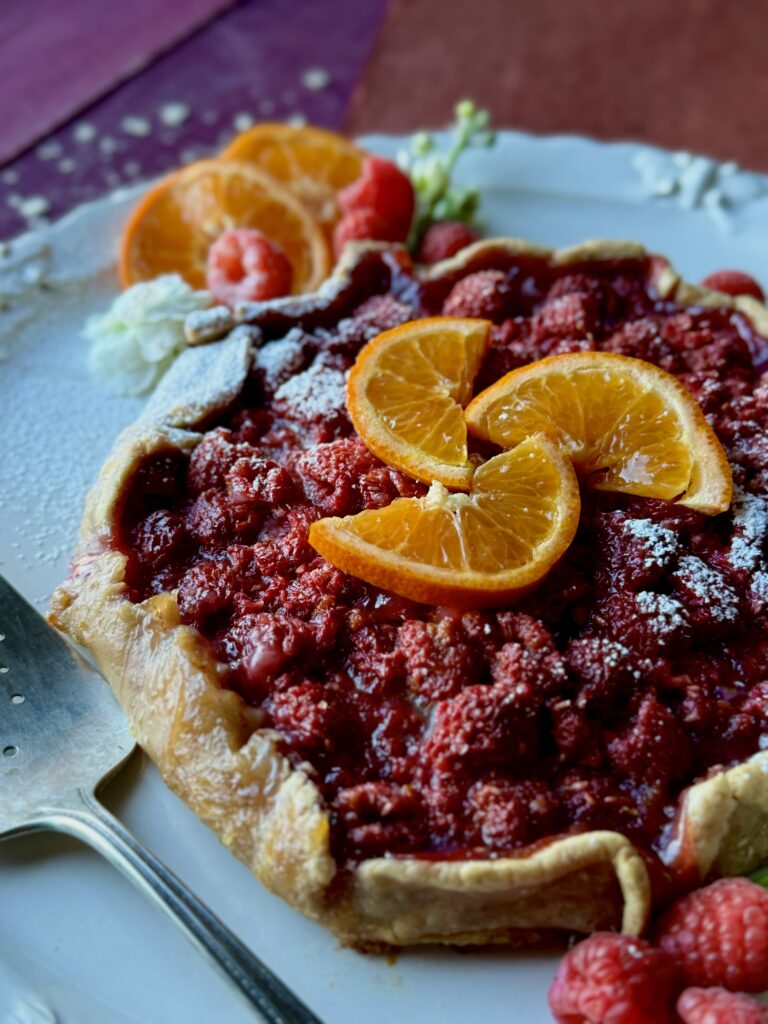
a lookin at a raspberry orange galette with sliced oranges, white flowers, and raspberry garnish on a white plate.

Raspberry Orange Galette Recipe

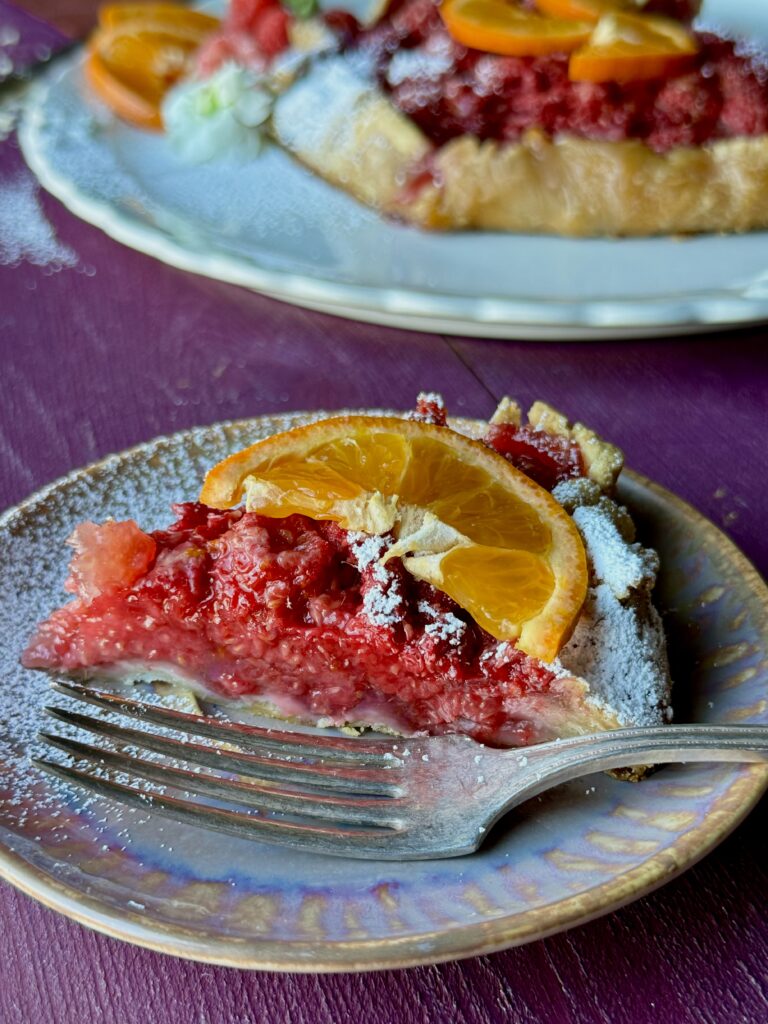
A slice of raspberry orange galette on a small plate with a fork.
Print
clock clock iconcutlery cutlery iconflag flag iconfolder folder iconinstagram instagram iconpinterest pinterest iconfacebook facebook iconprint print iconsquares squares iconheart heart iconheart solid heart solid icon

Raspberry Orange Galette


  • Author: Keith Recker

Description

A galette to enjoy with coffee for breakfast or a glass of wine in the evening.


Ingredients

Scale
  • 4 cups fresh raspberries
  • 6 tbsp cornstarch
  • 1 cup sugar (reduce by ¼ cup if you would enjoy a not-too-sweet tart for breakfast!)
  • 8 dashes orange bitters
  • Zest of 2 mandarin oranges
  • 4 tbsp mandarin orange juice


Instructions

  1. Lightly grease a cookie sheet with a bit of olive oil.
  2. Brush 9” pie crust with lemon olive oil on both sides. You can make your own, but store-
    bought rolls of pie crust are perfectly fine.
  3. Toss berries, sugar, and cornstarch together in a bowl until berries are evenly coated. Some sugar and cornstarch will remain loose in the bowl.
  4. Add bitters, zest, and juice, and stir until berries are moist and coated.
  5. Pile the fruit mixture in a mound in the middle of the crust. Compress the pile gently with both hands to reduce its volume a bit. Do not be afraid of the volume: the berries will cook down into a lovely jam at the end.
  6. Fold the crust up around the mound of berries to form a lip.
  7. Bake for 50 to 60 min at 325 degrees. Watch for overflow of juices, which is likely to
    happen. I remove drippings with a spoon once or twice in the course of baking.
  8. When ready, the crust will be golden. The fruit will have reduced into a delicious filling.
    Garnish with fresh orange slices, whipped cream, and a leaf or two of fresh mint.

Recipe by Keith Recker
Styling by Anna Franklin
Photography by Star Laliberte

Subscribe to TABLE Magazine‘s print edition.

Traditional Apple Pie

0
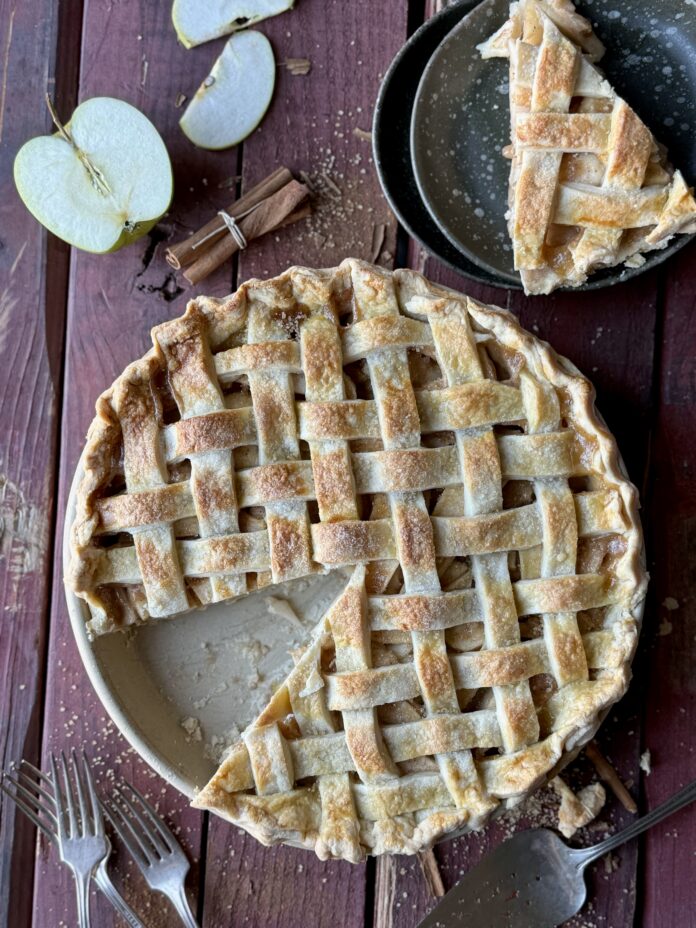
A traditional apple pie with a lattice top crust on a worn red wood surface with a sliced apple, cinnamon sticks, a slice of pie and silver forks.

When we think about iconic symbols of American culinary tradition, the nostalgic, cherished, classic apple pie comes to mind. Our Traditional Apple Pie recipe is a way to savor the comforting flavor we fondly remember grandma pulling from her oven on a Sunday afternoon. Sure, you can find delicious apple pies for sale at your local farmers’ market, and even your local grocery store bakery, but let’s be honest—there is nothing quite like the aroma of warm apples and cinnamon filling your home when you pull the cozy homemade goodness of a fresh baked apple pie from your oven. So, what are you waiting for? Get baking!

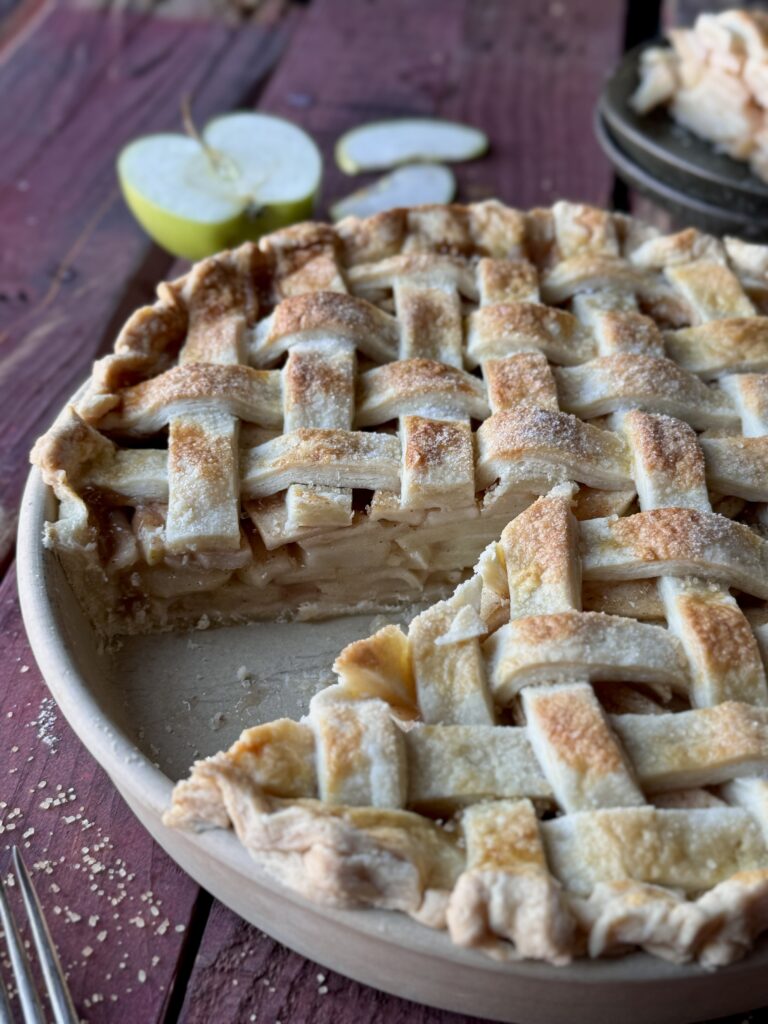
A traditional apple pie with a lattice top crust and a slice removed.
Print
clock clock iconcutlery cutlery iconflag flag iconfolder folder iconinstagram instagram iconpinterest pinterest iconfacebook facebook iconprint print iconsquares squares iconheart heart iconheart solid heart solid icon

Traditional Apple Pie


  • Author: Anna Franklin

Description

As classic as it gets!


Ingredients

Scale

For the dough:

  • 4 cups flour
  • 1 tsp salt
  • 2 1/2 sticks butter
  • 5 tbsp cold water

For the filling:

  • 10 cups 1/4-inch-thick Granny Smith apple slices (about 8 apples)
  • 1/2 cup granulated sugar
  • 1/4 cup packed brown sugar
  • 1/4 cup all-purpose flour
  • 1 tbsp lemon juice
  • 1 and 1/2 tsp ground cinnamon
  • 1/4 tsp each: ground allspice & ground nutmeg
  • Egg wash: 1 large egg beaten with 1 tbsp milk
  • Optional: coarse sugar for sprinkling on crust


Instructions

  1. In a large bowl, stir the apple slices, sugar, flour, lemon juice, cinnamon, allspice, and nutmeg together until thoroughly combined.
  2. Pour the apple filling into a very large skillet or dutch oven, and place over medium-low heat. Stir and cook for 5 minutes until the apples begin to soften. Remove from heat and set aside.
  3. Preheat oven to 400°F.
  4. Measure flour and salt into a bowl. Using two butterknives or a pastry cutter, cut in the butter until none of the pieces are any bigger than the size of a pea.
  5. Sprinkle in the cold water and mix until the flour is moistened.
  6. Gather the dough into a ball and then flatten out slightly. Divide the dough into two even pieces and form both into flattened rounds.
  7. Flour your work surface and roll out each piece of dough into a 10 in round. This should hang over your pie pan about 1-2 inches.
  8. Place one rolled out piece in the bottom of your pie pan and fill with your apple filling. Top with your second piece of pie dough and crimp around the edges to seal the pie.
  9. If using a solid piece of dough, poke a few vents in the middle of the pie crust. (We did a lattice design for our crust)
  10. Brush your pie with your egg wash and sprinkle with sugar before baking.
  11. Bake your pie at 400° for 20 minutes and then drop the heat to 350° and bake for another 30-40 minutes.

Hungry for more? Try our Dutch Apple Pie with a Twist.

Recipe and Styling by Anna Franklin
Photography and Story by Star Laliberte

Subscribe to TABLE Magazine‘s print edition.
2024 Oscar Nominee Inspired Bites and Sips

0
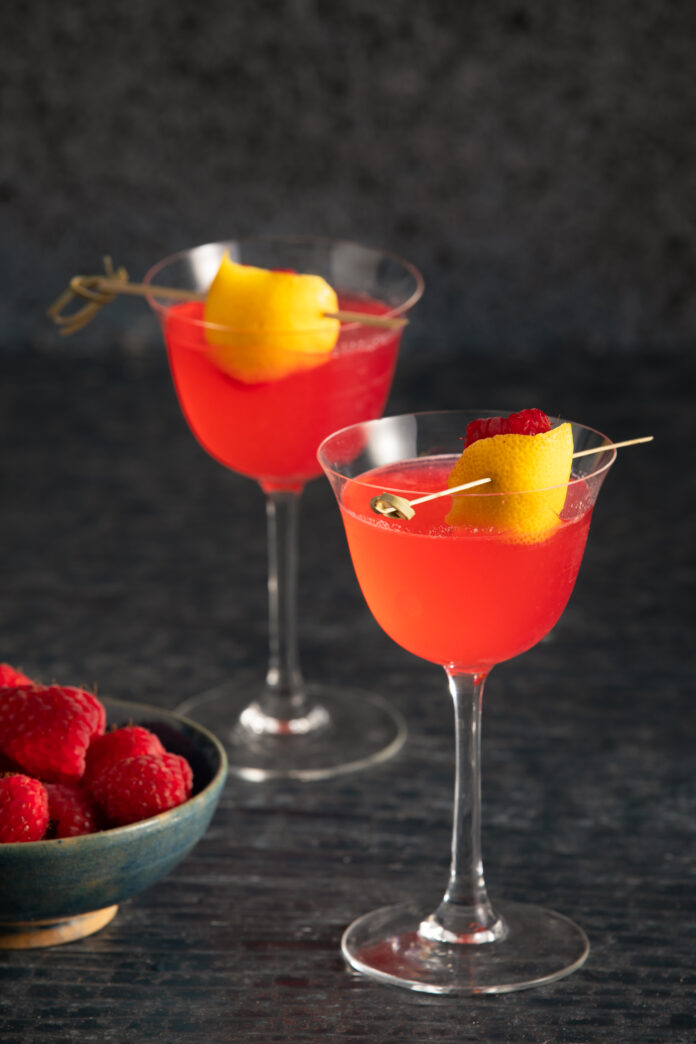
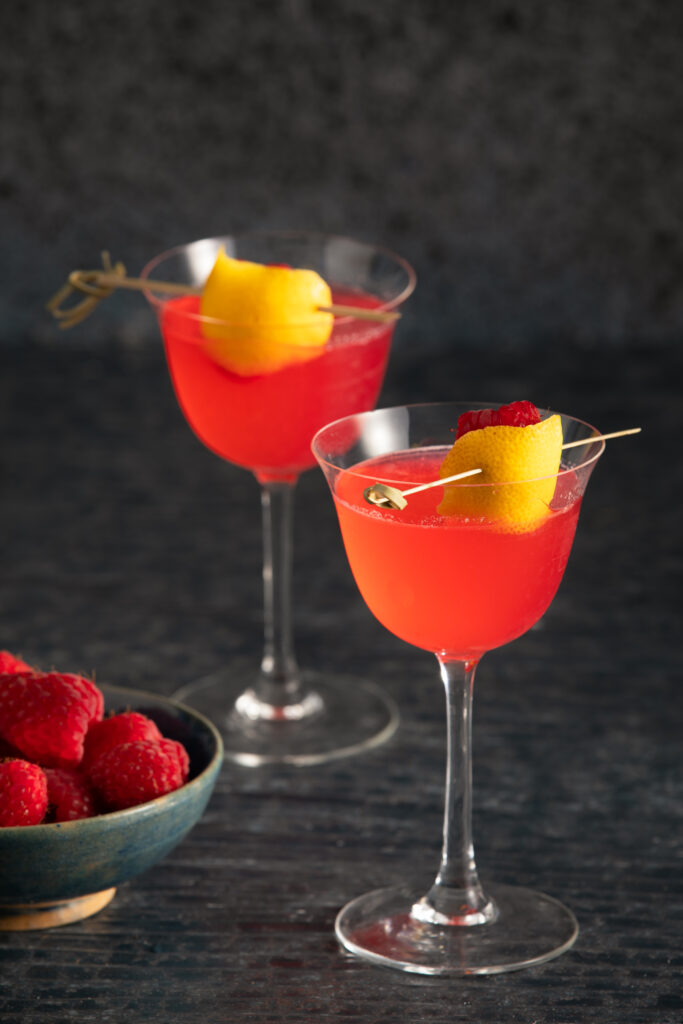
Moon Rising - Killers of the Flower Moon Cocktail. Two sit in martini glasses, garnished with a lemon peel. Bright red in color

Step onto the red carpet while indulging in a cinematic culinary experience like no other with our 2024 Oscar nominee-inspired bites and sips. From the charming pink hues of our Hi Barbie! Cocktail to the intriguing Mushroom Recipes for a Post-Oppenheimer World, our selections are designed to captivate your senses and transport you into the atmosphere of the most celebrated films of the past year. Join us as we explore a world where culinary artistry meets movie-making, inviting you to savor the flavors of your favorite Oscar-nominated movies in a way that’s both delicious and delightful.

Hi Barbie! Cocktail

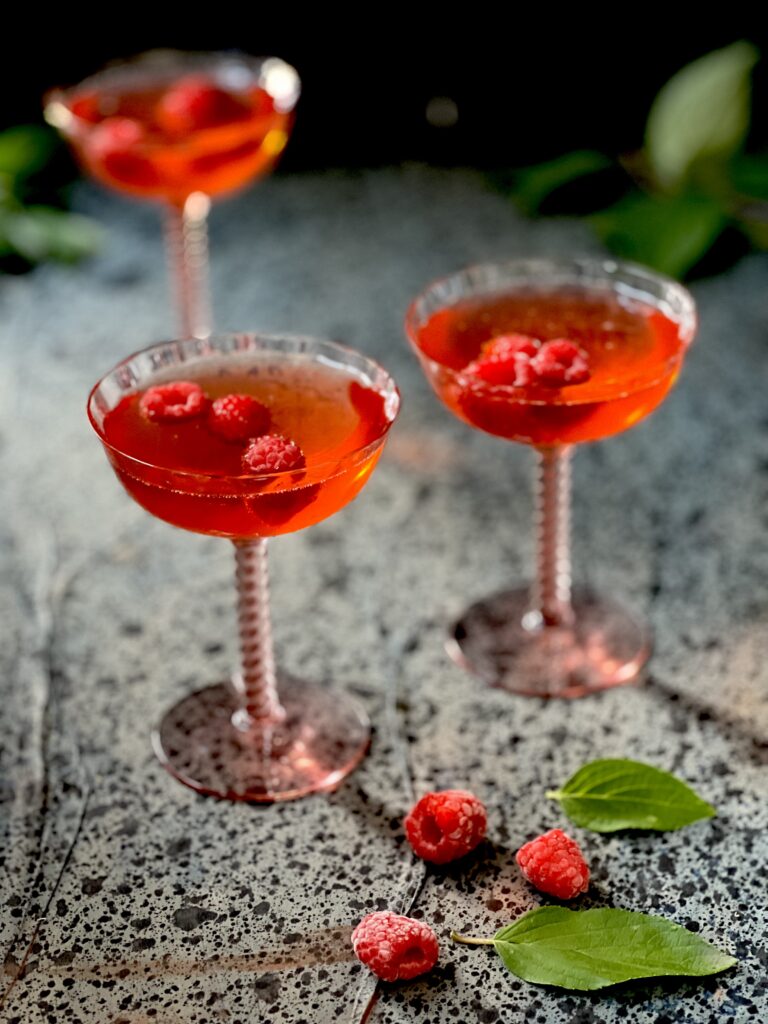
Three dark pink cocktails in pink coupe glasses with floating raspberries

Did the heartwarming message of the Barbie movie leave a happy imprint on your heart? Then this is all pink Hi Barbie! Cocktail is for you! It’s inspired not only by the pink atmosphere of Barbie World but the cheery vibes of Barbie in her finest moments. Plus, with Grey Goose Vodka and pink Prosecco, you can embrace the wonderful life of being human… even if that means a bit of a headache the next day.

Ken-ergy: The Ultimate Post-Workout Smoothie

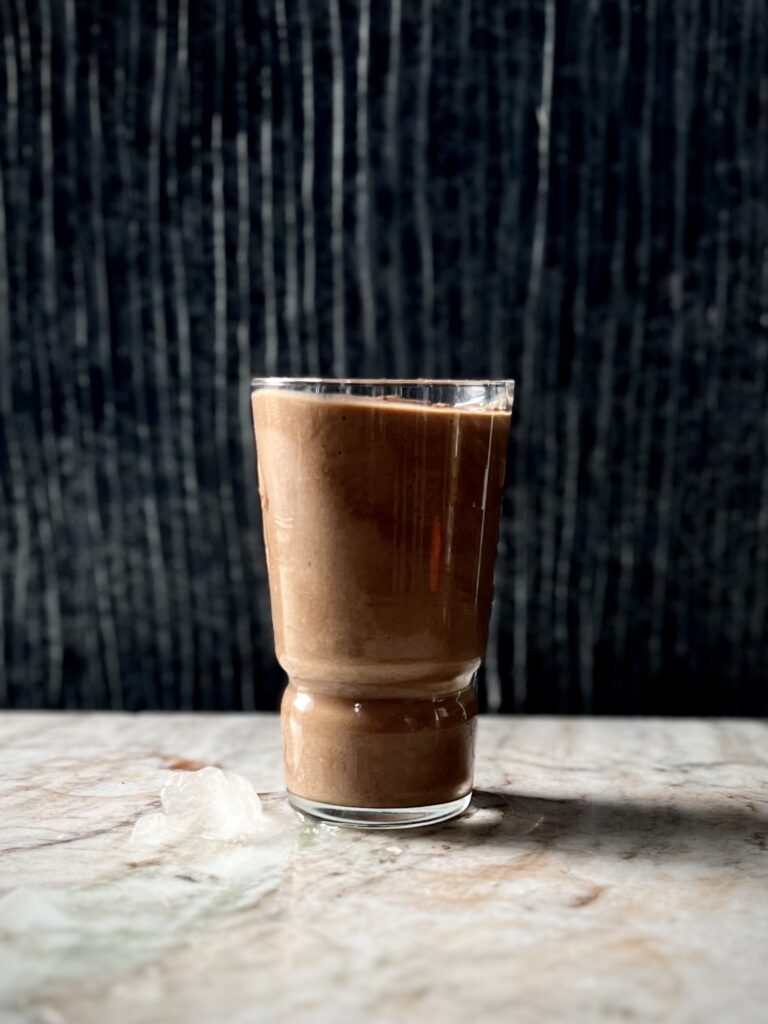
A look in of a single glass with a thick chocolate Ken-ergy: The Ultimate Post-workout smoothie and a little melting ice on the left side

This Ultimate Post-Workout Smoothie is just Ken…ergy. With the catchy hit “I’m Just Ken” being nominated for Best Original Song, our Ken-ergy drink is the perfect accompaniment. Embrace the attitude of Ken’s upbeat spirit with cold coffee, avocado, banana, cocoa powder, PBfit powdered peanut butter, vanilla whey protein, and Om Master Blend Organic Mushroom Powder. Not only is it delicious, but it’ll keep you moving after a killer workout or busy day.

5 Mushroom Recipes for a Post-Oppenheimer Movie World

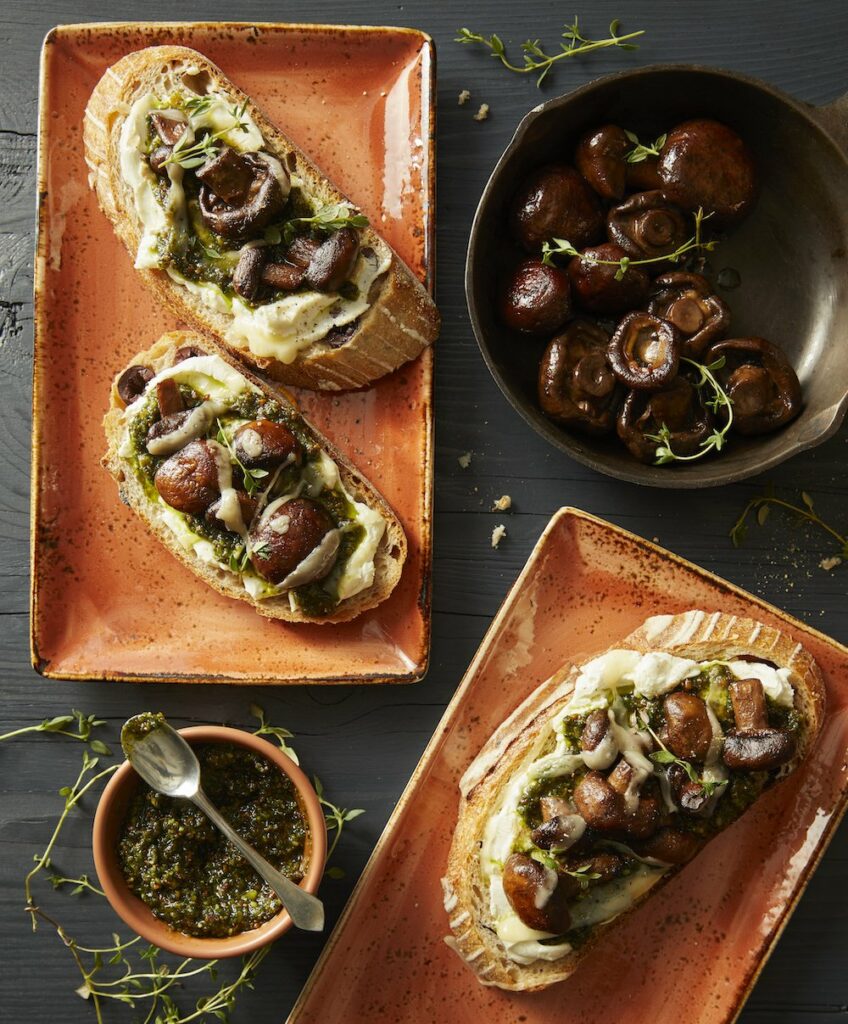
Buttered Mushroom Tartine on two separate plates with mushrooms in one plate and a dip sauce in another

We’re coming up on the one-year anniversary of Oppenheimer in July, and we’re still discussing the movie’s lasting impact. Whether it’s because of Cillian Murphy’s incredible acting, the outrageous visual effects, or the fact it’s a Christopher Nolan film, we can see why it’s been continuously catching people’s eye. Celebrate this masterpiece with impressionable mushroom recipes like Buttered Mushroom Tartine. Mushroom recipes… mushroom cloud… see what we did there?

Smoked Bourbon Old Fashioned (The Holdovers)

A orange with half its peel off sits to the right of a smoked bourbon old fashioned in rocks glass. curls of smoke waft off the glass.

A grumbling teacher at a remote prep school, played by Paul Giamatti, would most definitely need a Smoked Bourbon Old Fashioned while stuck with a group of students during the holidays. It’s robust and leaves you feeling all warm on the inside, much like the Best Picture nominee, The Holdovers. Sit back, relax, then let this cocktail, alongside this astounding cast, keep you entertained for the evening. 

Purple Cocktails in Celebration of The Color Purple

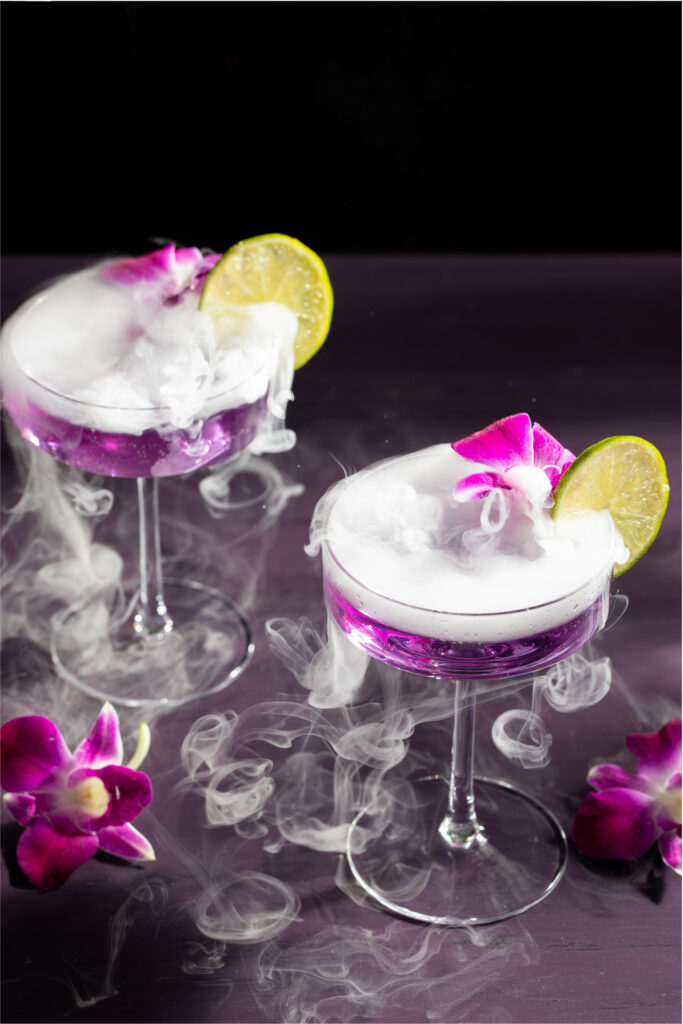
Two glasses with purple liquid inside are topped with little botanical pink flowers and lemon slices with smoke pouring overtop.

If you’ve seen or read The Color Purple, then you know you need a cocktail or two to wash down this heartbreaking movie. Much like the movie, our list of purple cocktails tells tales with their rich flavor profiles and beautiful colors. Let drinks like our dazzling Dreams Cocktail or delicious Lavender ’99 set the perfect atmosphere for your viewing experience. Just don’t blame us if you end up crying by the end of this heroic tale.

Killers of the Flower Moon Cocktail

Moon Rising - Killers of the Flower Moon Cocktail. Two sit in martini glasses, garnished with a lemon peel. Bright red in color
Inspired by the book Killers of the Flower Moon: The Osage Murders and the Birth of the FBI and its film counterpart, our Killers of the Flower Moon Cocktail fuses flavors for the perfect viewing or reading experience. Raspberry, vodka, lemonade, and then a squeeze of fresh lemon create a cocktail with fruity, citric flavor. It’s a combination that mimics the orangish-red hue of the film and tastes just as good as it looks.

Story by Kylie Thomas

A footer photo with a black background and subscribe info and button

Subscribe to TABLE Magazine‘s print edition.
7 Chocolate Recipes for Every Occasion

0
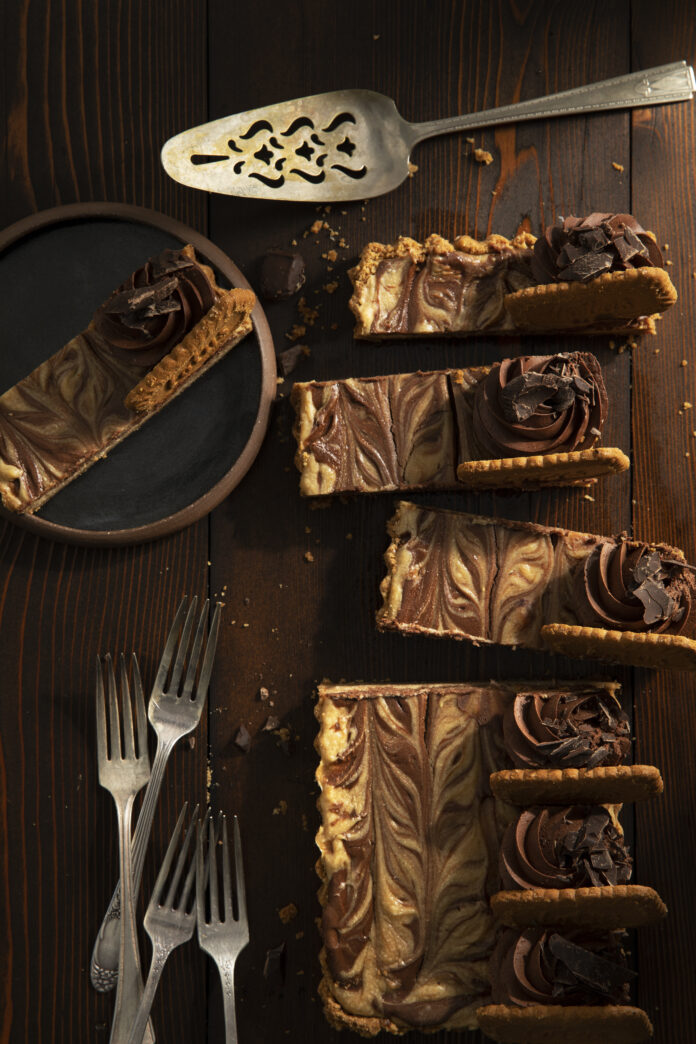
Peanut butter chocolate cheesecake sliced and served on a wooden surface with forks on the side

Here at TABLE, we’re constantly curious as to how we can learn more, grow in our skills, and share stories in ways we haven’t tried before. This is especially true in winter, when dark and cold days keep us. This season, a 20-pound chocolate bar from Mon Aimee Chocolat, a gourmet chocolate store located in Pittsburgh’s Strip District, presented itself. Selina Progar, TABLE contributor and pastry chef at Eleven, took on the challenge with gusto. “It was so big I had to bring it outside and bang it on the ground, wrapped up, to break it up,” Selina said, laughing.

We gave Selina the freedom to be as expressive and experimental as she desired with this mountain of chocolate. “It was intimidating! But incredibly worth it,” Selina shared. “It was a thicker chocolate than I’ve used in the past, with a higher viscosity.” When Selena melted the chocolate, it had a beautiful light ganache texture. Easy to work with, it is a great fit for those who don’t often work with chocolate tempering. It’s a versatile chocolate that can be used both in a professional kitchen and by the home baker.

Breaking Down the Bar

If you’re looking to expand your world of chocolate, it helps to know some fundamentals. Baking chocolates can be quite varied, so it’s important for you to learn how each one is different.

Selina finds one of the most important aspects of baking with chocolate to take into consideration is its percentage of cocoa content. Cocoa percentage includes cocoa mass or cocoa liquor (not to be confused with the alcoholic version), cocoa nib, and any added cocoa butter. Cocoa butter is the edible fat extracted from the cocoa bean, which has its own cocoa aroma and flavor.

For example, a plain dark chocolate bar with a cocoa content of 70% means that 70% of the chocolate has been made from ingredients found in the cocoa bean. The remaining 30% will consist of other ingredients like sugar. “Seventy percent is dark in our own home [kitchens], but in the baking kitchen, it’s perfect to work with,” says Selina.

Why Selina Progar likes working with chocolate

“It’s the huge range of percentages, brands, and flavors of chocolate. It allows for so many different kinds of recipes to be made. You can infuse teas. You can make ganaches for bonbons, truffles, candy bars.” Each chocolate has its own flavor note and flavor pairings. You can use different parts of the cocoa bean for cocoa butter, chocolate liquor, and cocoa nibs. “We use each of those in different aspects in the kitchen. For example, cocoa butter is used to make velvet sprays. We can add dyes for fun, bright colors.”

Working with Chocolate at Home

Melt Chocolate with a Double Boiler

A lot of people head to the microwave, but this can burn the chocolate. A double boiler gives a lot more control. It’s just a pot filled with three inches of water, and a bowl (preferably heatproof glass) that fits on top. Turn on the stove to medium heat and let the steam of the boiling water gently melt the chocolate while you stir constantly.

Use the Right Tools

Unless you’re trying to temper chocolate to make elaborately decorated desserts, you don’t need specialty tools beyond a nice rubber spatula with no garlic or other food smells.

Skip the Chips

When a recipe calls for melted chocolate, it’s best to use the real deal instead of chocolate chips, which are not designed to melt well, and have a less intense flavor than a full-on chocolate bar. Chopping your own chocolate chunks might take a little extra time, but it’s well worth it.

Have Fun!

What is Selina’s biggest advice for working with chocolate? “Don’t be scared to move beyond chocolate chip cookies. You can play around with it and incorporate it into things you might not know it belongs in. Look at flavor charts of different chocolates and see what you can pair it with. Look at Mexican mole sauces. You can use it for anything and everything.”

Visit Mon Aimee Chocolat in Pittsburgh’s Strip District

With chocolate sourced from over 60 countries, Mon Aimee curates one of the largest collections of premium fine chocolate in the United States. They showcase Pittsburgh’s local handcrafted chocolatiers, as well as award-winning bean-to-bar chocolatiers.

7 Chocolate Recipes to Get You Started

Chocolate Bourbon Pecan Pie

Chocolate Bourbon Pecan Pie: Decadent twist on a classic recipe, stealing the spotlight at every table.

Everyone at your table will be reaching for another slice! An elegant spin on a classic pecan pie, a sprinkle of bourbon adds rich flavor that will be the talk of the table.

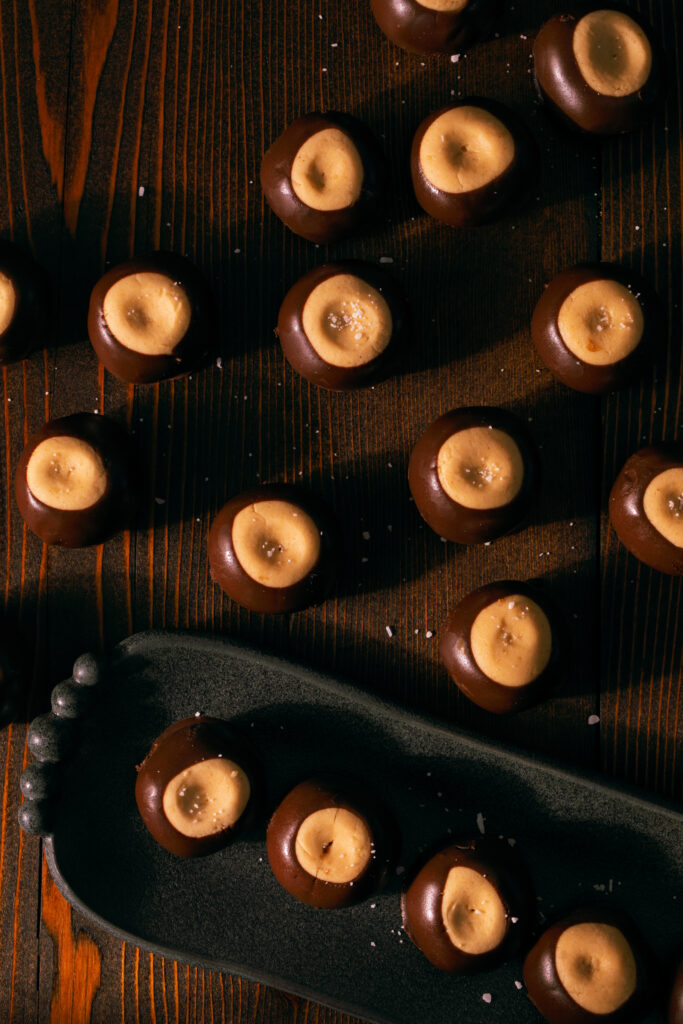
Buckeyes

11 buckeyes sit spread apart on a wooden table

Nostalgia runs deep with this easy, no-bake Buckeyes recipe. But so does deliciousness. Just a handful of ingredients form homemade peanut butter balls dipped in luxurious chocolate and made with just a handful of ingredients. This crowd-pleaser is sure to please your crowd.

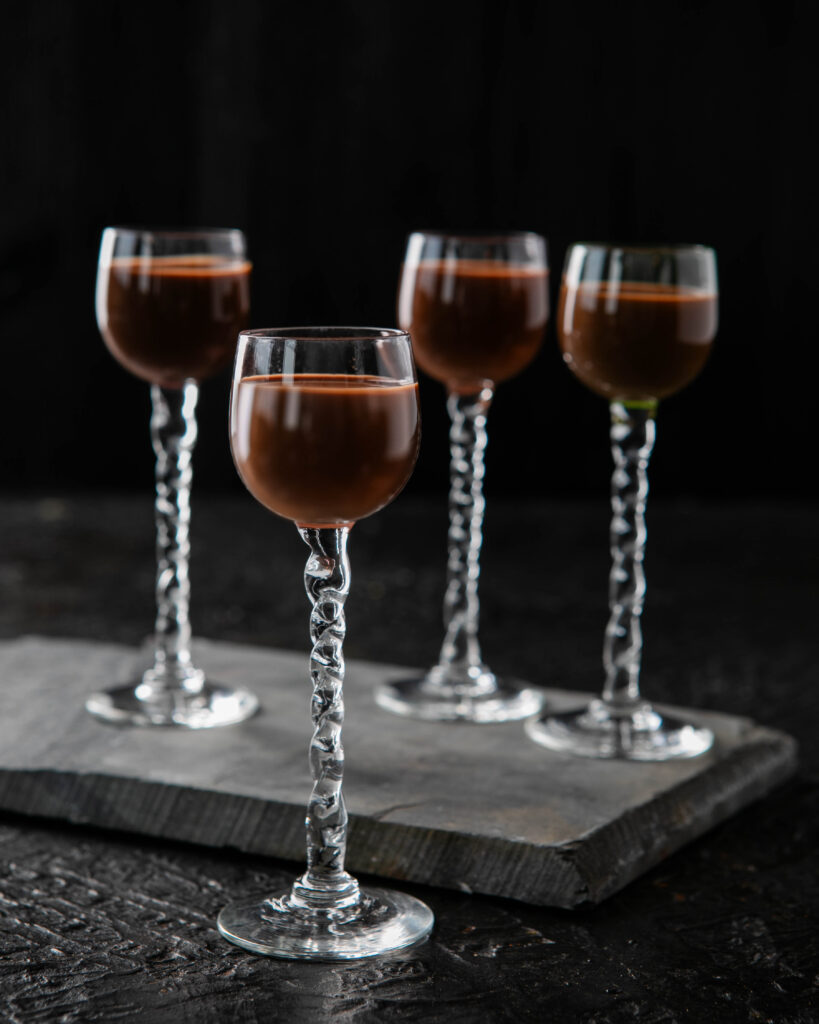
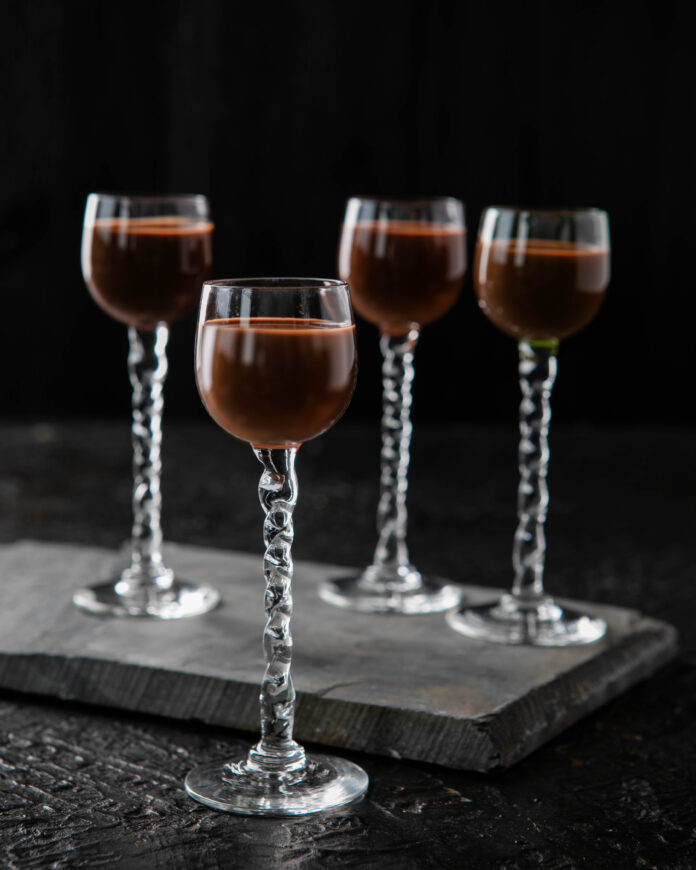
Chocolate Cello

A rich blend of Ghirardelli chocolate, cream, and Everclear - the perfect boozy indulgence for sipping or drizzling over desserts.

Add a dose of spirit to your next gathering with a boozy, satisfying dessert-in-a-glass. Pour this Chocolate Cello over cheesecake or ice cream. Add it to your coffee, or sip it straight!

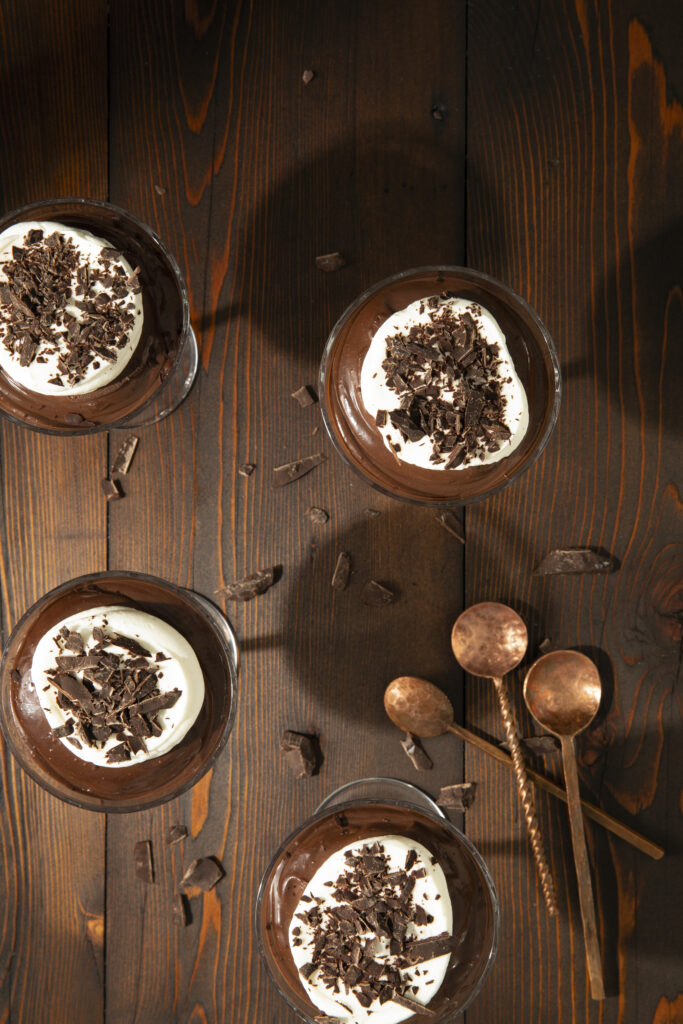
Chocolate Crémeux

Chocolate Cremeux - pudding served in four glasses with chocolate chunks spread across the wooden table alongside three spoons

Falling somewhere between a chocolate ganache and mousse, crémeux is a melt-in-the-mouth pudding-like cream, soft and slightly dense in texture. Use it in tarts, spread it on brioche, or just eat it with a spoon.

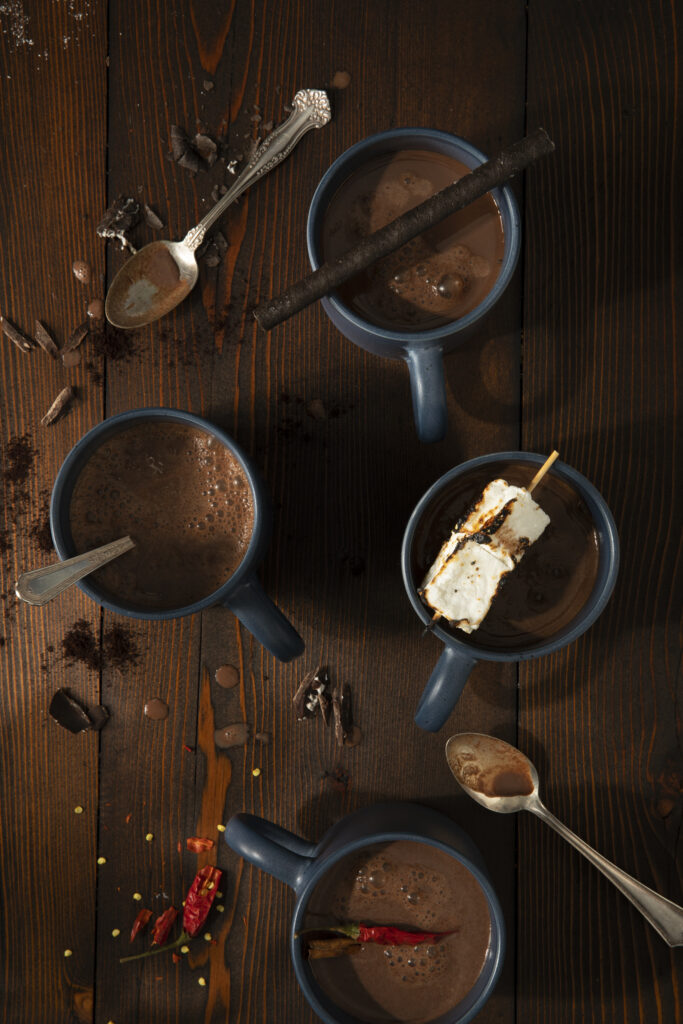
Hot Chocolate Tray

Hot Chocolate Tray with four cups of hot chocolate. One cup as a chili, one has a cylindrical chocolate bar, one has a spoon, and one has a marshmallow. hot chocolate recipes

Step up your hot chocolate game and beat the winter blues with a fun activity for the whole family. Whether you prefer flavors of peppermint, caramel, or cayenne, creativity will come alive as you make your own bespoke hot chocolate creations.

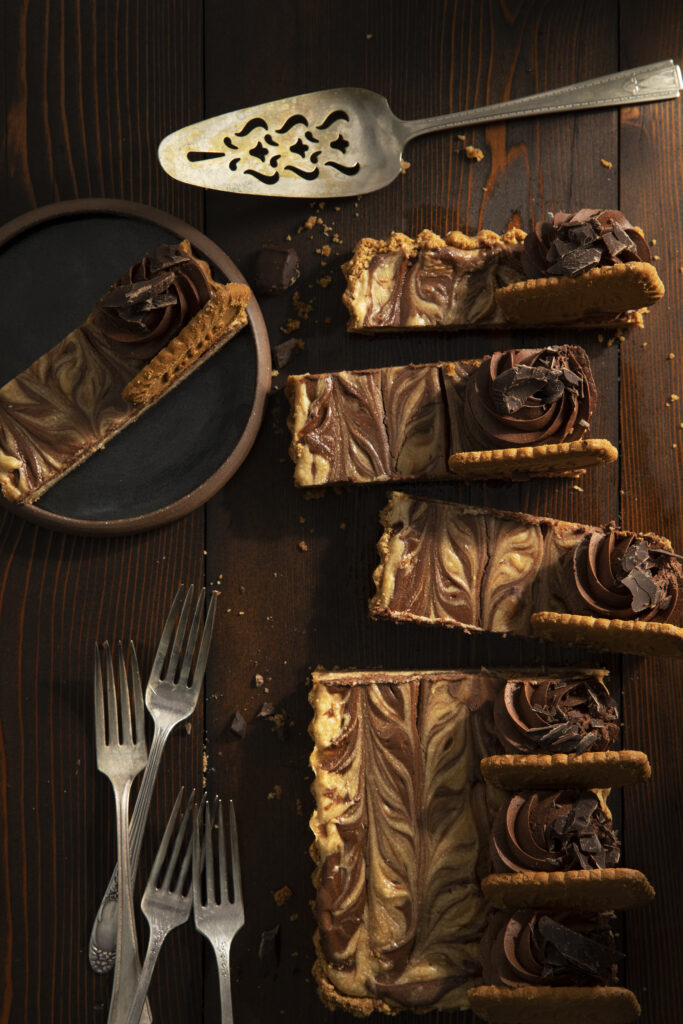
Chocolate Peanut Butter Cheesecake with Whipped Chocolate Ganache

Peanut butter chocolate cheesecake sliced and served on a wooden surface with forks on the side

This Chocolate Peanut Butter Cheesecake recipe is a rich and decadent dessert that will have your guests going for more. A cookie crust is filled with a creamy, luscious peanut butter and chocolate cheesecake filling. A layer of whipped chocolate ganache tops off the ultimate peanut butter lover’s dessert.

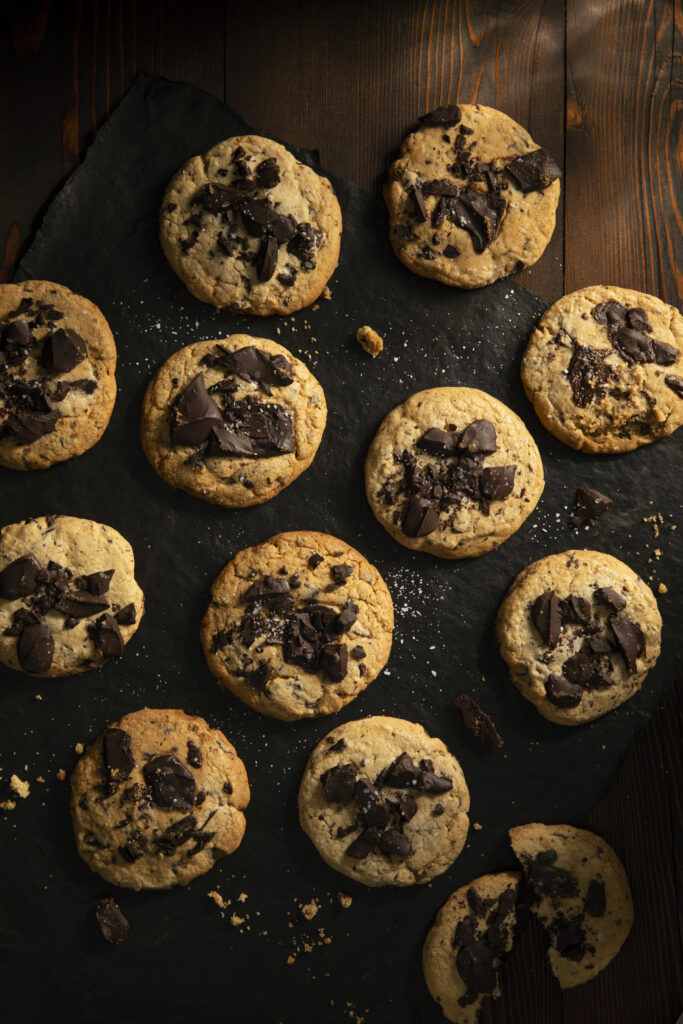
Sea Salt Chocolate Chunk Cookies

Sea Salt Chocolate Chunk Cookies served with crumbles

We take famous chocolate chip cookies to the next level with a sprinkle of sea salt and wonderful, gourmet chocolate. They are soft, chewy, and golden brown with slightly crisp edges. Easy-to-make, these cookies will become an instant classic in your kitchen.

Story by Lindsay Anne Herring
Recipe by Selina Progar
Styling by Anna Franklin
Photography by Dave Bryce
Chocolate Courtesy of Mon Aimee Chocolat 

Subscribe to TABLE Magazine’s print edition.
Chocolate Cello

0
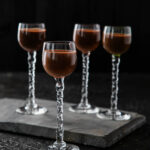
A rich blend of Ghirardelli chocolate, cream, and Everclear - the perfect boozy indulgence for sipping or drizzling over desserts. Chocolate cello recipe

Add a dose of spirit to your next gathering with a boozy, satisfying dessert-in-a-glass. Pour this Chocolate Cello over cheesecake or ice cream. Add it to your coffee, or sip it straight!

What is Cello?

Cello is a clear, citrus-flavored liqueur that is a popular choice for mixing cocktails. Its sweet and tangy flavor profile makes it a great complement to various spirits. Whether you’re crafting a classic cocktail or experimenting with new flavor combinations, Cello can add a refreshing twist to your drink. Its bright citrus notes can help balance out stronger spirits or enhance the flavor of fruity cocktails. But in our case, we’ll be making a Chocolate Cello instead that uses the same ideas of smoothness and flavorful mixing.

Print

clock clock iconcutlery cutlery iconflag flag iconfolder folder iconinstagram instagram iconpinterest pinterest iconfacebook facebook iconprint print iconsquares squares iconheart heart iconheart solid heart solid icon
A rich blend of Ghirardelli chocolate, cream, and Everclear - the perfect boozy indulgence for sipping or drizzling over desserts. Chocolate cello recipe

Chocolate Cello


  • Author: Selina Progar

Description

A boozy way to enjoy chocolate!


Ingredients

Scale


Instructions

  1. Melt chocolate in the microwave or over a double boiler.
  2. Bring heavy cream and 1 cup of milk to a boil with the sugar until the sugar is dissolved.
  3. Combine the hot cream mixture and the chocolate and mix until totally mixed.
  4. Add the remaining cold milk, cold water, and Everclear and whisk until combined. Strain through a tamis, bar strainer, or a chinois.
  5. Store the Chocolate Cello in Mason jars of any size and in the freezer for long storage or the fridge for immediate use.

Story by Lindsay Anne Herring
Recipe by Selina Progar
Styling by Anna Franklin
Photography by Dave Bryce
Chocolate Courtesy of Mon Aimee Chocolat 

Subscribe to TABLE Magazine’s print edition.