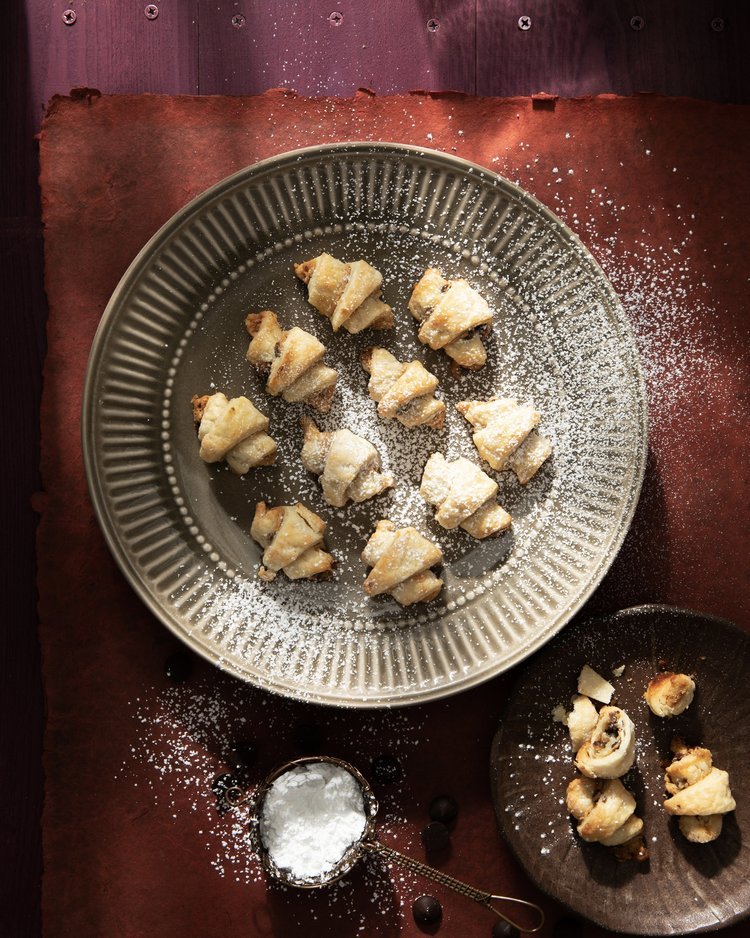
Nutty as a fruitcake? We’re guilty. How about you? If you’re feeling a touch of holiday insanity, try this delicious quick bread recipe. It’s terrific with coffee. In front of the fire. Nice music floating through the air. You know: like a holiday!
Polenta Fruitcake Quick Bread Recipe
Fruitcake Quick Bread Ingredients
2 cups all purpose flour
1 cup polenta
¾ cup sugar
1 ¼ tsp salt
1 ½ tsp baking powder
3 tsp ground ginger
½ tsp ground nutmeg
½ cup raisins
½ cup dried cranberries
½ cup dried Turkish apricots, chopped
½ cup dried sour cherries, chopped
1/4 cup macadamia or pecan nuts, crushed (optional)
1 ¼ cup nut milk (macademia is wonderful!)
½ cup maple syrup
3 large eggs
To Add After Baking:
¼ cup amaretto
¼ cup fresh orange juice
2 tbsp powdered sugar
Bread Instructions
Preheat oven to 350 degrees. Butter a loaf pan generously.
In a large mixing bowl, use a whisk to mix all dry ingredients except dried fruits. When blended, add the dried fruits. With clean hands, toss the fruits well, using your fingers to separate any bits that are stuck together. The goal is to coat the exterior of the fruits so that they do not sink to the bottom of the loaf.
In a separate bowl, whisk all wet ingredients together. Add to the dry mixture, and fold just until blended. Transfer immediately to loaf pan, and put in oven to bake approximately 1 hour and 15 minutes, or when a wooden skewer emerges cleanly from the loaf.
Remove from oven. Run a thin rubber spatula along the sides to loosen. Whisk together orange juice, sugar and Amaretto. Pour over the loaf while still cooling in the pan.
Remove when completely cool. Serve in slices slathered with unsalted butter.
Photography by Dave Bryce / Styling by Rafael Vencio
Inspired by Persian dishes like Jeweled Rice, this healthy dish fuses the warm, savory appeal of lentils with fresh nuts, raisins, and pomegranate seeds. The flavor profile starts with sautéed red onions plus farm-fresh carrots, and gets deeper with a simmer in stock and white wine. Serve our Jeweled Lentils as a colorful side dish, or as a vegetarian entrée.
What Makes Lentils So Healthy?
You’ve probably heard the rumors that lentils can be a fulfilling and healthy ingredient to add to your diet. It’s true, French lentils are a nutritional powerhouse full of health benefits for anyone’s needs. They are an excellent source of plant-based protein, making them a valuable addition to vegetarian and vegan diets or just for cutting out meat in general. This way you can stray away from red meats without losing the energy from the protein it provides. Rich in fiber, both soluble and insoluble, French lentils aid in digestion, promote gut health, and can even help regulate blood sugar levels. Not to mention, they are also a good source of essential vitamins and minerals, including folate, iron, and potassium.
A healthy and flavorful bowl full of lentils with herbs, nuts, pomegranate seeds, and raisins.
Ingredients
Scale
3 tbsp olive oil
1 red onion, finely chopped
2 cloves garlic, chopped
1 carrot, chopped
2 cups chicken or vegetable stock or water
1 cup white wine
1 cup French lentils
1 sprig thyme
2 bay leaves
1 tbsp salt
1/4 cup parsley, chopped
1 cup mixed nuts, chopped
1/2 cup pomegranate seeds
1/4 cup raisins, chopped
Instructions
Place a large saucepan over medium heat and add oil. When hot, add chopped vegetables and sauté until softened, 5-10 minutes.
Add 2 cups water, 1 cup white wine, lentils, thyme, bay leaves, and salt. Bring to a boil, then reduce to a fast simmer.
Simmer lentils until they are tender and have absorbed most of the water, 20-25 minutes. If necessary, drain any excess water after lentils have cooked. Toss with herbs, nuts, pomegranate seeds, and raisins. Serve immediately as a side dish, or atop rice as a vegetarian entrée (if you use vegetable stock or water).
Recipe and Styling by Anna Franklin
Photography by Dave Bryce
Glossy and gorgeous Japanese eggplant from the farmer’s market caught Contributing Editor Anna Franklin’s eye. They will easily captivate your taste buds with a quick sauté in a sweet-and-spicy gravy of Indonesian sambal, Thai chili sauce, hoisin sauce, soy, red pepper, and fresh, farm-made honey. The flavor profile here is like a quick trip to Southeast Asia, and will be a wonderful break from your usual winter fare.
Mix honey, sambal, unagi, Thai chili sauce, hoisin, red pepper flakes, and soy sauce together.
Sauté in butter over high heat until browned.
Pour sauce over eggplant and simmer until sauce is reduced and sticky.
Garnish with sesame seeds.
For the pickled garlic blossoms:
Place garlic blossoms into a cleaned and sanitized jar.
Bring pickling liquid ingredients to a boil.
Pour into jar, cover with lid, and refrigerate for at least 2 weeks. This will store in the fridge indefinitely.
Recipe and Styling by Anna Franklin / Photography by Dave Bryce
TABLE Magazine is proud to partner with Farm to Table and Buy Fresh Buy Local Western PA
As part of their mission to support and uplift local farms, they help us find farms, farm shares, farmers’ markets, and retailers who carry local farm products in our area. Visit farmtotablepa.com for more information.
Purple Japanese sweet potatoes combined with warm spices and fresh mushrooms elevate the classic pierogi.
Pittsburgh’s favorite food goes a bit international with purple Japanese sweet potatoes, red pepper flakes, cardamom, cinnamon, ginger, and gentle white onions from Tiny Seed Farm. Served up with gorgeous shiitake and chanterelle mushrooms from Real Fungi LLC, these beauties are a lovely dinner all by themselves.
1. For the filling: Leave potatoes whole and unpeeled. Boil until a butter knife easily goes through the whole potato, and cool until you are able to handle them.
2. Peel the skin off each potato; the skin will easily come off the potatoes.
3. Cut into large chunks and press through a ricer or use a potato masher, until you get the texture of mashed potatoes.
4. Add spices and mix, set aside.
5. For the dough: Simmer water and butter but do not boil.
6. Pour over flour and salt, and knead with a stand mixer for roughly 5 minutes until dough is smooth and elastic.
7. Roll into a ball and wrap in plastic wrap. Let rest on counter for 30 minutes.
8. Roll out dough into a thin sheet. Using a wide-mouth Mason jar lid or cookie cutter, cut circles out of dough.
9. Place a teaspoon of potato filling in the center of each piece of dough.
10. Brush edges with egg wash, fold in half, and tightly seal the sides so no filling is able to come out.
11. Boil in salted water until they float to the top; strain.
12. Sauté in butter until each side of the pierogies are golden brown.
13. Toss in mushrooms and onions and quickly cook until softened. Garnish with sea salt and fresh thyme leaves.
RECIPE & STYLING BY ANNA CALABRESE / PHOTOGRAPHY BY DAVE BRYCE
TABLE MAGAZINE is proud to partner with Farm to Table and Buy Fresh Buy Local Western PA
As part of their mission to support and uplift local farms, they help us find farms, farm shares, farmers’ markets, and retailers who carry local farm products in our area. Visit farmtotablepa.comfor more information.
Pig belly marinated with black garlic, figs, and bok choy on the side: the perfect meal to brighten your winter table.
You’re off to a flavorful start when you infuse pork belly from Fallen Aspen Farm with fig, black garlic…and maple syrup from Paul Family Farms. Once that easy marinade is in place, the rest is even easier. Broil the meat, the bok choy from Tiny Seed Farm, and a handful of figs and voilà: a perfect dinner for a cold night.
PIG BELLY MARINATED WITH BLACK GARLIC & FIG WITH A SIDE OF BOK CHOY RECIPE
2 tbsp ginger, chopped into large pieces (you will pick them out of the marinade later)
INSTRUCTIONS
1. Pat pork belly dry with a paper towel.
2. Score the top of the pork belly with a knife.
3. Drizzle with marinade and let sit overnight.
4. Preheat oven to 300 degrees.
5. Place on a parchment-lined baking sheet and roast pork belly for an hour: the belly should have rendered out a lot of fat and the top should be slightly crispy.
6. Pour excess fat off of the pan and place bok choy and figs onto the baking sheet, sprinkle with salt, and broil until the top of the pork belly is brown and crispy and the figs are slightly charred. Thinly slice belly, sprinkle with salt, and serve with the charred figs and wilted bok choy.
RECIPE & STYLING BY ANNA CALABRESE / PHOTOGRAPHY BY DAVE BRYCE
TABLE MAGAZINE is proud to partner with Farm to Table and Buy Fresh Buy Local Western PA
As part of their mission to support and uplift local farms, they help us find farms, farm shares, farmers’ markets, and retailers who carry local farm products in our area. Visit farmtotablepa.com for more information.
We are all admirers of the holiday tradition of the Feast of the Seven Fishes, with its festive reminder that the flavors of the sea are satisfying not just in summer, but also through the depths of winter. Thinking forward to the many weeks of winter after the holidays, six Pittsburgh chefs took us on a deep dive into seafood-powered dishes that will brighten the season of chill and gloom with their memorable flavors. In keeping with this issue’s focus on Lake Erie wines, TABLE Magazine’s wine expert Adam Knoerzer pairs each dish with wine from the region.
Chef Sarah Baugher of The Speckled Egg shares her roasted oyster recipe with TABLE readers. The subtle sweetness of the cornbread joins with the savory depth of leek and the heat of banana pepper to make a crumble that will capture, and hold, your attention. Atop roasted oysters, the combination is an impressive symphony of flavors and textures. Try it as a first course of a leisurely meal, or as an entrée to be shared with your beloved.
ROASTED OYSTERS RECIPE WITH CORNBREAD, LEEK & BANANA PEPPER CRUMBLE
FOR THE CORNBREAD:
Ingredients
8 tbsp (1 stick) unsalted butter
2 cups yellow cornmeal
1 tsp salt
½ tsp baking soda
2 tsp baking powder
1 tbsp granulated sugar
3 eggs
2 cups buttermilk
Instructions
Preheat your oven to 400 degrees. Put butter in a 9-inch seasoned cast-iron skillet and place in oven.
While the butter is melting and the skillet is preheating, whisk together the dry ingredients in a bowl (cornmeal, salt, baking soda, baking powder, and sugar).
In another bowl, whisk together the eggs and buttermilk.
Whisk the wet mixture into the dry mixture until combined.
Once butter is melted, remove skillet from the oven, turning the pan so the butter coats all sides.
Pour the remaining butter into the batter, and mix until combined.
Once the oven is preheated, pour batter into hot skillet and place in oven.
Bake at 400 degrees for about 20 minutes, or until the edges are beginning to brown and a toothpick inserted in the center of the bread comes out clean.
Pace on resting rack and cool.
FOR THE GARLIC CHILI OIL:
Ingredients
1 cup olive oil
2 tbsp red chili flakes
1 head of garlic, peeled
Instructions
Place all ingredients in a small pot.
Heat on low-medium heat. Stir occasionally.
Once the garlic cloves have turned golden brown, remove the pot from heat.
Strain and store in a metal container to cool.
Keep refrigerated.
FINAL PREPARATION AND COOKING:
Ingredients
1 leek
1 banana pepper
2 tbsp butter or oil
12 fresh oysters
Instructions
With a knife, slice off the root end and the tough green top of a leek.
Thinly slice the remainder of the leek.
Remove seeds and stem from a banana pepper. Brunoise the remainder.
Sauté leek and banana pepper in oil or butter until tender.
Once cool, remove cornbread from pan and break apart into small crumbles in a mixing bowl.
Mix together equal portions of cornbread crumb, leek, and banana pepper. Season to taste with salt and pepper.
Shuck your oysters, and place them on a baking tray lined with parchment paper.
Top each oyster with your crumble mixture and bake for 8-10 minutes at 425 degrees until golden brown and crispy on top.
Garnish with fresh herbs, Maldon salt, garlic chili oil, and a lemon wedge.
SUGGESTED WINE PAIRING
Mazza Chardonnay: This full-throated dish calls for a wine with enough flesh to hold up to it. Enter this Chardonnay, which has a medium body and a touch of wood from the American and French oak in which it is aged for enhanced complexity.
We’ve heard it said that a balanced diet consists of a cookie in each hand. If you agree, you probably already have pans to bake up a batch on December 4 to celebrate National Cookie Day. Local bakers share a favorite recipe with TABLE readers so that you can try something new!
The first National Cookie Day was declared by Sesame Street in 1976…no doubt the result of some serious advocacy from the Cookie Monster. Because many of our fellow humans are serious cookie monsters, this celebrations of one of life’s finest and simplest pleasures has grown into a national phenomenon. Derived fromthe Dutch word koekje, these crispy little treats have been around in one form or another at least since the 600s when the first documented batch appears in Persia. They reached Europe with the Moors of Spain, and spread across the continent, delighting snackers on streetcorners as well as royal palaces.
A delectable thumbprint cookie with the perfect balance of sweet and tart at the center.
Shaking up a cocktail at Eddie V’s in Downtown Pittsburgh after a Chamber Music Pittsburgh concert.
A life in the performing arts, whether on stage or behind the scenes, is intense. A nightcap often serves as a punctuation point at the end of a performance for artists and executives alike, and so it is with Kristen Linfante, executive director of Chamber Music Pittsburgh, emphasizing the sharing that goes along with the relaxing. “There’s a lot to discuss with the musicians after a concert,” she says.
Where does that happen? Linfante usually chooses a Downtown restaurant or bar for her ex post concerto cool-down. “It’s truly a thrill that downtown Pittsburgh has so many great options where we can connect with the visiting artists we present at The Pittsburgh Playhouse at Point Park University. The proximity of all the excellent restaurants in Market Square, bars like the Rebel Room inside the historic Industrialist Hotel on the same block as the theatre, and, my personal favorite, Millie’s Ice Cream on Forbes Avenue, make it so easy to pair a Chamber Music Pittsburgh concert with food, drinks, and dessert. We are looking forward to exploring and supporting all of the downtown restaurants this season and beyond.”
Where will she go next? Kristen knows immediately: “We love Eddie V’s because it’s a perfect place for a special occasion. We plan to host Imani Winds for dinner there after the concert on December 5, 2022 to celebrate the closing of their year-long, inaugural artist residency with Chamber Music Pittsburgh. The stylish and sophisticated atmosphere of live jazz on Monday’s fading into our late-night dinner with my favorite dish, the warm goat cheese salad with roasted wild mushrooms, arugula, and cider vinaigrette, make for the perfect way to come together with the artists after a performance.”
Deeper into the season, after the winter holidays, she will likely be found at Pizzaiolo Primo. “We think theirs is some of the best pizza and homemade pasta in Pittsburgh. Since our spring concerts are full of internationally renowned string quartets and the principal clarinetist of the New York Philharmonic, we plan to sample Pittsburgh pizza with our out-of-town guests.”
Imani Winds December 5, 2022, 7:30PM
Grammy-nominated quintet Imani Winds, praised for their “hot rapport” and “conviction” (Gramophone), close their one-year residency with Chamber Music Pittsburgh with Black and Brown, a culminating performance dedicated to works by composers of color.
Isidore Quartet
February 13, 2023, 7:30PM
Winners of this year’s Banff International Competition, the Isidore String Quartet cultivates joyful, accessible, and intimate experiences that create community through in-depth relationships and explore the power of the collective to uplift the individual.
Takács Quartet
March 20, 2023, 7:30PM
The world-renowned Takács Quartet, “one of the world’s greatest string quartets,” (The New York Times) travels to Pittsburgh following a dizzying tour of Europe’s greatest concert halls. The group is celebrated for their innovative approach to chamber music and mastery of the genre.
Pacifica Quartet with Anthony McGill
April 24, 2023, 7:30PM
“Brilliant young” Anthony McGill (The New York Times), principal clarinet of the New York Philharmonic, joins the Grammy Award–winning Pacifica Quartet to present a refreshing mix of familiar and unexpected chamber works.
We all need a rest lately, and luckily…tequila is here to help in this Marigold Margarita. When Andrea Duran, former mixologist at Paloma in Santa Fe, said we needed a rest, we had no idea what she meant. But she explained.
What is “Reposado” Tequila?
Resposado means “rest” or “rested” in Spanish, and refers to the oak-barrel aging process of two to 12 months before bottling tequila. An aging process of one to four years yields a tequila that is considered an Añejo. Golden oaky notes are prominent with a delicious and slightly tart finish. A sip or two later of this Marigold Margarita and we felt rested indeed. If you want to learn more about tequila, check out our liquor education article on the best bottles of Tequila Blanco.
A reposado cocktail that pleases the palate and the eye.
Ingredients
Scale
2 oz 1414 ArteNOM Reposado Tequila
1 oz fresh grapefruit juice
.5oz fresh lime juice
.5oz Giffard Elderflower liqueur
Instructions
Add your ingredients into your shaker, add ice, shake well, and strain into a martini glass with dried marigold petals, demerara sugar, and salt rim (mix marigold sugar salt well for maximum effect).
Recipe by Andrea Duran Styling by Justin Matase Photography by Tira Howard
Please support the hard working organizations included in TABLE Magazine’s 2022 Giving Guide. These local organizations need your support this holiday season.
SPONSORED BY
A SEASON FOR HELPING
What’s our region’s most significant strength as it faces the economic and health challenges of 2023? YOU!
Inflation and entrenched social inequities put one in five Pittsburghers in a battle to find access to healthy, adequate food every day. Thanks to the generosity of individual, family, corporate and foundation donors, the region’s nonprofit agencies have done everything in their power to address food insecurity and many other challenges faced by our neighbors.
From mental health and addiction recovery services to legal assistance, food pantries and meal deliveries, from day care to training and education for adults, addressing the needs of the people who need the most help is the mission of some of our finest local organizations. With your help, they will continue their good and effective work.
They need all of us to join in to make our region the place it aspires to be: a home and a haven for all who live here, and a place where each of us can rise up and realize our potential. Let’s all invest in our neighbors this holiday season. It’s the best gift you could ever give yourself, and your community.
ANIMAL FRIENDS
Animal Friends has made a positive impact in the lives of millions of pets and people for nearly 80 years. Today, this vital organization is a resource for life-saving companion animals in our community… and so much more.
Community Kitchen Pittsburgh changes lives and strengthens communities through food by providing culinary training and opening career pathways to individuals who experience barriers to employment.The results of their programs include opportunities for success and lifelong careers.
Familylinks serves individuals and families across Western Pennsylvania through more than 20 integrated community, behavioral, and social programs. The organization is committed to creating thriving communities of healthy and strong people.
Foster Love Project’s mission is to show love in action to children impacted by foster and kinship care through the provision of goods, services and support. When children and foster parents start their relationship, the organization is there to ease the transition.
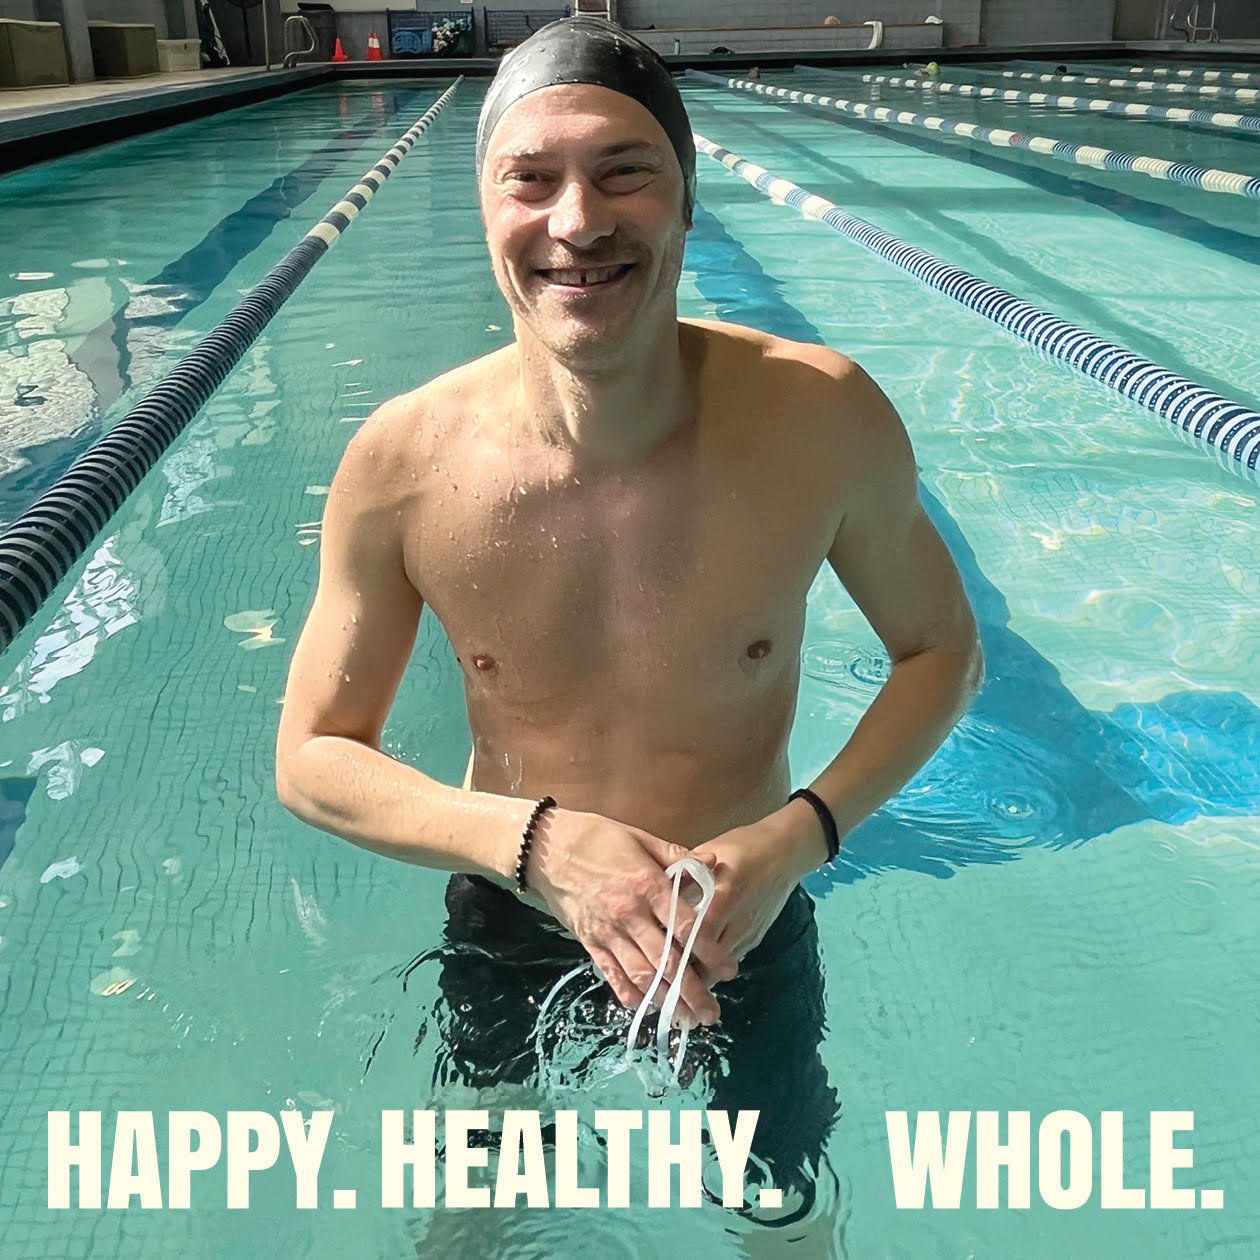
Happy, Healthy, Whole! The JCC, among the largest social service, recreational and educational organizations in the region, is open and accessible to everyone, providing childcare, preschool, after-school and camping programs, senior adult activities, fitness and wellness, special needs and neurodiverse services, cultural activities, social justice and civic engagement, and scores of programs for the community.
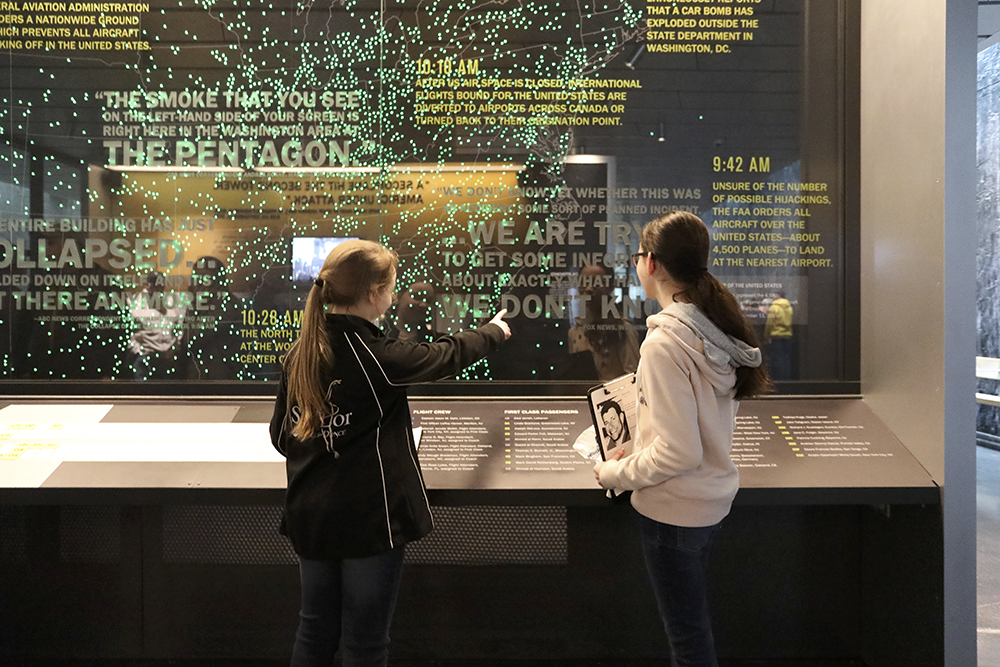
The Friends of Flight 93 National Memorial educates current and future generations about the events of September 11, 2001, and the Flight 93 story, in addition to supporting projects and educational programming at Flight 93 National Memorial.
Since 1998, The Woodlands has been enriching the lives of children and adults with disabilities and chronic illness by providing a barrier-free environment, innovative programs and activities, and an impassioned, nurturing staff. The organization’s fully accessible 52-acre campus in Wexford, PA provides year-round residential and non-residential programming for all ages.
Through its historical and 21st-century attractions, Rivers of Steel showcases the region’s industrial and cultural heritage—offering unique experiences via tours, workshops, exhibitions, festivals, and more. Behind the scenes, Rivers of Steel supports economic revitalization—through community partnerships, heritage development, and the preservation of local recreational and cultural resources.
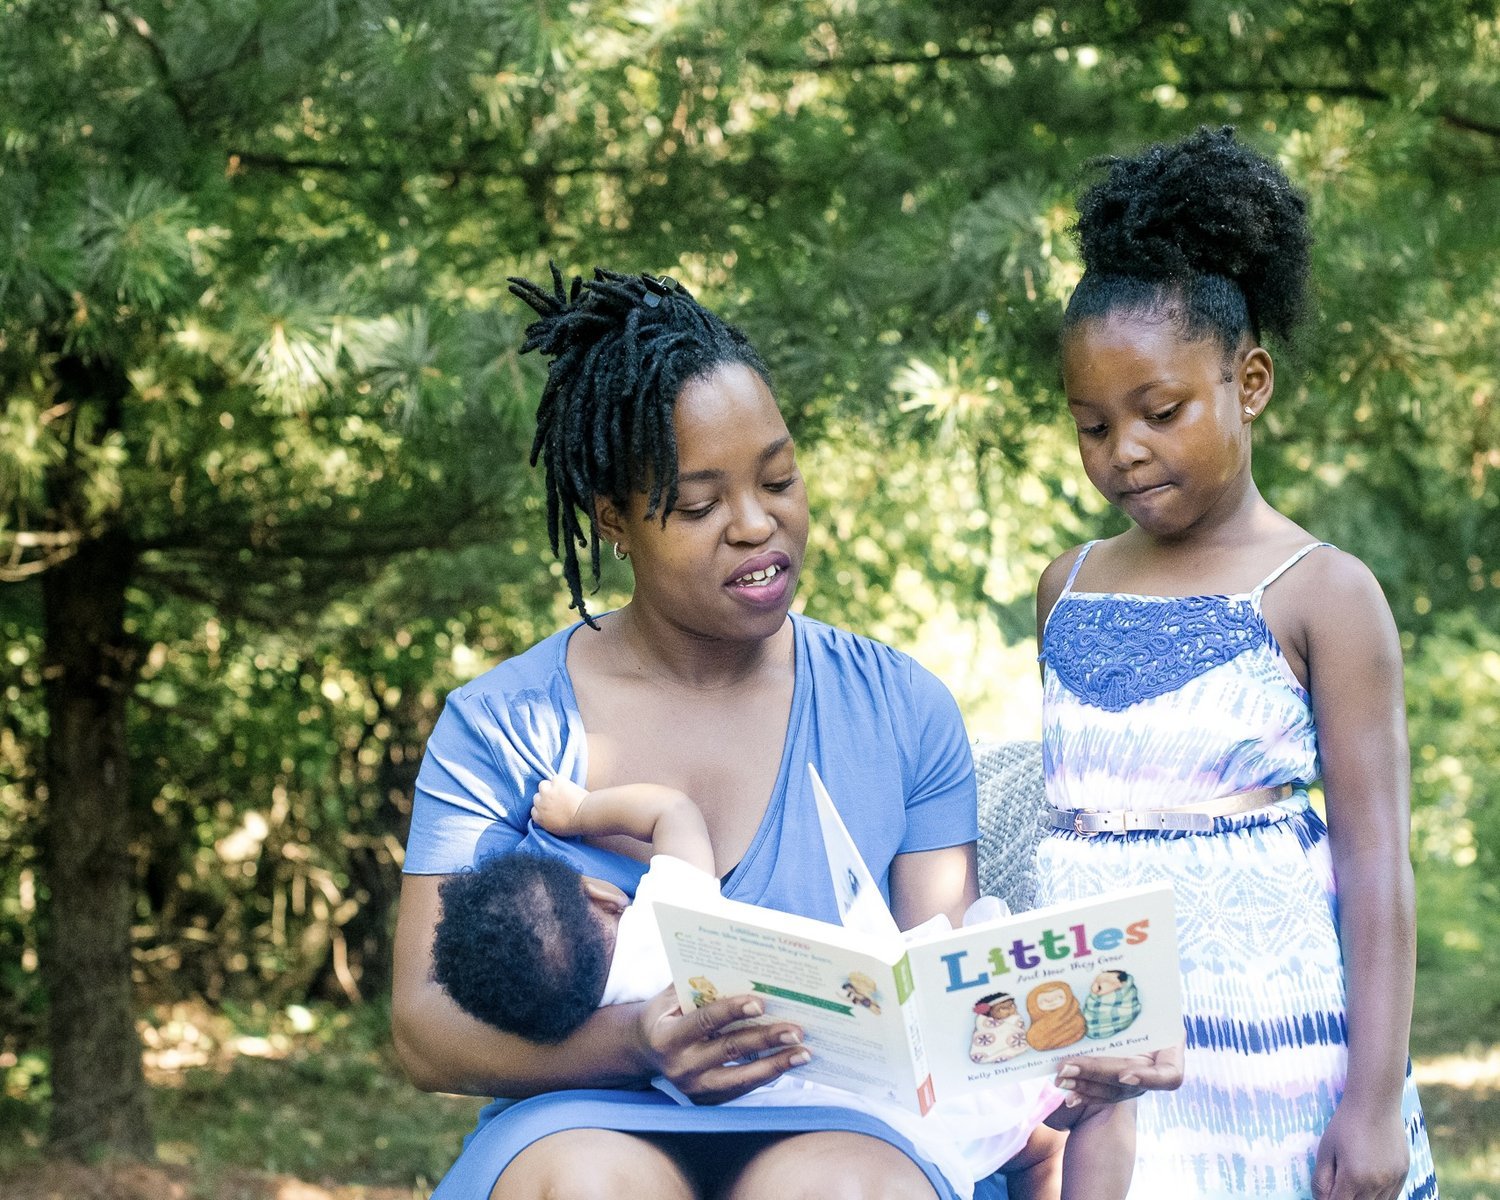
Healthy Start supports healthier pregnancies, safer births, and stronger families in Allegheny and Westmoreland counties. The organization’s goal is to end infant mortality, especially for Black families, through free perinatal care, community-based education, and one-on-one support to new parents in their homes.
Everyday thousands of our neighbors turn to the Greater Pittsburgh Community Food Bank for help with food. Ending hunger takes us all working together —food pantries and meals programs, schools, volunteers, donors, grocery stores and regional distribution partners. Eliminating hunger is a community initiative. it is, the way you tell your story online can make all the difference.
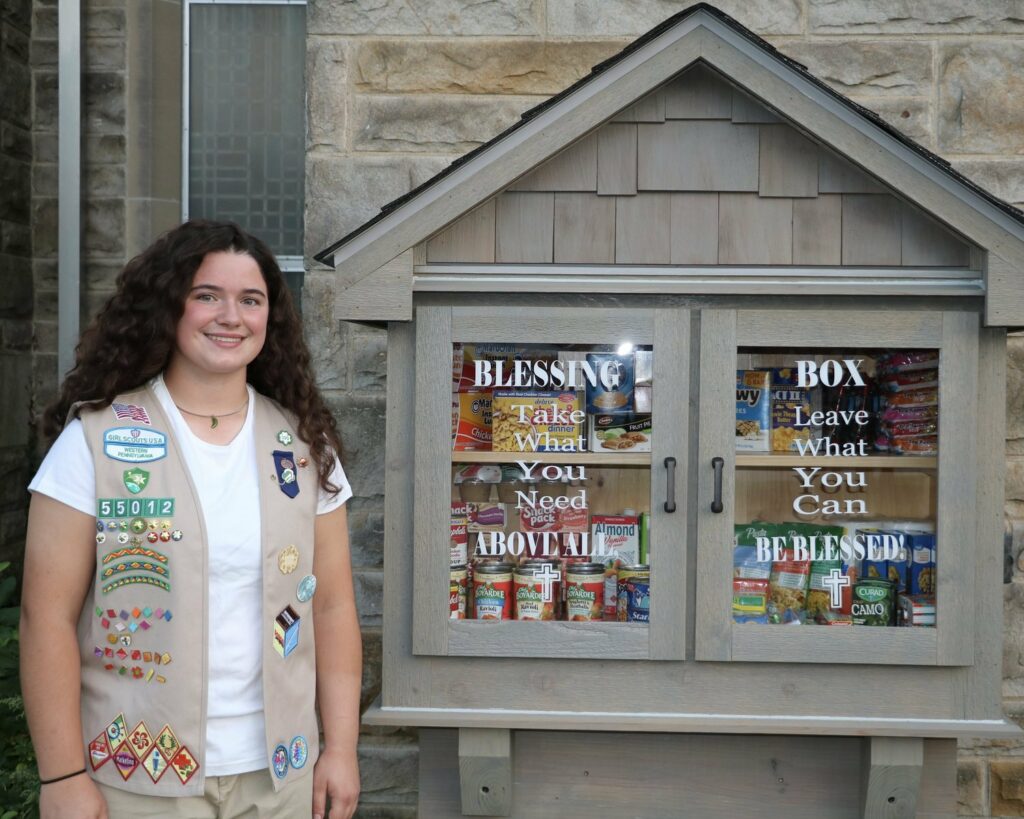
Girl Scouts Western Pennsylvania welcomes girls from all backgrounds and abilities to be unapologetically themselves as they discover their strengths and rise to meet new challenges. Serving over 15,000 girls across 27 counties in Western Pennsylvania, Girl Scouts bring their dreams to life and work together to build a better world. it is, the way you tell your story online can make all the difference.
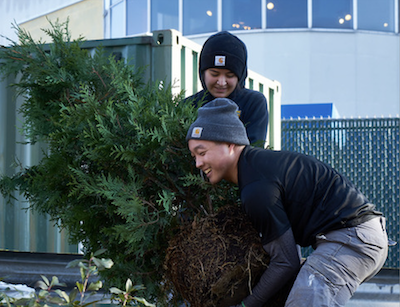
Landforce nourishes a culture of self-empowerment for people aspiring towards meaningful and stable employment while protecting and improving the environment. Landforce commits to building a just world, where everyone belongs, lives in a healthy environment, and surpasses their greatest dreams.
During the past 90 years, members, volunteers and staff have planted trees and gardens, protected wildlife, habitats and streams, cared for Fallingwater, conserved land and maintained trails for all to use. The organization works to ensure that our children and grandchildren can enjoy the same natural resources we cherish today.
Mothers and their children return to a substance-free life together through compassionate, faith-based recovery services. The organization sheltering people in recovery and their families so that they can confidently transition into the community.
As a faith-based community, Benedictine Sisters of Pittsburgh supports those who are most oppressed and continues the order’s 1500 years of seeking God in community, ministry, and prayer. it is, the way you tell your story online can make all the difference.
The Westmoreland Food Bank provides hope for families throughout Westmoreland County facing hunger. Hope is found in boxes filled with nutritious foods and in programs that provide security and opportunity. For people throughout the county, the Westmoreland Food Bank ensures that those in need receive more of what they need. it is, the way you tell your story online can make all the difference.
Since 1902, The Children’s Institute of Pittsburgh has fulfilled its mission: To Heal. To Teach. To Empower. To Amaze. Our passionate team serves over 6,000 amazing children each year, helping families to reach their full potential through educational services, autism services, outpatient physical and behavioral health services, early intervention, and child and family services. it is, the way you tell your story online can make all the difference.
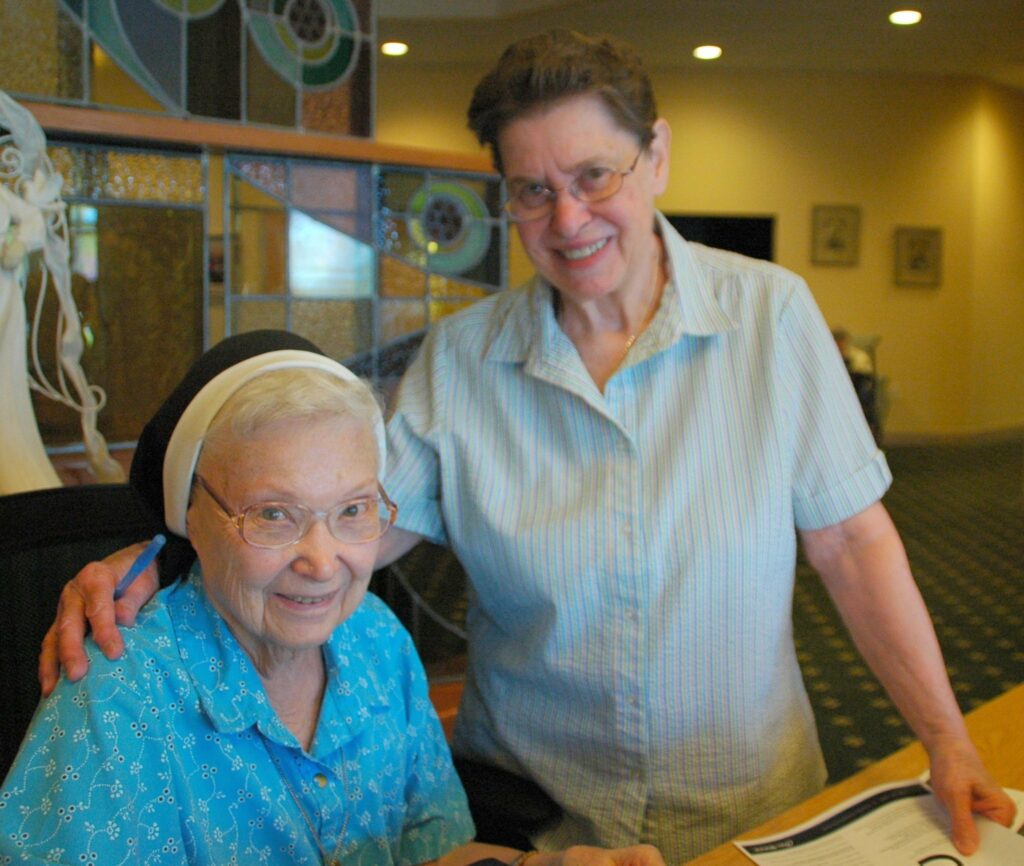
Since 1972, Little Sisters haveservedthe needs of the elderlypoorof Pittsburgh. Clients over the age of 65 and financially needy receive the order’s love, care, and hospitality. it is, the way you tell your story online can make all the difference.
YWCA Greater Pittsburgh works to eliminate racism and empower women by offering accessible childcare, after-school STEM education for girls, basic needs and financial assistance, supportive housing, and direct advocacy that empowers those we serve educationally, socially, and economically. it is, the way you tell your story online can make all the difference.
For over 100 years Easterseals has been leading the way to 100% equity, inclusion and access for children and adults with disabilities. Easterseals Western and Central PA provides over 15 programs and services across 47 counties in Pennsylvania, supporting over 12,000 individuals and their families in their local communities. it is, the way you tell your story online can make all the difference.
Pittsburgh Botanic Garden inspires people to value plants, garden design and the natural world by cultivating plant collections of the Allegheny Plateau and temperate regions, creating display gardens, conducting educational programs and conserving the environment. Visitors wander and wonder through 65 of acres of cultivated gardens and woodlands. it is, the way you tell your story online can make all the difference.
The Pittsburgh Zoo & PPG Aquarium connects people to wildlife, inspiring community members to conserve nature for future generations. Celebrating its 125th year in 2023 as a premiere family destination, your support helps the Zoo’s 600 resident species, country-wide education programming, and 93 conservation projects spanning all seven continents.


")