These Halloween Rice Krispie treats turn a classic snack into a batch of colorful little monsters, with candy eyes and icing smiles that kids add themselves. They’re easy, they need no oven, and they look far more impressive than they are hard to make.
Imagine gooey, crispy squares transformed into adorable little monsters, complete with candy eyes and colorful decorations that capture the essence of Halloween dessert fun. Whether you’re hosting a Halloween party or simply want to bring some festive cheer to your home, these Monster Rice Krispie Treats are a delightful way to celebrate the season.
Why You’ll Love These Halloween Rice Krispie Treats
They’re easy. You need just marshmallows, marshmallow fluff, butter, and cereal, melted together in a skillet. There’s no oven and no baking. They’re fun. Kids pick the colors, cut the circles, and give each monster its own face, and no two look alike. And they’re impressive. Green and purple circles with candy eyes and icing smiles look like they came from a party shop, and they’re fun to name before you eat them.
Halloween Rice Krispie Treats for School, Parties, and Trick-or-Treaters
Halloween Treats to Share at School
Cut into circles, these treats come as ready-made single servings, so they’re easy to pack up and pass around a classroom, and kids love handing out monsters they decorated themselves. Check your school’s policy on homemade treats first, since many classrooms have rules about ingredients and allergies.
A Halloween Party Treat Kids Can Decorate
Arrange a tray of green and purple monsters on the party table, or make decorating part of the party by setting out the icing and candy eyes and letting guests build their own. Either way, it’s an easy, no-bake Halloween treat that fits into a busy party schedule.
Treats for Special Trick-or-Treaters
This one is the easiest homemade TABLE Magazine treats to hand out. Wrap each monster individually in a cellophane bag tied with ribbon for the friends and neighbors who deserve something better than fun-size candy. Homemade treats are best saved for people you know. Add a small tag listing the ingredients, and check labels for allergens.
Ingredient Notes: Rice Krispies and Marshmallow Fluff
Rice Krispies. Kellogg’s launched Rice Krispies cereal in 1928. About a decade later, in 1939, Kellogg’s employees Mildred Day and Malitta Jensen are credited with inventing the marshmallow-and-cereal treat, which they first called “marshmallow squares.” The story goes that it began as a fundraiser for the Camp Fire Girls, and the recipe first appeared on cereal boxes in 1941.
Marshmallow Fluff. Spreadable marshmallow creme was created in 1917 by Archibald Query in Somerville, Massachusetts, who sold it door to door. In 1920, H. Allen Durkee and Fred Mower bought his recipe for $500 and began selling it as Marshmallow Fluff, which is still made in Lynn, Massachusetts. In these treats, it makes the mixture extra soft, and you can adjust the amount to change the sweetness.
Tips for Making Halloween Rice Krispie Treats
While you can buy Rice Krispie Treats in a store, making them yourself is fun, rewarding, and will make you realize how easy it is to make at home the things you see in grocery store aisles. Some tips: adjust the sweetness with different marshmallow fluff ratios (we’ve used half a cup, but you can go up or down), press the mixture into the pan firmly but gently with a spatula, and let the treats firm up completely before you cut into them. You want the marshmallow to settle entirely before enjoying for the smoothest, most delicious texture.
Work quickly. Once you stir the melted marshmallow into the cereal, the mixture is thick and starts to set as it cools. Have your greased baking dish, spatula, cookie cutter, icing, and candy eyes ready before you begin.
Save the scraps. Cutting circles leaves scraps around the edges, which make a perfect snack for your helpers.
How Kids Can Help Make Monster Rice Krispie Treats
Adults should handle the hot skillet and melted marshmallow. From there, kids can measure the cereal, add the drops of food coloring, press the mixture into the pan, choose the cookie cutter and cut the circles, and then do the best part: dotting on icing, sticking on candy eyes, and giving each monster a mouth.
Looking for more? See our easy Halloween treats to make with kids, try our Marshmallow Monster Popcorn and Halloween Candy Bark, and browse TABLE’s Cooking with Kids and Desserts recipes.
Storing Monster Rice Krispie Treats
Store the decorated treats in an airtight container for up to 14 days. For school, parties, or trick-or-treaters, wrap each one individually.
Print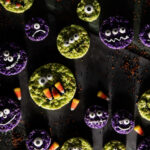
Monster Rice Krispy Treats for Halloween
- Total Time: 45 – 60 min
- Yield: 10 to 15 monsters, depending on cutter sizes used 1x
Description
Colorful green and purple Rice Krispie treats cut into circles and decorated with candy eyes and icing smiles. An easy, no-bake Halloween treat kids can make.
Ingredients
- 10 oz large marshmallows
- 1/2 cup marshmallow fluff
- 8 cups Rice Krispies cereal
- ¼ cup butter
- 5–8 drops green food coloring
- 5–8 drops purple food coloring
- Large candy eyes
- ½ cup black or brown icing
Instructions
- In a large skillet, melt butter over medium heat. Once butter is melted, add marshmallows and marshmallow fluff to the skillet. Stir constantly over medium-high heat until they are completely melted and smooth.
- Split the marshmallow mixture evenly between two bowls. Add 5-8 drops of green food coloring to one bowl and 5-8 drops of purple to the other. You can add more or less to achieve the desired color. Stir well.
- In a large bowl, quickly combine the melted marshmallow mixture with the Rice Krispies cereal until very well mixed. The mixture will be thick, you’ll want to work quickly because it will start to set as it cools.
- Press rice Krispy mix evenly into a 9×13 greased baking dish.
- Place into refrigerator for at least 15 minutes or until firm. Once firm, remove them from the refrigerator and cut them into circles using a cookie cutter.
- Using your black or brown icing, make small dots where you want the eyes to be and stick candy eyes to the dots of icing. Use the same icing to add a mouth under the eyes.
- Once the icing has set, serve and enjoy!
- Prep Time: 30 min
- Category: Dessert
- Method: Stovetop, no-bake
- Cuisine: American
Nutrition
- Serving Size: 1 Treat
- Calories: 195 to 295
Halloween Rice Krispie Treats FAQs
Are these Rice Krispie treats no-bake?
Yes. The marshmallow mixture is melted on the stovetop, and the treats firm up in the refrigerator, so there’s no oven.
Can kids help make them?
Yes. Adults should handle the hot skillet and melted marshmallow, and kids can add the food coloring, press the mixture into the pan, cut the circles, and decorate the monsters.
How do I make the treats softer or less sweet?
Adjust the marshmallow fluff. The recipe uses half a cup, but you can go up or down to change the sweetness.
Can I give these to trick-or-treaters?
Yes, for friends, neighbors, and families you know. Wrap each treat individually, add an ingredient tag, and check labels for allergens.
About the Recipe Author
Anna Franklin is TABLE Magazine’s food stylist and recipe developer. A Pittsburgh native and graduate of the Indiana University of Pennsylvania Academy of Culinary Arts, she spent many years cooking in restaurant kitchens and photo studios before moving into food styling. Anna tests, plates, and styles the recipes and restaurant features in TABLE’s print and digital editions, working alongside photographers Dave Bryce and Laura Petrilla. She is also the founder of Bazaaa Sauce, a Pittsburgh hot sauce microbrand. Read more of her work at TABLE.
About the Photographer
Dave Bryce is TABLE Magazine’s contributing architecture, interiors, and food photographer, based in Pittsburgh. He photographed Fallingwater: Living With and In Art (Rizzoli, 2025) and regularly shoots for Pittsburgh Magazine and American Farmhouse Style, working with architects, interior designers, and hospitality brands. See more at davebrycephotography.com.
Subscribe to TABLE Magazine’s print edition.