Take a look at our Pittsburgh Summer Outdoor Dining Guide for 2025! We have Pittsburgh outdoor dining destinations near and far, whether you want a romantic date night in the city or a day trip with the family. Outdoor dining is one of the best ways to enjoy a day out. So, we hope you get to take advantage of the beauty of summer with these al fresco experiences.
Enjoy Summer Outdoor Dining at these Pittsburgh Area Restaurants
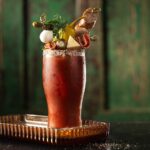
Located on the 9th floor of downtown Pittsburgh’s trendy Kimpton Hotel Monaco is an open-air space perfect for an evening of cocktails and small plates with friends. Their menu offers German-influenced bar bites like the BG Pretzel, a giant soft pretzel served with beer cheese, as well as a smoked & aged cheddar cheese spread, bar nuts flavored with rosemary, cayenne and brown sugar, and a handful of other tasty bites. In addition to refreshing cocktails they offer an exhaustive list of European beer. Sit and enjoy the breeze or play a supersized game of Jenga with a view.
Enjoy Bigham Tavern’s famous wings and elevated pub grub al fresco now in TWO spots this season. Bigham Tavern at Bridgewater, opening this summer, will provide an expansive outdoor dining scene with live music on the banks of the Beaver River. The original Mount Washington location boasts a large covered patio to enjoy those cool, summertime cocktails or a game of corn-hole. They invite you to join them for weekend brunch or their ever-popular Wing Wednesdays and Trivia Thursdays! Contact them for private dining options. Reservations can be made online.
Bistro to Go offers a delightful selection of made-from-scratch meals, including sandwiches, salads, and classic Southern dishes. While the primary focus is on providing quick and delicious meals for those on the go, the establishment also offers outdoor dining options, allowing patrons to enjoy their meals in the fresh air. This makes it a convenient choice for those looking to savor quality food in a relaxed setting.
Perfect for summer plans in Mt. Washington or Mt. Nebo, Coughlin’s Law has the patio space for you! Both locations offer outdoor dining and full bar to meet your food or drink needs. We have house brewed beers on tap along with a seasonal cocktail menu featuring a frozen drink flight. This season’s food menu is also filled with great options including appetizers, handhelds and entrees. Hope you can join us this summer!
Looking for a great outdoor dining spot this summer? Dive Bar & Grille in Indiana Township offers the perfect outdoor dining space. Known for their exceptional service and vibrant atmosphere, Dive Bar & Grille is dedicated to providing superior customer service. Enjoy great food, signature cocktails, an expansive menu, and a wide selection of beers and wines on their inviting patio. Stop by and make Dive Bar & Grille your new favorite hangout spot. Don’t forget to visit our other locations in North Hills, Lawrenceville, South Side, and Regent Square.
At Eighty Acres, patrons will enjoy three-season dining on the restaurant’s newly renovated patio. It’s designed to provide filtered sun rays during the brightest time of day and warmth on colder nights. The exterior of Eighty Acres recently underwent a full facelift; the facade now matches the modern farm-to-table cozy home aesthetic of the inside. If you love fresh food and fresh atmosphere, there is a seat waiting for you!
Experience the vibrant flavors of Mediterranean fusion at Elia Mediterranean Grille in Warrendale, PA. Step into a bustling atmosphere where the lively ambiance complements the delectable menu offerings. Indulge in dishes like the Lollipop Lamb Chops, Elia Signature Salad, and authentic Greek desserts such as Baklava, all crafted from fresh, high-quality ingredients. Whether you’re dining in or ordering takeout, Elia promises an unforgettable culinary journey.
A wood-flamed mash-up of Modern Americas with Classic European influences, guests discover just how delicious home-away-from-home scratch cooking can be at Fig & Ash in the North Side. Enjoy an outdoor dining experience on their fully covered patio that’s comfortable in both rain or shine. On cooler nights, the restaurant turns on several outdoor fire pits and heaters to keep patrons cozy. Reservations are strongly encouraged!
An authentic Pittsburgh Italian restaurant tradition, Girasole is located in the quaint neighborhood of Shadyside. Dine Italian-style surrounded by rustic stone walls as if you are in the wine cellar of a villa. Or, sip and savor delicious offerings on the deck or front walk.
What better way to spend an afternoon than sampling delicious award-winning wines paired with a unique cheese and charcuterie board at Johnson Estate Winery in Westfield, NY? Enjoy the rich green vistas of Johnson Estate’s vineyards at FLIGHT, the winery’s outdoor tasting venue. Open Friday-Mondays (11am-5pm) in July and August – and Wednesdays and Thursdays (5:00-8:30pm) for After Hours Food and Drink. Visit NYS’s oldest estate winery – it’s worth the trip from Pittsburgh!
Experience authentic Neapolitan cuisine in the heart of Pittsburgh’s bustling Market Square. Guests can dine amidst the exciting European ambiance of the first floor, or sit back on the relaxing second floor with a glass of their favorite vino. For those who prefer to enjoy their meal in the fresh air, Pizzaiolo Primo offers a charming outdoor patio, perfect for dining while overlooking the lively piazza, all enhanced with traditional Tuscan themes.
Experience authentic Neapolitan cuisine at Pizzaiolo Primo in South Fayette. Guests can enjoy the vibrant atmosphere of the indoor dining area or unwind on the spacious outdoor patio. The patio offers a perfect setting to savor traditional Italian dishes while enjoying the fresh air. Whether dining inside or al fresco, Pizzaiolo Primo provides a delightful culinary experience in a welcoming environment.
Relax and enjoy the warm breeze as you sit on the deck overlooking the water on Pittsburgh’s only Washington’s Landing waterfront outdoor dining. The menu has many mouthwatering dishes. Plus, when you finish, continue your experience with a stroll along the river, perhaps a drink at the open-air bar. Or just relax where you are as the friendly atmosphere of Red Fin Blues surrounds you.
Built out of a 1940’s era auto garage, Rear End Gastropub & Garage is known for serving familiar regional cuisine with fresh homemade ingredients, seasonal craft cocktails, and a 20-tap locally inspired draft list. Covered patios and an outdoor grass area create a fun relaxed atmosphere complete with an outdoor fireplace and cornhole boards. With live music, taco Tuesday, wing Wednesday, and other exciting events, there is something for everyone to experience and enjoy at Rear End. Family-friendly and dog friendly.
Casual dining in the heart of the Sewickley village, Vivo Kitchen is nestled among the boutiques, art galleries, and specialty shops that line Beaver Street. A seasonal menu of eclectic American cuisine is presented in a modern, airy venue with a contemporary vibe that flows outside into the charming courtyard. Try new menu items as well as their perennial favorites like the roasted shishito peppers, and their rightly sought-after crispy garlic chicken.
Photography by Laura Petrilla
Subscribe to TABLE Magazine‘s print edition.
")