Home Blog Page 41

Baked Baby Pumpkins

0
A platter holds six baked baby pumpkins, some with their tops removed and filled with a sauce.

Baked baby pumpkins are the perfect use for those adorable mini-pumpkins, such as Little Jack Horners or Baby Boos. They look so festive and jaunty with their lids slightly askew when you serve them. These are perfect for a sit-down Sunday dinner with family and friends: they make a great impression and are guaranteed to get the autumn conversation going.

Serving Suggestions for Your Baked Baby Pumpkins

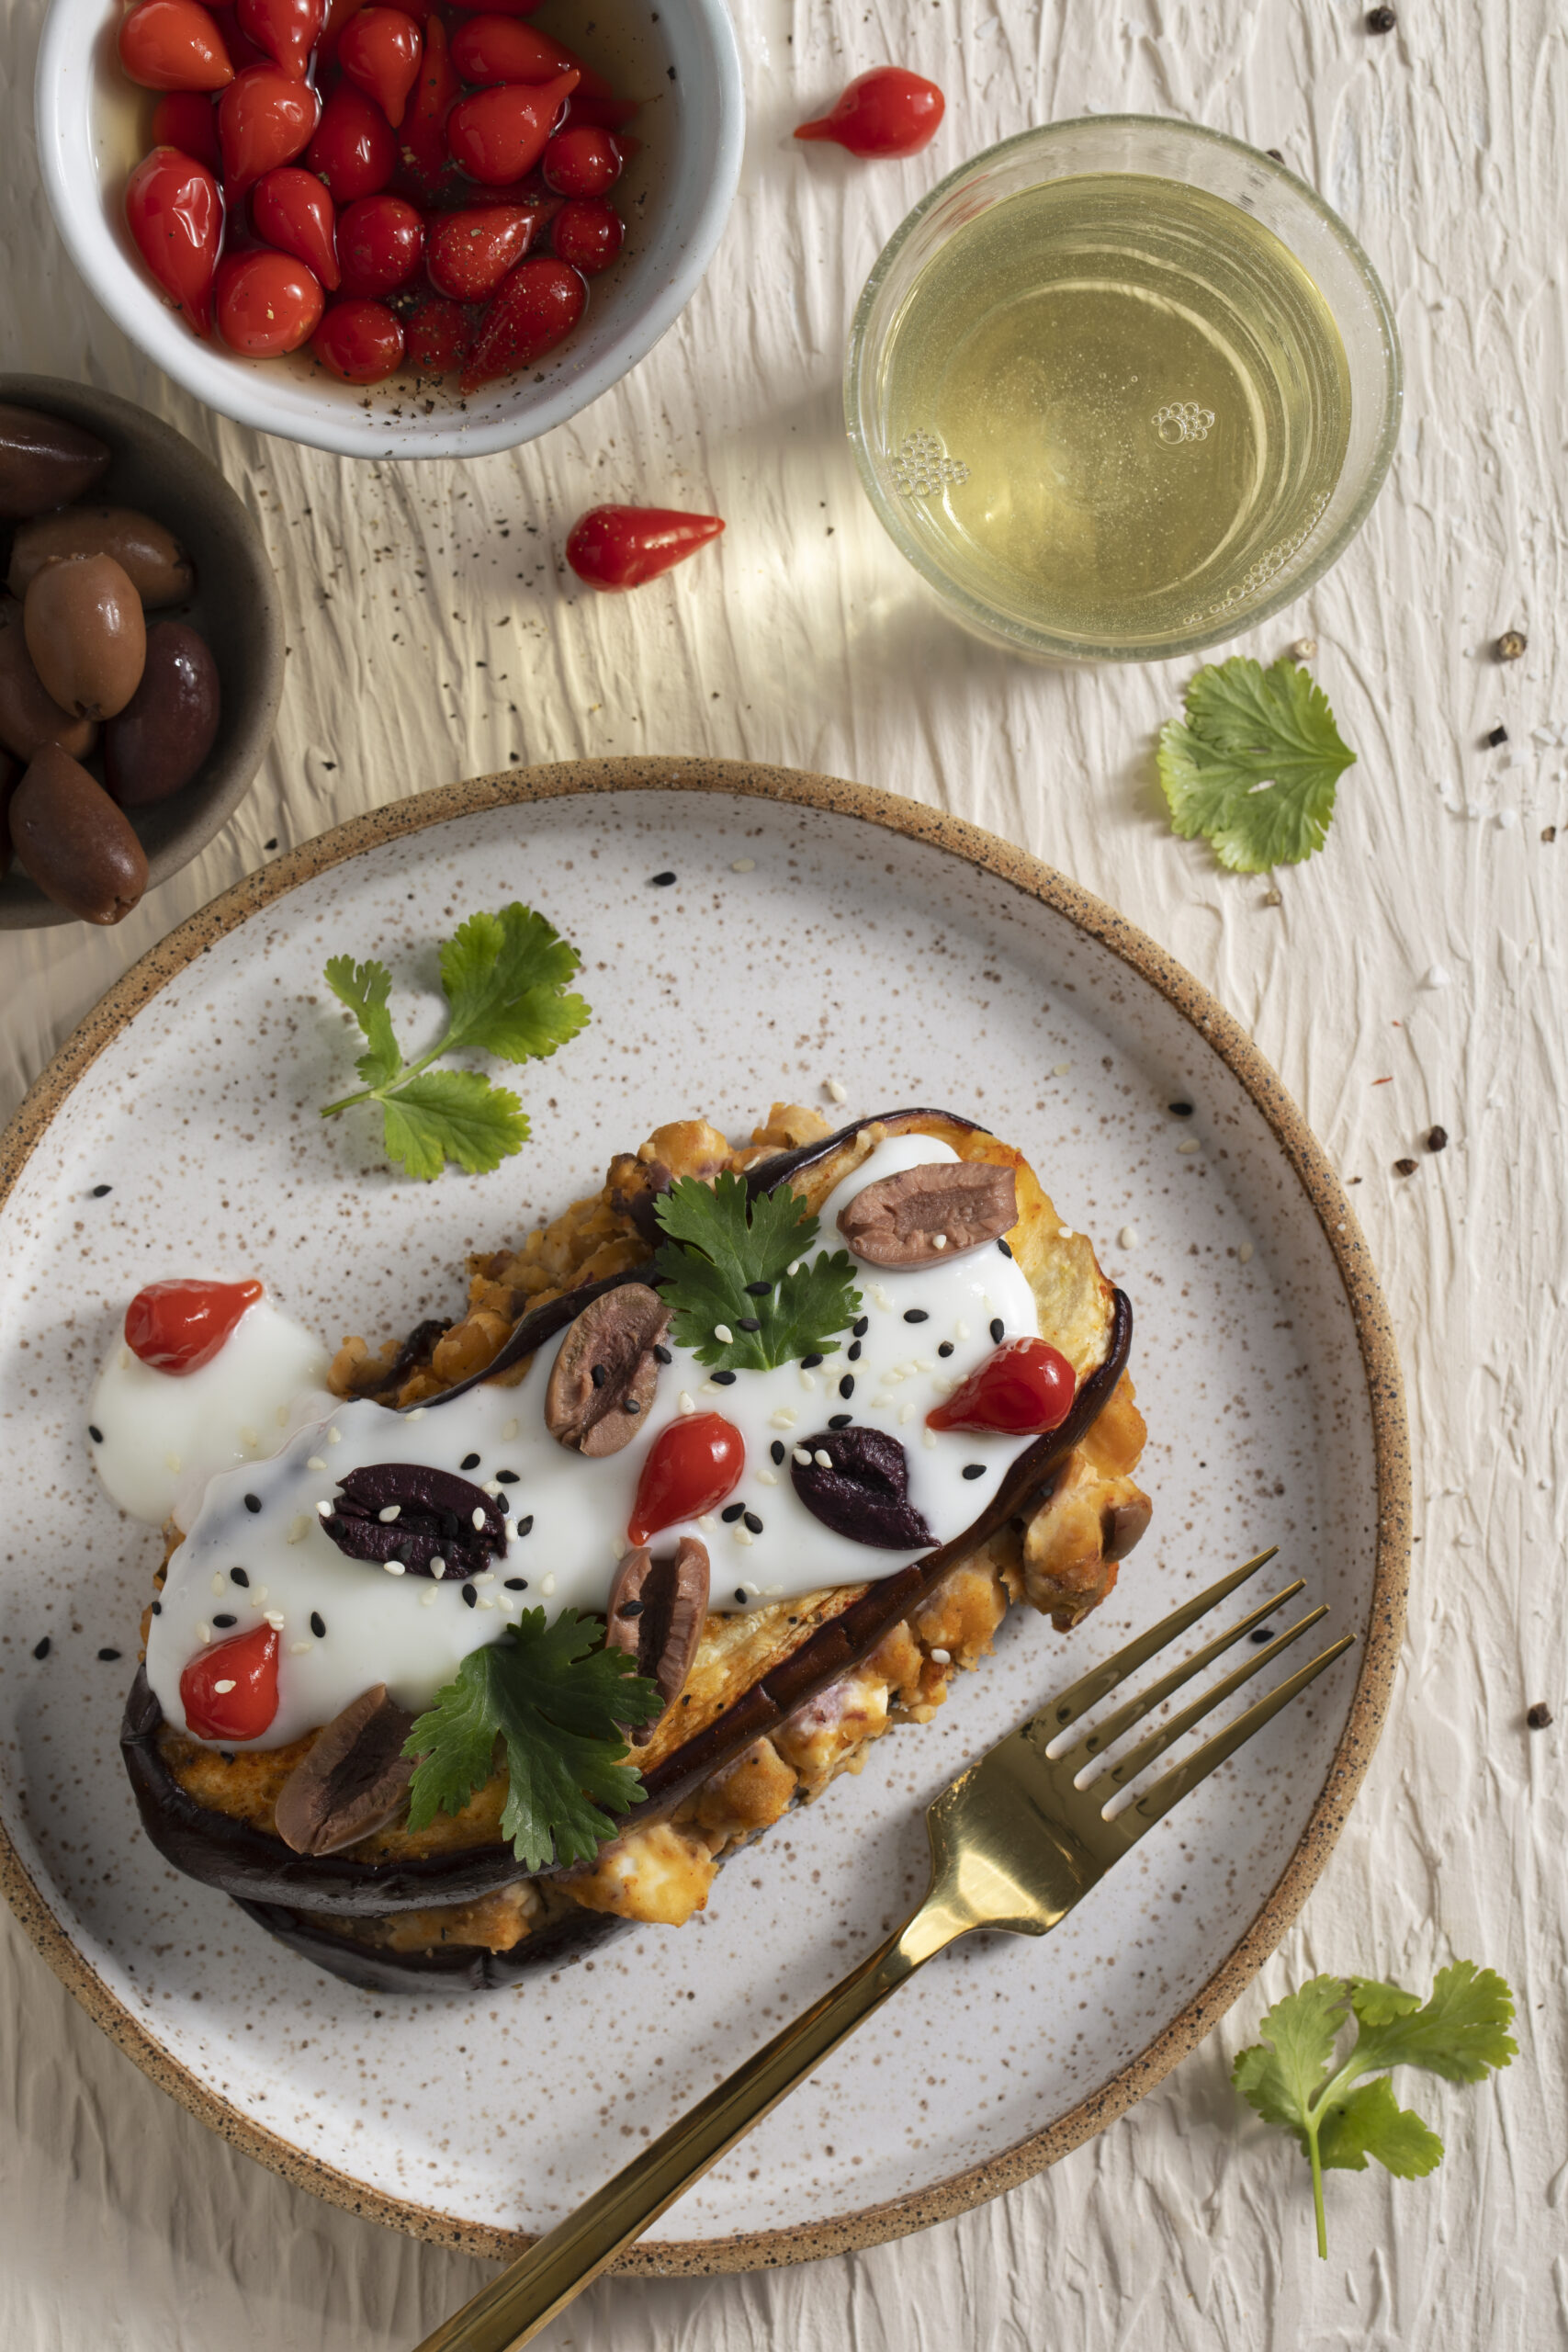
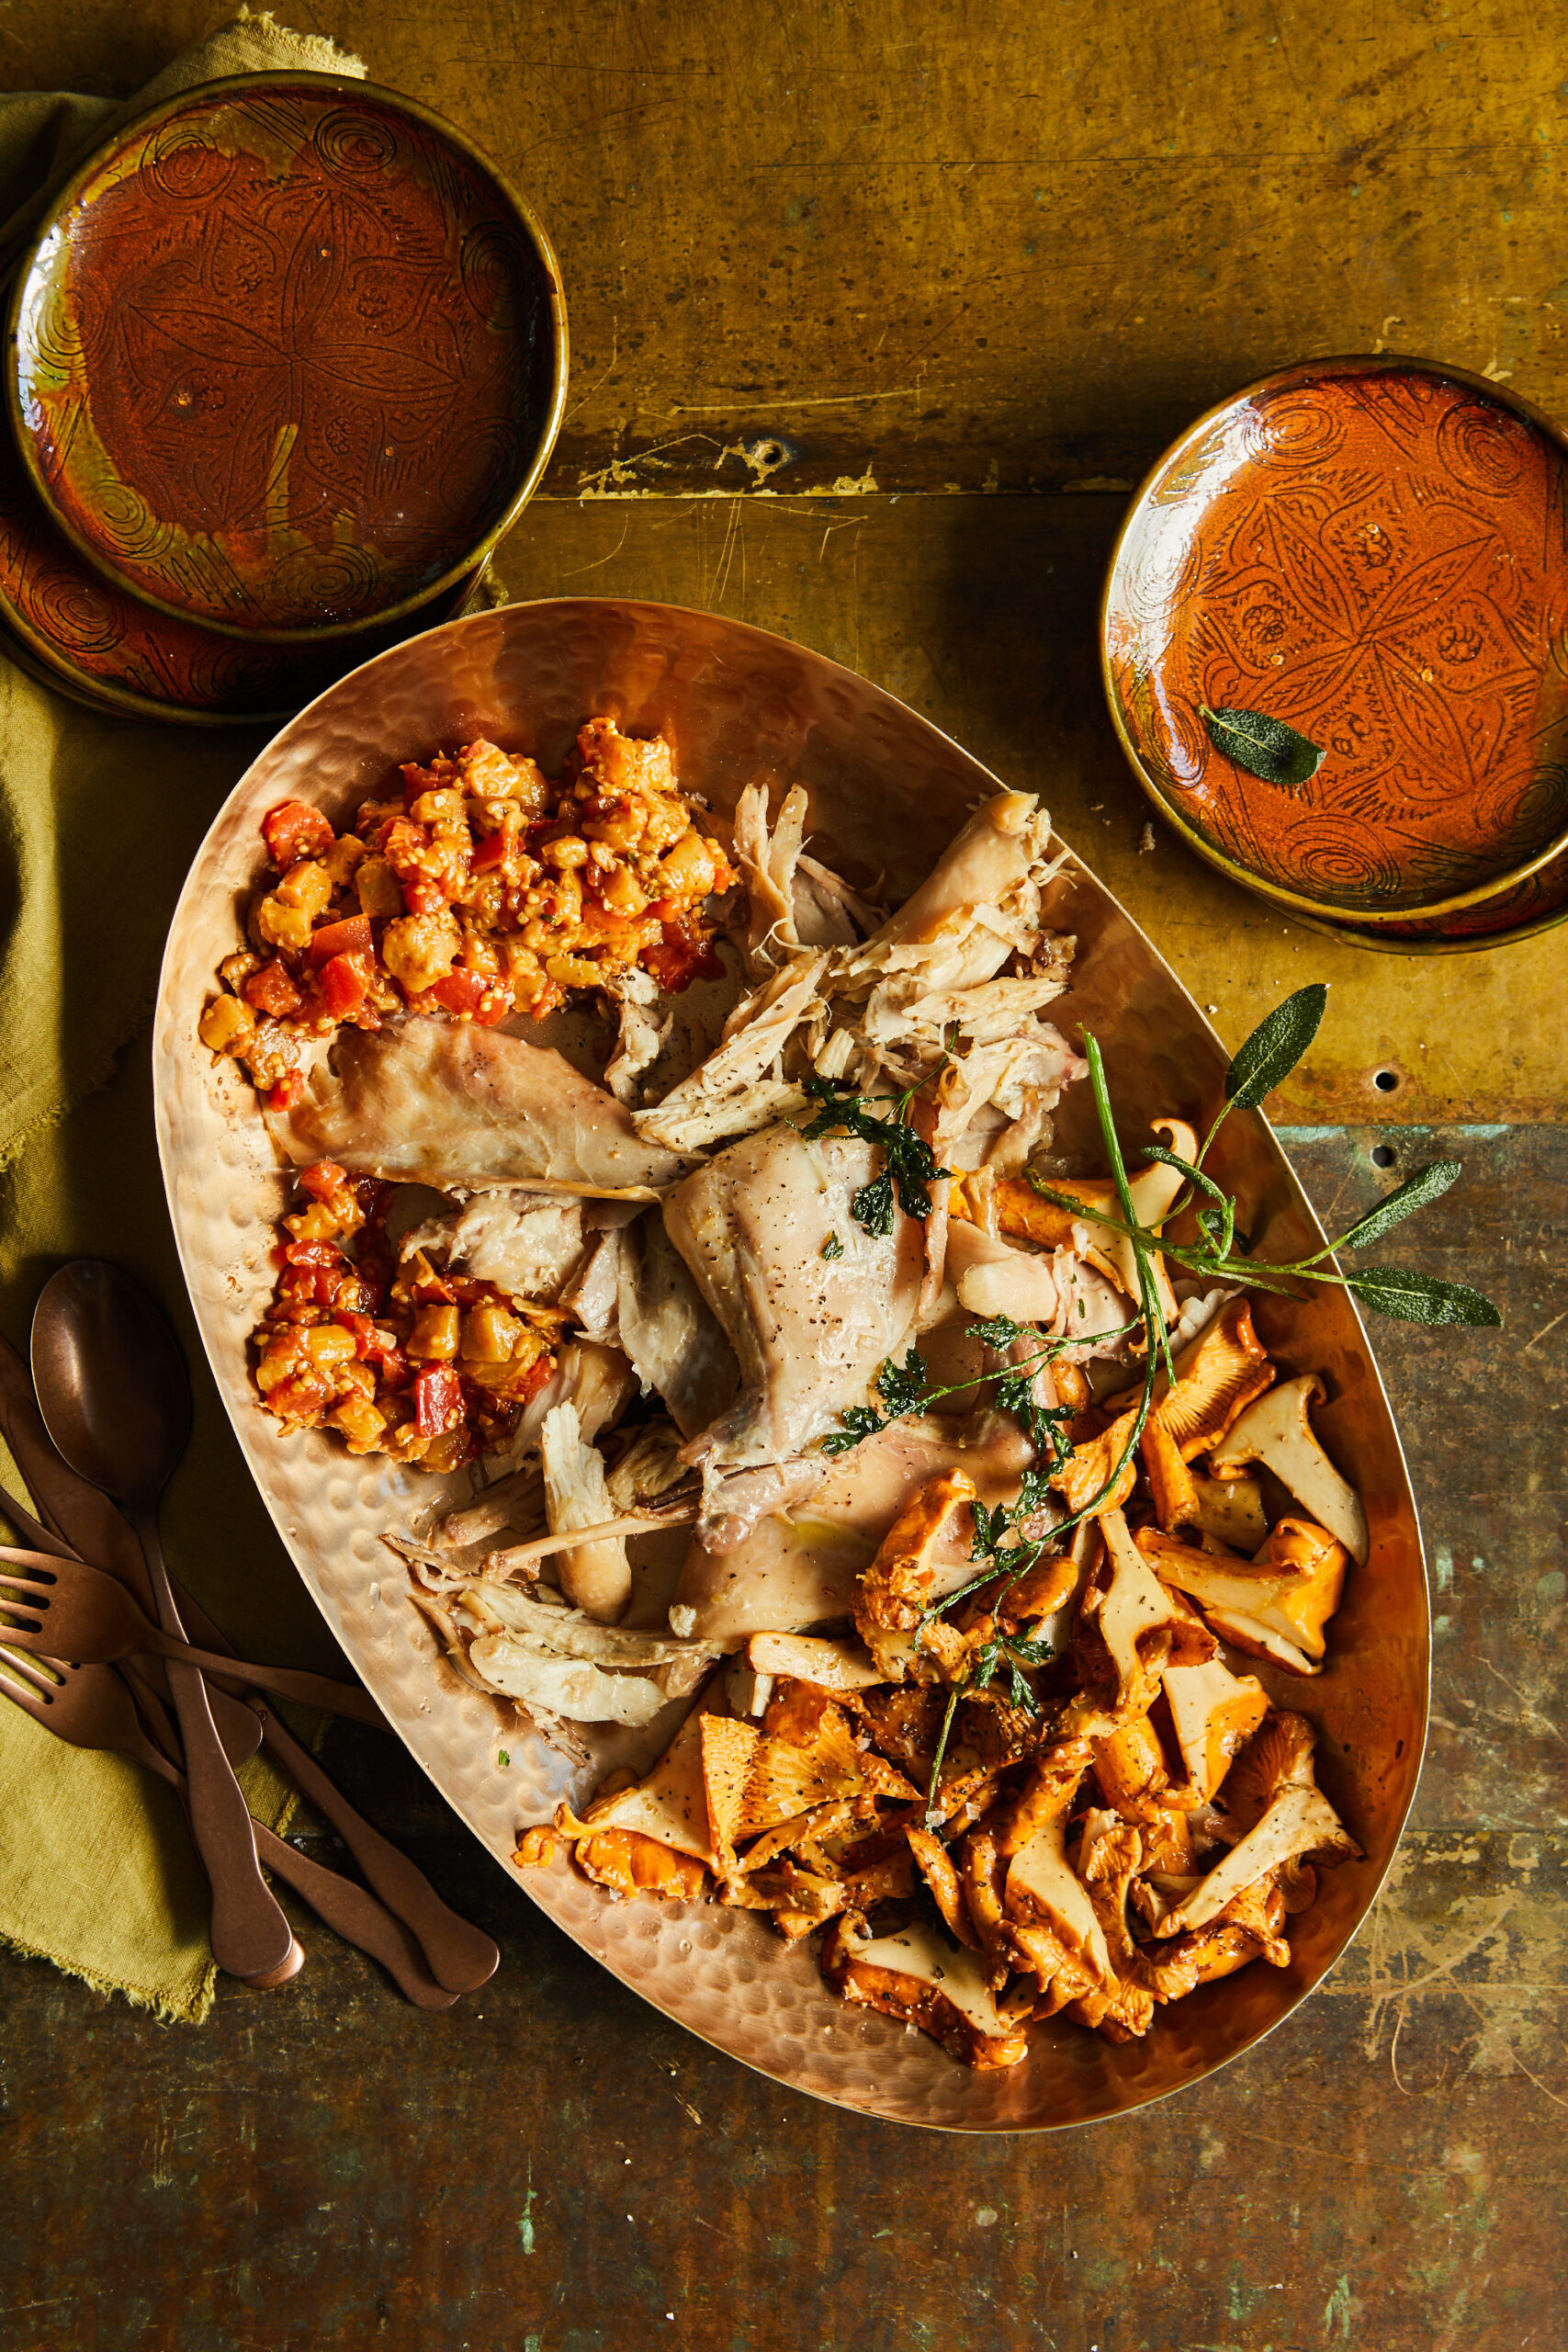
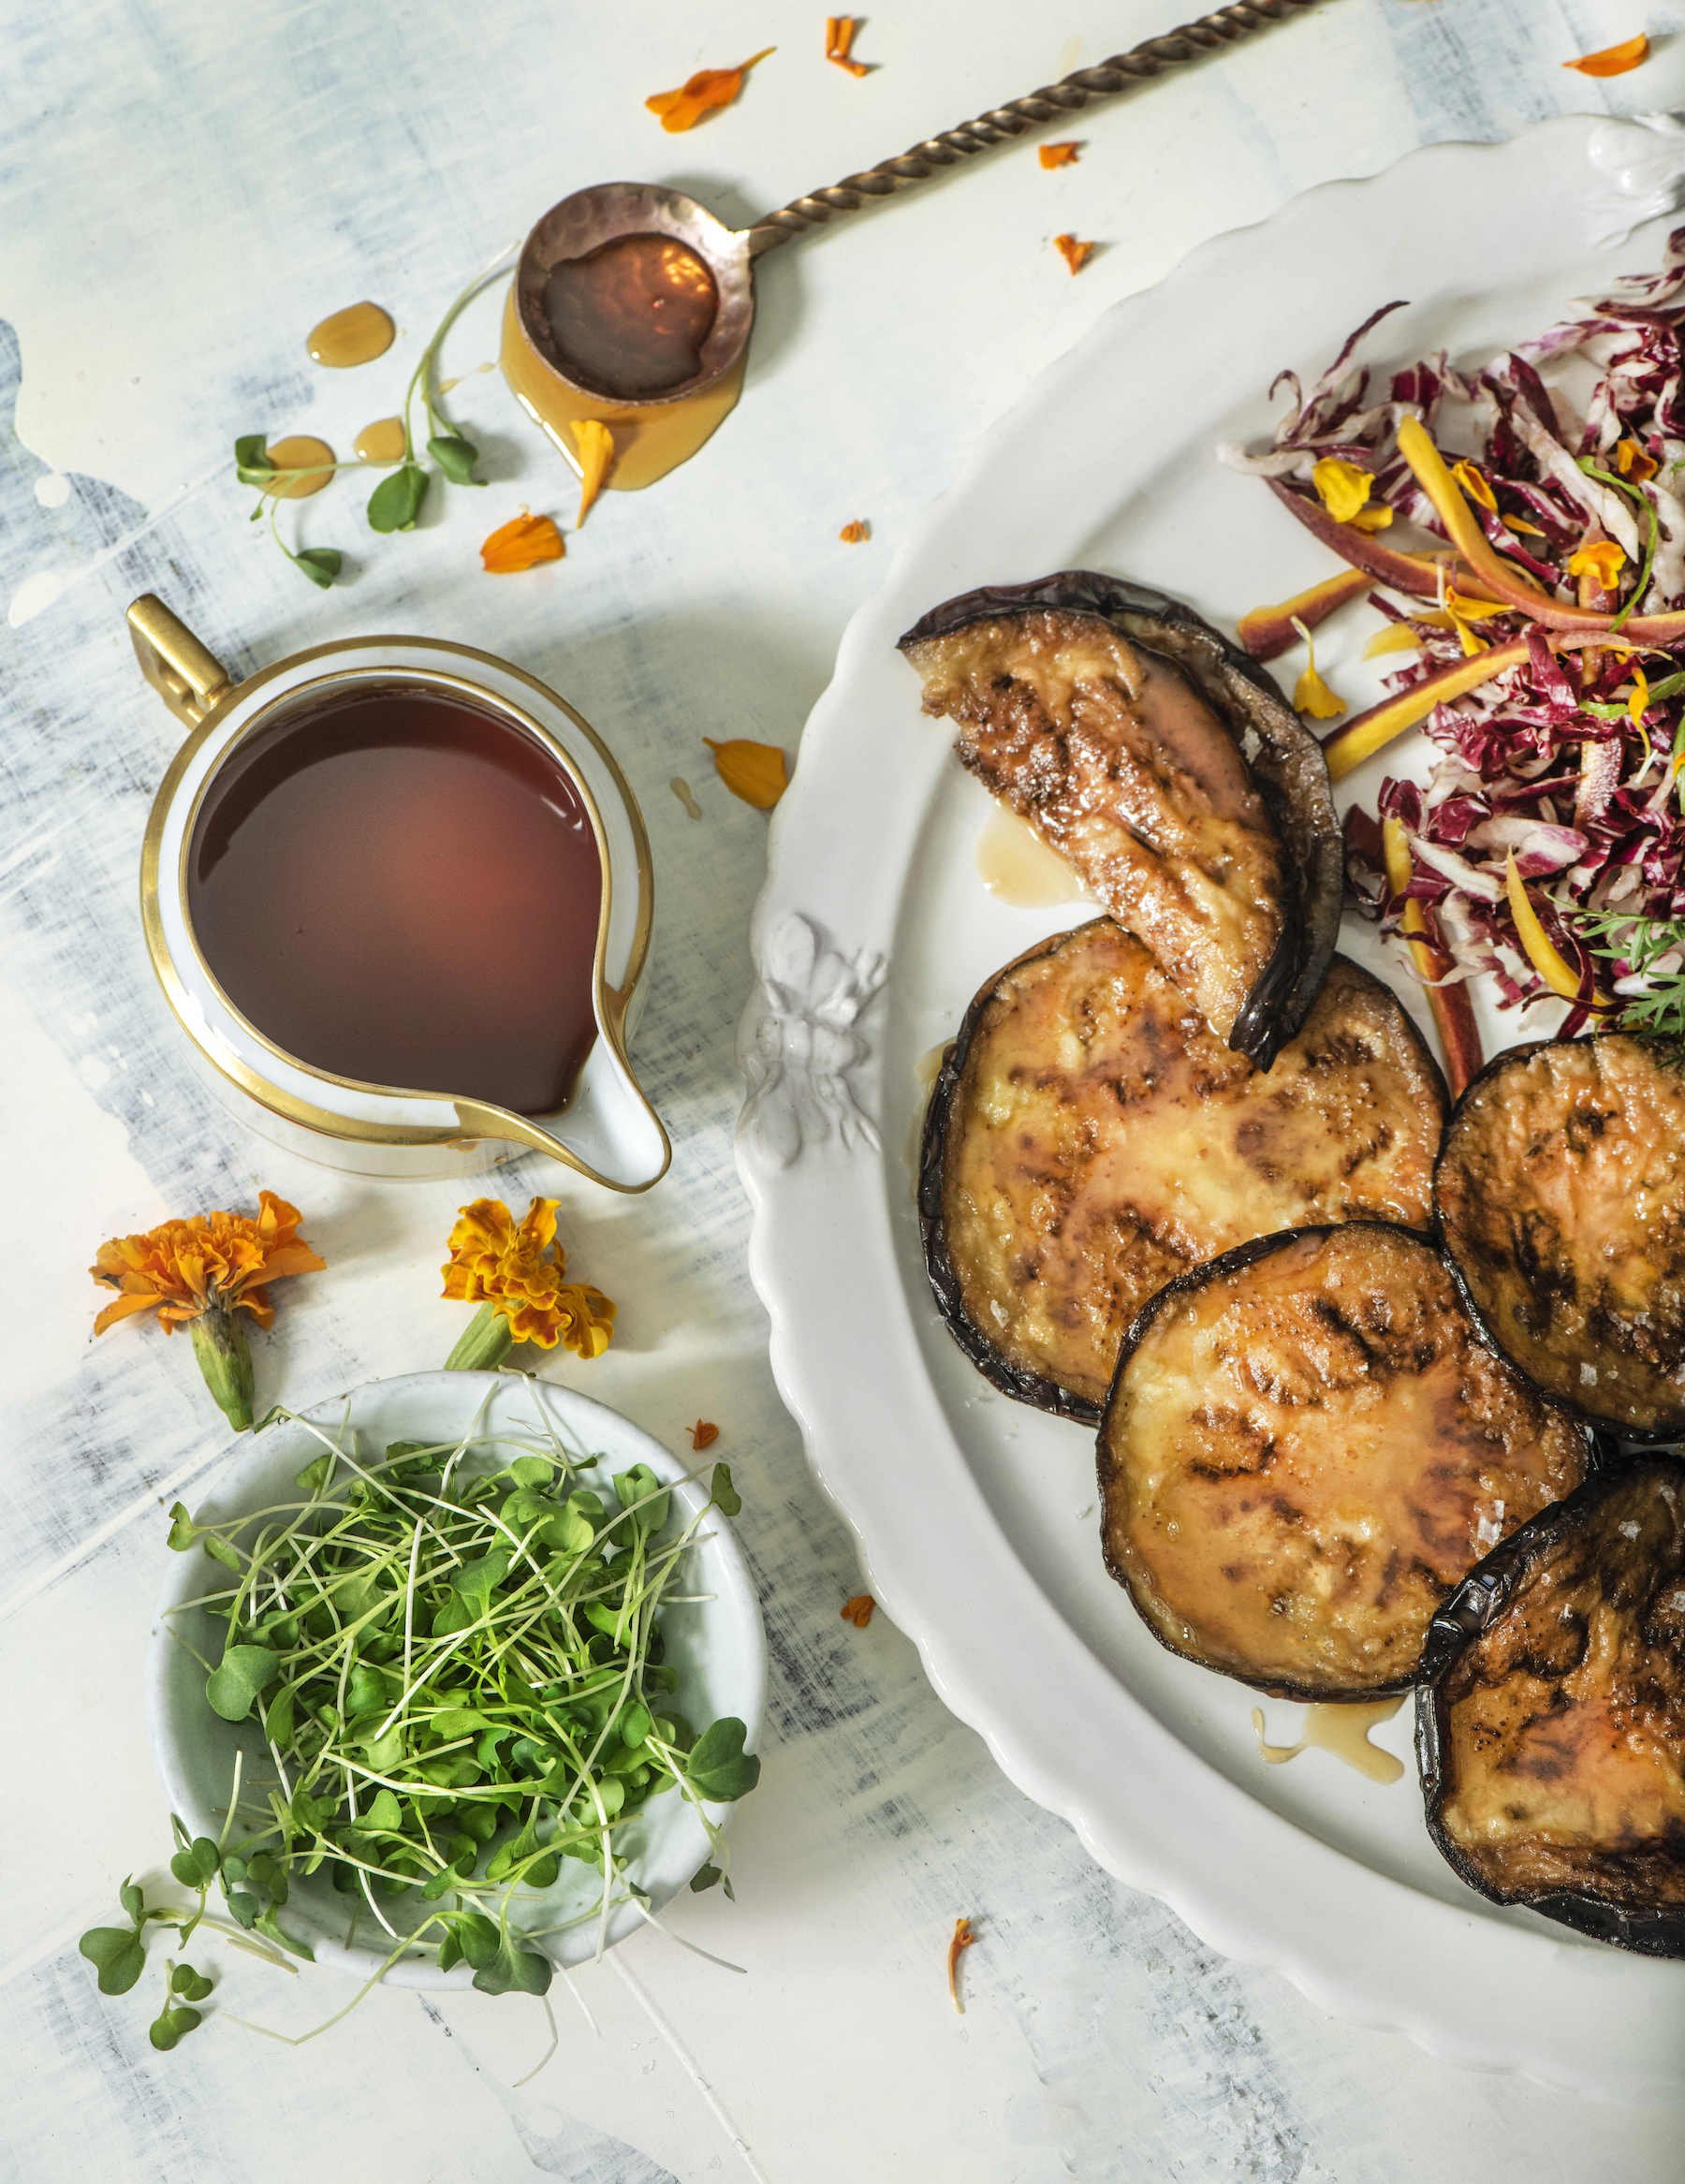
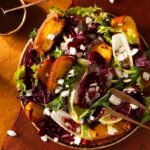
Serve these tasty gems with your favorite roasted meat or fish dish, alongside a serving of cold weather greens. The natural bitterness of kale and radicchio makes an excellent counterbalance with the earthy sweetness of roasted pumpkin.

Print
clock clock iconcutlery cutlery iconflag flag iconfolder folder iconinstagram instagram iconpinterest pinterest iconfacebook facebook iconprint print iconsquares squares iconheart heart iconheart solid heart solid icon
A platter holds six baked baby pumpkins, some with their tops removed and filled with a sauce.

Baked Baby Pumpkins


  • Author: Cheryl Alters Jamison

Description

Decorate your fall plate with baked baby pumpkins.


Ingredients

Scale
  • 6 miniature single-serving pumpkins, tops cut off “jack-o-lantern” style and seeded
  • Olive oil
  • Fine sea salt
  • 6 tbsp (3/4 stick) unsalted butter
  • ¼ cup packed brown sugar
  • ½ tsp ground cinnamon
  • ¼ tsp ground dried red chile, preferably New Mexican or ancho
  • ¼ tsp ground coriander


Instructions

Preheat the oven to 350 degrees. Lightly oil a shallow baking dish.

  1. Coat the pumpkins and their lids lightly with oil, inside and out.
  2. Sprinkle the interiors of each lightly with salt.
  3. Place the pumpkins in the dish and top each with its lid. Bake for 50 to 55 minutes, or until soft and lightly browned. Leave the oven on.
  4. Melt the butter in a small pan over medium-low heat and mix in the brown sugar, cinnamon, red chile, and coriander. Drizzle the mixture inside each of the pumpkins. Replace the lids afterward. Bake for an additional 10 to 15 minutes, until very soft but still holding their shape. Serve hot.

Recipe and Story by Cheryl Alters Jamison
Styling by Anna Franklin
Photography by David Bryce

Subscribe to TABLE Magazine’s print edition.

Roasted Pumpkin Salad with Chèvre, Pomegranates, and Pepitas

0
A colorful roasted pumpkin salad is presented on a plate with red and green lettuce, goat cheese, and pomegranate seeds.

Fall salads call for a bit of heft, for which chunks of fresh roasted pumpkin are perfect. Combine the pumpkin with bright bits of pomegranate and crumbles of cheese over sturdy greens, and top it all off with more pumpkin in the form of crunchy pepitas, or hulled pumpkin seeds. You can buy the pepitas, but instructions follow for preparing your own, if you wish. However you garnish the salad, and whatever other ingredients you use to customize it, your Roasted Pumpkin Salad is sure to be a hit on an autumn afternoon.

How Do You Roast a Pumpkin?

1. Prep the pumpkin

  • Preheat oven to 350 °F.
  • Slice the pumpkin in half and scoop out the seeds. Save them for roasting on their own!
  • Leave the skin on because it’s easier to separate the flesh from the skin after roasting.

2. Season the pumpkin

  • Place the halves flesh side up on a baking sheet.
  • Rub olive oil into the flesh and sprinkle a little salt. Or use vinaigrette dressing (see below).
  • If you’re feeling fancy, sprinkle a bit of sweet paprika on, as well. 

3. Roast the pumpkin

  • Bake for 45–50 minutes, until soft (like a properly cooked potato). 

4. Scoop and serve (or save)

Use immediately by placing the pumpkin making mashed pumpkin in a stand mixer, adding butter or olive oil, salt, black pepper, and a dash of dried sage. Or refrigerate in a sealed container until you’re ready to use it in a recipe like the Roasted Pumpkin Salad below!

5. Pair your Roasted Pumpkin Salad with a lovely wine!

A classic rosé from Provence, replete with minerality and dry with just a touch of fruit, will complement the natural sweetness of roasted pumpkin.

Print
clock clock iconcutlery cutlery iconflag flag iconfolder folder iconinstagram instagram iconpinterest pinterest iconfacebook facebook iconprint print iconsquares squares iconheart heart iconheart solid heart solid icon
A colorful roasted pumpkin salad is presented on a plate with red and green lettuce, goat cheese, and pomegranate seeds.

Roasted Pumpkin Salad with Chèvre, Pomegranates, and Pepitas


  • Author: Cheryl Alters Jamison

Description

A salad that sings the flavors of fall.


Ingredients

Scale

For the Vinaigrette:

  • ½ cup vegetable oil or other neutral-flavored oil
  • 2 tbsp balsamic vinegar
  • 1 tbsp rice vinegar or white vinegar
  • 1 small shallot, minced
  • 2 tsp sugar
  • ¼ tsp fine sea salt

For the Salad:

  • One – to 3-pound sugar or pie pumpkin, cut into 6 wedges and seeded
  • Several handfuls frisée or another sturdy green lettuce
  • Several handfuls red oak leaf lettuce, leaves of red endive or radicchio, or more frisée
  • 6 oz creamy goat cheese like chèvre, crumbled
  • ½ to ¾ cup pomegranate arils (about 1 pomegranate)
  • ¼ cup toasted salted pepitas (hulled pumpkin seeds)
  • Flaky sea salt, such as Maldon, or fleur de sel


Instructions

For the Vinaigrette:

  1. Place all the ingredients in a glass bowl and combine. Stir well with a small whisk or fork until the ingredients are mixed.
  2. Taste and adjust the seasoning.

For the Salad:

  1. Preheat the oven to 350 degrees. Grease a baking sheet or line it with a silicon mat.
  2. Place the pumpkin slices on the baking sheet, brush each with about a teaspoon of vinaigrette and bake for 45 to 50 minutes, until soft.
  3. Let cool briefly. Slice the wedge lengthwise into three thinner crescents, then slice the skin away from the pieces.
  4. Arrange a bed of the greens on a platter or in a large shallow bowl. Tuck red lettuces around the greens. Tuck pumpkin pieces around and throughout the salad. Drizzle with more vinaigrette. Scatter cheese, pomegranate arils, and pepitas over the salad, sprinkle with salt, and serve.

To Prepare Pepitas from Pumpkin Seeds: 

  1. Rinse pumpkin goo away from the seeds as best you can.
  2. Put seeds in a pan with water to cover by a couple of inches. Bring to a boil and boil for about 10 minutes.
  3. Drain seeds and lay them out on a clean dishtowel or paper towels. Let cool and dry on the surface. Roll over the seeds lightly with a rolling pin or wine bottle. The outer shells will crack and, with your fingers, you can then work out the green seed pods, the pepitas.
  4. Toss the pepitas with just a touch of oil. Sauté in a small heavy skillet until just fragrant, and sprinkle lightly with salt.

Recipe and Story by Cheryl Alters Jamison
Styling by Anna Franklin
Photography by David Bryce

Subscribe to TABLE Magazine’s print edition.

Pumpkin-Stuffed Ravioli with Brown Butter, Sage, and Hazelnuts

0
A plate of pumpkin-stuffed ravioli is garnished with brown butter, sage, hazelnuts, and shaved cheese.

These ravioli and their accompaniments simply sing of autumn. The pumpkin filling is enveloped in wonton wrappers to make large pasta “pillows”. A ravioli crimper or other pastry trimmer can make a decorative edge, but you can also use the tines of a fork to seal the edges, too. The sage-scented sauce is simple, enriched with toasty brown butter. To make it, melt butter in a skillet, then continue to warm it long enough to color the milk solids and develop a nutty aroma.

Wonton Wrappers in a Ravioli Recipe?

Why not? Wonton wrappers are a clever shortcut for easy homemade ravioli, offering a delicate texture without the labor of rolling pasta from scratch. Their thinness ensures quick cooking, making them perfect for tender fillings like ricotta, spinach, or roasted pumpkin. Simply spoon the filling onto one wrapper, brush edges with water, top with another, and press or crimp to seal. They cook in no time: boil for just 2–3 minutes until translucent, then plate and baste gently with sauce. This simple swap saves time while delivering authentic flavor!

Print
clock clock iconcutlery cutlery iconflag flag iconfolder folder iconinstagram instagram iconpinterest pinterest iconfacebook facebook iconprint print iconsquares squares iconheart heart iconheart solid heart solid icon
A plate of pumpkin-stuffed ravioli is garnished with brown butter, sage, hazelnuts, and shaved cheese.

Pumpkin-Stuffed Ravioli with Brown Butter, Sage, and Hazelnuts


  • Author: Cheryl Alters Jamison

Description

Pumpkin-Stuffed Ravioli bursts with creamy pumpkin.


Ingredients

Scale

For the Sauce:

  • 4 tbsp (½ stick) unsalted butter
  • 2 garlic cloves, sliced thinly
  • ½ cup chicken or vegetable stock
  • 1 tbsp minced fresh sage
  • ¼ tsp fine sea salt, or more to taste

For the Pasta and Filling:

  • 15-oz can pumpkin puree
  • ¾ cup ricotta cheese
  • ½ cup grated Parmigiano or Pecorino Romano cheese, or a combination of the two
  • 3 oz finely chopped hazelnuts (about ½ cup)
  • 1 tbsp minced fresh sage
  • ½ tsp fine sea salt, or more to taste
  • About 40 wonton wrappers (have extras on hand in case some tear, or you end up with extra filling)

To garnish: 

  • Shredded Parmigiano or Pecorino Romano cheese
  • ¼ cup coarsely chopped hazelnuts, toasted in a dry skillet
  • Fresh sage leaves or sprigs


Instructions

For the Sauce:

  1. Warm the butter in a small skillet over medium heat. Add the garlic and sauté it for a couple of minutes, until it just begins to color.
  2. Remove the garlic with a slotted spoon and discard it. Continue heating the butter, stirring it frequently. The aroma will begin to turn nutty as the milk solids turn into golden brown specks.
  3. Add the remaining sauce ingredients and simmer the mixture for several minutes to reduce the stock a bit and combine the flavors. Reserve.

For the Pasta and Filling:

  1. Mix together in a medium bowl the pumpkin, cheeses, hazelnuts, sage and salt.
  2. Spoon 1 scant tbsp of filling in the center of a wonton wrapper. Wet the edges of that wrapper and the edges of a second wrapper.
  3. Top the filling with the second wrapper and press down firmly on each side to make a tight seal. Use the tines of a fork to crimp the edges, or use a decorative pastry cutter or ravioli crimper to further seal the edges.
  4. Set the ravioli on a platter or baking sheet to dry out a bit while you form the remaining “pillows”.
  5. Repeat with the remaining filling and wonton wrappers. The recipe makes about 20 large ravioli.
  6. The ravioli can be cooked immediately or covered and refrigerated for up to a day.
  7. Heat several quarts of salted water in a large saucepan or stockpot. When the water comes to a rolling boil, gently slide in the ravioli. Unless your pot is quite large, it may be easier to cook the ravioli in two batches, to make sure none stick together.
  8. Cook just 3 to 5 minutes, until the dough is tender and no longer gummy. Scoop out ravioli with a slotted spoon and drain them gently. Transfer them to individual plates or shallow bowls.
  9. Quickly reheat the sauce, stirring to combine it, and spoon it equally over the ravioli. Garnish each serving with cheese, a sprinkling of nuts, and sage leaves or sprigs.

Recipe and Story by Cheryl Alters Jamison
Styling by Anna Franklin
Photography by David Bryce

Subscribe to TABLE Magazine’s print edition.

Haitian Pumpkin-Beef Soup (Joumou)

0
Two bowls of Haitian Pumpkin-Beef Soup are shown on a reddish-brown surface, garnished with shredded cabbage and green onions.

A symbol of Haitian independence and resilience, joumou is a hearty soup traditionally eaten on New Year’s Day. Initially, it was cooked by enslaved Africans for their white owners. Since Haiti’s liberation in 1804, it has represented freedom. The dish carries a UNESCO designation as an official symbol of the country’s cultural heritage. Often joumou is made with a very hefty turban squash, or other sizeable pumpkin. Starting with a can of pumpkin puree allows making a smaller batch of the soup while also eliminating the step of pureeing the pumpkin. You will need to make the pikliz, a piquant relish used in the soup and as an accompaniment, at least a day ahead. It keeps for weeks though, refrigerated.

What is pikliz?

Haitian pikliz, a fiery pickled slaw, emerged during Haiti’s colonial era, blending African, French, and Caribbean influences. While no exact “invention date” is recorded, it has been a staple for centuries, traditionally used to preserve vegetables in a hot climate. Recipes vary widely from family to family and chef to chef. Some use fiery Scotch bonnet peppers for maximum heat, others add garlic, thyme, or cloves for complexity. Cabbage, carrots, and vinegar remain constants, but the spice balance is deeply personal. Beloved in Haiti for its vibrant flavor and crunch, pikliz cuts through the richness of fried foods like griot, adding brightness, heat, and a taste of home to every bite.

Print
clock clock iconcutlery cutlery iconflag flag iconfolder folder iconinstagram instagram iconpinterest pinterest iconfacebook facebook iconprint print iconsquares squares iconheart heart iconheart solid heart solid icon
Two bowls of Haitian Pumpkin-Beef Soup are shown on a reddish-brown surface, garnished with shredded cabbage and green onions.

Haitian Pumpkin-Beef Soup (Joumou)


  • Author: Cheryl Alters Jamison

Description

A symbol of Haitian independence and resilience.


Ingredients

Scale

For the Pikliz:

  • 1 to 3 habanero or Scotch bonnet chiles (depending on the firepower desired)
  • 2 cups shredded cabbage
  • ½ medium yellow onion, coarsely grated
  • 1 medium carrot, coarsely grated
  • 1 small celery rib, minced
  • 1 green onion, with light green top, sliced thin
  • 1½ tsp salt
  • ½ tsp whole black peppercorns
  • 2 whole cloves
  • 1½ cups white or cider vinegar, or more as needed

For the Soup: 

  • 1 lb boneless beef chuck, cut into ½ cubes
  • Juice of 1 medium lime
  • 1/3 cup pikliz
  • 1 large shallot, minced
  • 2 garlic cloves, minced
  • 2 green onions, sliced, plus more for garnish
  • 1 tsp fine sea salt, plus more to taste
  • ½ teaspoon dried thyme
  • 2 tbsp vegetable oil or other neutral-flavored oil
  • 2 medium carrots, sliced
  • 1 leek, dark green tops discarded
  • 15-oz can pumpkin puree
  • 5 cups water, or more as needed
  • 6 oz red waxy potatoes, chunked
  • ½ small cabbage, chunked
  • 1 habanero or Scotch bonnet chile, whole, but with two slashes made in its sides
  • 1 tsp fine sea salt, or more to taste
  • ½ cup uncooked vermicelli or fideos


Instructions

For the Pikliz:

  1. Wearing rubber gloves, remove the stems and seeds of the chiles and slice the pods into very thin strips.
  2. Place the cabbage in a nonreactive bowl or jar and top with the chiles and the remaining ingredients.
  3. Stir together and then push it down into the liquid. Add a bit more vinegar if the vegetable mixture isn’t fully covered. Cover the pikliz and refrigerate for at least 24 hours, stirring occasionally. Use leftover pikliz as a relish with grilled chicken or pork.

For the Soup:

  1. Toss the beef together in a bowl or gallon-size zipper-lock bag with the lime juice. Add the pikliz, shallot, garlic, green onions, 1 tsp salt, and thyme. Let sit 30 minutes at room temperature, or up to 4 hours refrigerated.
  2. Drain off any liquid from the meat, reserving the liquid. Add the oil to a stockpot or Dutch oven and warm over medium-high heat. Add one-half of the beef cubes and sear. Scrape out beef with a spatula onto a plate. Add the remaining beef and sear it.
  3. Return the first batch of beef to the pot and reduce the heat to medium. Add the carrots and leek and cook until vegetables soften, about 5 minutes. Stir in the pumpkin, water, and any remaining marinade. Simmer covered about 15 minutes.
  4. Mix in the potatoes, cabbage, chile, and salt. Simmer together covered for about 30 minutes more, or until flavors are melded, beef is tender, and all vegetables are soft. Add a bit more water if needed to have a soupy consistency.
  5. Stir in the vermicelli and continue cooking uncovered at a simmer for an additional 5 to 10 minutes, until vermicelli is tender. Discard the habanero chile.
  6. Spoon soup into bowls. Top each with a spoonful of pikliz or pass it alongside at the table.

Recipe and Story by Cheryl Alters Jamison
Styling by Anna Franklin
Photography by David Bryce

Subscribe to TABLE Magazine’s print edition.

Eggplant Recipes That Are Simple But Delicious

0
A mouthwatering plate of sweet fried eggplants, a delicious dish traditionally enjoyed during Hannukah celebrations.

It doesn’t take much to cook up an eggplant recipe that tastes like it came from a 5-star kitchen. With just a few eggplants from your local farmers market, you can make anyone a fan of eggplant. A blend of seasonings, various cooking methods, and a bit of passion, take this vegetable from basic to brilliant. Let us know if you still see eggplant the same way after making a couple of these simple recipes.

Eggplant Recipes That Are Simple But Delicious

Smoked Eggplant with Tomato Sauce (Batarsh and Tomato Ragout)

A dish of rye crisps topped with tomato ragout and wine glasses surrounding the dish.

The traditional flavors of the Middle East dress up eggplant in this Batarsh and Tomato Ragout recipe. A savory tomato sauce coats wood-fired eggplant in a spread that you’ll want to eat by the spoonful. It tastes wonderfully complex, but it’s easier to put together than you’d think.

Savory Eggplant Jam with Homemade Crackers

A plate holds an Eggplant Jam that sits beside an array of placed homemade crackers on another small plate.Try Savory Eggplant Jam with Homemade Crackers as a snack or appetizer for a dinner party. You’ll fall for the delicate, savory flavor and crispy crunch of perfectly made crackers. Though if you are looking to ditch the extra carbs, you can always exchange the homemade crackers for carrot sticks or other vegetables.

Low-Carb Eggplant Napoleon

two slices of eggplant with hummus in between and a yogurt sauce with cherry peppers, Kalamata olives, and sesame seeds on top. Low Carb Eggplant NapoleonThis healthy lunch option takes roasted or pan-fried eggplant slices and slathers them in hummus-sour cream, greek yogurt, and tomatoes, olives, and sesame seeds. The best part is you don’t have to worry about the breading of regular Eggplant Napoleon, though you will still get the same great flavor and crisp.

Sticky Eggplant with Pickled Garlic Blossoms

Sticky eggplant in a. bowl with garlic blossoms on top of a piece of granite.Japanese eggplants, bathed in a sweet-and-spicy gravy of Indonesian sambal, Thai chili sauce, hoisin sauce, soy, red pepper, and honey alongside pickled garlic blossoms. This dish will take you on a quick trip to Southeast Asia. 

Rabbit Confit with Chanterelle Mushrooms and Eggplant Compote

Rabbit Confit with Chanterelle Mushrooms and Eggplant Compote on an orange plate with two dishes of sauces at the top of the plate This recipe may look complicated at first glance, but when you break down each element, it’s clear that you’ll be able to put together a dinner that’s impressive and simple to master. The Eggplant Compote is truly the star here and can be cooked in less than half an hour to add to any dish of your choosing.

Sweet Fried Eggplants

A mouthwatering plate of sweet fried eggplants, a delicious dish traditionally enjoyed during Hannukah celebrations.

Honey is the key to making these eggplants so delectable. Withis quick snack will be your go to for in between lunch and dinner or even breakfast and lunch. Or, you can also serve it along with a salad and make a vegetarian meal out of this recipe.

Martha Stewart-Inspired Stacked Eggplant Parmesan

A green plate with Martha Stewart-Inspired Stacked Eggplant Parmesan individually on a plate with a beschamel sauce off to the side.

One of our favorite eggplant recipes is this Martha Stewart-Inspired Eggplant Parmesan Stacks. These crispy stacks consist of thinly sliced eggplant, savory tomato sauce, parmesan, mozzarella, and basil, along with a homemade béchamel sauce.

Eggplant and Smoked Mozzarella Tart

An eggplant and smoked mozzarella tart cut into pieces on a white table beside silverware and plates.

Each slice of this Eggplant and Smoked Mozzarella Tart offers an unforgettable blend of textures and tastes. It’s the perfect vegetarian recipe to anchor a light lunch, impress guests at a dinner party, or simply treat yourself.

Story by Kylie Thomas

Subscribe to TABLE Magazine‘s print edition.

Asparagus Ravioli

0
An above shot of Asparagus ravioli on a small white plate.

Celebrate asparagus season in the most delicious way with this handmade Asparagus Ravioli recipe—complete with a zesty preserved lemon vinaigrette that adds a bright, unexpected twist. From kneading silky egg pasta to blending a rich, creamy filling of asparagus, Parmesan, and cream cheese, this dish is a rewarding kitchen project that turns simple ingredients into something truly special. Whether you’re looking for a spring dinner centerpiece or a fresh take on homemade pasta, this Asparagus Ravioli delivers vibrant flavor, impressive presentation, and the satisfaction of scratch cooking.

Print
clock clock iconcutlery cutlery iconflag flag iconfolder folder iconinstagram instagram iconpinterest pinterest iconfacebook facebook iconprint print iconsquares squares iconheart heart iconheart solid heart solid icon
An above shot of Asparagus ravioli on a small white plate.

Asparagus Ravioli


  • Author: Kristin Butterworth
  • Yield: Serves 4-6 1x

Description

Celebrate asparagus season in the most delicious way.


Ingredients

Scale

Egg Pasta

  • 2 ½ cups 00 farina flour
  • ¾ tsp kosher salt
  • 2 whole eggs
  • 3 egg yolks
  • 1 tbsp olive oil

Asparagus Ravioli Filling

  • 1 lb asparagus, roughly chopped
  • 6 tbsp cream cheese
  • ¼ cup Parmesan cheese
  • ½ tsp minced garlic
  • Salt and pepper, to taste

Preserved Lemon Vinaigrette

  • 1/3 cup olive oil
  • ¼ cup lemon juice
  • 1 tsp Dijon mustard
  • ½ tsp honey
  • 3 tbsp preserved lemon, brunoise-cut or small dice
  • Salt and pepper, to taste


Instructions

Egg Pasta

  1. In a KitchenAid or similar mixer combine the flour and salt. Add eggs, yolks, and oil and run the machine until the dough holds together. If dough looks dry, add another teaspoon olive oil. If dough looks wet, add a little flour until dough is tacky and elastic.
  2. Dump dough onto a work surface and knead briefly until very smooth. Wrap in plastic and rest at room temperature for 40 minutes.
  3. Cut the dough into 4 pieces, keeping them covered with plastic wrap or a dishtowel when not in use. Using a pasta roller, set to the thickest (widest) setting, roll one piece of dough out onto a sheet. Fold the sheet in thirds like a letter and pass it through the machine 2 more times on the same setting.
  4. Reduce the setting, and repeat rolling and folding the dough, passing it through the machine until you reach the “number 2” thickness.
  5. Cut the pasta into desired size for the raviolis. Place cut pasta on a flour-dusted sheet tray and cover with a dishtowel while rolling and cutting the remaining dough. Make sure to sprinkle flour over the cut pasta before you place another layer on top.

Asparagus Ravioli Filling

  1. Bring a medium pot of well-salted water to a boil over high heat. Have ready a bowl of ice water to shock the asparagus to stop the cooking process. Boil the asparagus tips until tender but still bright green, about 2 minutes. With a slotted spoon, transfer to the ice water. When cool, transfer with the slotted spoon to a small bowl and set aside. In a food processor (or by hand), chop the asparagus very finely and transfer to a medium bowl. Add the cream cheese, Parmesan, and garlic to the chopped asparagus; mix well. Season to taste with salt and pepper.
  2. For the ravioli: Arrange your cut pasta on a work surface. Put 1 level tablespoon of the asparagus filling in the center of each piece of dough. Using a spray bottle, moisten the edges of each with water. Top each with another piece of pasta and press the edges firmly to seal, expelling any air bubbles as you seal. If you don’t plan to cook the ravioli immediately, cover them with a damp cloth or freeze until ready to use.

Preserved Lemon Vinaigrette

  1. Combine all ingredients in a small mixing bowl with a whisk. The honey and Dijon should emulsify the vinaigrette but you will need to mix before serving. Feel free to adjust the dressing with salt and pepper and maybe some additional honey if needed.

Recipe and Food by Chef Kristin Butterworth
Story and Prop Styling by Keith Recker
Photography by Dave Bryce

Subscribe to TABLE Magazine‘s print edition.

Watermelon Steak Salad

0
An above shot of a bowl filled with brightly colored fruit, making up a watermelon steak salad.

Watermelon has always been that one fruit that can spark up nostalgia for me: it’s a remembrance of summer evenings or afternoon family picnics. On any given summer night, my mother and father would have a watermelon wedge waiting for me; it was just something that was always there. It’s also one of those ingredients that tends to go well with a variety of flavors. Be it spicy, salty, tart, acidic, or bitter – they all seem to work. This time of year is great for many other fruits and vegetables – tomatoes, radish, bitter greens, and other melon varieties – which, luckily, all complement watermelon very well. This Watermelon Steak Salad dish will show that although watermelon is great on its own, there are many flavor profiles that pair great with it, too.

Print
clock clock iconcutlery cutlery iconflag flag iconfolder folder iconinstagram instagram iconpinterest pinterest iconfacebook facebook iconprint print iconsquares squares iconheart heart iconheart solid heart solid icon
An above shot of a bowl filled with brightly colored fruit, making up a watermelon steak salad.

Watermelon Steak Salad


  • Author: Steve Paul

Description

This dish will show that although watermelon is great on its own, there are many flavor profiles that pair great with it, too.


Ingredients

Scale

Watermelon Steak Salad

  • 1/4 seedless watermelon
  • 1/4 tsp salt
  • 1/2 tsp sugar
  • 2 tbsp lemon zest

Mint Labneh

  • 1 cup Greek yogurt
  • 2 tbsp lemon juice
  • 1/4 cup heavy cream
  • 3/4 tsp salt
  • 3 tbsp mint, chopped
  • 3 tbsp parsley, chopped

Citronette

  • 2 lemons, zest and juice
  • 1 lime, zest and juice
  • 1 1/2 tsp chopped garlic
  • 1/4 cup red wine vinegar
  • 2 tbsp sugar
  • 1 tsp ground black pepper
  • 1 tbsp salt
  • 1 cup olive oil

Pickled Coix Seed

  • 1/4 cup coix seed
  • 1/4 cup white vinegar
  • 1 cup water
  • 1 pinch of turmeric
  • 1 tbsp sugar
  • 1 1/2 tsp salt

Jicama Relish

  • 1/2 cup jicama, peeled, small dice
  • 1/2 cup cantaloupe, peeled and deseeded, small dice
  • 1/4 cup pickled coix seed
  • 2 tbsp chopped chives
  • 1/4 citronette

Bread-and-Butter-Cucumber

  • 1/2 seedless cucumber, small dice
  • 2 cups apple cider vinegar
  • 1/2 cup water
  • 3/4 cup sugar
  • 1 1/2 tsp turmeric
  • 3/4 tsp celery salt

To assemble: 

  • 1 tbsp black sesame seed
  • 1 tbsp toasted white sesame seed
  • 1/2 cup feta, crumbled
  • 1/4 watermelon radish, thinly shaved, stored in ice water
  • 1/2 fennel bulb, thinly shaved
  • 1 head blonde frisee, picked
  • 1/2 jalapeño, thinly shaved
  • 6 cherry heirloom tomatoes, halved
  • 1 grapefruit, supremed
  • 2 mint leaves
  • Olive oil, to garnish


Instructions

Watermelon Steak Salad

  1. Cut off the rind and cut into steaks ¾-inch thick, 4 inches long, and 2 1/2 inches wide, 3 to 4 steaks depending on the size of the melon. Mix the salt and sugar together and sprinkle on the steaks. Top the steaks with the lemon zest and seal in a Ziplock bag, removing as much air as possible, and set in the refrigerator with a weight on top of it. A dinner plate or two would be fine.

Mint Labneh

  1. Using a strainer and cheesecloth, strain some of the liquid out of the yogurt for an hour or longer if you can. Once strained, add all ingredients together in a blender and blend until smooth.

Citronette

  1. Add all ingredients except the oil in a blender and blend until smooth. With the blender running, start adding the oil slowly with a thin stream until all incorporated.

Pickled Coix Seed

  1. Add all ingredients in a pot and bring to a simmer for 20 minutes until fully cooked through. Strain and cool in ice water.

Jicama Relish

  1. Toss all ingredients together in a bowl, place in the refrigerator and allow to sit and marinate for an hour.

Bread-and-Butter-Cucumber

  1. Put the cucumber in a jar and bring the remaining ingredients to a boil and allow to cool before pouring over the cucumber. Allow to sit for a few hours before using – the longer the better.

To assemble: 

  1. Take out watermelon steaks and allow to dry on paper towels to remove any liquid. Put a spoonful of mint labneh in the middle of the plate and form a circle, then place the watermelon in the middle of the labneh and top with the sesame seeds. Cover the top of the steak with a thin layer of the jicama relish, and top with some crumbled feta and three watermelon radishes.
  2. Mix a salad with shaved fennel, frisee, and dress with citronette, and build over the steak. Garnish with shaved jalapeño, bread-and-butter cucumber, tomato, grapefruit, and torn mint leaf. Drizzle olive oil over the entire dish and serve.

Story by Maggie Weaver
Photography by Dave Bryce
Food Styling by Veda Sankaran
Prop Styling by Keith Recker
Recipe by Chef Steve Paul
Wallpaper: Guermantes by Manuel Canovas, Courtesy of Cowtan & Tout

Subscribe to TABLE Magazine‘s print edition.

Baba Ghanouj

0
An above shot of a turquoise bowl filled with Baba Ghanouj.

Eggplant is one of my favorites. Growing up, my mom prepared it in rice dishes—cubed, fried, and then cooked in with the rice, or cut into thick rounds and layered at the bottom of the pot below the rice. It seemed to be everywhere, but I never tired of it. It was in the moussaka, maqlooba, and especially in baba ghanouj. This smoky, creamy baba ghanouj recipe remains a staple in my kitchen. Sometimes we’d enjoy eggplant simply fried and served with pita, fresh vegetables, and hummus. But probably my all-time favorite is maqdoos: pickled baby aubergines stuffed with walnuts and garlic. My grandmother made these, and I hope to master them someday too.

Print
clock clock iconcutlery cutlery iconflag flag iconfolder folder iconinstagram instagram iconpinterest pinterest iconfacebook facebook iconprint print iconsquares squares iconheart heart iconheart solid heart solid icon
An above shot of a turquoise bowl filled with Baba Ghanouj.

Baba Ghanouj


  • Author: Omar Abuhejleh

Description

This smoky, creamy baba ghanouj recipe remains a staple in my kitchen.


Ingredients

  • Eggplants
  • Applewood chips, for smoking
  • Fresh lemon juice, about 2 tbsp per eggplant
  • Minced garlic, around 3 cloves per eggplant
  • Salt, about 1/4 tsp per eggplant
  • Small amount of tahini, 2 tsp per eggplant
  • Dash of cayenne and/or cumin (optional)


Instructions

  1. Start by roasting the eggplant in the oven. Simply rinse them, poke a few holes in each, and bake at 375 degrees for around 45 minutes or until they are soft to the touch. Remember to poke holes in the eggplants, otherwise there is a very good chance that the eggplants will explode in the oven, or worse, explode when you go to handle them. This has happened to me, so please be careful!
  2. Another thing to remember is when checking the eggplant for being done, examine the part of eggplant closest to the stem, as this is the toughest area, but also has some of the best pulp when baked thoroughly.
  3. After baking, let eggplant cool for about 20 minutes. Then slice eggplant lengthwise and use a spoon to scoop out the pulp (including the seeds). Then smoke eggplant pulp over applewood chips for around 30 minutes. Use a small amount of chips, as a little goes a long way here.
  4. You can do this, as B52 does, on a stovetop. Use a covered perforated pan insert, like a steamer basket and pot, and position the pulp on one side of the insert so the drippings do not extinguish the chips below. You can make an aluminum-foil basket to hold the chips in your pot, which should sit on the bottom of the pot directly over the heat. (Obviously be careful here – please do not start a bonfire on your stovetop).
  5. The next step is to chop the eggplant pulp on a cutting board. It’s super important to do this by hand, otherwise the texture will not be right. You want it to remain a bit chunky. After chopping, add the remaining ingredients.

Story by Maggie Weaver
Photography by Dave Bryce
Food Styling by Veda Sankaran
Prop Styling by Keith Recker
Recipe by Chef Steve Paul
Wallpaper: Guermantes by Manuel Canovas, Courtesy of Cowtan & Tout

Subscribe to TABLE Magazine‘s print edition.

Vietnamese-Style Chicken Wings

0
An above shot of a baking sheet filled with Vietnamese Chicken Wings.

These Vietnamese-style chicken wings are a mouthwatering balance of sweet, salty, and tangy, with layers of flavor that build from an overnight marinade. Infused with fish sauce, brown sugar, garlic, lemongrass, and ginger, the wings emerge from the oven with a glossy, caramelized coating and irresistible aroma. A final squeeze of fresh lime and sprinkle of cilantro brighten each bite, while an optional dipping sauce—packed with chili heat and umami depth—brings even more complexity to the table. Perfect for game day, dinner parties, or casual snacking, these wings deliver bold Southeast Asian flavor with minimal fuss.

What Makes Something Vietnamese-Style?

When you see Vietnamese-style on a recipe, think bold, aromatic, and balanced. It usually signals a dish built around the signature flavors of Vietnamese cooking—salty fish sauce, sweet caramelized sugar, bright citrus (like lime), fresh herbs, and a little heat from chili. It’s not just about one note, but the interplay between them: savory meets sweet, spicy meets sour. Techniques like marinating meat with lemongrass, garlic, and ginger, then roasting or grilling to lock in flavor, are also hallmarks.

Print
clock clock iconcutlery cutlery iconflag flag iconfolder folder iconinstagram instagram iconpinterest pinterest iconfacebook facebook iconprint print iconsquares squares iconheart heart iconheart solid heart solid icon
An above shot of a baking sheet filled with Vietnamese Chicken Wings.

Vietnamese Chicken Wings


Description

Sticky, Savory, and Full of Zing


Ingredients

Scale
  • 2 pounds small to medium chicken wings
  • 2 whole limes quartered for marinade and serving
  • ½ cup fish sauce
  • ½ cup brown sugar
  • 2 garlic cloves minced
  • 1 ½ tsp grated ginger
  • 1 tbsp finely chopped lemongrass
  • 1 tbsp chopped cilantro for serving

Dipping Sauce (optional)

  • 1/4 cup fish sauce
  • 2 tbsp brown sugar
  • 1 tbsp Thai pepper or other small pepper
  • 1 lime, juiced
  • 1 cup water
  • 2 spring onions chopped
  • 1 tsp sesame seeds


Instructions

  1. Combine fish sauce, brown sugar, garlic, ginger, juice from one lime, and lemongrass in a bowl. Add chicken wings and evenly coat marinade over all the wings. Cover and marinate overnight in the refrigerator. Reserve some marinade for basting during cooking.
  2. Preheat the oven to 400F and place chicken wings and on a baking sheet in a single layer and bake for 40 minutes. Town and baste midway with marinade.
  3. Add fresh lime juice and cilantro before serving warm.

Dipping Sauce (optional)

  1. Add all ingredients to a saucepan. Reduce liquid until slightly thickened (five minutes) Serve.

Subscribe to TABLE Magazine‘s print edition.

Pumpkin Blondies

0
A baking pan of pumpkin blondies with a square slice topped with cream cheese frosting and chocolate shavings on a small plate.

The Pie Place owners, Jess Gombar and Julie Accamando, love to work fresh and local ingredients into their menu, often in unique combinations. Their sublime Pumpkin Blondies made their way to TABLE Magazine’s photo studio recently and was a crowd favorite. Not a crumb was left. Nor a drop of icing. Or a molecule of chocolate shavings. Visit them in Upper Saint Clair to pick up a dozen, or make them at home with the recipe they generously share.

Have a Perfectly Pumpkin Fall with These Recipes

Baked Baby Pumpkins

Pumpkin Cheesecake with Gingersnap Crust

Martha Stewart-Inspired Five Spice Pumpkin Pie

Print
clock clock iconcutlery cutlery iconflag flag iconfolder folder iconinstagram instagram iconpinterest pinterest iconfacebook facebook iconprint print iconsquares squares iconheart heart iconheart solid heart solid icon
A baking pan of pumpkin blondies with a square slice topped with cream cheese frosting and chocolate shavings on a small plate.

Pumpkin Blondies


  • Author: The Pie Place

Description

Soft and spiced pumpkin blondies loaded with chocolate chips, topped with creamy frosting and a drizzle of melted chocolate for a sweet autumn treat.


Ingredients

Scale

For the pumpkin blondies:

  • ¾ cup butter, softened
  • 1 ½ cups brown sugar
  • 2 eggs
  • 1 ½ tsp vanilla
  • 1 heaping cup pumpkin (we use Libby’s)
  • 1 ½ cups flour
  • 1 ½ tsp baking powder
  • 1 ½ tsp cinnamon
  • 1 ½ tsp nutmeg
  • ½ tsp salt
  • 2 cups chocolate chips

For the cream cheese frosting:

  • ½ cup softened (not melted) butter
  • 8 oz cream cheese
  • 1 tsp vanilla
  • 34 cups confectioners sugar


Instructions

For the pumpkin blondies:

  1. Beat all the wet ingredients in a mixer with the paddle attachment. Once the wet ingredients are combined, add in all of the dry ingredients, adding in the chocolate chips last.
  2. Pour into a greased 9×13 baking pan.
  3. Bake at 350º for 25+ minutes, or until a toothpick comes out clean.
  4. Cool and ice with cream cheese frosting (see below) and drizzle with melted chocolate.

For the cream cheese frosting:

  1. Mix cream cheese and the softened butter in a mixer with the paddle attachment until well incorporated. Add in the vanilla.
  2. Slowly add in the powdered sugar, a little at a time, until the desired consistency is reached.

Recipe by The Pie Place Owners, Jess Gombar and Julie Accamando
Styling by Ana Kelly
Photography by Adam Milliron
Plates by Emmanuelle Wambach

Subscribe to TABLE Magazine’s print edition.

Create a free account, or log in.

Gain access to read this content, plus limited free content.

Yes! I would like to receive new content and updates.

Table Magazine wants to know your location.

TABLE Magazine operates regional sites - Knowing your location helps us route you to the appropriate site for the best experience.