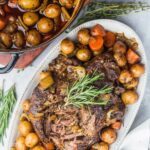
Home Blog Page 42

North African Shakshouka

0
A plate of North African shakshouka staged with crusty bread.

This North African dish builds layers of vegetable flavors into a bright and spicy ragout. Once those flavors are balanced, crack an egg right into the pot, allowing it to poach in that full-bodied sauce. “Turkey eggs give the shakshouka a richness that melds together with the fiery and tangy flavor,” says chef Jessica Lewis. “It’s hearty and healthy, especially important after all those heavy casseroles you felt obligated to try during holiday season!” PS: Chicken eggs work just fine, too.

About Shakshouka

Sometimes spelled as shakshuka, this combination of tomatoes, eggs, and spices is a staple all around the Middle East. The dish is believed to have originated in North Africa, particularly in areas like Tunisia and Libya, in the mid-16th century. Jewish communities in North Africa then brought it to other countries after migration. It was a welcome addition to the culinary offerings of their new home countries!

Print
clock clock iconcutlery cutlery iconflag flag iconfolder folder iconinstagram instagram iconpinterest pinterest iconfacebook facebook iconprint print iconsquares squares iconheart heart iconheart solid heart solid icon
A plate of North African shakshouka staged with crusty bread.

North African Shakshouka


  • Author: Jessica Lewis

Description

An easy to make and delicious dish.


Ingredients

Scale
  • 1 fresh tomato
  • 1 cup  celery, medium diced
  • 1 cup leeks, thinly slices (white bottoms only)
  • 1 cup fennel, thinly sliced
  • 1 cup carrots, medium diced (or any seasonal vegetable)
  • 1 quart red bell peppers, charred, fire-roasted, and de-seeded
  • 2 cups poblano peppers, charred, fire-roasted, and de-seeded
  • Salt & black pepper, to taste
  • 1 quart canned San Marzano tomatoes
  • 1 quart vegetable stock (medium light in color)
  • Big pinch cumin
  • Big pinch paprika
  • Small pinch chili powder
  • Medium pinch ground fennel
  • Medium pinch ground coriander
  • Small pinch chili flakes
  • 4 tablespoons garlic, sliced
  • 1/2 cup white wine
  • 6 Turkey eggs (or chicken eggs!)

Instructions

  1. Preheat oven to 400 degrees.
  2. Sweat raw vegetables, and add in peppers. Season with salt and pepper. Mix in canned tomatoes. Add vegetable stock. Add all spices, and taste. Add more as necessary. Bring to boil. Simmer for one hour.
  3. Once the ragout is awesome in every way, ladle into a cast iron, about halfway or 3/4 way up the side of the pan. Crack in eggs. Bake for about 5 minutes, or until eggs are cooked to desired wellness.

Recipe by Jessica Lewis
Photography by Dave Bryce

Subscribe to TABLE Magazine‘s print edition.

Celebrate Spring With These Pea Recipes

0
A white plate holds a pea puree bruschetta with smoked salmon on top as a green plate off to the side holds a small bowl of the pea purree.

Sugar snaps, snow peas, English peas popped from their pods — these little green wonders confirm that spring finally has sprung. Celebrate the season with these fresh ideas for pea recipes from multiple James Beard Award-winning cookbook author Cheryl Alters Jamison.

Celebrate Spring With These Pea Recipes

Chilled Pea Soup with Mint

A white bowl holds a Chilled Pea Soup with radish and mint garnishes as a bowl of peas sits off to the right.

Cool soups usher in the warm months ahead. The mint accent mates well with peas, even as it reinforces the soup’s striking emerald color. A perfect prepare-ahead starter for spring lunch or dinner.

Bruschetta with Crushed Peas and Smoked Salmon

A white plate holds a pea puree bruschetta with smoked salmon on top as a green plate off to the side holds a small bowl of the pea purree.

Here’s a lovely little tidbit dressed in green, pink, and white. The hints of dill, lemon, and olive oil really elevate the peas without masking their simple sweetness. The smoked salmon adds a delicious counterpoint to this easy-to-make dish. If you pair these bruschetta with Gruet’s sparkling Brut Rosé and a fresh farmer’s market salad, you have a lovely warm weather dinner.

Pea Salad with Greens, Strawberries, and Mint Vinaigrette

A giant platter of pea salad with strawberries, pickled veggies, and peas sits on a table beside a small bowl of dressing and a blue plate with vegetables on it.

This salad’s a toss-up of bright tastes and textures. Some of the vegetables — the peas in pods, in particular — get a light pickling, which adds more interest to the final sweet and savory dish. Should some diced carrot, zucchini, or bell pepper make their way into the pickling … you may find some bespoke nuances you’ll want to keep in your pocket for future occasions.

Green Goddess Pea, Bacon, and Cheddar Salad

A white bowl holds butter lettuce leaves with plenty of peas, cheddar cheese, and bacon. Off to the bottom right corner sits a bowl of green goddess dressing.

Here’s a hearty salad that makes a great side with the season’s first grilled steaks, chicken, or burgers. This updates an American classic, which typically tosses the vegetable mixture with mayonnaise and not much else. Substituting an herb-filled green goddess dressing heralds spring and adds more flavor nuances to the salad.

Pasta Primavera

In a large steel pot sits a Pea Pasta Primavera with peas and other ingredients surrounding the pot on a white table.

Manhattan’s legendary Le Cirque restaurant invented this dish back in the mid-1970s. It’s refreshingly retro, both elegant and easy to assemble, at least after you lightly cook the vegetables, which can be done ahead. A chilled Viognier or Sancerre would pair well with this delicious pasta. Invite some friends over.

Story and Recipes by Cheryl Alters Jamison
Food Styling by Keith Recker
Photography by Tira Howard

Subscribe to TABLE Magazine’s print edition.

All Hearts Cocktail

0
Glasses of a red cocktail garnished with a blood orange slice, surrounded by strawberries, oranges, and mandarin orange slices on a white surface.

What makes a cocktail as delicious as the heart you put into making it? Your choice of vodka has a lot to do with it. “I only use the heart of each run of Boyd & Blair. The flavor from the hearts is delicious and super-concentrated, but the tails smell like a musty dishrag and provide the bite that is experienced when drinking certain vodkas. Most distillers include some amount of tails in an effort to produce more yield. The amount of tails that are added to the final product greatly impact the final flavor profile. I never include any tails in Boyd & Blair, only the hearts.” – Barry Young, co-founder and Master Distiller of Pennsylvania Pure Distilleries.

All Hearts Cocktail Recipe

Print
clock clock iconcutlery cutlery iconflag flag iconfolder folder iconinstagram instagram iconpinterest pinterest iconfacebook facebook iconprint print iconsquares squares iconheart heart iconheart solid heart solid icon
Glasses of a red cocktail garnished with a blood orange slice, surrounded by strawberries, oranges, and mandarin orange slices on a white surface.

All Hearts Cocktail


  • Author: Justin Matase

Description

This bright and refreshing drink combines Boyd & Blair vodka, strawberry puree, and lemon juice, shaken with ice and topped with bubbly Prosecco. Smooth and fruit‑forward, it highlights the pure “hearts” of the vodka for a clean, elegant flavor.


Ingredients

Scale
  • 1 oz Boyd & Blair vodka
  • 1 oz strawberry puree
  • 1/2 oz lemon juice
  • Prosecco

Instructions

  1. Mix Boyd & Blair, strawberry puree, and lemon juice in a cocktail shaker filled with ice and shake well.
  2. Strain into a champagne flute and top with Prosecco.

Recipe by Justin Matase
Photography by Dave Bryce

Subscribe to TABLE Magazine’s print edition.

Creole Poisson Gros Sel

0
A plate of poisson gros sel on a white background.

 A well-loved Haitian family dish prepared in a Creole court-bouillon-style sauce, poisson gros sel is a show-stopping alternative to the traditional Friday fish fry. Thanks to Chef Claudy Pierre for sharing this delicious recipe with TABLE Magazine.

What Does Poisson Gros Sel Mean?

Since this is a dish for the Lenten season, it’s fish, the traditional Friday food. But the literal translation of the name is “fish with big salt.” However, this fish is not actually very salty, and you’ll notice the ingredient list barely features salt at all. The “big salt” is rock salt, common on island beaches. You only need a tablespoon of it, because it goes far. Plus, this dish gets many of its aromatic flavors from the court-bouillon broth it cooks in. For another Haitian recipe, try our Haitian Pork Griot.

Print
clock clock iconcutlery cutlery iconflag flag iconfolder folder iconinstagram instagram iconpinterest pinterest iconfacebook facebook iconprint print iconsquares squares iconheart heart iconheart solid heart solid icon
A plate of poisson gros sel on a white background.

Creole Poisson Gros Sel


  • Author: Claudy Pierre

Description

A dish celebrating the bounty of the sea.


Ingredients

Scale
  • 3 whole marinated red snappers
  • 3 limes
  • 1 large onion
  • 2 scallions, chopped
  • 3 garlic cloves, minced
  • ½ tbsp chopped parsley
  • ¼ tsp black pepper
  • ¼ teaspoon hot pepper
  • 1 tsp of sea salt or fleur de del
  • 1 to 2 tbsp olive oil
  • Fish broth or stock
  • 2 heads of garlic, chopped
  • 1 cup onions, sliced
  • 1/2 cup tomato paste
  • 2 Scotch bonnet peppers
  • 4 thyme sprigs
  • 1 cup bell peppers, sliced
  • 1 cup oil
  • 2 tbsp unsalted butter
  • 2 whole cloves
  • 1 cup water
  • Squeeze of lime, to taste

Instructions

  1. For the fish, remove fish scales and clean with lime. Score the fish diagonally 3 times on both sides. Blend the next 8 ingredients into a paste and add it to the fish. Refrigerate and marinate overnight.
  2. The next day, heat oil on low and cook snapper 5 to 7 minutes per side and set aside.
  3. To a medium saucepan add liquid from marinated fish and excess marinade from the bowl. Pour fish broth or stock into the bowl to get the rest of the marinade and pour that into the pan as well. Sauté garlic and onions until soft then set aside.
  4. For the sauce, add tomato paste, Scotch bonnet peppers, thyme, bell peppers, oil, and butter. Mix, cover, and cook for about 15 minutes on a medium to low flame.
  5. After 15 minutes, spoon sauce all over and inside the fish. Add cloves, sautéed garlic and onions, mix and then cover for another 5 minutes. Serve over rice with a squeeze of lime.

Recipe by Claudy Pierre
Styling by Rafe Vencio
Photography by Dave Bryce

Subscribe to TABLE Magazine’s print edition.

Haitian Cremas, a Drink for Special Occasions

0
A glass of cremas with anise and a cinnamon stick in it.

When you think of cremas think “creamy,” “family,” “laughs,” “spices,” and “alcohol.” This Haitian version of egg nog or coquito is rich and delightful, and easy to make, often shared with family and friends during the holiday season. However, you can make it for any special occasion

The History of Haitian Cremas

Cremas most likely emerged around Haitian independence in 1804, though no one person is named as its original inventor. There’s a particular style of rum popular in Haiti, clairin, that’s best for cremas. Clairin uses local cane sugar in its distillation process, mixing well with the citrus and spices in cremas. Some say the secret to cremas is lime juice and lemon juice to thicken it and balance out the flavors. Cremas joins the pantheon of celebratory drinks from around the world like coquito, eggnog, and mulled wine as something to bring heart and spirit to the holidays.

Print
clock clock iconcutlery cutlery iconflag flag iconfolder folder iconinstagram instagram iconpinterest pinterest iconfacebook facebook iconprint print iconsquares squares iconheart heart iconheart solid heart solid icon
A glass of cremas with anise and a cinnamon stick in it.

Haitian Cremas, a Drink for Special Occasions


  • Author: Claudy Pierre

Description

A Haitian holiday drink to celebrate family.


Ingredients

Scale
  • 2 cans evaporated milk
  • 4 cans sweetened condensed milk
  • 2 cans cream of coconut
  • 2 tsp vanilla extract
  • 2 tsp almond extract
  • 2 tsp star anise extract
  • 2 tsp cinnamon
  • 2 tsp grated nutmeg
  • 2 tsp limejuice
  • 2 cups rum, such as Barbancourt

Instructions

  1. Add the milks and cream of coconut in a large bowl then mix thoroughly. Add vanilla, almond, and star anise extracts, then cinnamon and nutmeg to the mixture. Add the limejuice. Add the dark rum and mix thoroughly.
  2. Allow cremas to sit for 2 to 3 minutes and then use a funnel to pour the mixture into bottles. Now it’s ready to serve at room temperature or chilled – drink up!

Recipe by Claudy Pierre
Photography by Jacqueline Moss

Subscribe to TABLE Magazine‘s print edition.

19th Century Cocktail

0
A 19th century cocktail with bourbon and lillet rouge.

New York-based mixologist Brian Miller riffs on the gin-based 20th Century by using bourbon instead of gin and Lillet Rouge instead of Lillet Blanc. This ruby toned cocktail is a bourbon-gem.

What Makes This Cocktail 19th Century?

Use of the term “bourbon” as a specific type of whiskey began to gain recognition in the 19th century. While it was likely being produced in the late 18th century, it wasn’t until the 1800s that bourbon became associated with a specific style of whiskey, particularly in Kentucky. Gin overtook bourbon by the time the roaring ’20s came around, but for a time, it represented American drinking culture, particularly in the South and West. It became a drink of choice because of its growing availability and popularity. But you can still toast to the past with this 19th century cocktail.

Print
clock clock iconcutlery cutlery iconflag flag iconfolder folder iconinstagram instagram iconpinterest pinterest iconfacebook facebook iconprint print iconsquares squares iconheart heart iconheart solid heart solid icon
A 19th century cocktail with bourbon and lillet rouge.

19th Century Cocktail


  • Author: Emma Riva

Description

A throwback cocktail…for way back.


Ingredients

Scale
  • ¾ oz lemon juice
  • ¾ oz Marie Brizard white crème de cacao
  • ¾ oz lillet rouge
  • 1 ½ oz Woodford Reserve bourbon A t

Instructions

  1. Shake and strain into a coupe
  2. Garnish with an orange peel or slice

Recipe by Brian Miller
Photography by Michael Markland

Subscribe to TABLE Magazine’s print edition.

Haitian Pikliz

0
A plate of Haitian pikliz on a wooden table.

Every Haitian home has a jar or two of pikliz, a spicy pickled slaw, in the fridge. It’s great as a garnish, particularly with grilled meats, gifting your plate with a wake up kick to the tastebuds. Chef Claudy Pierre’s version is phenomenal with any meat during any season of the year.

Where Does The Name Pikliz Come From?

Pikliz gets its name from piquer, a French word that means “to sting,” alluding to its kick of spice and bitterness from the fermentation. The taste of Haitian Pikliz is similar to kimchi or other fermented cabbages, and you can serve it as a side dish with Haitian Pork Griot.

Print
clock clock iconcutlery cutlery iconflag flag iconfolder folder iconinstagram instagram iconpinterest pinterest iconfacebook facebook iconprint print iconsquares squares iconheart heart iconheart solid heart solid icon
A plate of Haitian pikliz on a wooden table.

Haitian Pikliz


  • Author: Claudy Pierre

Description

A staple of Haitian cuisine.


Ingredients

Scale
  • 2 cups cabbage, shredded
  • 1 cup carrot, grated
  • 1 bell pepper, sliced
  • 1 onion, sliced
  • 3 scallions, sliced
  • 1 shallot, sliced
  • Scotch bonnet pepper, divided
  • Salt, to taste
  • Pepper, to taste
  • 2 cups white wine vinegar

Instructions

  1. Combine the shredded cabbage, grated carrot, 1 sliced bell pepper, 1 sliced onion, 3 sliced scallions, 1 sliced shallot, and 2 sliced Scotch bonnets in a large bowl. Add the salt and freshly cracked black pepper.
  2. Put on gloves, and thoroughly mix using your hands. Pack down the pikliz into sterilized mason jars. Cover with the white wine vinegar. Put on the lid and store in the refrigerator for at least 12 hours to marinate.

Recipe by Claudy Pierre
Photography by Jacqueline Moss

Subscribe to TABLE Magazine‘s print edition.

Ricotta Vegetarian Meatballs

0
A bunch of ricotta vegetarian meatballs sit in a cast iron pan, soaked in re sauce with basil garnish on top.

Ricotta Vegetarian “Meatballs” seem to have originated in the Southern region of Calabria, where it is very easy to find excellent ricotta from both cows and sheep. This dish is part of traditional peasant cuisine; it is made with very simple ingredients but with lots of flavor. For excellent results, use the best, freshest ricotta cheese you can find. After you make these meatballs and their matching homemade tomato sauce, throw in your favorite pasta and then congratulate yourself on a thoughtful dinner.

What Replaces the Meat in These Vegetarian Meatballs?

We know what you’re thinking. How on Earth can you make a meatball without the main ingredient? Believe it or not our Vegetarian Meatballs use the ingredient of ricotta to make these delectable bites. The combination of ricotta cheese along with stale bread, eggs, and parmesan cheese makes a dough that you can form into balls. After formation, you can cook this dough in a pan along with the homemade tomato sauce. The end product actually ends up looking a lot like regular meatballs. The taste complements any dish it’s served alongside. Perhaps you’ll take an adventure with Stanley Tucci and prepare a sauce inspired by his Maria Rosa Tomato Sauce.

Print
clock clock iconcutlery cutlery iconflag flag iconfolder folder iconinstagram instagram iconpinterest pinterest iconfacebook facebook iconprint print iconsquares squares iconheart heart iconheart solid heart solid icon
A bunch of ricotta vegetarian meatballs sit in a cast iron pan, soaked in re sauce with basil garnish on top as the pan is surrounded by pasta, a bowl of the meatballs, and bread.

Ricotta Vegetarian Meatballs


  • Author: Sara Ghedina

Description

Vegetarian meatballs are just as good as the real thing.


Ingredients

Scale

For the “meatballs”: 

  • 1 and 3/4 cup ricotta cheese
  • 4 cups stale bread, crust removed, cut in chunks
  • 2 medium eggs
  • 1 garlic clove
  • 1 tbsp minced parsley
  • 23 tbsp freshly grated Parmesan cheese
  • Salt and pepper to taste

For the tomato sauce: 

  • 2 cans whole peeled tomatoes
  • 2 tbsp olive oil
  • 23 garlic cloves
  • 34 fresh basil leaves
  • Salt and pepper to taste

Instructions

  1. Strain ricotta overnight to remove excess liquid.
  2. The next day, place it in a large bowl along with bread, minced garlic, parsley and Parmesan cheese.
  3. Lightly beat the eggs with a fork and add them to the mixture.
  4. Season with salt and pepper, and mix well until everything is incorporated and you get a smooth and lightly sticky dough. If the mixture is too wet, add a bit of breadcrumbs or flour.
  5. Take some of the dough and, using your hands, form 2-inch balls, a little larger than the size of a golf ball. Lightly roll them in your palm to smooth them out a little. You should get around 14-16 of them.
  6. Place the “meatballs” on a tray dusted with flour while you make the sauce.
  7. In a large pan, heat the olive oil with the peeled garlic cloves and gently crush them with a spoon to release the flavor.
  8. Cook for 2-3 minutes, then, using a food mill, purée the canned tomatoes and pour them into the pan.
  9. Season with salt and pepper, remove the garlic cloves and add the basil leaves.
  10. Bring the sauce to simmer and cook it on low heat for few minutes, then gently add the ricotta balls, distributing them evenly in the pan. Cover with a lid and cook for about 10 minutes.
  11. Serve the ricotta balls while hot, with plenty of sauce on top. Make sure to have lots of bread available to scoop up the sauce!

Recipe, Story, Styling, and Photography by Sara Ghedina

Subscribe to TABLE Magazine’s print edition.

Scarpaccia (Italian Zucchini Tart)

0
A lower angle of square slices of Scarpaccia with a knife near the bottom and olive oil near the top.

Scarpaccia is a typical dish from Camaiore, a small town in the province of Lucca, Tuscany. Part of the traditional cuisine of the area, it was originally made by bread bakers at the end of the day when the oven had been turned off but was still warm.There are many variations of scarpaccia: some use onions or leeks instead of green onions, some add eggs to the batter, and some add zucchini blossoms on top. Either way, remember that the suggested ingredient quantities are only an imprecise starting point, because it all depends on how much water the zucchini will release and on the type of flour you use. For a perfect result, trust your instinct and eyeball everything, just like my grandmother used to do.

What Exactly is Scarpaccia Anyways?

Scarpaccia is a rustic Italian dish that’s great on a budget. It is basically a savory or sweet tart (or flatbread, depending on how you look at it). In its savory form, it often features zucchini as the star ingredient along with eggs, flour, and herbs, resulting in a simple yet flavorful crisp. However, there are also sweet versions, particularly common in Tuscany. These resemble a thin cake or pancake and uses anise or other sweet spices. Either way, the end product is a thin, crunchy, chewy sheet layered with your favorite vegetables or sweet spices on top.

Print
clock clock iconcutlery cutlery iconflag flag iconfolder folder iconinstagram instagram iconpinterest pinterest iconfacebook facebook iconprint print iconsquares squares iconheart heart iconheart solid heart solid icon
A piece of parchment paper sits on a counter top with square slices of Italian Scarpaccia scattered on the paper.

Scarpaccia (Italian Zucchini Tart)


  • Author: Sara Ghedina
  • Yield: Serves 5

Description

Thin, crunchy, and layered in zucchini slices.


Ingredients

Scale
  • 2 lb zucchini
  • 68 zucchini blossoms (optional)
  • 34 spring onions
  • 3/4 cup all-purpose flour
  • 1/2 cup + 1 tbsp chickpea flour
  • 1 cup water or more if needed
  • 6 tbsp olive oil, plus extra to grease the pan
  • 12 tbsp corn flour (polenta)
  • 45 sprigs fresh thyme or other herbs
  • Salt and pepper to taste

Instructions

  1. Slice zucchini and spring onions really thin (for the green onions, use the white and light part only), place them in a large bowl and sprinkle with salt and pepper. Gently mix them by hand, cover with a plate, and place a weight on top. Let sit in the fridge for at least three hours to allow the vegetables to release their water.
  2. Drain and set aside, reserving the liquid. Combine the two flours and add them to the zucchini water, add 4 tbsp olive oil and stir well, adding more water as needed until you have a smooth and runny batter.
  3. Season it with salt, pepper and fresh thyme (or other herbs), and mix well until there are no lumps. Add back the sliced vegetables and mix well.
  4. If you have them, remove and discard the pistil from the zucchini blossoms, cut them in stripes and set aside.
  5. Generously grease a baking tray or roasting pan with olive oil the bottom, pour the batter in, and level it with a spatula. It should be about 1/2 inch thick.
  6. Scatted the zucchini blossom strips (optional) on top. Sprinkle the scarpaccia with 1-2 tbsp corn flour for extra crispiness. Drizzle with 2 tbsp olive oil. Bake at 400° for 30-40 minutes until the scarpaccia is golden brown and crispy on top.
  7. Cut it in squares and serve warm as an appetizer or a light meal along with a side salad and a glass of Verdicchio wine.

Recipe, Story, Styling, and Photography by Sara Ghedina

Subscribe to TABLE Magazine’s print edition.

Pasta with Trapanese Pesto 

0
A round white bowl holds spaghetti pasta with a Trapanese Pesto on top and halved tomatoes throughout. Basil garnish sits on top.

Whenever it comes to adding pesto to your pasta, do you whip up a fresh pesto at home or stop in-store to pick up a jar? Both of these options have their pros and cons but after making our Trapanese Pesto, you may never go back to your original method again. Since this pesto uses almonds and tomatoes, it adds on a light and fresh taste along with extra creaminess from the almonds. After you whip up the pesto, we recommend pairing it with thick spaghetti but you can use whatever type of pasta you prefer.

What is Trapanese Pesto?

Trapanese Pesto is part of the Sicilian gastronomic tradition and it is a variation of the classic Genoese pesto. The recipe was born in the port of Trapani, where Genoese ships coming from the East would stop, introducing Ligurian basil and pine nuts pesto to the locals, who then modified the recipe using almonds and tomatoes, typical of their own land and culinary culture. In Sicily, they use this pesto for busiate, a helix shaped type of pasta, but you can use thick spaghetti instead. Or any kind of pasta, really: you will not be disappointed. 

Print
clock clock iconcutlery cutlery iconflag flag iconfolder folder iconinstagram instagram iconpinterest pinterest iconfacebook facebook iconprint print iconsquares squares iconheart heart iconheart solid heart solid icon
A round white bowl with thick spaghetti inside it featuring halved tomatoes, basil, a Trapanese Pesto and a fork as it sits on a marble countertop.

Pasta with Trapanese Pesto 


  • Author: Sara Ghedina
  • Yield: Serves 4

Description

Ditch the classic Genovese pesto and try this Trapanese type instead for a light and fresh flavor.


Ingredients

Scale
  • 2/3 cup peeled almonds
  • 2 cups cherry tomatoes
  • 2 garlic cloves
  • 30 basil leaves
  • 2 tbsp grated Pecorino cheese
  • 34 tbsp extra-virgin olive oil
  • Salt and pepper to taste
  • 3/4 lb thick spaghetti or pasta of choice

Instructions

  1. Wash cherry tomatoes thoroughly, remove the stem and then, using a sharp knife, cut a shallow X on the bottom of each. Blanch them for a couple of minutes in boiling water, drain, allow to cool off a bit and peel them.
  2. Place tomatoes, almonds, basil, garlic, grated Pecorino cheese and olive oil in a blender. Mix until you get a smooth but still coarse texture. Add salt and pepper to taste, and blend once more. If the pesto is too thick you can add more olive oil or 1-2 tbsp water until you get the right consistency.
  3. Place pesto in a large serving bowl.
  4. Cook spaghetti al dente according to package instructions. Reserve a little cooking water and then drain. Add to the pesto.
  5. Mix to blend the sauce well. If needed, add some reserved pasta cooking water, stirring well to make the dish creamier.
  6. Drizzle with olive oil and garnish with fresh basil leaves. For an extra touch, you could add some sautéed or roasted cherry tomatoes on top. Serve immediately.

Recipe, Story, Styling, and Photography by Sara Ghedina

Subscribe to TABLE Magazine’s print edition.