Home Blog Page 165

6 Recipes for Leftover Easter Eggs

0
A green bowl holds a Green Goddess Egg Salad with dyed eggs to the right of the bowl.

We’ve all been there. It’s the day after Easter and you still have two cartons of leftover hard-boiled Easter eggs in your fridge that you would hate to waste. You could eat each hard boiled egg one by one with salt on top (like you’ve probably been doing for the past weekend). Or, you could invent those eggs into an innovative dish that your family will actually enjoy eating. Think deviled eggs with updated flavors, springtime egg salad, and a few recipes from across the ocean. You’ll be glad the Easter bunny left you with enough eggs to try them all!

6 Recipes for Leftover Easter Eggs

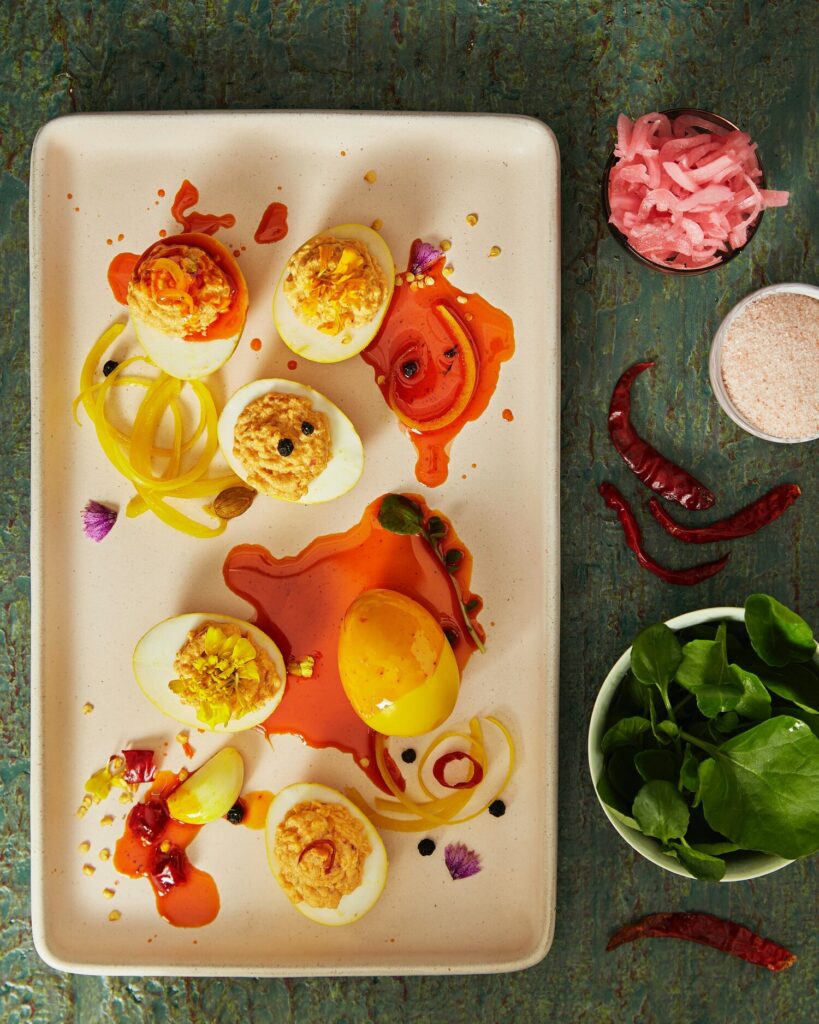
Chicken Tikka Deviled Eggs

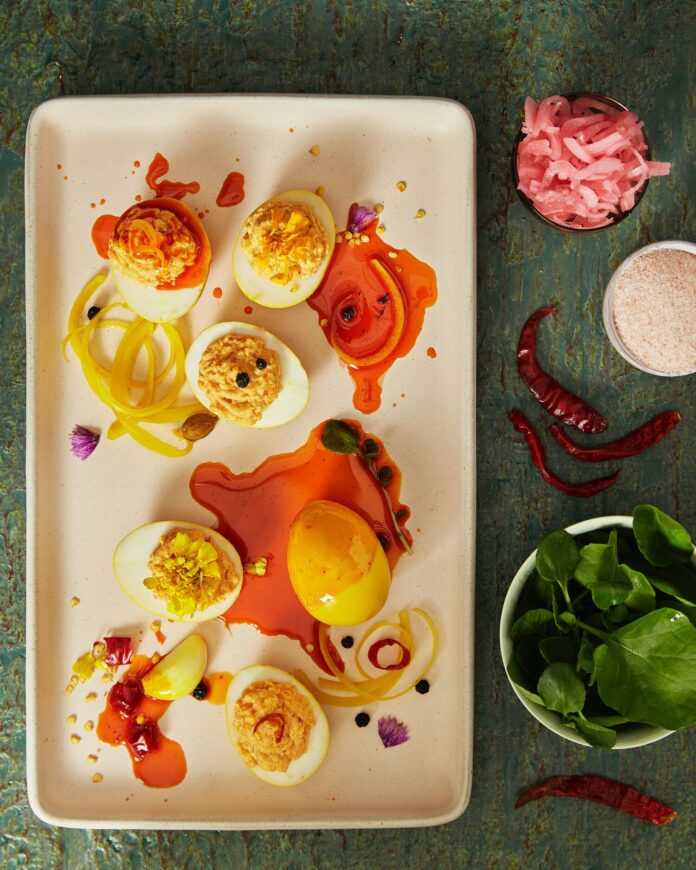
A white plate holds an array of chicken tikka deviled eggs covered in an orange chili oil.

Deviled eggs are a go-to whenever you have leftover hard-boiled eggs, but why opt for the same flavor you always make? Our Chicken Tikka Deviled Eggs are an Indian-fusion of flavors. The eggs are pickled in spiced vinegar before getting drizzled in a homemade chili oil. 

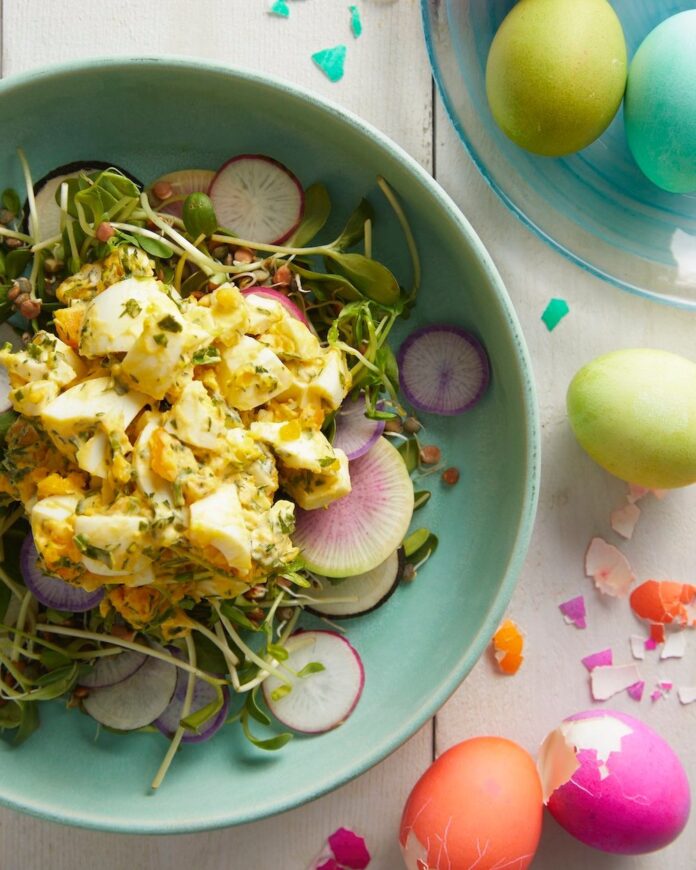
Green Goddess Egg Salad

A green bowl holds a Green Goddess Egg Salad with dyed eggs to the right of the bowl.

Egg salad and springtime go together better than BBQ in the summertime. Try a Green Goddess Egg Salad inspired by the beloved Green Goddess dressing. It’s a fresh take with seasonal ingredients like chives, dill, and parsley from your local farmers market. 

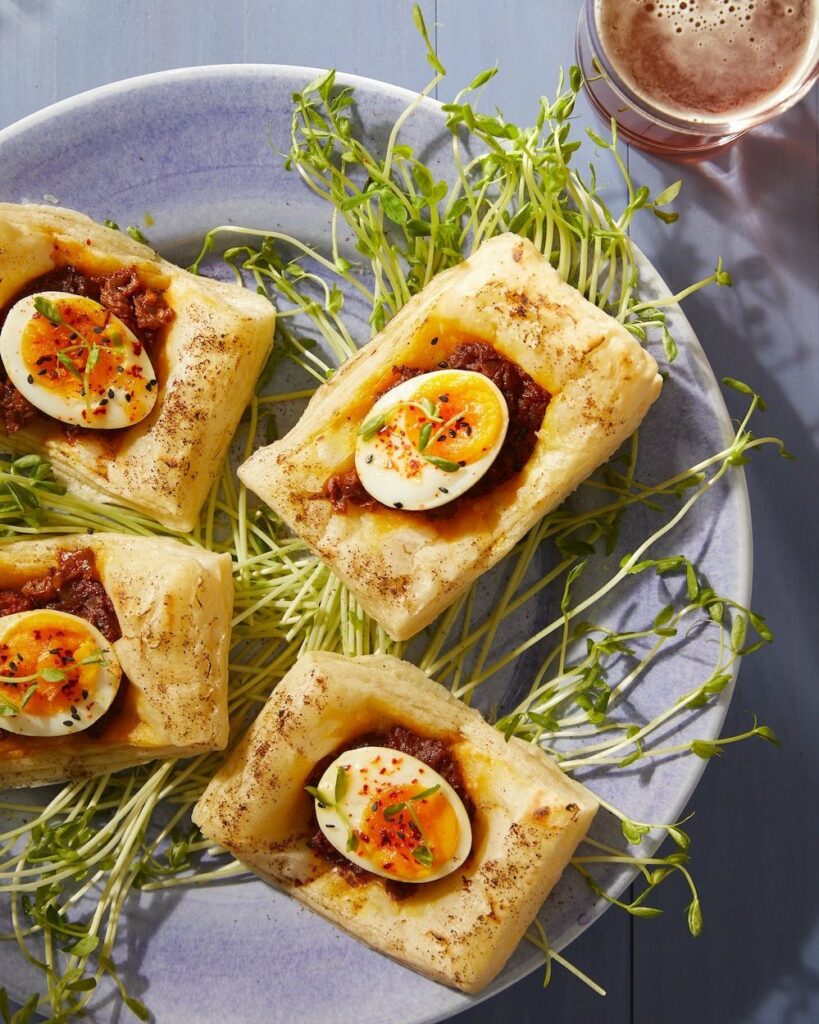
Egg Masala Puffs

An aerial view of four Egg Masala Puffs on a grey plate with micro greens underneath.

Throughout bakeries in India, Egg Masala Puffs line the displays, inviting a bite that’s crispy and tender all at once. Masala spices coat buttery squares of puff pastry which cradle a perfectly cooked egg. Try it for breakfast alongside a hot cup of coffee or chai. 

Deviled Eggs with Caviar

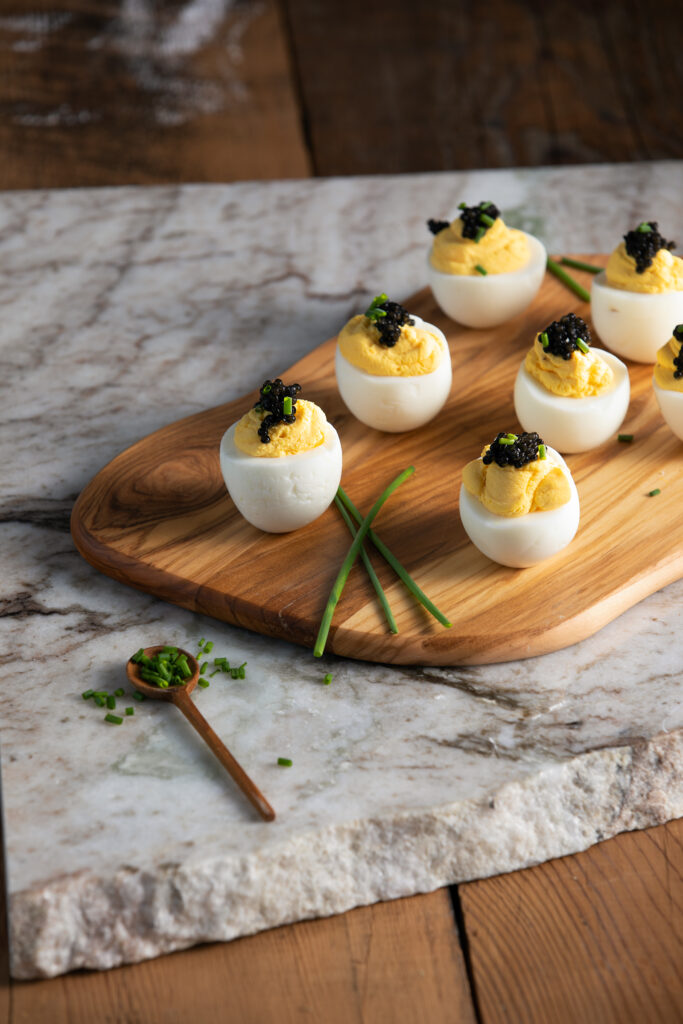
a wooden board on a piece of white and gray marble on a wooden table with six deviled eggs topped with caviar and garnished with chives

Eggs and caviar: minimalist and simple, yet excellent. The caviar adds special nuances of rich, nutty, and salty flavors to a traditional Deviled Egg. Plus, if you’re seeing any family after Easter, these make amazing, elevated hand-held appetizers. 

Chorizo Scotch Eggs with Chimichurri

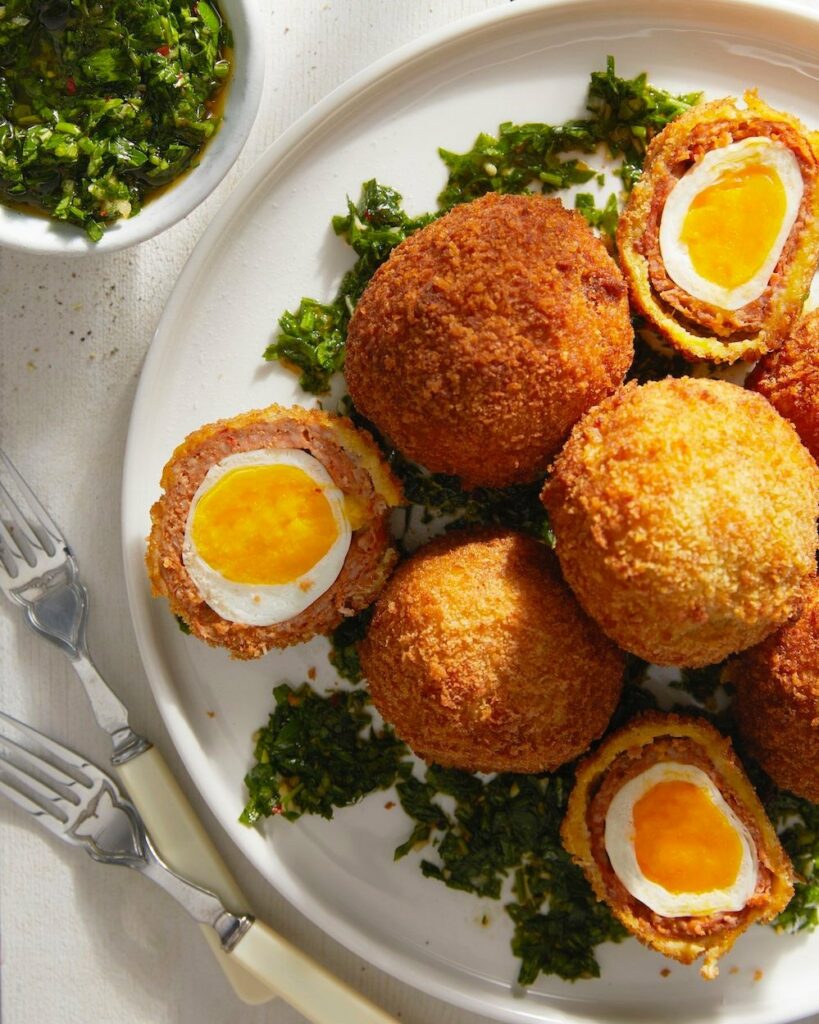
Chorizo Scotch Eggs with Chimichurri sits on a white plate surrounded by greenery.

The elusive scotch egg sounds intimidating, but when broken down, the recipe is easy to follow even for beginner cooks. Our Chorizo Scotch Eggs use a savory bed of chorizo to encase the egg. A homemade Chimichurri accompanies the fried delights for a kick of heat. 

Mother’s Day Deviled Eggs

A woman in a white dress and wide brim hat smiles and leans forward as she sprinkles paprika over deviled eggs.

If nothing else here tickles your egg-fancy, you can’t go wrong with a traditional deviled egg. Our Mother’s Day Deviled Eggs are classic and satisfying with a gorgeous wine pairing. Sink your teeth into the creamy filling of smashed egg yolks, mayo, and palate-pleasing spices inside a firm egg white. 

Story by Kylie Thomas

Subscribe to TABLE Magazine‘s print edition.

Chicken Tikka Deviled Eggs

0
A white plate holds an array of chicken tikka deviled eggs covered in an orange chili oil.

It’s the day after Easter. We are asking ourselves once again what we are going to do with all of the hard boiled eggs in the fridge. TABLE Magazine contributor Veda Sankaran (also known as @jalsabyveda) came up with an answer that you simply have to try. She pickles the eggs first in spiced vinegar. This makes them both beautiful and delicious, and then fills them Indian-inflected magic. The results of these Chicken Tikka Deviled Eggs are simply wonderful!

Where Does Chicken Tikka Come From?

The word “tikka” means bites or pieces in Farsi, and versions of this dish have existed for a very long time. The most popular recipe, chicken tikka masala, potentially has its roots in the United Kingdom. Ali Ahmed Aslam, a Pakistani-Scottish chef in Glasgow, claimed to have sold the first tikka masala as a menu item for British audiences. Trying to figure out who created it originally may be a little bit like trying to find out who created chicken noodle soup. It’s just kind of always been around. But it’s a delicious recipe, and the spices combined in Chicken Tikka Deviled Eggs make for a perfect savory combination.

Print
clock clock iconcutlery cutlery iconflag flag iconfolder folder iconinstagram instagram iconpinterest pinterest iconfacebook facebook iconprint print iconsquares squares iconheart heart iconheart solid heart solid icon
A white plate holds an array of chicken tikka deviled eggs covered in an orange chili oil.

Chicken Tikka Deviled Eggs


  • Author: Veda Sankaran

Description

A spicy Easter delight.


Ingredients

Scale

For the pickled eggs:

  • 12 boiled eggs, peeled
  • 2 cups white vinegar
  • 2 cups water
  • 1 tbsp salt
  • 2 tbsp sugar
  • 1 tbsp black peppercorn
  • 3 Guntur Sannam chilies or other variety of dried Indian chili pepper
  • 1 tbsp whole coriander seeds
  • 1 tsp cardamom pods
  • 3 large bay leaves
  • 1” piece of cinnamon bark
  • 1 tbsp turmeric

For the deviled eggs:

  • 6 pickled eggs, sliced vertically
  • 1 ½ tbsp mayonnaise (I prefer Duke’s)
  • 2 tbsp finely diced shallots
  • 3 tbsps of leftover chicken tikka sauce
  • 4 two inch pieces of leftover chicken tikka, finely minced
  • ¼ tsp brown sugar
  • pinch of salt

For the curry leaf, turmeric, chili oil:

  • 4 tbsp neutral oil, like rice bran, vegetable, or canola
  • 1 tsp Kashmiri chili powder
  • 1 tsp turmeric
  • 6 large curry leaves, finely minced


Instructions

For the pickled eggs:

  1. In a small saucepan, heat the vinegar and water with the sugar and salt. Once it is warm, add in all the spices and simmer for 2 minutes.
  2. Place the boiled eggs in a container that can be tightly sealed, whether that is a glass mason jar or tupperware container that has a tight lid. Make sure whatever you choose, that the eggs have enough room to roll, as you will periodically be gently shaking it to evenly distribute the spices.
  3. Once the pickling liquid has simmered for two minutes, take it off the heat and let cool slightly before pouring it along with all the spices over the eggs. Make sure that the eggs are completely submerged, before sealing the container.
  4. As the spices will settle, especially the turmeric, make sure to carefully swirl the container holding the eggs every day. It’s best to wait at least 3 days before eating the eggs for maximum flavor. The longer they stay in the pickling liquid, the more intense the vinegar flavor, so if you prefer a stronger pickled egg, wait for a few more days before eating.

For the deviled eggs:

  1. Carefully remove the egg yolks from the pickled eggs and flake with a fork until there are no big chunks of yolk. Add the mayonnaise, finely chopped shallots, minced chicken tikka, and the tikka sauce and then combine.
  2. Once everything is combined, add the brown sugar and salt. Taste and if you feel like you would like more tikka sauce or mayo, go ahead. This recipe is a guideline, so feel free to adjust to your preference.
  3. Use a spoon or a piping bag to fill the egg whites with the deviled yolks. Before serving, drizzle with the curry leaf, turmeric, chili oil.

For the curry leaf, turmeric, chili oil:

  1. Warm the oil in a small skillet until it is hot enough to release the flavor of the spices, but not to burn them. Use a food thermometer to make certain the oil does not get hotter than 370 degrees. I prefer my oil to be between 270-300 degrees.
  2. Place the minced curry leaves, Kashmiri chili powder, and turmeric in a heatproof dish. Once the oil is hot enough, pour over the spices and stir. Let sit for at least 15 minutes for the oil to infuse before drizzling over the eggs.

Recipe by Veda Sankaran
Photography by Dave Bryce

Subscribe to TABLE Magazine‘s print edition.

Green Goddess Egg Salad

0
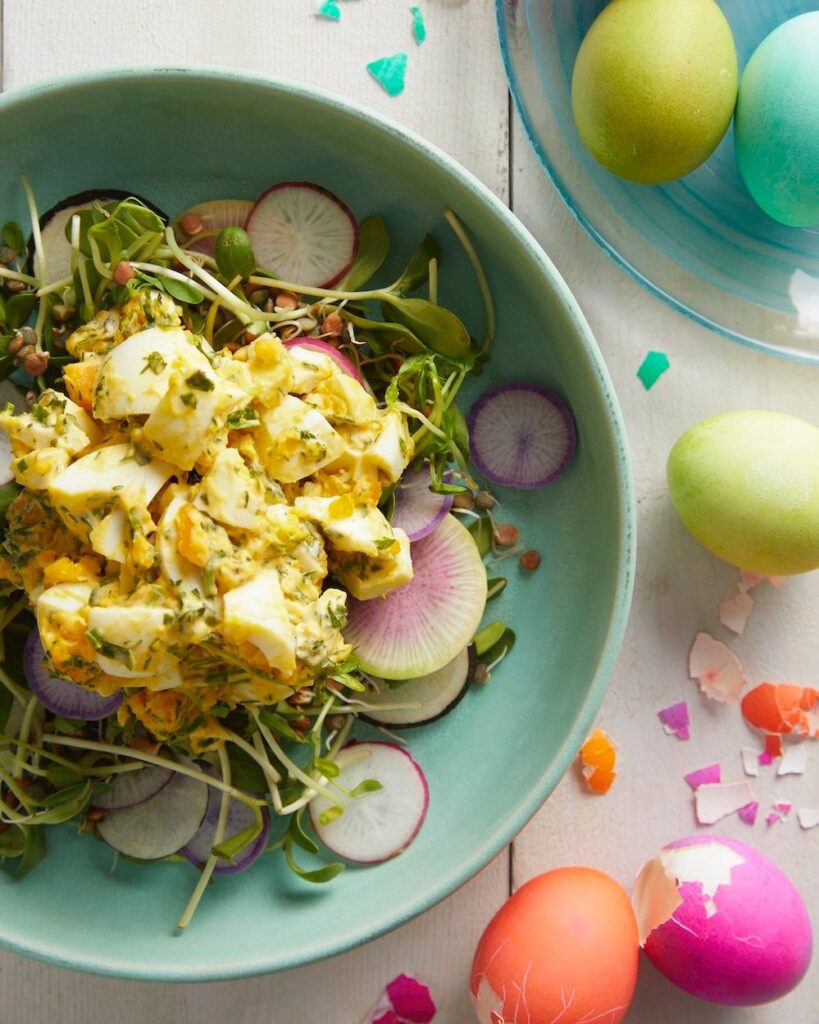
A green bowl holds a Green Goddess Egg Salad with dyed eggs to the right of the bowl.

It’s not officially springtime until egg salad graces your lunch or dinner table. And although you may remember egg salad sandwiches as an afternoon childhood snack, there’s a lot more to this simple yet creamy and delicious dish.

Green Goddess Egg Salad Recipe

INGREDIENTS

6 hard-boiled eggs, peeled
¼ cup mayonnaise
1 tbsp Dijon mustard
1 tsp fresh parsley, chopped
1 tbsp fresh dill, chopped
1 tbsp fresh chives, chopped
Salt and pepper, to taste

INSTRUCTIONS

  1. Rough-chop eggs and place in a bowl.
  2. Mix with other ingredients until herbs are mixed in and the yolks start to mix in with the mayonnaise and Dijon.
  3. Serve on Green Goddess Egg Salad on a bed of sprouts and thinly sliced radishes.

Try another way to use your hard boiled eggs with our Deviled Eggs with Caviar.

Recipe and styling by Anna Franklin ⁠/ Photography by Dave Bryce

A footer photo with a black background and subscribe info and button
Subscribe to TABLE Magazine‘s print edition.

Natural Dye Recipe for Easter Eggs

0
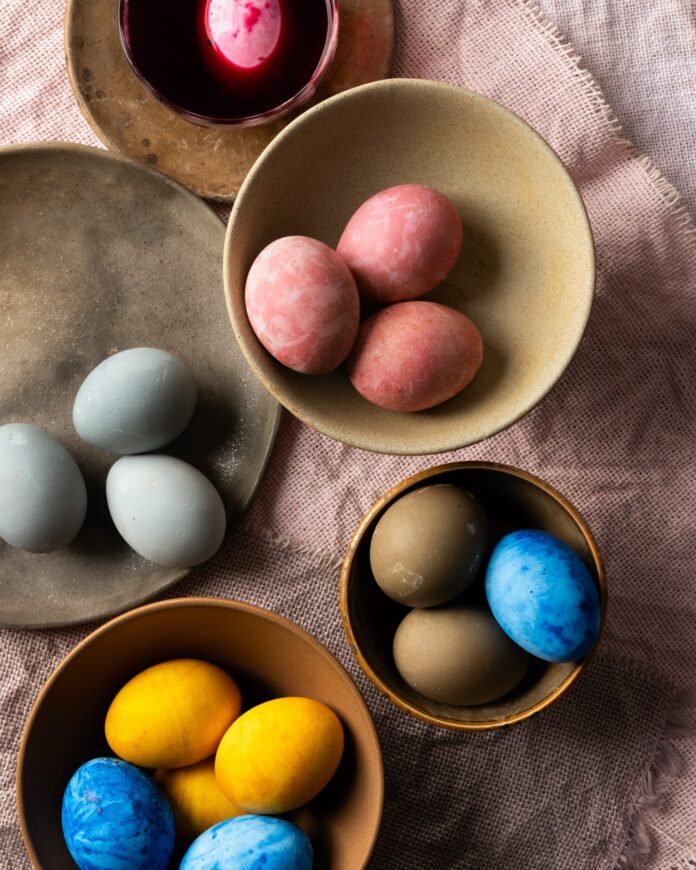
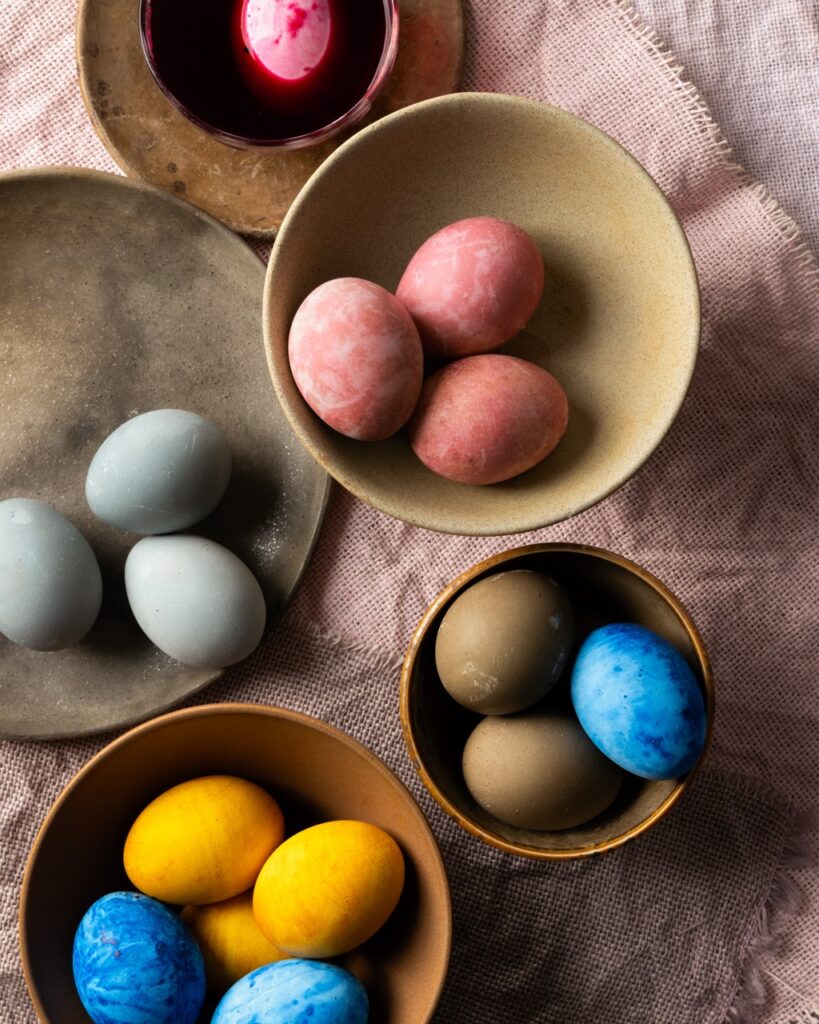
Bowls of dyed Easter eggs in yellow, blue, pink, and grey.

One trip to the grocery store on Friday, and you have what you need to make Easter Sunday naturally beautiful. This Natural Dye Recipe for Easter Eggs project is great for kids, as well as for crafty adults — and making these eggs reminds us that nature provides not just food, but color, too. You might just find yourself saving onion skins in a paper bag for your next craft project.

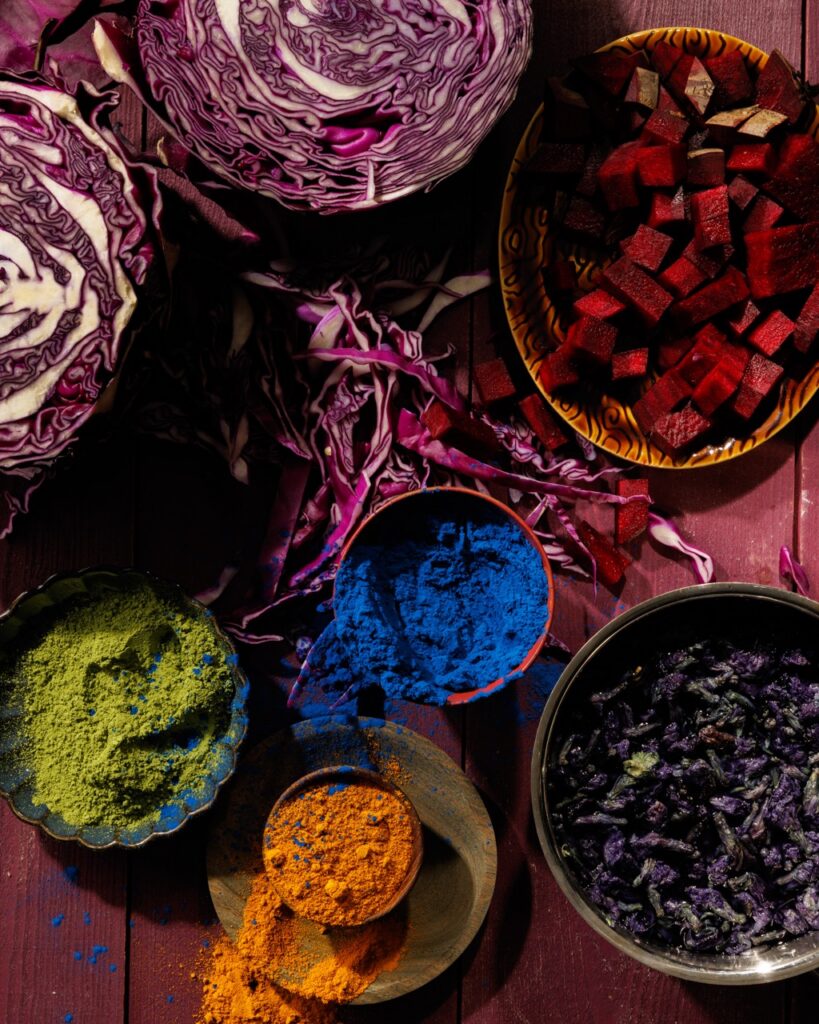
Powders and vegetables in vibrant colors on a purple table.

The Natural Dyes for These Easter Eggs

You may have some of the ingredients for these natural dye Easter eggs on hand, but we’ve included a shopping list, and some basic instructions. Our natural dye eggs use turmeric, blueberries, red beets, red cabbage, carrot greens, and onion skins. Each of these has its own coloration and character and will need its own pot to let your Easter eggs steep in. This is a great way. to teach kids about vegetables they might not want to eat. For other fun ways to use Easter eggs, check out our additional Easter egg dyes.  

Print
clock clock iconcutlery cutlery iconflag flag iconfolder folder iconinstagram instagram iconpinterest pinterest iconfacebook facebook iconprint print iconsquares squares iconheart heart iconheart solid heart solid icon
Bowls of dyed Easter eggs in yellow, blue, pink, and grey.

Natural Dye Recipe for Easter Eggs


  • Author: Keith Recker

Description

Get the most vibrant colors out of your eggs.


Ingredients

Scale
  • 2 dozen white eggs
  • 1 quart of white vinegar
  • 1 box of baking soda
  • 2 pints blueberries
  • 1 jar of ground turmeric
  • 6 fresh red beets
  • 1 red cabbage
  • 3 cups yellow onion skins (Or red onions skins, but don’t mix.)
  • 6 cups carrot greens (Just the leafy tops… but don’t worry if you can’t get them. You can leave these off.)


Instructions

  1. Each colorant needs its own non-reactive pot: turmeric, blueberries, red beets, red cabbage, carrot greens, onion skins. You can do each ingredient one at a time, cleaning your pot thoroughly in between, or you can brew up each colorant simultaneously using multiple pots.
  2. Put a quart and a half of water into a non-reactive pot. Add at least 3 cups of your dye ingredients (except for turmeric, where 1/4 to 1/3 of a cup will do). Chop the beets and the cabbage. The rest can get tossed in.
  3. Here’s where the options start. If you want brighter colors, add 1/2 cup of white vinegar: the acidity helps make the colors a bit more vivid. If you want moody colors, throw in a rusty nail or a couple of rusty washers: the iron content shifts the color towards darker values.
  4. With red cabbage, it’s nice to try two pots: one with vinegar, and one with a half cup of baking soda. The alkilinity of baking soda shifts the color to a beautiful Egyptian blue.
  5. Boil the dyestuffs for 10 minutes, and then gently add ROOM TEMPERATURE eggs. Boil for another 8 minutes or so. Turn the heat off. Remove one egg from each color and wrap it tightly in kitchen twine. Immerse those eggs in a different color of your choosing. Let eggs sit overnight in their various liquids, occasionally stirring or basting the eggs if they are not completely covered in liquid.
  6. Remove the eggs the next morning then unwrap any twine. Be inventive now: while wet, the pigment is still malleable. You can gently rub stripes into the surfaces, or make dappled marks with your fingertips. You can dip your fingers in another color and add nuances and marks. You can sift salt over a wet egg and let it dry. When you brush it off, interesting textures remain.
  7. You can choose to pour dye liquids into small bowls, and let eggs sit partially covered in contrasting colors. Keep playing with the surfaces until you have something unique and rich… like Nature itself!

Story and photography by Keith Recker

Subscribe to TABLE Magazine‘s print edition.

5 Ways to Dye Easter Eggs

0
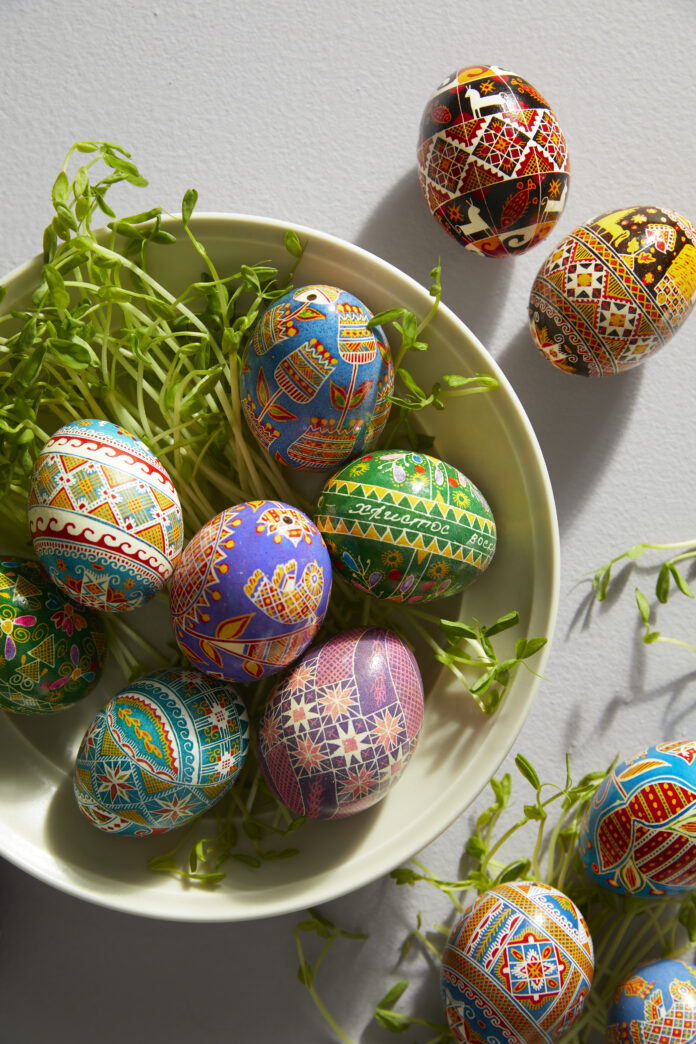
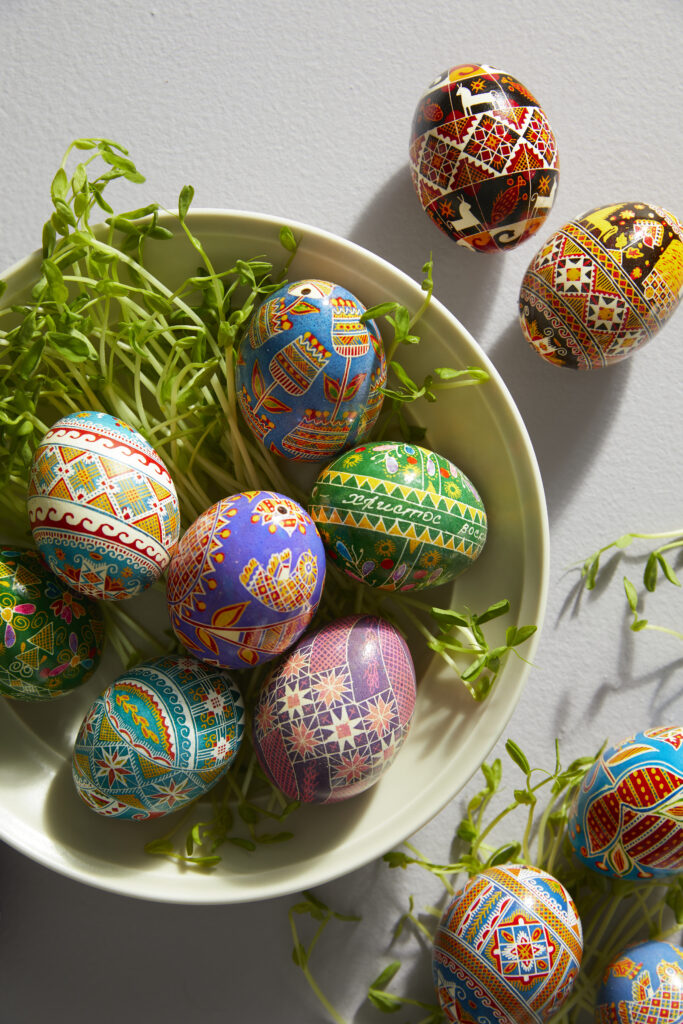
A bowl holds Pysanky designed Ukrainian Easter eggs with green easter grass underneath them and some loose on the table.

Happy (almost) Easter! As spring blossoms around us, it’s time to dive into the creative and enjoyable tradition of decorating eggs. Whether you’re a seasoned pro or a first-time dyer, there are plenty of exciting and unique ways to dye Easter eggs. Some of these recipes use a variety of natural foods to make dyes while others use just a handful of flowers and onion skins to make unique designs. Get ready to unleash your inner artist and transform ordinary eggs into vibrant works of art that will brighten up your Easter celebrations.

Powders and vegetables in vibrant colors on a purple table.

5 Ways to Dye Easter Eggs

Natural Dye Recipe for Easter Eggs

Bowls of dyed Easter eggs in yellow, blue, pink, and grey.

Did you know you can make naturally dyed eggs with ingredients you probably already have in your kitchen? Products like blueberries, ground turmeric, beets, and red cabbage create gorgeous colors of blue, orange, pink, and purple. Experiment with these and other foodstuffs, and you might just make a brand new color.

The Art of Pysanky

A bowl holds Pysanky designed Ukrainian Easter eggs with green easter grass underneath them and some loose on the table.

Pysanky are Ukrainian wax-painted Easter eggs that are decorated in stunning patterns “written” with a pysak or stylus. These beauties are a long-standing Easter tradition said to bring good luck and fortune. Learn more about this tradition from Ukrainian folk artist Lesia Pina. She teaches you how to make your own Pysanky with hot wax, natural dyes, and a candle.

Using Flowers and Plants by Ciao Florentina

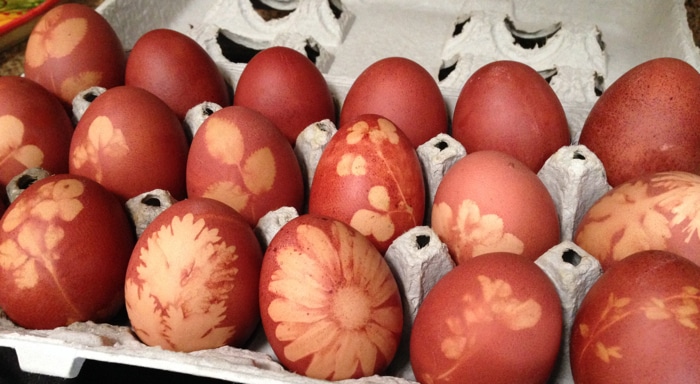
Dyed Easter eggs sit in an egg container with flower and leaf shapes designed on their shell.
Photo courtesy of Ciao Florentina

If you’re looking to add a special design to your Easter eggs, small flowers and leaves make the perfect stencil. Just stick your favorite clover onto the egg with a droplet of water, dip in naturally-made yellow onion dye, and bask in the simplicity of this process. You can even add beets to the onion dye for a deeper burgundy color.

Shaving Cream Marble Eggs by Better Homes and Gardens

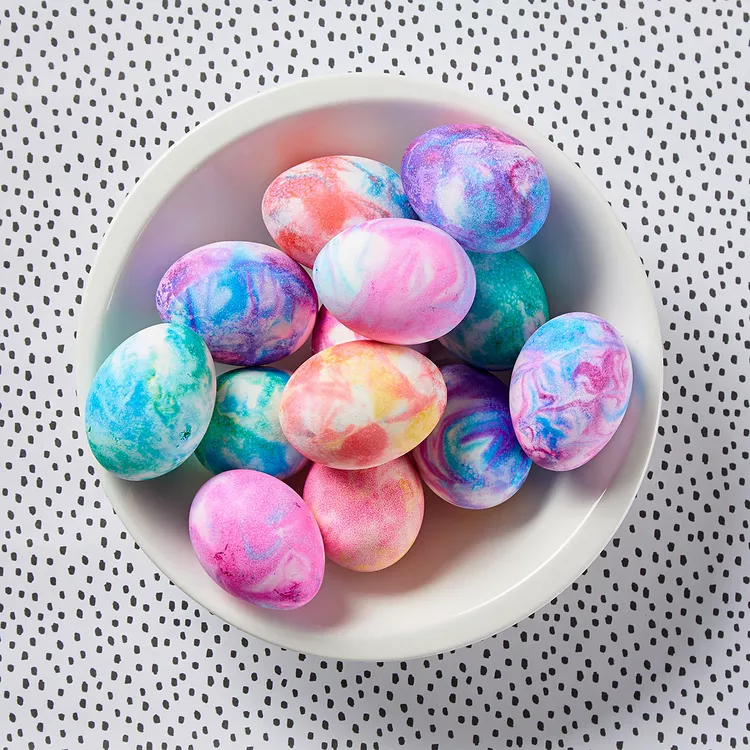
A white bowls holds various colorful marbled dyed Easter eggs.
Photo courtesy of Brie Passano for Better Homes and Gardens

While shaving cream as an egg dyeing process sounds like a crazy idea, it actually creates the smoothest pastel marble designs. It’s also a fun hands-on way for the kids and adults to take joy in the Easter festivities. All you need is a pan of old fashioned, foamy shaving cream, drops of food dye, and a toothpick to swirl your design.

Marble Eggs by SOS Kitchen

Four marble colorful dyed Easter eggs sit on a pink plate surrounded by silk and egg cups.
Photo courtesy of SOS Kitchen

Yellow, red, and white onion skins, leave these eggs looking like a stained glass window. The steps for this recipe are much like dyeing eggs in regular food coloring but with the addition of adhering shredded onion skins to eggs dampened with water. You will need a nylon stocking to hold the skins onto the egg, but it’s simple!

Story by Kylie Thomas

Subscribe to TABLE Magazine‘s print edition.

Green Chile Chicken Enchilada Casserole

0
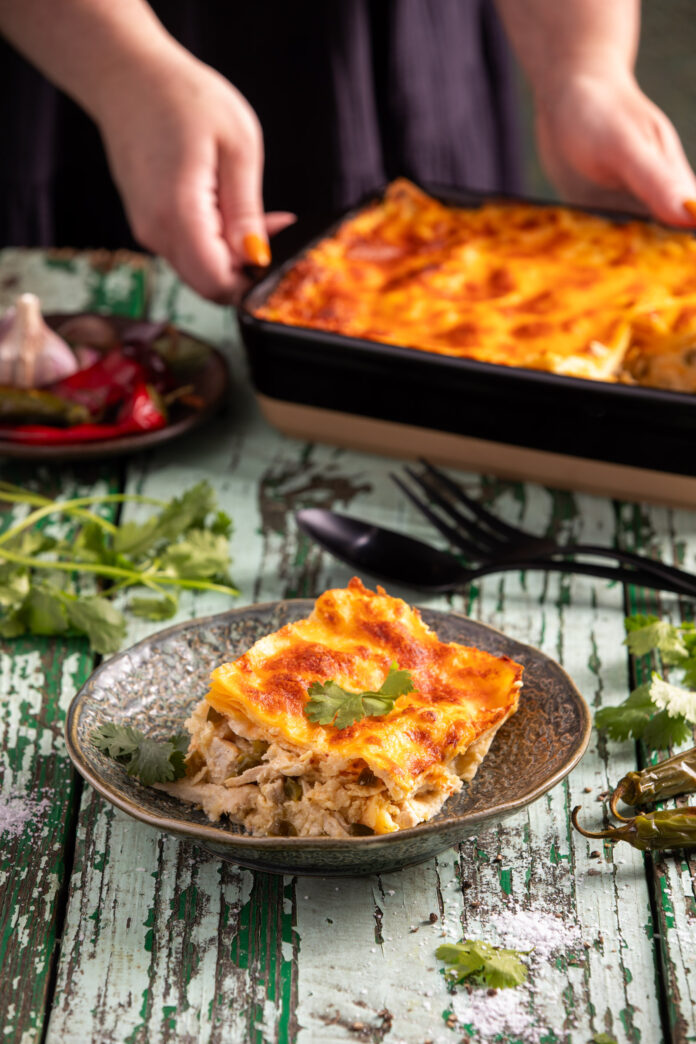
Green Chile Chicken Enchilada Casserole served in a plate which is placed on a wooden surface

Green Chile Chicken Enchilada Casserole changed my life. Yes, a life-changing casserole! Over the years since I found The Honorable Manuel Lujan, Jr.’s recipe for enchilada casserole, my version has evolved to this one. I did have the opportunity, some years after I moved to New Mexico, to meet Mr. Lujan. He was astonished to hear how his recipe (really his wife Jean’s) had altered my future. This recipe is excerpted from Cheryl Alters Jamison’s article for TABLE Magazine, My Life in Five Dishes. Read her wonderful story…and, of course, try the recipes!

Tips for Making A Chicken Enchilada Casserole

You can assemble this casserole up to 8 hours ahead in the refrigerator. When you’re making it, be wise and deliberate about your layering. Start with a layer of sauce on the bottom of the dish to prevent sticking. Then alternate layers of tortillas, chicken, cheese, and sauce. Use a mix of cheeses like cheddar, Monterey Jack, and Oaxaca for depth of flavor and gooey texture. Add some cheese between layers and on top for a bubbly finish.

Print
clock clock iconcutlery cutlery iconflag flag iconfolder folder iconinstagram instagram iconpinterest pinterest iconfacebook facebook iconprint print iconsquares squares iconheart heart iconheart solid heart solid icon
Green Chile Chicken Enchilada Casserole served in a plate which is placed on a wooden surface

Green Chile Chicken Enchilada Casserole


  • Author: Cheryl Alters Jamison

Description

The best dinner is one that you cook all in one big dish!


Ingredients

Scale
  • 1112 oz can or box of condensed cream of chicken soup
  • 1 cup half-and-half or evaporated milk
  • Vegetable oil or canola oil for frying
  • 1 dozen corn tortillas
  • 2 cups shredded cooked chicken
  • 1 cup chopped roasted mild to medium New Mexican green chile, fresh or thawed frozen, or more to taste
  • 4 oz (1 cup) grated mild cheddar or colby cheese
  • 3 oz (3/4 cup) grated Monterey jack cheese
  • ¼½ cup finely chopped onion


Instructions

  1. Preheat the oven to 350 degrees. Grease a large shallow baking dish. Stir together the soup and half-and-half in a small bowl.
  2. Heat ½-1 inch of oil in a small skillet until the oil ripples.
  3. With tongs, dunk each tortilla in the oil long enough for it to go limp, a matter of seconds. Don’t let the tortilla turn crisp. Repeat with the remaining tortillas. Drain on paper towels. Slice tortillas in quarters.
  4. Make 2-3 layers of the tortilla pieces, chicken, chile, both cheeses, onion, and soup mixture.
  5. Leave enough soup mixture and cheese to top the casserole generously, covering all of the tortilla pieces.
  6. Bake for 25-30 minutes, until heated through and bubbly. Serve immediately.

Make All the Recipes in Cheryl Alters Jamison’s Life in 5 Dishes at Home

Green Chile Chicken Enchilada Casserole

Wilted Lettuce Salad

Chile Rellenos

Morning Migas

Apple Pie

Adapted from Tasting New Mexico, © 2012 Cheryl Alters Jamison and Bill Jamison

Recipe and Story by Cheryl Alters Jamison
Styling by Merrie O’Donnell and Keith Recker
Photography by Dave Bryce

Subscribe to TABLE Magazine‘s print edition.

Morning Migas

0
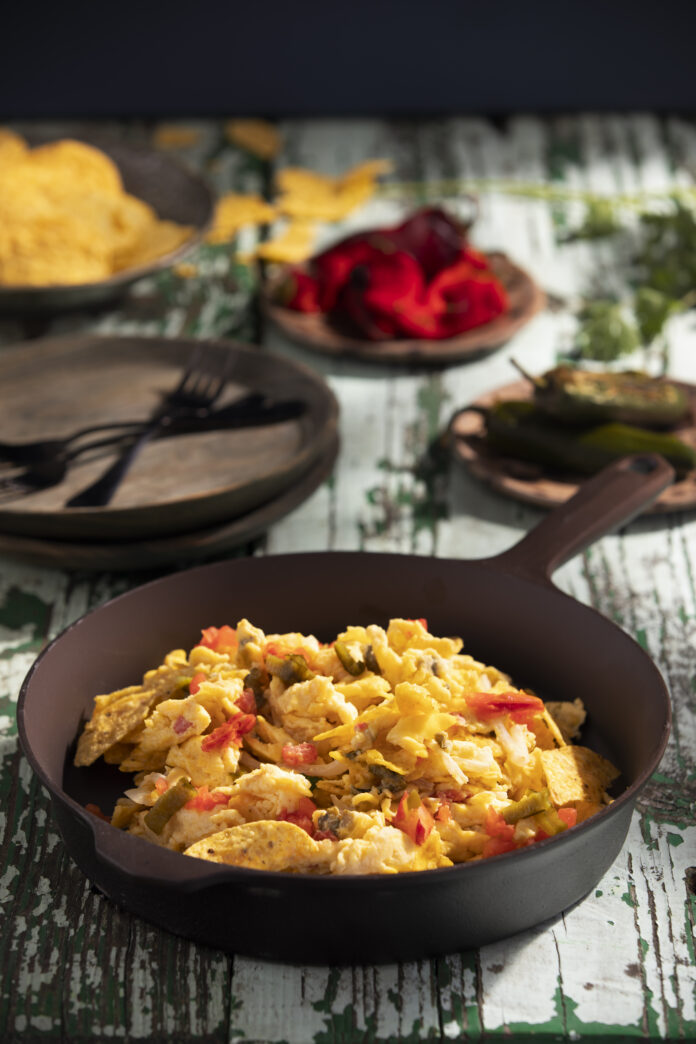
Morning Migas served in a skillet

James Beard Award-Winning Chef Cheryl Alters Jamison looks back at her life and shares a Morning Migas recipe to tell her story. 

“When I made a trip to Santa Fe in 1977, the guy my friends and I were visiting whipped up breakfast,” Alters Jamison explained. “It was more Tex than New Mex, a sensational scramble of eggs with chiles, cheese, and tortilla chips, my introduction to migas. Eventually, I married the cook. Once we got our own flock of chickens, migas began to show up on the menu most weekends.”

(Excerpted from Cheryl Alters Jamison’s article for TABLE Magazine, My Life in Five Dishes. Read her wonderful story…and, of course, try the recipes!)

Print
clock clock iconcutlery cutlery iconflag flag iconfolder folder iconinstagram instagram iconpinterest pinterest iconfacebook facebook iconprint print iconsquares squares iconheart heart iconheart solid heart solid icon
Morning Migas served in a skillet

Morning Migas


  • Author: Cheryl Alters Jamison
  • Yield: Serves 4-6 1x

Description

A skillet full of Southwestern flavors for breakfast.


Ingredients

Scale
  • 9 large eggs
  • 3 tbsp water, milk, or cream
  • Salt to taste
  • 1 small red-ripe plum tomato
  • 1 fresh New Mexican green chile or poblano chile
  • 2 tbsp unsalted butter or olive oil
  • 1 fresh jalapeño chile
  • 1 small onion, cut into very thin half-moons
  • About dozen tortilla chips, broken into bite-size pieces
  • 68 oz mild cheddar cheese, grated
  • 2 tbsp minced fresh cilantro, optional
  • Extra whole tortilla chips, diced red-ripe tomato, grated mild cheddar cheese, cilantro sprigs, or sour cream, optional


Instructions

  1. Crack the eggs into a medium bowl and add the water and salt. Whisk just long enough to combine. You should still see large bubbles. Set aside.
  2. Roast the tomato, green chile, and jalapeño. Either hold each on a fork directly over the flame of a gas burner or place them on a baking sheet under the broiler until browned all over and blackened in spots. The tomato skins, in particular, will probably split a bit.
  3. Place the green chile and jalapeño in a plastic bag to steam as they cool. When cool enough to handle, finely chop the tomato and its charred skin. Strip the peel off the green chile and jalapeño, or as much as comes off easily. Slice the chiles open and remove their seeds and, if you wish, the veins that run lengthwise (which cuts the heat a bit). Slice the green chile into thin strips and mince the jalapeño.
  4. Warm the butter in a large skillet over medium heat. Add the onion and sauté until limp, then stir in the tomato, chiles, and their juices and heat through. If they give off enough liquid to make the mixture watery, cook briefly until most of the liquid evaporates.
  5. Reduce the heat to medium-low then pour in the egg mixture and stir up from the bottom of the skillet as it cooks to your desired doneness. About a minute before the eggs are done, add the chips, stirring them in well. Remove the eggs from the heat, and stir in the cheese and cilantro if desired.
  6. The dish is popular because it tastes great, not because the jumble of ingredients looks beautiful. Dress the migas with one or more of the garnishes to enhance the visual appeal if you like then serve immediately.

Make all five recipes from Cheryl Alters Jamison’s Life in 5 Dishes at Home

Green Chile Chicken Enchilada Casserole

Wilted Lettuce Salad

Chile Rellenos

Morning Migas

Apple Pie

Recipe and Story by Cheryl Alters Jamison
Styling by Merrie O’Donnell and Keith Recker
Photography by Dave Bryce

Subscribe to TABLE Magazine‘s print edition.

Wilted Lettuce Salad

0
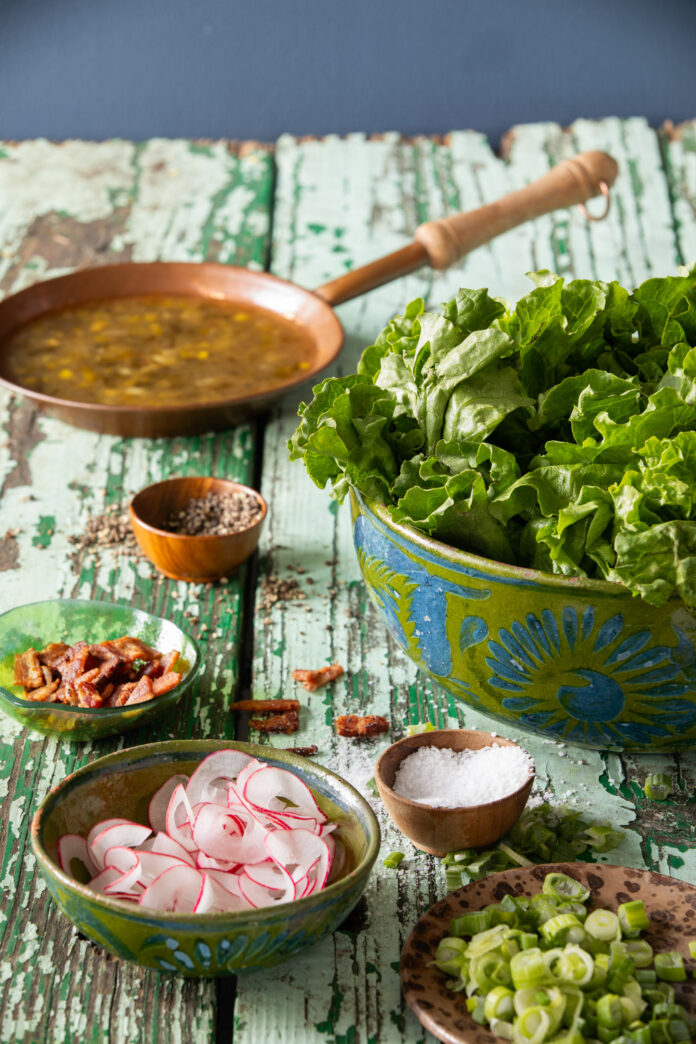
Wilted Lettuce Salad - A bowl of fresh leaf lettuce topped with crispy bacon, radishes, and scallions

In an era of Iceberg, the ruffly Black-Seeded Simpson leaf lettuce my grandparents grew was a revelation. An heirloom still prized for its large lime-green leaves, it’s a beauty, tender but with more character than the mesclun lettuce blends common today. The greens were bathed in a dressing made with bacon fat, kept at the ready in a stovetop stoneware crock. We would pluck radishes and scallions from the garden’s rich black soil at the same time as the lettuce.

(Excerpted from Cheryl Alters Jamison’s article for TABLE Magazine, My Life in Five Dishes. Read her wonderful story…and, of course, try the recipes!)

Wilted Lettuce Salad Recipe

Serves 4-6

INGREDIENTS

12 cups torn leaf lettuce
6 oz smoky bacon, sliced cross-ways into pieces about 1/2-inch thick
2-3 scallions, trimmed of any limp ends and sliced into thin rings
1 garlic clove, minced
1 tbsp honey
3 tbsp cider vinegar
2-3 radishes, halved and sliced thin
Fine sea salt and freshly milled black pepper

INSTRUCTIONS 

  1. Arrange the greens in a large salad bowl.
  2. Fry the bacon in a skillet over medium heat until brown and crisp. Remove the bacon from the drippings, crumble it, and reserve it.
  3. Add to the drippings the scallions and garlic, and sauté 1 minute.
  4. Add the honey and the vinegar and heat through, stirring until the honey dissolves. Immediately pour the hot dressing over the greens and toss lightly. The greens will reduce substantially in volume.
  5. Sprinkle the bacon over the salad, along with the radishes. Season with salt and pepper, and serve hot or at room temperature.

Adapted from American Home Cooking © 1999 Cheryl Alters Jamison and Bill Jamison

Recipe and Story by Cheryl Alters Jamison / Styling by Merrie O’Donnell and Keith Recker / Photography by Dave Bryce

Make Cheryl Alters Jamison’s Life in 5 Dishes at Home

Green Chile Chicken Enchilada Casserole

Wilted Lettuce Salad

Chile Rellenos

Morning Migas

Apple Pie

A footer photo with a grey and white marble background, three TABLE Magazines and subscribe info and button

Subscribe to TABLE Magazine‘s print edition.

Chiles Rellenos

0
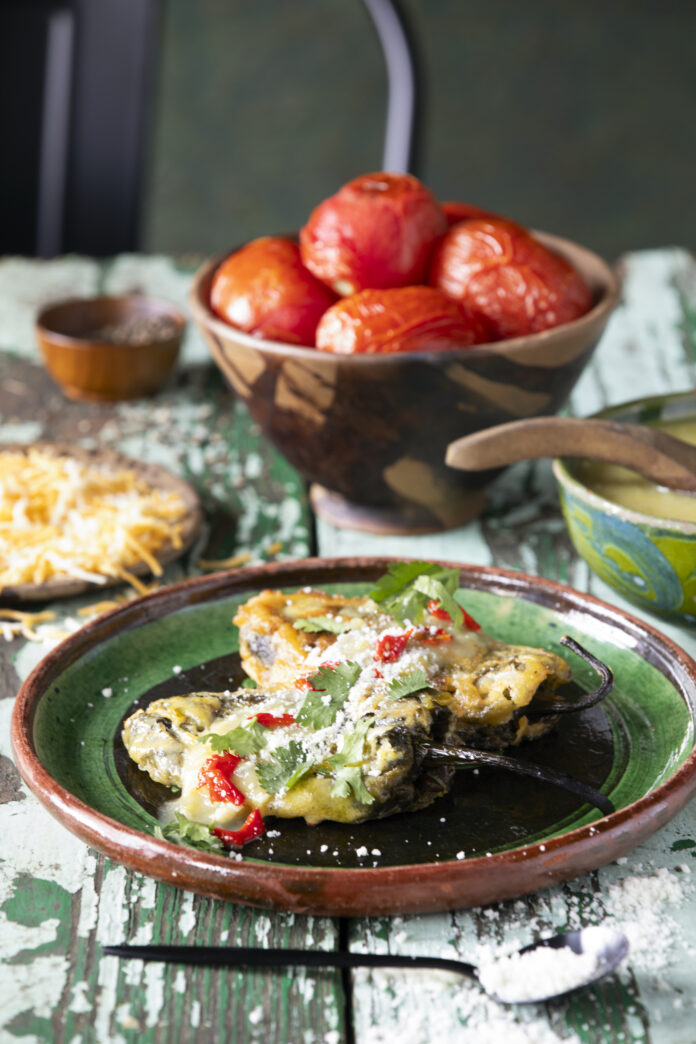
Golden-fried stuffed New Mexican green chiles served with homemade green chile sauce.

If I’d only known, back in the 1960s that I had invented the jalapeño popper! I had no understanding back then of any difference between jalapeños and New Mexican green chiles. Here’s what I really intended to make on the fateful evening described above.

(Excerpted from Cheryl Alters Jamison’s article for TABLE Magazine, My Life in Five Dishes. Read her wonderful story…and, of course, try the recipes!)

Print
clock clock iconcutlery cutlery iconflag flag iconfolder folder iconinstagram instagram iconpinterest pinterest iconfacebook facebook iconprint print iconsquares squares iconheart heart iconheart solid heart solid icon
Golden-fried stuffed New Mexican green chiles served with homemade green chile sauce.

Chiles Rellenos


  • Author: Cheryl Alters Jamison
  • Yield: Serves 6

Description

Treat yourself to an authentic Mexican dish.


Ingredients

Scale
  • 8 oz grated Monterey jack cheese
  • 4 oz grated mild cheddar or Colby cheese
  • 2 tsp dried Mexican oregano, marjoram, or epazote, optional
  • 12 whole medium-large New Mexican chiles, roasted, peeled, and slit from end to end
  • 4 large eggs
  • Approximately ¾ cup beer or club soda
  • 1¼ cups all-purpose flour
  • 2 tbsp yellow or white cornmeal
  • ¾ tsp fine sea salt
  • Vegetable oil or canola oil for deep-frying
  • Green chile sauce (see below), warmed

For the green chile sauce (makes 4 cups):

  • 2 tbsp vegetable or canola oil
  • 1 medium onion, chopped
  • 12 garlic cloves, minced
  • 1 tbsp all-purpose flour
  • 2 cups mild to medium-hot fresh or frozen New Mexican green chiles, roasted and chopped
  • 2 cups chicken stock
  • Salt to taste


Instructions

  1. Make the filling. Combine the cheeses with the optional oregano. With your fingers, stuff each chile with cheese, filling them full but not too overflowing.
  2. Make the batter. Separate 2 of the eggs, placing egg whites in the bowl of an electric mixer. Beat until soft peaks form. In a large bowl, combine the 2 egg yolks, 2 eggs, ¾ cup beer, flour, cornmeal, and salt. The batter should seem pourable but thick enough to coat the chiles. If too thick, add more beer.
  3. To assemble: Heat 4 inches of oil in a large heavy pan to 350 degrees. Place a baking rack over a few thicknesses of paper towels within easy reach of the stovetop.
  4. Lay the first chile in the batter, seam-side up while spooning more batter over it. When evenly coated, pull it from the batter by its stem and let any excess batter drip back into the bowl. No cheese should show—the batter should be thick enough to seal the chile’s seam. Gently slip the chile into the oil and repeat with the remaining chiles, as you have room in the pan.
  5. Fry the chiles for 4-5 minutes, turning as needed to cook them evenly until golden and crispy. Drain the chiles on the baking rack.
  6. Transfer the chiles to a platter or individual plates and then top with green chile sauce. Alternatively, spoon the sauce onto the plates and arrange the chiles over it. Serve immediately.

For the green chile sauce:

  1. Warm 2 tablespoons of vegetable oil or canola oil in a heavy saucepan over medium heat.
  2. Add ½-1 medium onion, chopped, and a clove or 2 of minced garlic, and sauté until soft, about 5 minutes.
  3. Stir in 1 tablespoon all-purpose flour and cook for another couple of minutes. Mix in 2 cups of chopped roasted mild to medium-hot New Mexican green chile, fresh or thawed frozen. Immediately begin pouring in 2 cups of chicken stock and then bring to a boil.
  4. Reduce heat to a low simmer and cook for about 15 minutes, adding salt to taste, until thickened but very pourable. Use warm or refrigerate for later use.

Make all five recipes from Cheryl Alters Jamison’s Life in 5 Dishes at Home

Green Chile Chicken Enchilada Casserole

Wilted Lettuce Salad

Chile Rellenos

Morning Migas

Apple Pie

Adapted from Tasting New Mexico, © 2012 Cheryl Alters Jamison and Bill Jamison

Recipe and Story by Cheryl Alters Jamison
Styling by Merrie O’Donnell and Keith Recker
Photography by Dave Bryce

Subscribe to TABLE Magazine‘s print edition.

Cheryl Alters Jamison’s Life in 5 Dishes

0
Golden-fried stuffed New Mexican green chiles served with homemade green chile sauce.

A long, conversational swapping of anecdotes between Editor-in-Chief Keith Recker and Cheryl Alters Jamison sparked an idea. Would this beloved observer of the Santa Fe food scene and veteran cookbook author tell her life story through recipes? The answer was, of course, a delicious hell yes!
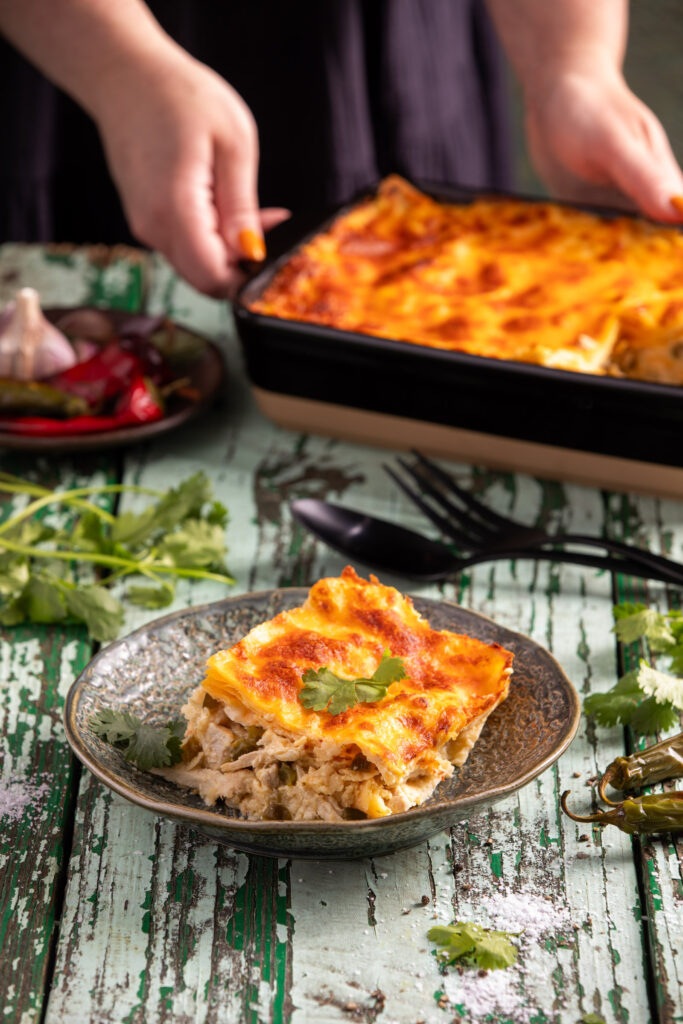
Green Chile Chicken Enchilada Casserole served in a plate which is placed on a wooden surface

A Memorable Recipe

Green Chile Chicken Enchilada Casserole changed my life. I don’t mean that statement in a hyperbolic “Oh wow, these are awesome!” kind of way. What I mean is that a chance encounter with a recipe for the New Mexican classic literally focused me on moving to Santa Fe more than five decades ago.

I was growing up in Galesburg, IL. The town, 1,000 miles northeast of Santa Fe, sat at the crossroads of two major railroad lines, best known as the Burlington Northern and the Atchison, Topeka and Santa Fe. The railroads recruited Mexican immigrant employees early in the 20th century. Over time, as some of those workers stayed on, families opened cafes specializing in tacos and enchiladas, generally filled with beef and mild seasonings to appeal broadly to the local population. In junior high, my friends and I started to frequent one of these places in particular. Today, just about every town in that part of the world has a Mexican-owned café, and a taco truck or franchise or two, but Galesburg was one of the only small downstate communities where I could have discovered this kind of food in the mid-1960s.

I hadn’t been too wild about the meatloaf-and-Swedish-meatball cuisine more common to central Illinois in that era. I was fully simpatico, though, with putting seasoned beef into these newly found tacos and enchiladas, topped with a drizzle of salsa. My experience, though, was limited to this one simple style of antojitos.
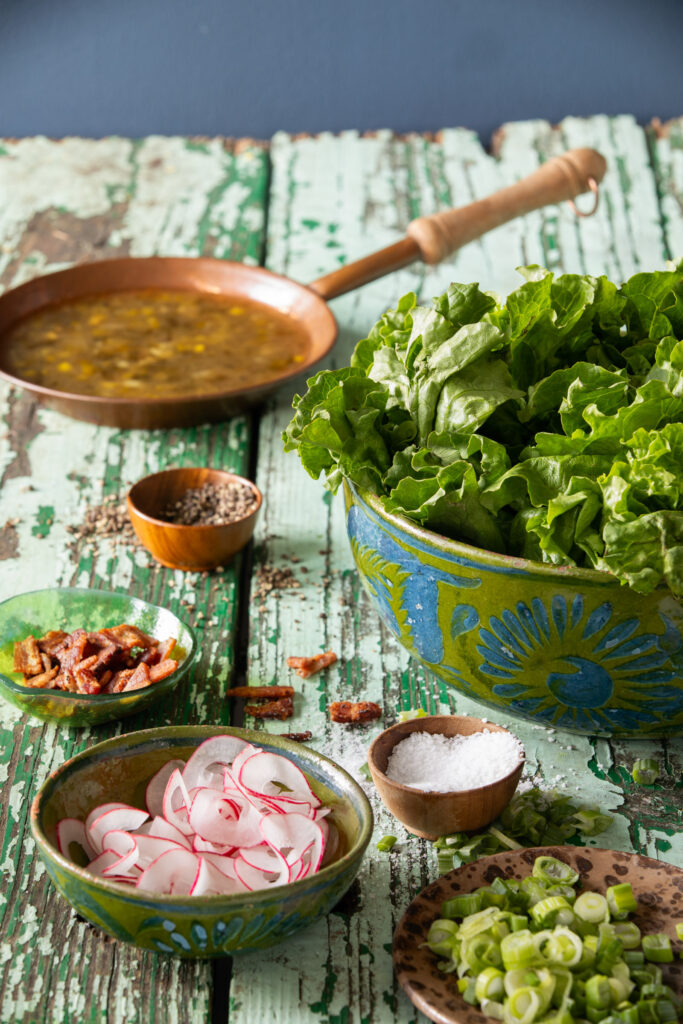
Wilted Lettuce Salad - A bowl of fresh leaf lettuce topped with crispy bacon, radishes, and scallions

Interest in the Kitchen

I had been fascinated with cooking since I was a small child, when I had the good fortune to grow up playing in my great-grandparents’ half-acre garden. Granny and Granddad would let me help them pick string beans, corn, tomatoes, and a beloved leaf lettuce called Black Seeded Simpson, and then turn the produce into simple dishes.

My parents carried on the tradition in a small way, with a couple of rows of tomatoes as well as the leaf lettuce. I found I could use those ingredients to top the tacos and enchiladas I was now trying to duplicate at home, however poorly. Some fried taco shells had made it to the local grocery store shelves. I mixed something called “taco seasoning,” probably mostly salt and cumin, into ground beef to flavor my attempts at the dish. Corn tortillas came in a can—a can—like an oversized tuna can! The tortillas resembled rawhide in texture, but I warmed them into submission for something akin to enchiladas.

This was well before the numbers of cookbooks on every conceivable food topic exploded, and before the internet was even a gleam in anyone’s eye, so I had few resources to support my new-found culinary interest. My home, like most at the time, had a Betty Crocker Cookbook, a Joy of Cooking, a few mimeographed church and PTA recipe collections, and a box of index cards with family favorites. I eagerly scoured newspapers and magazines for the occasional new “Mexican” recipe idea. It was in this vacuum of food knowledge that “green enchilada cassarole [sic]” gobsmacked me.

The Unexpected Cookbook

I came home one day from high school and greeted my father, who was sorting the mail at the kitchen table. He opened a manila envelope from our Illinois congressman, and said the booklet inside would be more appropriate for me than for him. He slid across the table The Republican Congressional Cookbook. It seemed an effort to humanize these men (and it was all men, though some at least credited their wives for their recipe) who “make speeches and pass laws.”
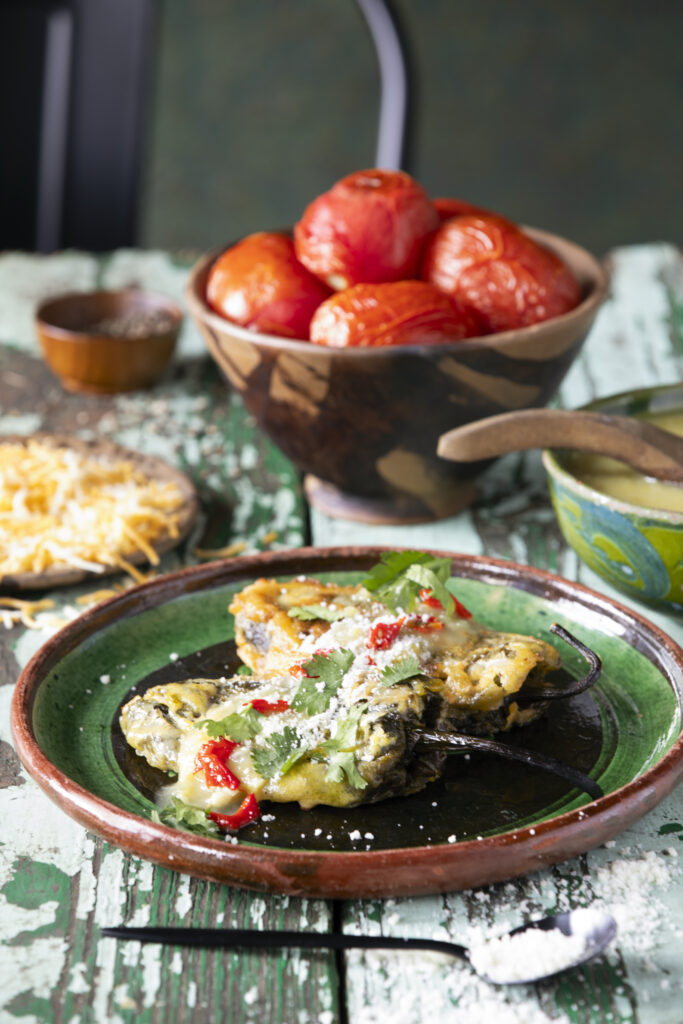
Golden-fried stuffed New Mexican green chiles served with homemade green chile sauce.

I eagerly flipped through the book, seeing pea pods and water chestnuts from Hawaii, and Rocky Mountain trout from Colorado, but also oddly out-of-place Shrimp de Jonghe from Arkansas, and Poulet Michel with Armagnac from our congressman. The recipe from New Mexico stopped me cold. Here was something wondrous, layering tortillas, lots of gooey cheese, and shredded chicken, rather than the beef I then assumed was in all Mexican or Southwestern-style dishes. What I couldn’t get over though, was that it used a whole can of something described as green “chili.”

Passion for the West

Because of our many family vacations in the Rocky Mountain West, I already was dreaming of moving to this part of the world, once I had any control over my destiny. No longer, however, was it going to be good enough to move to Colorado or Wyoming. I was not only going to live in the mountains, but in the state where people ate food loaded with this new-to-me green.

I still stumbled mightily on my way to pepper proficiency. Attempting to absorb everything I could about this cuisine, I came across a recipe that further excited me—chiles rellenos. I knew just enough to be dangerous. I understood that green in a can wouldn’t cut it for a dish of stuffed chiles, so I stopped in a grocery store where I had seen some fresh chiles. What I didn’t understand, though, was that what I had purchased much more picante jalapeños.

You might think I would have been tipped off to a problem by the mountain of grated cheese and vat of batter, I had assembled, in contrast to my six little chiles. I was not deterred. I fried those things up, and served them to my tender-palated family. The horrified reaction of my parents and sisters is family legend. If I could just get myself to New Mexico, I was sure I could figure out this world of chiles.
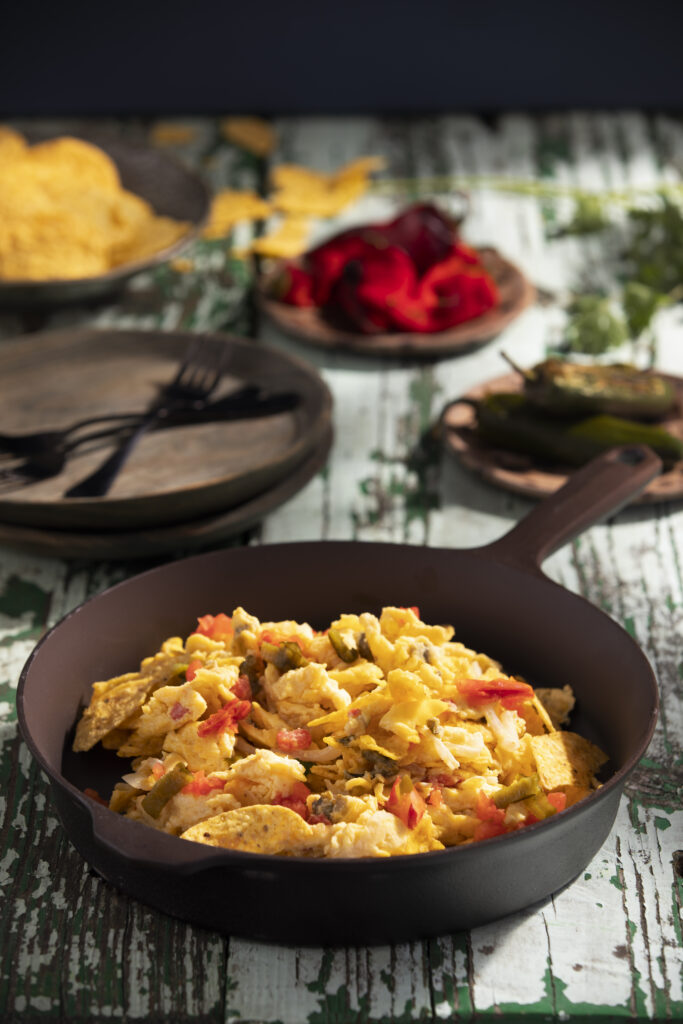
Morning Migas served in a skillet

Making a New Dream

As I was finishing graduate school in arts management at the University of Illinois, I was in need of an internship, my intended stepping stone to moving westward. As it turned out, nothing in my field was available where I wanted to be. My program director came up, though, with an offer that was just what I was looking for, and he enthused that it would be working with an up-and-coming hotshot in the arts. It turned out to be in Oklahoma City, which, ultimately, I rationalized was halfway to the Rockies, making frequent visits west much easier. The hotshot was a guy named Bill Jamison, who indeed was a rising star in the field. He rose so fast that we were only in the same place at the same time for a few months, before he was offered a Santa Fe-based dream job.

Accepting an invitation with friends to visit Bill in Santa Fe, I finally had the opportunity to dig into some of the New Mexican food I had been reading about for years. I reveled in the red and the green in popular places of that time like Guadalupe Café, The Shed, and the Pink Adobe. At the Pink, I had a pie epiphany as well, tasting Rosalea Murphy’s lard-crusted apple creation, which took me back to my great-grandmother’s pies. We had drinks at this amazing already-venerable Canyon Road bar, El Farol. Bill surprised me too by whipping up a stellar chile-enhanced breakfast scramble. It all furthered my determination to find a way to move here—for the food though, not the guy.

Moving to New Mexico

It took a couple more years, but eventually Bill offered to hire me again, this time in a Santa Fe arts job. I celebrated by taking myself back to The Shed, where I tempted fate by wearing a white suit to eat red chile cheese enchiladas. I moved here in August of 1980. The timing was especially fortuitous, in my mind, because it was green chile season. No longer would I have to depend upon cans of the stuff.

Like real New Mexicans, I could buy a big Santa sack of it roasted, then put it in the freezer to use throughout the year. I was a little overly enthusiastic, because I had a 40-pound bag for just me, and a freezer so small I referred to it as a freezette. I had to peel and seed all of the pods right then, to make the chile much smaller in volume. For months, the freezer couldn’t even hold ice cube trays, for all the chile crammed into it. It was my first step, however, to becoming a resident of the Land of Enchantment. It also was a step toward wanting to know everything I could about the foods of this glorious place.
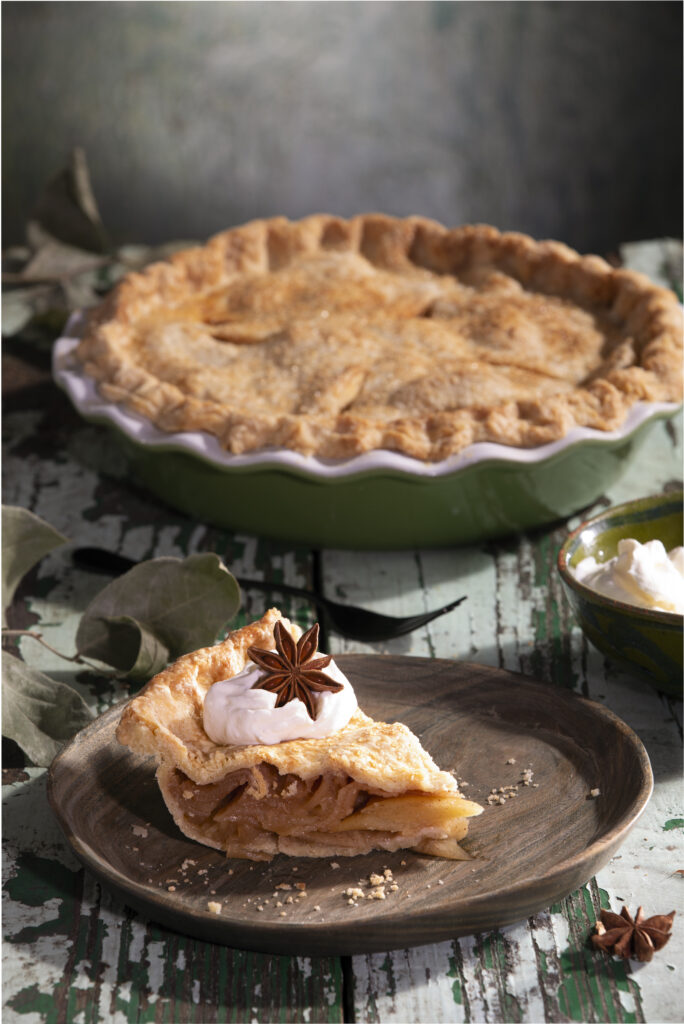
A baked pie sits in a pie tin with a slice of apple pie sitting on a brown plate in front of the pie, topped with an anise star.

A Life-Changing Moment

I had no inkling yet that I would eventually marry that guy who hired me twice, or that we would shift from our arts careers to writing about the foods of the American Southwest and Mexico. That came as a result of wanting to put people straight on the important differences between food here and elsewhere, of the strong Indigenous identity of the food to this day, and as a way to celebrate the extraordinary chile that had captivated me in print so many decades ago. Forty-some years after settling here, I remain enchanted with New Mexico and its distinctive food, ever thankful that the Green Chile Chicken Enchilada Casserole came into my life.

Make Cheryl Alters Jamison’s Life in 5 Dishes at Home

Green Chile Chicken Enchilada Casserole

Green Chile Chicken Enchilada Casserole changed my life. Yes, a life-changing casserole! Over the years since I found The Honorable Manuel Lujan, Jr.’s recipe for enchilada casserole, my version has evolved to this one. I did have the opportunity, some years after I moved to New Mexico, to meet Mr. Lujan. He was astonished to hear how his recipe (really his wife Jean’s) had altered my future.

Wilted Lettuce Salad

In an era of Iceberg, the ruffly Black-Seeded Simpson leaf lettuce my grandparents grew was a revelation. An heirloom still prized for its large lime-green leaves, it’s a beauty, tender but with more character than the mesclun lettuce blends common today. The greens were bathed in a dressing made with bacon fat, kept at the ready in a stovetop stoneware crock. We would pluck radishes and scallions from the garden’s rich black soil at the same time as the lettuce.

Chiles Rellenos

If I’d only known, back in the 1960s that I had invented the jalapeño popper! I had no understanding back then of any difference between jalapeños and New Mexican green chiles. Here’s what I really intended to make on the fateful evening described above.

Morning Migas

When I made a trip to Santa Fe in 1977, the guy my friends and I were visiting whipped up breakfast,” Alters Jamison explained. “It was more Tex than New Mex, a sensational scramble of eggs with chiles, cheese, and tortilla chips, my introduction to migas. Eventually, I married the cook. Once we got our own flock of chickens, migas began to show up on the menu most weekends.

Apple Pie

The homemade apple pie of my early childhood was enveloped in a flaky lard crust. After my grandmothers retired from baking, my mom—and it seemed like everyone else—succumbed to the ease of grocery store freezer-section pies. For holidays, a local bakery pie might come to the table. None had the flavor and texture of the old days, but I didn’t know what was missing. On my 1977 visit to Santa Fe, I was treated to dinner at the venerable Pink Adobe. The combo plate was satisfying, but the pie dazzled me. Cinnamon-scented apple slices were surrounded by the crust of my childhood. I discovered that lard was the secret adding flakiness and an elusive savoriness to the crust. Most pie recipes say it’s fine to substitute a store-bought crust but it’s not fine. Go to the effort to make your own and find yourself transported.

Recipe and Story by Cheryl Alters Jamison / Styling by Merrie O’Donnell and Keith Recker / Photography by Dave Bryce

A footer photo with a grey and white marble background, three TABLE Magazines and subscribe info and button

Subscribe to TABLE Magazine‘s print edition.