Home Blog Page 9

Baba Ghanouj

0
An above shot of a turquoise bowl filled with Baba Ghanouj.

Eggplant is one of my favorites. Growing up, my mom prepared it in rice dishes—cubed, fried, and then cooked in with the rice, or cut into thick rounds and layered at the bottom of the pot below the rice. It seemed to be everywhere, but I never tired of it. It was in the moussaka, maqlooba, and especially in baba ghanouj. This smoky, creamy baba ghanouj recipe remains a staple in my kitchen. Sometimes we’d enjoy eggplant simply fried and served with pita, fresh vegetables, and hummus. But probably my all-time favorite is maqdoos: pickled baby aubergines stuffed with walnuts and garlic. My grandmother made these, and I hope to master them someday too.

Print
clock clock iconcutlery cutlery iconflag flag iconfolder folder iconinstagram instagram iconpinterest pinterest iconfacebook facebook iconprint print iconsquares squares iconheart heart iconheart solid heart solid icon
An above shot of a turquoise bowl filled with Baba Ghanouj.

Baba Ghanouj


  • Author: Omar Abuhejleh

Description

This smoky, creamy baba ghanouj recipe remains a staple in my kitchen.


Ingredients

  • Eggplants
  • Applewood chips, for smoking
  • Fresh lemon juice, about 2 tbsp per eggplant
  • Minced garlic, around 3 cloves per eggplant
  • Salt, about 1/4 tsp per eggplant
  • Small amount of tahini, 2 tsp per eggplant
  • Dash of cayenne and/or cumin (optional)

Instructions

  1. Start by roasting the eggplant in the oven. Simply rinse them, poke a few holes in each, and bake at 375 degrees for around 45 minutes or until they are soft to the touch. Remember to poke holes in the eggplants, otherwise there is a very good chance that the eggplants will explode in the oven, or worse, explode when you go to handle them. This has happened to me, so please be careful!
  2. Another thing to remember is when checking the eggplant for being done, examine the part of eggplant closest to the stem, as this is the toughest area, but also has some of the best pulp when baked thoroughly.
  3. After baking, let eggplant cool for about 20 minutes. Then slice eggplant lengthwise and use a spoon to scoop out the pulp (including the seeds). Then smoke eggplant pulp over applewood chips for around 30 minutes. Use a small amount of chips, as a little goes a long way here.
  4. You can do this, as B52 does, on a stovetop. Use a covered perforated pan insert, like a steamer basket and pot, and position the pulp on one side of the insert so the drippings do not extinguish the chips below. You can make an aluminum-foil basket to hold the chips in your pot, which should sit on the bottom of the pot directly over the heat. (Obviously be careful here – please do not start a bonfire on your stovetop).
  5. The next step is to chop the eggplant pulp on a cutting board. It’s super important to do this by hand, otherwise the texture will not be right. You want it to remain a bit chunky. After chopping, add the remaining ingredients.

Story by Maggie Weaver
Photography by Dave Bryce
Food Styling by Veda Sankaran
Prop Styling by Keith Recker
Recipe by Chef Steve Paul
Wallpaper: Guermantes by Manuel Canovas, Courtesy of Cowtan & Tout

Subscribe to TABLE Magazine‘s print edition.

Vietnamese-Style Chicken Wings

0
An above shot of a baking sheet filled with Vietnamese Chicken Wings.

These Vietnamese-style chicken wings are a mouthwatering balance of sweet, salty, and tangy, with layers of flavor that build from an overnight marinade. Infused with fish sauce, brown sugar, garlic, lemongrass, and ginger, the wings emerge from the oven with a glossy, caramelized coating and irresistible aroma. A final squeeze of fresh lime and sprinkle of cilantro brighten each bite, while an optional dipping sauce—packed with chili heat and umami depth—brings even more complexity to the table. Perfect for game day, dinner parties, or casual snacking, these wings deliver bold Southeast Asian flavor with minimal fuss.

What Makes Something Vietnamese-Style?

When you see Vietnamese-style on a recipe, think bold, aromatic, and balanced. It usually signals a dish built around the signature flavors of Vietnamese cooking—salty fish sauce, sweet caramelized sugar, bright citrus (like lime), fresh herbs, and a little heat from chili. It’s not just about one note, but the interplay between them: savory meets sweet, spicy meets sour. Techniques like marinating meat with lemongrass, garlic, and ginger, then roasting or grilling to lock in flavor, are also hallmarks.

Print
clock clock iconcutlery cutlery iconflag flag iconfolder folder iconinstagram instagram iconpinterest pinterest iconfacebook facebook iconprint print iconsquares squares iconheart heart iconheart solid heart solid icon
An above shot of a baking sheet filled with Vietnamese Chicken Wings.

Vietnamese Chicken Wings


Description

Sticky, Savory, and Full of Zing


Ingredients

Scale
  • 2 pounds small to medium chicken wings
  • 2 whole limes quartered for marinade and serving
  • ½ cup fish sauce
  • ½ cup brown sugar
  • 2 garlic cloves minced
  • 1 ½ tsp grated ginger
  • 1 tbsp finely chopped lemongrass
  • 1 tbsp chopped cilantro for serving

Dipping Sauce (optional)

  • 1/4 cup fish sauce
  • 2 tbsp brown sugar
  • 1 tbsp Thai pepper or other small pepper
  • 1 lime, juiced
  • 1 cup water
  • 2 spring onions chopped
  • 1 tsp sesame seeds

Instructions

  1. Combine fish sauce, brown sugar, garlic, ginger, juice from one lime, and lemongrass in a bowl. Add chicken wings and evenly coat marinade over all the wings. Cover and marinate overnight in the refrigerator. Reserve some marinade for basting during cooking.
  2. Preheat the oven to 400F and place chicken wings and on a baking sheet in a single layer and bake for 40 minutes. Town and baste midway with marinade.
  3. Add fresh lime juice and cilantro before serving warm.

Dipping Sauce (optional)

  1. Add all ingredients to a saucepan. Reduce liquid until slightly thickened (five minutes) Serve.

Subscribe to TABLE Magazine‘s print edition.

Pumpkin Blondies

0
A baking pan of pumpkin blondies with a square slice topped with cream cheese frosting and chocolate shavings on a small plate.

The Pie Place owners, Jess Gombar and Julie Accamando, love to work fresh and local ingredients into their menu, often in unique combinations. Their sublime Pumpkin Blondies made their way to TABLE Magazine’s photo studio recently and was a crowd favorite. Not a crumb was left. Nor a drop of icing. Or a molecule of chocolate shavings. Visit them in Upper Saint Clair to pick up a dozen, or make them at home with the recipe they generously share.

Have a Perfectly Pumpkin Fall with These Recipes

Baked Baby Pumpkins

Pumpkin Cheesecake with Gingersnap Crust

Martha Stewart-Inspired Five Spice Pumpkin Pie

Print
clock clock iconcutlery cutlery iconflag flag iconfolder folder iconinstagram instagram iconpinterest pinterest iconfacebook facebook iconprint print iconsquares squares iconheart heart iconheart solid heart solid icon
A baking pan of pumpkin blondies with a square slice topped with cream cheese frosting and chocolate shavings on a small plate.

Pumpkin Blondies


  • Author: The Pie Place

Description

Soft and spiced pumpkin blondies loaded with chocolate chips, topped with creamy frosting and a drizzle of melted chocolate for a sweet autumn treat.


Ingredients

Scale

For the pumpkin blondies:

  • ¾ cup butter, softened
  • 1 ½ cups brown sugar
  • 2 eggs
  • 1 ½ tsp vanilla
  • 1 heaping cup pumpkin (we use Libby’s)
  • 1 ½ cups flour
  • 1 ½ tsp baking powder
  • 1 ½ tsp cinnamon
  • 1 ½ tsp nutmeg
  • ½ tsp salt
  • 2 cups chocolate chips

For the cream cheese frosting:

  • ½ cup softened (not melted) butter
  • 8 oz cream cheese
  • 1 tsp vanilla
  • 34 cups confectioners sugar

Instructions

For the pumpkin blondies:

  1. Beat all the wet ingredients in a mixer with the paddle attachment. Once the wet ingredients are combined, add in all of the dry ingredients, adding in the chocolate chips last.
  2. Pour into a greased 9×13 baking pan.
  3. Bake at 350º for 25+ minutes, or until a toothpick comes out clean.
  4. Cool and ice with cream cheese frosting (see below) and drizzle with melted chocolate.

For the cream cheese frosting:

  1. Mix cream cheese and the softened butter in a mixer with the paddle attachment until well incorporated. Add in the vanilla.
  2. Slowly add in the powdered sugar, a little at a time, until the desired consistency is reached.

Recipe by The Pie Place Owners, Jess Gombar and Julie Accamando
Styling by Ana Kelly
Photography by Adam Milliron
Plates by Emmanuelle Wambach

Subscribe to TABLE Magazine’s print edition.
Easy Recipes for Leftover Beef Brisket

0
A halved French onion dip sandwich recipe made with leftover beef brisket, melted cheese and thinly sliced meat, resting on a black platter.

Tired of eating the plain old leftover beef brisket on a plate? Instead, transform your leftover brisket into masterpiece recipes that taste like cooking dinner fresh all over again. Rhonda Schuldt dreams up a collection of creative and delicious recipes that will give your leftover beef brisket a new lease on life. Devour her savory French Onion Dip Sandwich, hearty Vegetable Beef Soup, and Open-Faced Beef Sandwich. Each recipes is sure to impress your taste buds and make you fall in love with leftovers all over again.

While you’re here, shake up a relaxing Chamomile Lavender Spritz to treat yourself during all that extra time you’ll save using leftover brisket.

Print
clock clock iconcutlery cutlery iconflag flag iconfolder folder iconinstagram instagram iconpinterest pinterest iconfacebook facebook iconprint print iconsquares squares iconheart heart iconheart solid heart solid icon
A halved French onion dip sandwich recipe made with leftover beef brisket, melted cheese and thinly sliced meat, resting on a black platter.

French Onion Dip Sandwiches


  • Author: Rhonda Schuldt

Description

Tender brisket and caramelized onions served on a toasted hoagie with melted Swiss cheese, paired with rich broth for dipping.


Ingredients

Scale
  • 1 tbsp olive oil
  • 1 tbsp butter
  • 2 large onions, sliced
  • 4 cups sliced leftover brisket
  • 3 cups beef broth
  • Toasted hoagie buns
  • Swiss cheese slices

Instructions

  1. Heat olive oil and butter in a medium pot.
  2. Add onions and cook over medium heat, stirring occasionally, until caramelized.
  3. Add brisket and beef broth, stir, and simmer on medium-low until beef is tender and broth slightly reduced.
  4. Remove beef and onions with a slotted spoon, letting excess broth drain.
  5. Place mixture on the bottom half of a toasted hoagie, top with Swiss cheese, and add the top bun.
  6. Optional: Broil open-faced to melt cheese before adding the top bun.
  7. Serve with a small bowl of the broth for dipping.
Print
clock clock iconcutlery cutlery iconflag flag iconfolder folder iconinstagram instagram iconpinterest pinterest iconfacebook facebook iconprint print iconsquares squares iconheart heart iconheart solid heart solid icon

Vegetable Beef Soup


  • Author: Rhonda Schuldt

Description

A hearty soup loaded with brisket, fresh vegetables, and herbs—perfect for a cozy, filling meal.


Ingredients

Scale
  • 23 tbsp olive oil
  • 2 carrots, diced
  • 2 ribs celery, diced
  • 1 cup onion, diced
  • 2 cloves garlic, chopped
  • 3 cups green cabbage, chopped
  • 1 (28 oz) can diced tomatoes
  • 2 quarts beef stock
  • 4 cups leftover brisket, cut into 1-inch chunks
  • 2 medium red potatoes, cubed
  • Optional vegetables: green beans, corn, peas
  • 1 tsp oregano
  • ½ tsp thyme
  • 1 bay leaf
  • Salt and pepper, to taste

Instructions

  1. Heat olive oil in a stock pot.
  2. Add carrots, celery, onion, and garlic; cook 5 minutes until softened.
  3. Add cabbage and cook until wilted.
  4. Stir in tomatoes, beef stock, brisket, potatoes, and any extra vegetables.
  5. Season with oregano, thyme, bay leaf, salt, and pepper.
  6. Simmer for 45 minutes or until potatoes and beef are tender.
  7. Serve hot with crusty bread.
Print
clock clock iconcutlery cutlery iconflag flag iconfolder folder iconinstagram instagram iconpinterest pinterest iconfacebook facebook iconprint print iconsquares squares iconheart heart iconheart solid heart solid icon

Open-Faced Beef & Mashed Potato Sandwiches


  • Author: Rhonda Schuldt

Description

Thick toasted bread topped with creamy mashed potatoes, warm brisket slices, and rich homemade gravy.


Ingredients

Scale
  • Thick-cut bread, toasted
  • Mashed potatoes
  • Sliced warmed brisket

For Brisket Gravy:

  • 2 tbsp cornstarch
  • ½ cup cold water
  • Pan juices from roast brisket*

If no pan juices:

  • 4 tbsp butter
  • 2 tbsp flour (regular or gluten-free)
  • 23 cups beef stock
  • ½ packet onion soup mix
  • Salt and pepper, to taste

Instructions

For Gravy with Pan Juices:

  1. Mix cornstarch with cold water, stir into pan juices, bring to a boil, and cook until thickened.

For Gravy Without Pan Juices:

  1. Melt butter in a saucepan, stir in flour, and cook until golden. Whisk in beef stock and onion soup mix, bring to a boil, then add cornstarch mixture. Season to taste.

To Assemble:

  1. Place toasted bread on a plate, top with mashed potatoes, brisket slices, and pour gravy over the top.

Recipes by Rhonda Schuldt

Subscribe to TABLE Magazine’s print edition.

Homemade Stock Recipes

0
A large silver stockpot filled with a steaming broth of chicken, carrots, and celery, with a ladle resting inside.

Making stock is a delicious way to utilize scraps and leftovers so that nothing is wasted. Basic stock follows a common process with just a few variations depending on the stock you wish to make. The following recipes suggest the base and common ingredients, but the variations are endless!

What Kinds of Stock Can You Make?

You can make a wide variety of stocks, each with its own unique flavor profile and culinary purpose. Chicken stock is perhaps the most versatile, serving as a light and savory base for countless soups, sauces, and gravies. Beef stock is richer and more robust, perfect for hearty stews, braises, and French onion soup. Fish stock is delicate and quick-cooking, providing a light, briny foundation for seafood bisques and risottos. For a plant-based option, vegetable stock is a flavorful and adaptable choice, made from a mix of vegetables like carrots, celery, onions, and herbs.

Print
clock clock iconcutlery cutlery iconflag flag iconfolder folder iconinstagram instagram iconpinterest pinterest iconfacebook facebook iconprint print iconsquares squares iconheart heart iconheart solid heart solid icon
A large silver stockpot filled with a steaming broth of chicken, carrots, and celery, with a ladle resting inside.

Vegetable Stock


  • Author: Rhonda Schuldt

Description

A rich, aromatic stock made from roasted root vegetables and herbs, perfect for soups, stews, and vegetarian dishes.


Ingredients

Scale
  • 6 cups roughly chopped vegetables (parsnip, carrots, rutabaga, winter squash, mushrooms, etc. — avoid cruciferous vegetables)
  • 3 carrots, roughly chopped
  • 2 large onions, roughly chopped
  • 3 celery stalks, roughly chopped
  • 1 bay leaf
  • Small bunch of parsley
  • 2 cloves garlic, smashed
  • 46 quarts water (enough to cover ingredients by at least 2 inches)

Instructions

  1. Preheat oven to 400°F (200°C).
  2. Spread chopped vegetables on a baking sheet and roast for 15–20 minutes until well caramelized.
  3. Transfer roasted vegetables to a large (12-quart) stock pot.
  4. Add carrots, onions, celery, bay leaf, parsley, garlic, and water.
  5. Bring to a boil, then reduce heat and simmer for 2–3 hours.
  6. Let cool, strain through a fine mesh strainer, and discard solids.
Print
clock clock iconcutlery cutlery iconflag flag iconfolder folder iconinstagram instagram iconpinterest pinterest iconfacebook facebook iconprint print iconsquares squares iconheart heart iconheart solid heart solid icon

Chicken Stock


  • Author: Rhonda Schuldt

Description

A flavorful, golden stock made from roasted chicken bones and vegetables, ideal for soups, sauces, and gravies.


Ingredients

Scale
  • 1 large raw or 2 leftover roasted chicken carcasses (or 45 lbs chicken wings, backs, or necks)
  • 3 carrots, roughly chopped
  • 2 large onions, roughly chopped
  • 3 celery stalks, roughly chopped
  • 1 bay leaf
  • Small bunch of parsley
  • 46 quarts water (enough to cover ingredients by at least 2 inches)

Instructions

  1. Preheat oven to 400°F (200°C).
  2. Place chicken parts on a baking sheet and roast for 15–20 minutes until well caramelized.
  3. Transfer roasted chicken parts to a large (12-quart) stock pot.
  4. Add carrots, onions, celery, bay leaf, parsley, and water.
  5. Bring to a boil, then reduce heat and simmer for 4–6 hours.
  6. Let cool, strain through a fine mesh strainer, and discard solids.
Print
clock clock iconcutlery cutlery iconflag flag iconfolder folder iconinstagram instagram iconpinterest pinterest iconfacebook facebook iconprint print iconsquares squares iconheart heart iconheart solid heart solid icon

Beef Stock


  • Author: Rhonda Schuldt

Description

A deep, hearty stock made from roasted beef bones and vegetables, perfect for rich soups, stews, and braises.


Ingredients

Scale
  • 56 lbs leftover beef bones (or beef trimmings, marrow bones, or ribs)
  • 3 carrots, roughly chopped
  • 2 large onions, roughly chopped
  • 3 celery stalks, roughly chopped
  • 1 bay leaf
  • Small bunch of parsley
  • 2 cloves garlic, smashed
  • 46 quarts water (enough to cover ingredients by at least 2 inches)

Instructions

  1. Preheat oven to 400°F (200°C).
  2. Place beef bones on a baking sheet and roast for 15–20 minutes until well caramelized.
  3. Transfer roasted bones to a large (12-quart) stock pot.
  4. Add carrots, onions, celery, bay leaf, parsley, garlic, and water.
  5. Bring to a boil, then reduce heat and simmer for 4–6 hours.
  6. Let cool, strain through a fine mesh strainer, and discard solids.
  7. Store in refrigerator up to 1 week or freeze up to 3 months.

Salt is not added in these homemade stock recipes in order to create a low-sodium stock with ultimate flexibility in seasoning depending on the stock’s ultimate use.

Recipes by Rhonda Schuldt

Subscribe to TABLE Magazine’s print edition.

Luscious Almond Cake with Grand Marnier

0
A glazed almond cake topped with sliced almonds and orange zest, with two slices on separate plates and a glass of amber liquid, all on a patterned white tablecloth.

Chef Jessica Lewis, at the helm of Spirits and Tales on the top floor of The Oaklander, takes first position in our dessert-loving hearts with an absolutely phenomenal almond cake. Grand Marnier in the batter and brushed on top make it irresistible. Make this sweet for your sweetie…or just make it right this second for yourself.

True confessions: our crew devoured this cake as soon as the shutter clicked, and we hereby testify to its deliciousness! Try it fresh out of the oven with a scoop of ice cream on top as a warming treat.

Print
clock clock iconcutlery cutlery iconflag flag iconfolder folder iconinstagram instagram iconpinterest pinterest iconfacebook facebook iconprint print iconsquares squares iconheart heart iconheart solid heart solid icon
A glazed almond cake topped with sliced almonds and orange zest, with two slices on separate plates and a glass of amber liquid, all on a patterned white tablecloth.

Luscious Almond Cake with Grand Marnier


  • Author: Chef Jessica Lewis

Description

A rich and moist almond cake flavored with Grand Marnier and orange zest, perfect for a special occasion or an indulgent treat anytime.


Ingredients

Scale
  • 14 oz almond paste
  • 1/2 cup granulated sugar
  • 8 oz chilled cubed butter
  • 4 tbsp honey
  • 6 ea eggs, lg
  • 4 tbsp Grand Marnier
  • 2/3 cup all-purpose flour
  • 1/2 tsp ground clove
  • 3 ea oranges, zested
  • To taste kosher salt

Instructions

  1. Preheat oven to 350
  2.  Butter and flour spring form pan
  3.  In a mixer, add almond paste and sugar, whip until broken up and incorporated.
  4.  Add cubes butter one piece at a time, texture should be light and airy.
  5.  Add one at a time the rest of the ingredients, let mix and be fully incorporated.
  6.  Pour into cake pan, level with spatula.
  7.  Bake for 25-35 minutes in convection oven, color on top should be golden brown. This can be a dense cake, ensure middle is cooked through.
  8.  Remove and let cool, paint with grand marnier on top. Let rest.
  9.  Slice & enjoy!

Recipe by Chef Jessica Lewis
Photography by Erin Kelly

Subscribe to TABLE Magazine’s print edition.

Cauliflower Stir Fry

0
A plate of cauliflower stir-fry with sliced ginger, carrots, and green onion, with a pair of red chopsticks resting on the side.

Chef Ed Harris was born on the Caribbean island of St. Lucia, and eventually made his way with his family to Brooklyn. He added Asian flavor profiles to his palate during five years at NYC’s dramatic (and delicious) Buddakan restaurant in the Meatpacking District. He won Season Four of Food Network’s hit cooking show, Chopped, and he competed on Iron Chef International.

Chef Ed shares an easy Meatless Monday recipe for a Cauliflower Stir Fry that’s rich with ginger, garlic soy, chile and more. It takes all of 15 minutes to cook this delicious veggie feast at home.

Print
clock clock iconcutlery cutlery iconflag flag iconfolder folder iconinstagram instagram iconpinterest pinterest iconfacebook facebook iconprint print iconsquares squares iconheart heart iconheart solid heart solid icon
A plate of cauliflower stir-fry with sliced ginger, carrots, and green onion, with a pair of red chopsticks resting on the side.

Cauliflower Stir Fry with Ginger, Soy, and Garlic


  • Author: Ed Harris
  • Total Time: 15 minutes
  • Yield: Serves 4

Description

A quick and flavorful cauliflower stir fry made with ginger, garlic, soy, and sweet chili sauce, ready to cook in just 15 minutes for a tasty meatless meal.


Ingredients

Scale
  • 2 whole heads of cauliflower
  • Vegetable oil as needed
  • 1/4 cup ginger (minced)
  • 3 cloves garlic (minced)
  • 1 cup onions (minced)
  • 1/4 cup low sodium soy
  • 2 tbsp sesame oil
  • 1/2 cup vegetarian oyster sauce (mushroom sauce)
  • 1 cup sweet chili sauce
  • 6 mint leaves (torn)
  • 8 Thai basil leaves (torn)

Instructions

  1. In a medium size sauté pan put enough oil to cover the bottom of the pan. Heat the oil. Once hot, carefully put one whole cleaned and trimmed cauliflower heads in and sear until golden all sides.
  2. Remove from oil and let drain on paper towels. Repeat with second head.
  3. When cauliflower is cool enough to touch, cut into medium size pieces and put to the side.
  4. Remove all but about 4 tablespoons of oil. Over a medium flame, caramelize the onions, garlic and ginger. Be careful not to burn them.
  5. Once caramelized, transfer to a bowl with the soy sauce, sesame oil, mushroom sauce and sweet chili and mix well.
  6. In a clean sauté pan, bring the sauce to a boil, and then add cauliflower pieces and toss. Remove from heat and plate.
  7. Garnish with fresh herbs and serve.
  • Cook Time: 15 minutes

Recipe by Chef Ed Harris

Subscribe to TABLE Magazine’s print edition.

Kentuck Knob

0
Two cocktails in rocks glasses garnished with large orange peels, next to sprigs of fresh mint and a messy pile of sugar and liquid splatters.

Mixologist Alyssa McGrath shares another of her fantastic inventions with us, the Kentuck Knob.

It’s a combination of her love for Western PA and Old Overholt’s locally made rye, as well as her love of the versatility of Italian digestivos! You will enjoy the floral element of Montenegro mixing with the spicy nature of the rye.

What is Kentuck Knob?

Kentuck Knob is a stunning example of organic architecture by the legendary American architect Frank Lloyd Wright. This house comes from 1956, in a unique Usonian-style. Its location nestles into the side of a hill in the Laurel Highlands of Pennsylvania. The house is characterized by its hexagonal shape, use of local stone and wood, and a seamless integration with its natural surroundings.

Print
clock clock iconcutlery cutlery iconflag flag iconfolder folder iconinstagram instagram iconpinterest pinterest iconfacebook facebook iconprint print iconsquares squares iconheart heart iconheart solid heart solid icon
Two cocktails in rocks glasses garnished with large orange peels, next to sprigs of fresh mint and a messy pile of sugar and liquid splatters.

Kentuck Knob


  • Author: Alyssa McGrath

Description

A smooth and flavorful cocktail blending spicy rye, floral amaro, sherry, and fresh lemon juice, finished with a bright orange twist.


Ingredients

Scale

Instructions

  1. Combine all ingredients in a shaker.
  2. Shake and double strain over ice.
  3. Garnish with a massive orange twist.

Recipe by Alyssa McGrath

Subscribe to TABLE Magazine’s print edition.
Roasted Chicken with Vegetables

0
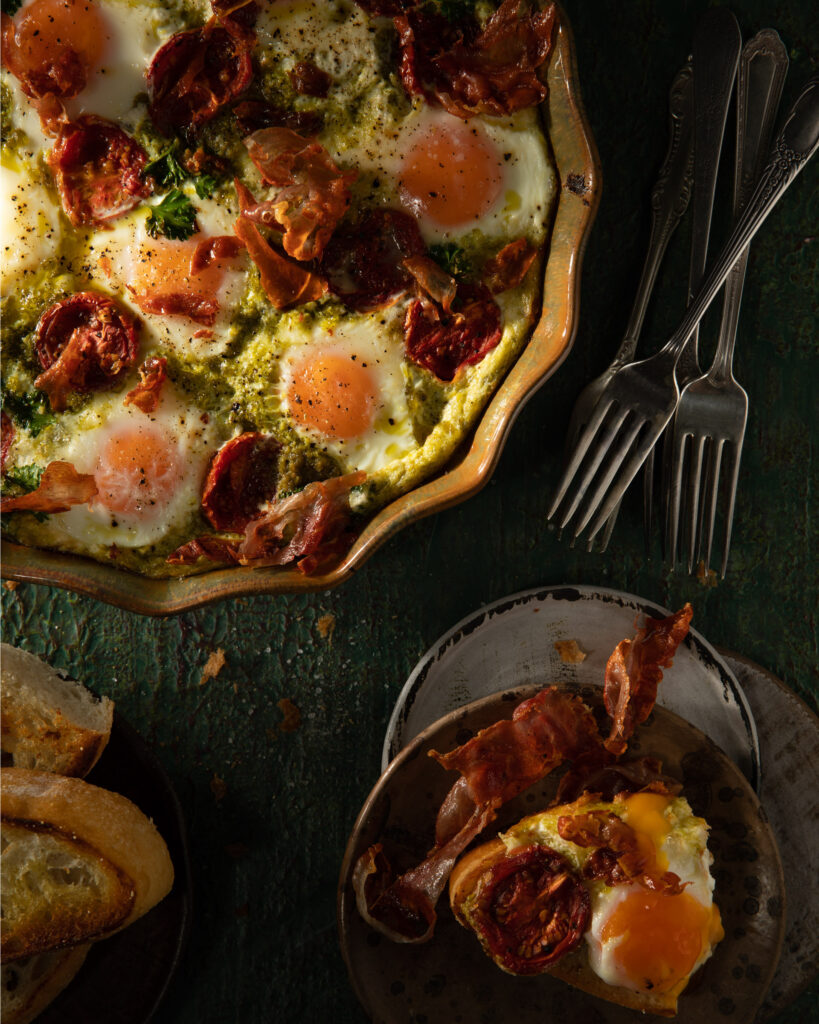
A perfectly roasted whole chicken on a white platter garnished with grapes, apples, cranberries, and fresh sage, alongside a vintage carving set.

TABLE Magazine contributor Rhonda Schuldt handles a crisis the old fashioned way: by wondering, “What would mom do?” Today’s crisis is that of what to make for dinner. The answer? Time-tested, family style recipes whose healthy leftovers are the beginnings of some inspired “second acts.” Or, otherwise known as Roasted Chicken with Vegetables. This recipe gets you your daily dose of healthy protein with an easily roasted chicken. The addition of potatoes, carrots, and onions gives this dish a home-y feel and will instantly take you back to your days of sitting at the dining table as a child.

Print
clock clock iconcutlery cutlery iconflag flag iconfolder folder iconinstagram instagram iconpinterest pinterest iconfacebook facebook iconprint print iconsquares squares iconheart heart iconheart solid heart solid icon
A perfectly roasted whole chicken on a white platter garnished with grapes, apples, cranberries, and fresh sage, alongside a vintage carving set.

Roasted Chicken with Vegetables


  • Author: Rhonda Schuldt

Description

A classic roasted chicken with potatoes, carrots, and onions, cooked until tender and juicy, perfect for a family meal and tasty leftovers.


Ingredients

Scale

To prep the chicken:

  • 1 whole chicken (about 5 lbs.; giblets removed), rinsed and patted dry
  • 3 cloves garlic, peeled but not chopped
  • 1 medium onion, peeled and quartered
  • 2 tbsp olive oil (or melted butter)

Optional:

  • 1 lemon, quartered
  • 1 stalk celery, quartered
  • 1 bunch each, fresh thyme, rosemary, parsley (or other fresh herbs, such as tarragon, chervil or marjoram)
  • Salt and Pepper

To prep the vegetables:

  • 68 medium red or Yukon Gold potatoes, quartered
  • 1 small bag of baby carrots (or 6 large carrots, peeled and cut into 2-inch pieces)
  • 1 large onion, peeled and quartered
  • 2 tbsp olive oil
  • Salt and Pepper

Instructions

To prep the chicken:

  1. Preheat oven to 350° F.
  2. Season chicken cavity with salt and pepper then stuff with garlic and the quartered onion; if desired add lemon pieces, celery, and fresh herbs to the cavity.
  3. Place chicken (breast-side up) in a large roasting pan, tuck the wings underneath the bird and tie the legs together with kitchen string.
  4. Brush or rub olive oil over the outside of the chicken and season liberally with salt and pepper.

To prep the vegetables:

  1. Place potatoes, carrots and onion in a large bowl, add olive oil, salt and pepper; toss to coat.
  2. Place the seasoned vegetables in the roasting pan around the chicken.

To assemble and roast:

  1. Place the chicken and vegetables in the 350° preheated oven.
  2. Roast for approximately 20 minutes per pound (1 hour and 40 minutes for a 5-pound bird), or until the inner thigh meat reaches an internal temperature of 165° F.
  3. Once the chicken is at the proper temperature, remove it from the oven and place it on a cutting board.
  4. Lightly tent with aluminum foil and let rest for 10 minutes before carving. Place vegetables in a warmed serving dish.

For the pan sauce (optional):

  1. To make a lovely pan sauce, place the roasting pan on the stove and heat over medium high.  Deglaze with ½ cup chicken stock or white wine, scraping up the tasty browned bits.
  2. Cook for 2-3 minutes to slightly reduce then finish by whisking in a tablespoon of butter.
  3. Carve the chicken and serve with the roasted vegetables. Drizzle with pan sauce if desired.

Notes

Cooking Tip: Roast 2 chickens for plenty of leftovers!  Meat can be removed and frozen for future use, and the bones can be utilized to make homemade stock.

Recipe by Rhonda Schuldt

Subscribe to TABLE Magazine’s print edition.
Using Leftover Chili in New Recipes

0
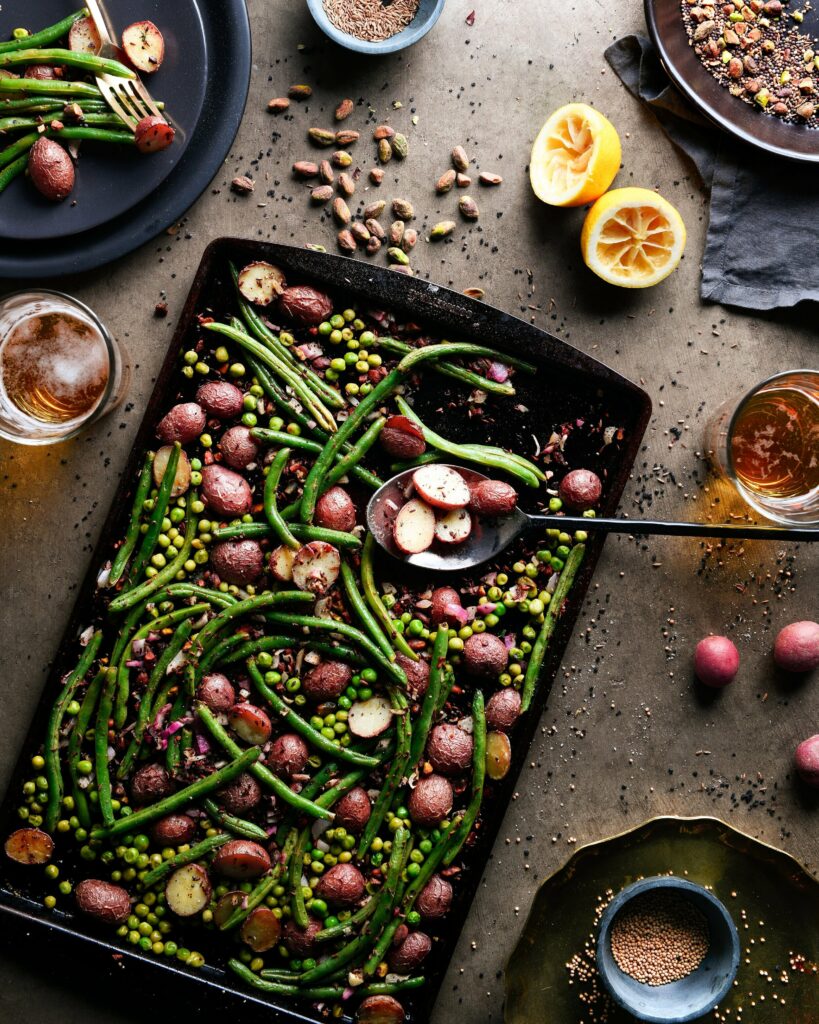
A platter of three loaded baked potatoes topped with recipes like leftover chili, sour cream, bacon bits, and chopped chives.

Whenever you’re tired after work and don’t feel up to making a dinner from scratch, preparing chili ahead of time can come in handy. Chili of any kind makes for all sorts of delicious leftover recipes to satisfy your hunger throughout the week. TABLE Magazine contributor Rhonda Schuldt suggests four mouth-watering dishes that make the most of leftovers from her Mom’s Basic Chili. Start off with Loaded Baked Potatoes that pour over with chili on top. Then, prepare a Taco Salad for lunch with all your favorite ingredients. Or, go more classic with a Chili Mac or Chili Joes that feel like home as a leftover chili recipe.

Print
clock clock iconcutlery cutlery iconflag flag iconfolder folder iconinstagram instagram iconpinterest pinterest iconfacebook facebook iconprint print iconsquares squares iconheart heart iconheart solid heart solid icon
A platter of three loaded baked potatoes topped with recipes like leftover chili, sour cream, bacon bits, and chopped chives.

Loaded Baked Potatoes


  • Author: Rhonda Schuldt

Description

Fluffy baked potatoes filled with warm chili and your favorite toppings for a hearty, comforting meal.


Ingredients

  • Large russet potatoes
  • Leftover chili (warmed)
  • Optional toppings: shredded cheese, sour cream, diced onions, hot sauce, etc.

Instructions

  1. Preheat oven to 400°F (200°C).
  2. Roast potatoes for about 45 minutes, or until easily pierced with a knife.
  3. Cut along the top of each potato and gently push from both ends to open.
  4. Add a scoop of warm chili and garnish with your favorite toppings.
Print
clock clock iconcutlery cutlery iconflag flag iconfolder folder iconinstagram instagram iconpinterest pinterest iconfacebook facebook iconprint print iconsquares squares iconheart heart iconheart solid heart solid icon

Taco Salad


  • Author: Rhonda Schuldt

Description

A fresh, crunchy salad topped with warm chili, cheese, and zesty toppings for a quick and flavorful meal.


Ingredients

  • Iceberg or romaine lettuce, thinly sliced
  • Diced tomatoes
  • Diced yellow onion
  • Leftover chili (warmed)
  • Shredded cheese of choice
  • Optional: sour cream, hot sauce
  • Optional vegetarian swap: leftover Cuban black beans

Instructions

  1. Place sliced lettuce in a serving bowl or plate.
  2. Top with diced tomatoes and onions.
  3. Add a scoop of warm chili (or black beans for vegetarian).
  4. Garnish with shredded cheese, sour cream, and hot sauce.
Print
clock clock iconcutlery cutlery iconflag flag iconfolder folder iconinstagram instagram iconpinterest pinterest iconfacebook facebook iconprint print iconsquares squares iconheart heart iconheart solid heart solid icon

Chili Mac


  • Author: Rhonda Schuldt

Description

A quick and cheesy comfort dish combining pasta and leftover chili for a filling, one-bowl meal.


Ingredients

Scale
  • 1 cup cooked macaroni
  • 1½ cups leftover chili (warmed)
  • Optional: shredded cheese for topping

Instructions

  1. In a bowl, mix cooked macaroni with warm chili until combined.
  2. Top with shredded cheese if desired.
  3. Serve hot.
Print
clock clock iconcutlery cutlery iconflag flag iconfolder folder iconinstagram instagram iconpinterest pinterest iconfacebook facebook iconprint print iconsquares squares iconheart heart iconheart solid heart solid icon

Chili Joes


  • Author: Rhonda Schuldt

Description

A chili-based twist on sloppy joes, served on a bun or open-faced for a messy, delicious bite.


Ingredients

Scale
  • ¾ cup leftover chili per serving
  • 1 tbsp tomato sauce per serving
  • Buns of your choice

Instructions

  1. In a pot, combine chili and tomato sauce.
  2. Heat and simmer until thickened.
  3. Serve on buns as a sandwich or open-faced.

Recipes by Rhonda Schuldt

Subscribe to TABLE Magazine’s print edition.