Commonly called by the nickname Torta, Tortang Talong (Eggplant Omelet) is widely popular in all parts of the Philippines. The simple version only uses eggs along with roasted eggplant. But, some variations of Tortang Talong include cooked ground meat or crab meat for a heartier dish. Patis (fish sauce) is the first choice for condiment, but banana ketchup is also another Filipino favorite. After you’re done preparing your Eggplant Omelet, you should serve it with hot white rice and as an accompaniment alongside fish and seafood dishes.
The History of Tortang Talong (Eggplant Omelet)
Eggplants tend thrive in the tropical climates of the Philippines which makes it an abundant and critical ingredient in Filipino cuisine. While this ingredient had its place in history already, it wasn’t until the Spanish colonial period that eggplant and eggs came to be. During this time, Filipino cooks adopted the concept of the torta (essentially an omelet) and began combining roasted eggplant with beaten eggs to create a more structured and filling meal. As farming practices expanded, the availability of eggs did as well leading this dish into the homes of Filipino citizens too.
2 large or 3 small Asian variety eggplants (about 1/2 lb)
2 large eggs
Salt and pepper
Oil for frying
Patis (fish sauce) for serving or banana ketchup (available at any Asian grocery stores)
Instructions
Char the eggplant to remove the skin; place over flame on top of stove or grill/broil until soft; place eggplant in a bowl covered with plastic to allow the steam to soften, peel when cooled. Use a fork to gently flatten the eggplant leaving the stem part to keep it whole.
Beat eggs in a bowl big/wide enough to dip the eggplant in. Season with a good pinch of salt and pepper.
Heat pan and add a little oil (about 1 tbsp or less if using a non-stick pan). Dip the eggplant and allow it to soak a little; leftover eggs can be slowly drizzled onto the eggplant while frying.
Fry until golden brown on one side (about 4 to 5 minutes) and flip over and cook the same.
Season with a little salt and pepper after frying and drain on paper towels if needed.
Recipe and Styling by Rafe Vencio Photography by Dave Bryce
Rice cakes in the Philippines comes in many variations, this recipe is a boiled version that is easy to make at home. This is a widely popular snack found everywhere in the Philippines. There are some variations to this recipe like toasting the coconut, but it can vary depending on the region. Picture the texture sort of like a Japanese mochi. It’s chewy, a bit dense, but not overly-done. A lot of the flavor here comes from the toasted sesame seeds and fresh grated coconut but there is a distinctness to the glutinous rice flour with a bit of sugar.
The History of Palitaw (Filipino Chewy Rice Cakes)
This recipe for Palitaw is essential to the pre-colonial past of the Philippines. In fact, the name comes from the indigenous Filipino word litaw which is a verb equating to floating or rising. Originally, this recipe would be pretty simple, calling on sugar and glutinous — two over-arching staples of the Filipino diet. But, as times continue and different ingredients become available to families, cooks experiment with additions like the coconut and toasted sesame seeds, or brown sugar and coconut caramel (latik syrup).
Ginataang Munggo or Mung Bean Porrige begins with a Filipino-essential base of mung beans and glutinous rice. Early preparations likely combined these staples into a basic porridge, and cooks later added coconut milk to give the recipe its creamy texture.
Over time, Filipino cooks continued to expand the recipe by incorporating root crops such as taro and sweet potatoes for added sweetness and softness, along with saba (Thai bananas) and ripe jackfruit to introduce aroma and depth of flavor. People commonly enjoy Ginataang Munggo as an afternoon snack or during merienda (a pause during the day to snack and relax with those you love), where it continues to stand as a familiar and satisfying part of Filipino food culture.
What Are Mung Beans?
Mung beans are small, green legumes popular across Asia, particularly in countries like the Philippines, India, and China. Farmers cultivate them because they grow quickly and because they are nutritious. Mung beans typically are round or slightly oval beans with a green outer skin and a pale yellow interior. Their taste boarders on nutty and earthy with a versatile texture that works in porridges, stir-fries, and salads. Because they’re a legume, the roots of the plant fix nitrogen into the soil, which makes them a valuable crop to put in rotation with other kinds of foodstuffs.
Comforting when you need a bowl that feels like home along the coast.
Ingredients
Scale
1 cup green mung beans
1 cup glutinous rice or 1/2 cup glutinous rice flour
2 cans coconut milk
1 can coconut cream
2 cups water or more as needed
1 cup sugar, less or more to adjust to your preference
Instructions
Wash and rinse glutinous rice and set aside.
Toast the mung beans in a dry skillet or pan until evenly browned. Using a mortar and pestle or food processor, grind the beans coarsely.
Bring coconut milk and 1 cup water to a boil then add the toasted mung beans and washed rice. Cook on medium heat until soft; add more water as needed if it starts to dry out. Once cooked, add the coconut cream and sugar to taste.
If adding optional ingredients: boil the root vegetables separately until soft and set aside, add to the sweet porridge at the last step; add jackfruit as well if using.
Recipe and Styling by Rafe Vencio Photography by Dave Bryce
Arroz Caldo, which translates to “rice broth” or “rice porridge,” reflects the Spanish influence on Filipino cuisine. However, the dish itself has strong roots in Chinese congee, a similar rice porridge. Across the Philippines, there are many variations of Arroz Caldo where some add safflower for color, others top with crispy garlic, boiled eggs, or a squeeze of calamansi citrus for brightness. The recipe and garnishes really come down to regional preferences or family traditions.
Though it is a popular snack, Arroz Caldo is hearty and filling enough to be a full meal. Its warm, soothing nature makes it especially popular during cooler weather or rainy days. More than just comfort food, it’s also a remedy for those who are feeling under the weather.
Why Use Fish Sauce in This Arroz Caldo (Chicken & Rice Porridge)?
Don’t worry, using fish sauce in an Arroz Caldo recipe won’t turn your dish fishy. Instead, it provides a deep, savory saltiness that regular salt alone can’t achieve. Since this is a simple dish with few ingredients, it relies on its seasoning and dish sauce to build the flavor. Plus, it adds that umami profile that makes this dish more complex than its preparation.
Fry half of the garlic until golden brown and set aside; reserve about 2 tbsp. of the oil; sauté the garlic first until golden brown and add the onions and ginger next, cook until lightly translucent and fragrant.
Add fish sauce, chicken, salt, pepper, water and bring to a boil; drop to a gentle simmer and cook chicken for about 45 to 50 minutes. Remove chicken and let cool; pick meat off and set aside.
Bring stock to a boil and add the glutinous rice; reduce to a simmer and cook for about 25 minutes or until the rice is tender, stirring frequently. Add water if you want to thin it down. Adjust seasoning to taste.
Add the chicken meat into the porridge before serving and garnish with crispy garlic and spring onions, fresh julienned ginger also optional as garnish.
Recipe and Styling by Rafe Vencio Photography by Dave Bryce
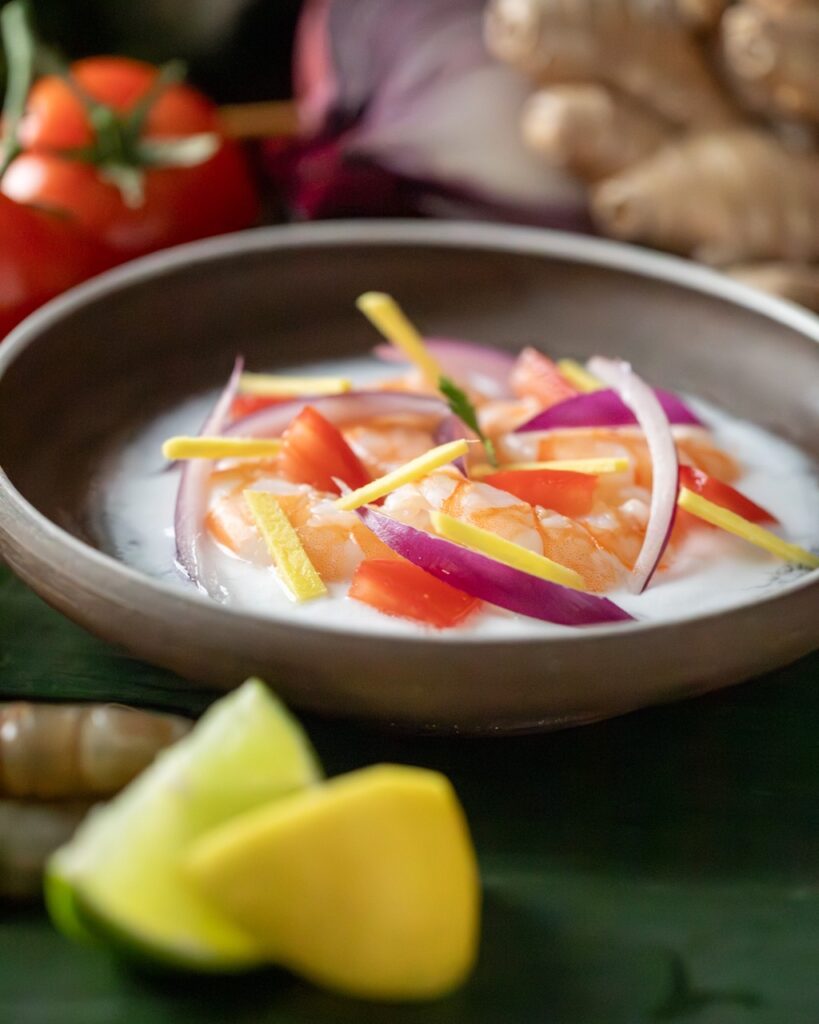
Kinilaw na Hipon is similar to Spanish Ceviche but with the Filipino addition of coconut milk that adds sweetness and balances the acidity ceviche depends on. Traditionally made with calamansi, a citrus endemic to the Philippines, a combination of lemons and limes works as a good substitute. Other types of fish like tuna work well with this recipe, but any fresh seafoods and shellfish can be used. Tapioca crackers are an excellent accompaniment to this dish, but you can also use tortilla chips or other crackers/chips of your preference.
How Do We Prepare the Shrimp in Kinilaw na Hipon?
Kinilaw na hipon doesn’t use heat to cook the shrimp in this recipe. Instead, it relies on acid, usually from vinegar or citrus juice, to transform the meat. This process is called denaturation. When the shrimp meets an acidic ingredient, the proteins in the shrimp unravel and firm up. A similar process occurs when cooking with heat. As this happens, the shrimp changes from translucent gray to opaque and slightly pink, changing its texture. At the same time, the acid, along with the recipe’s seasonings, help establish a delicious flavor.
Let these flavors transport you to the coastlines.
Ingredients
Scale
1 lb prawns or tiger shrimp, peeled & deveined
1 cup sugarcane vinegar or any white vinegar
2 tbsp shallots or red onions, minced
2 tbsp fresh ginger, minced
1 tbsp fresh garlic, minced
1 tsp small green chili, thinly sliced (optional)
1 tsp patis (fish sauce)
1/2 cup coconut milk
1/2 cup citrus juice (any ratio of either or both lemon and lime)
1/2 cup cucumber, peeled & seeded
1/2 cup Roma tomatoes, seeded and small diced
Salt and ground white pepper to taste
Cilantro for garnish
Instructions
Split the shrimp in half lengthwise along the spine and cut into smaller pieces; the smaller the cut the faster the shrimp will cure and influence the texture.
Combine all ingredients and let marinate for about 10 to 15 minutes to cure the shrimp to your preferred doneness; you can let it sit longer to allow the raw shrimp to fully cure.
Recipe and Styling by Rafe Vencio Photography by Dave Bryce
When the long march toward summer starts to feel like it’s dragging, Bourbon Cookie Bars ought to be in your hygge toolkit. A soft cookie bar full of pecans, raisins, and chocolate chips combines with a generous layer of boozy bourbon buttercream that will help make the chilly edges of any afternoon go pleasantly fuzzy. As with most cookies and bar recipes, you can add a dash of sustainability to the recipe by substituting a fifth of the flour by weight (40g, in this case) for a climate-resilient flour like rye, millet, or Kernza.
What is Climate-Resilient Flour in These Bourbon Cookie Bars?
Climate-resilient flours come from grains and crops that are better adapted to withstand environmental stress such as droughts, poor soil, and temperature swings all while requiring fewer chemical inputs. In the context of these Bourbon Cookie Bars, swapping in a portion of rye, millet, or Kernza flour adds a subtle nutty taste and a slightly heartier crumb along and helps practice sustainability. Kernza, for example, is a perennial grain with deep roots that help prevent soil erosion and capture carbon, while flours like millet thrive in dry conditions with minimal resources.
For those hard days where a sweet treat is all that can heal your soul.
Ingredients
Scale
1 ½ cups (195g) flour
¾ tsp baking powder
¼ tsp salt
¾ cup margarine, softened to room temperature
¾ cup light or dark brown sugar
1 ½ tsp vanilla
2 eggs
⅓ cup bourbon
1 cup toasted pecan pieces
½ cup raisins
½ cup chocolate chips
For the frosting:
3 ½ cups powdered sugar
6 tbsp margarine, softened to room temperature
1 tsp vanilla
3 tbsp bourbon
Instructions
Preheat the oven to 350F and lightly grease a 13 by 9 inch pan.
In the bowl of a stand mixer, beat the margarine, brown sugar, and vanilla on medium speed until the texture is fluffy and the color has lightened somewhat.
Add the eggs one at a time, then beat on low-medium speed until well combined, scraping down the sides of the bowl after each addition.
In a medium bowl, whisk together the flour(s), baking powder, and salt. Add this dry mixture to the margarine mixture alternately with the bourbon, in three parts each.
Using a spatula, stir in the pecan pieces, raisins, and chocolate chips.
Bake for 20-25 minutes.
While the bars cool, prepare the frosting in a stand mixer. Combine the margarine and one cup of the powdered sugar, mixing on low-medium speed until well combined. Alternately add a tablespoon of bourbon and about a third of the remaining powdered sugar at a time, mixing after each addition (incorporating both ingredients gradually helps keep the frosting extra smooth). Add the vanilla.
Once the bars have cooled, frost them directly in the pan using an offset spatula.
Bars keep for up to four days in an airtight container at room temperature.
Recipe by Caroline Saunders Photography by Dave Bryce
Mario (Chris Pratt), Yoshi (Donald Glover) in Nintendo and Illumination’s The Super Mario Galaxy Movie, Directed by Aaron Horvath and Michael Jelenic.
Every Mario game has levels you love to play and levels you hate. The former are fun, fast-paced and imaginative; the latter are clunky, difficult and irritating.
The Super Mario Galaxy Movie Review… It’s-A Not So Great…
The Super Mario Galaxy Movieis like a level you hate. It’s oddly humorless, deadly dull and sorely lacking in the energetic whimsy that makes Nintendo’s video games fun. Sure, it throws a lot at you. Trips to different galaxies! Yoshi! A parade of villains from the series’ 40-year history, in case you really needed an appearance by 1988 frog-boss Wart!
All that excess, however, simply reduces coherence. It’s an experience that leaves you inclined to put down the controller and give up.
More Princesses, More Castles
The previous film in this series, 2023’s Super Mario Bros. Movie, was unambitious but slightly more pleasing; it made room for jokes and cleverly played with video-game mechanics. Fundamentally, though, the studio Illumination (also responsible for the Minionsempire) doesn’t seek to craft particularly thoughtful films; it churns out 90-minute features that will entrance kids and sneak in enough easter eggs to keep parents occasionally amused.
The low bar set by the 2023 film was apparently too high this time around. The focus here is on visual flourishes, action sequences and — horror of horrors — plot development. We could’ve been having fun; instead, we’re (slowly) exploring Princess Peach’s backstory and seeing if Bowser can complete a redemption arc. (And no — we do not get a proper follow-up to Peaches, the surprise hit ballad from the last movie.)
That’s Not What Mario Sounds Like
Add a clunky story (a different princess, Rosalina, has been kidnapped, sending a plea for help across the stars to the Mario brothers), and the cracks in the franchise have plenty of room to show. The leading plumbers do the film no favors with their poor performances; Chris Pratt remains disinterested and lazy in his take on Mario, while Charlie Day overcorrects and gets irritating as Luigi. (Keegan-Michael Key, as Toad, is better; his appearances are refreshing.)
The film has been relentlessly marketed, so parents are likely already stuck taking the kids this weekend. (The film is expected to do huge business; it’s a win for cinemas, at least.) If you’re a grown-up fan hoping for a worthwhile journey, though, adjust your expectations; the slog isn’t worth the nostalgia hit.
Unfortunately, this isn’t one rough level in a good game — it’s a completely disappointing experience. Save the trip and play Nintendo instead.
The horror-comedy Dead Loveris also making its way to arthouses. The film, by Canadian director Grace Glowicki, has been well-received; it’s a deep riff on Frankenstein, one of many to hit theaters and streamers as of late.
In an age where socialization and health-forward thinking define the average person’s values, the world is seeing an upward trend in NA (non-alcoholic) or sober lifestyles as a way to meet both goals without sacrifice. Rather than having to sit at home while the rest of your friends meet up at a party or gather at a local bar, NA options have turned Dry January on its head, making any time of year the best time to cut back on your alcohol consumption.
Non-Alcoholic Beer, Spirits, and Other Beverages Taking Over 2026 Trends
Little Saints is one of the NA brands making a splash in 2026. Their combination of available ready-to-drink non-alcoholic cocktails (such as Classic Margarita, Ginger Mule, Negroni Spritz, and Paloma) and spirits (in a range of gin, rye and bourbon, and even functional spirits that use varieties of mushrooms) showcase how tasty going the NA can be. While their brand builds on the growing movement, there’s a core reason why interest keeps up-ticking.
Photo Courtesy of Little Saints
“We think it’s pretty simple: Accepting being hungover on a regular basis is a thing of the past,” explains Megan Klein, founder of Little Saints. “People still want to have a drink at night, because they like the ritual and the elevated flavor profile that signifies ‘it’s time for my reward’ at the end of the day. We believe that post-Covid, people are more comfortable advocating for their own well-being, and less likely to be peer-pressured into something that doesn’t make them feel good. Even the rise of GLP-1s is fueling the increased demand for NA, especially for NA that is zero sugar.
Non-Alcoholic Beverages Are For Everyone
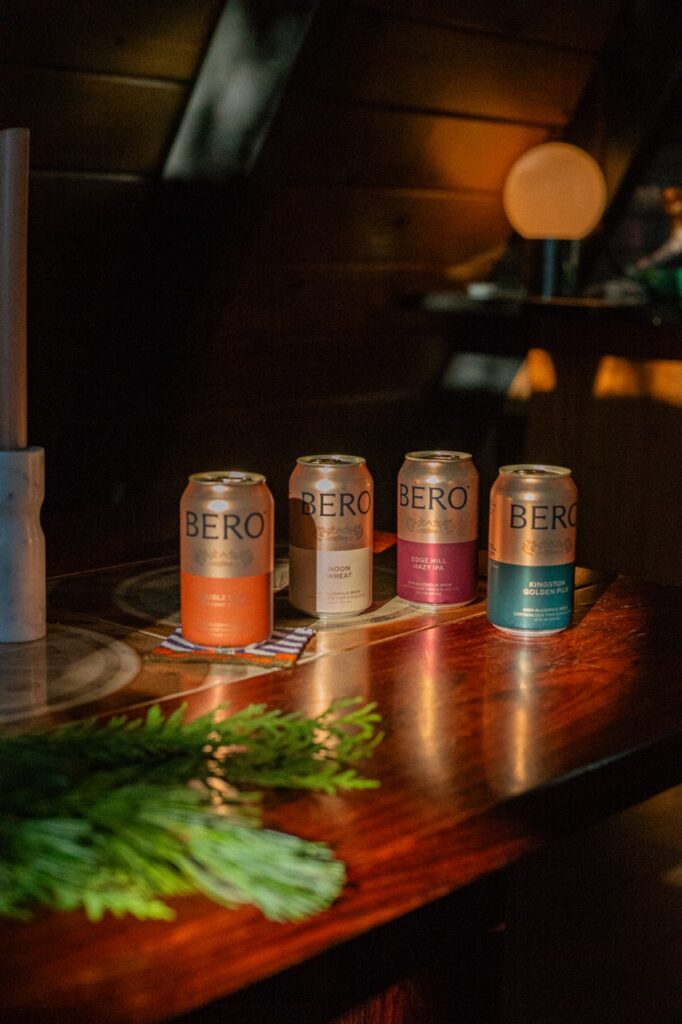
That balance of having something special while still treating your body well is key. Many people look at an NA lifestyle as the consequence of an action. But, that landscape is changing as more and more people realize there are other reasons for foregoing alcohol than just something like alcoholism. BERO, a premium non-alcoholic beer brand run by Spider-Man actor Tom Holland and Pittsburgh-native John Herman, are working on changing that misconception by crafting a beer that is just as delicious as those from a brewery but with less than .5% alcohol.
Photo Courtesy of BERO
“Non-alcoholic drinking is not this niche category of, ‘Oh, he’s drinking O’Doul’s, he has an issue,’” says BERO co-founder John Herman. “It’s not about that anymore. It’s about great-tasting optionality, the ritual of sharing a drink with people, making memories. I’m not on a full sobriety journey. But my daughter doesn’t understand a Saturday hangover and sleep is becoming that much more important as I age. It really opened my eyes to what the potential of this category could be.”
It’s not just those in their later, parental years of life who are making the change either. According to Datassential, “Gen Z is at the forefront, with nearly half planning to reduce alcohol consumption. They show the highest engagement with tea during social occasions and are most likely to question alcohol’s role in enhancing experiences.” As all age groups take into consideration what comes out of drinking, the more important businesses like BERO and Little Saints become, especially as the consensus around mocktails shifts.
The “Mocktail” You Know is a Thing of the Past
The “mocktail” that most know is slowly disapearing, but not for a bad reason. Whenever the mocktail was first on the rise, it didn’t take much to address a non-alcoholic customer. Most places chose to mix sodas and juices but there was still this need for something more, something that didn’t feel like you were an outcast relegated to the kid’s table. Hence, the addition of products like non-alcoholic spirits, cocktails, beers, and wines that add a sophistication to non-alcoholic drinking.
“We believe that the most rapidly growing channel of NA will be on-premise menu placements incorporating non-alcoholic spirits,” says Megan Klein of Little Saints. “While most bars and restaurants have an NA menu, many of those are still full of juice mocktails, which we know that people do not want, mainly due to high sugar content. All of our markets are reporting increased interest in menu placements that go beyond juice into the categories of top-shelf NA cocktails, such as NA martinis, negronis and margaritas, made with top-shelf NA spirits.”
Photo Courtesy of Little Saints
The Non-Alcoholic Sector in Pittsburgh
While there is still a long way to go before these products make it into every establishment, cities like Pittsburgh are already putting NA values front and center at many of the bar programs around the city. Usually you see these trends excel on the coasts and work their way in, but the City of Steel actually got a handle on the NA trend early.
“Pittsburgh somehow over-indexes here, and I think a lot of that goes back to the progressive and really great food scene,” says Herman. “You have a lot of leaders and they’re pushing for a higher quality of menu and selection than what traditionally existed. We went to Spork a couple weekends ago, and they had a full non-alcoholic pairing. It was so thoughtful and curated, tied into everything. That would have been advanced for the trendiest neighborhood in Southern California—what they’re putting out in Pittsburgh is incredible.”
Pittsburgh is also lucky when it comes to a supportive NA landscape that collaboration is one of the largest drives of menus and new products. Small, local restaurants, bars, breweries, distillers, and other professionals come together to introduce the community to a better, newer way of going alcohol-free. It provides the space needed for community engagement without pushing for people to over-consume alcohol.
“I think so much of the redevelopment and thought process of this town is being driven by the creative geniuses in food and restaurants,” explains Herman. “You have chefs trying to bring a higher-quality menu and selection, and that’s showing up in non-alcoholic offerings too. While Pittsburgh still has a strong beer culture, you’re now seeing some of those same breweries help define what NA beer can be. It’s both traditional and progressive at the same time.”
Photo Courtesy of Little Saints
The Future of Drinking
As bigger cities like Pittsburgh continue to place an emphasis on NA values, it’s becoming crucial that smaller cities follow its lead. As more people find out what their night-life and every-day could look like, there’s no going back from what expectations for NA options look like.
“General traffic at bars and restaurants is down, so you need to make sure you’re satisfying every consumer with great options and high-quality options,” says Herman. “That’s what’s driving a lot of this—it’s not just a trend, it’s a necessity. It’s becoming less of a decision of, ‘Do you want a mocktail or a beer or wine?’ It’s really about giving optionality. It’s not about saying, ‘You’re a wine drinker, so here’s a fruity mocktail.’ Instead, it’s about giving people choices that actually match how they want to drink in the moment.”
In case you’re interested in trying a taste of non-alcoholic beverages at home, Chef Richard Sandoval’s Art of Zero-Proof collection provides the perfect starting point for mixing up a delicious mocktail at home. You could even use Little Saints selections for curating the best flavor possible.
Or, take things easy and order up a case of BERO for sipping during the next big game or on a lovely sunny afternoon.
Story by Kylie Thomas Featured Photo Courtesy of Little Saints
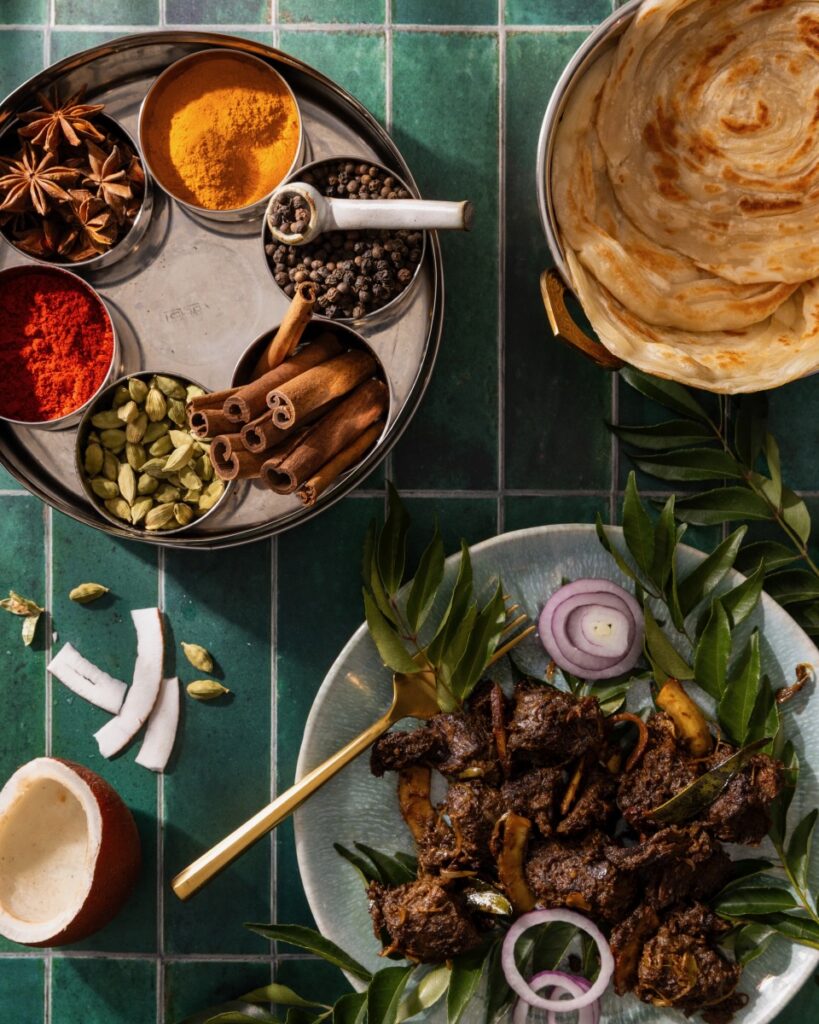
A task such as introducing an entire subcontinent’s cuisine through six recipes is not only a monumental task, but an impossible one. The breadth and depth of Indian cuisine is so wide that choosing representative recipes would inevitably do an injustice to the diverse communities of India. So, in choosing these particular recipes, I wanted to highlight some less familiar recipes from the southern region of India where I am from, touch upon some common techniques used in Indian cooking, and possibly remove some inaccurate presumptions made about Indian cuisine.
Techniques of Indian Cooking
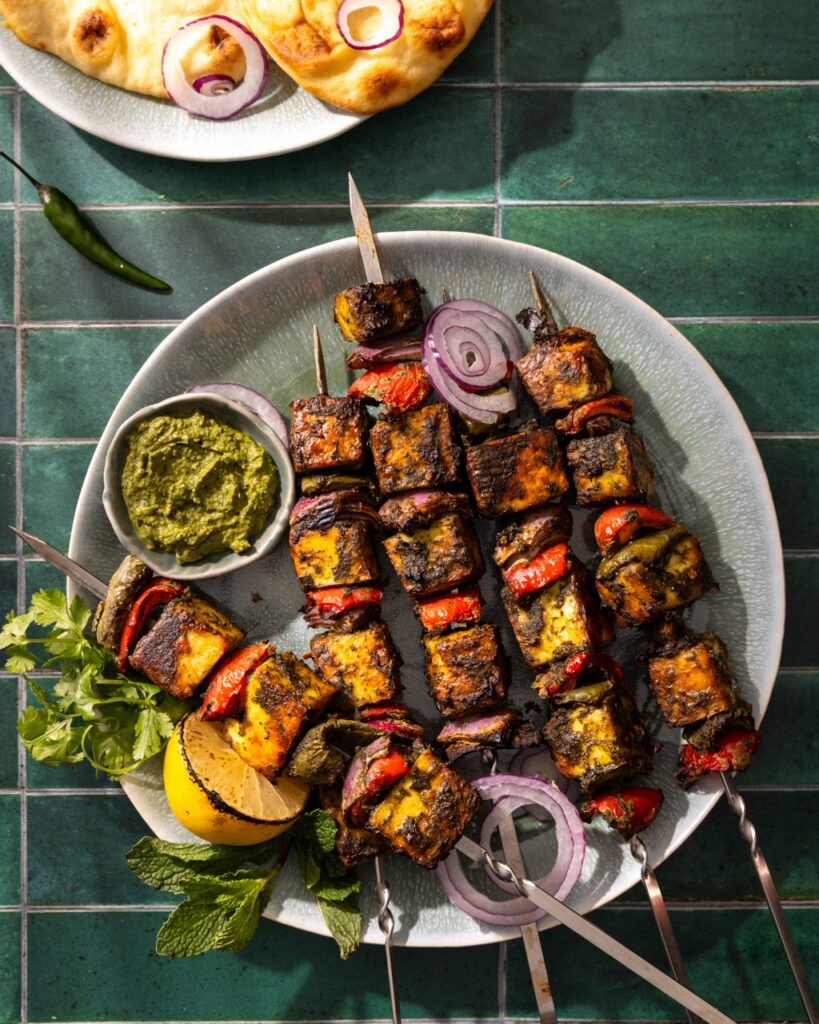
Indian cooking techniques like blooming whole spices in oil to release their flavor, tempering recipes using mustard seeds and curry leaves, using ghee or clarified butter to impart a unique buttery flavor to the food, and even soaking the basmati rice before cooking are all important ones to learn if one wishes to cook Indian food properly.
The Hariyali Paneer Kebabs are my nod to the northern part of India and paneer’s origins from Persian and Afghan influences during the Mughal period during the 16th and 17th centuries.
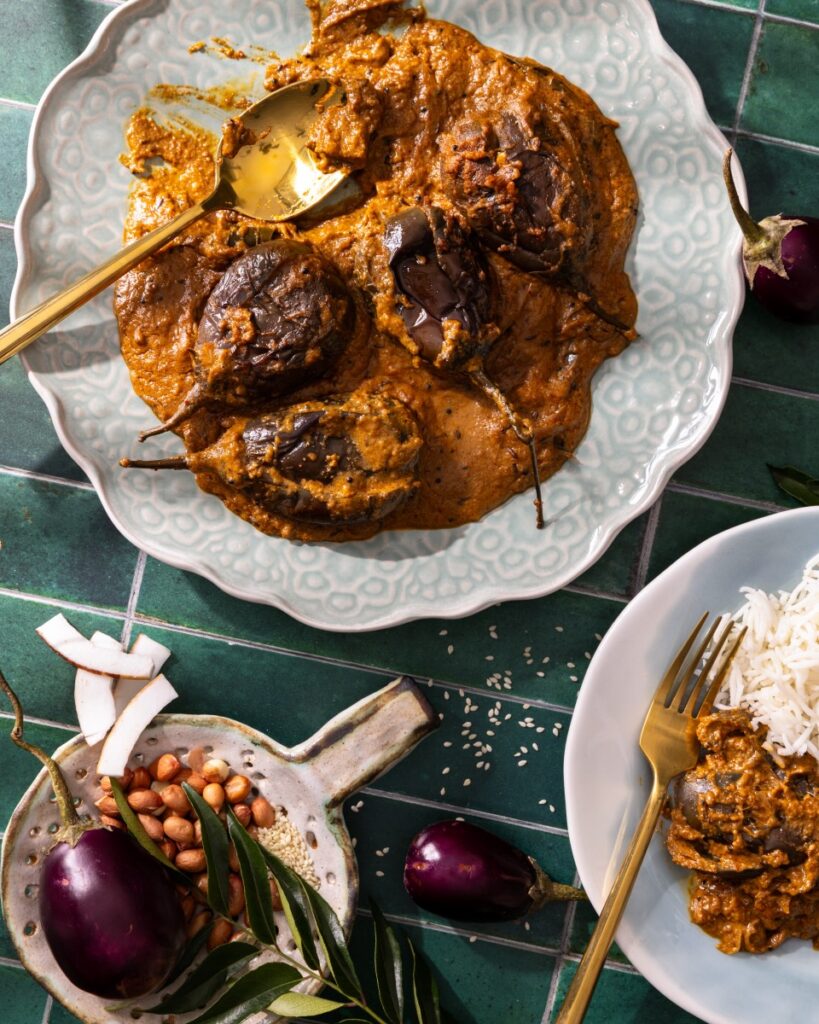
The Kerala Style Dry Beef Stir-Fry is to highlight the diverse religious and cultural communities in India as well as show how regional agriculture affects ingredient usage. The abundance of coconut groves in Kerala makes this ingredient ubiquitous in their recipes.
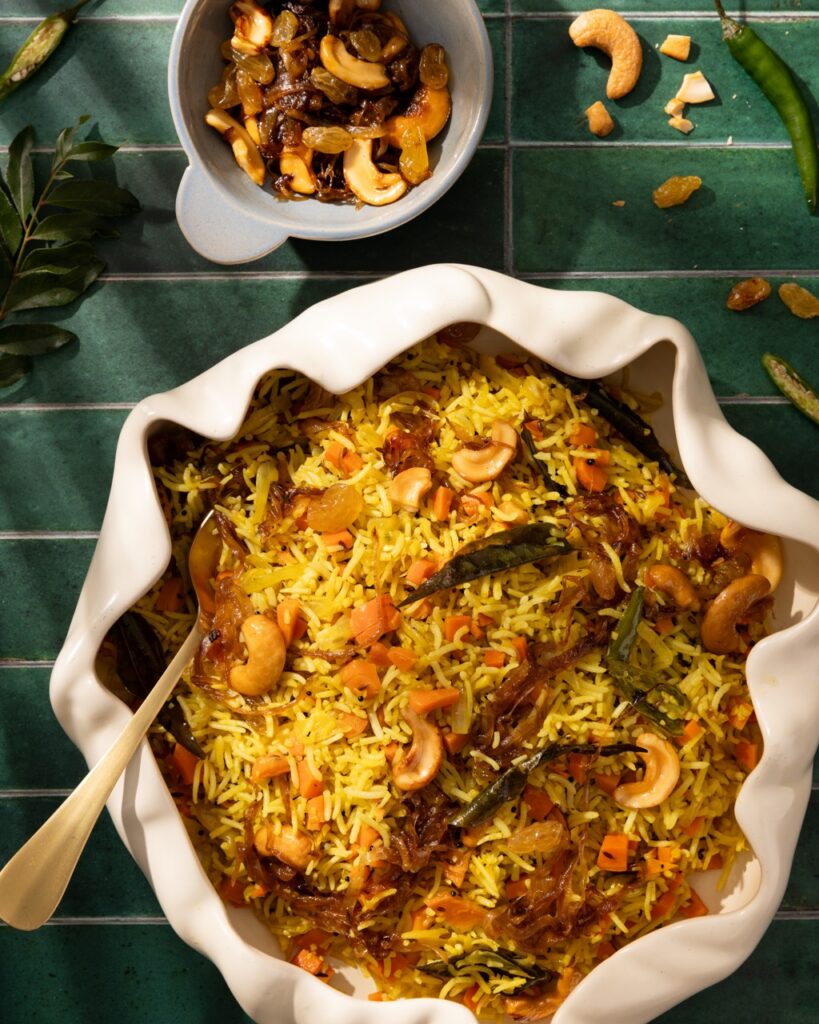
India is known for its multitude of rice dishes, ranging from complicated biriyanis to simple daily recipes like this one. In South Indian households, a variety of vegetarian rice dishes, like coconut rice, tomato rice, or lemon rice (and carrot rice) are staple quick recipes made for lunches or picnics.
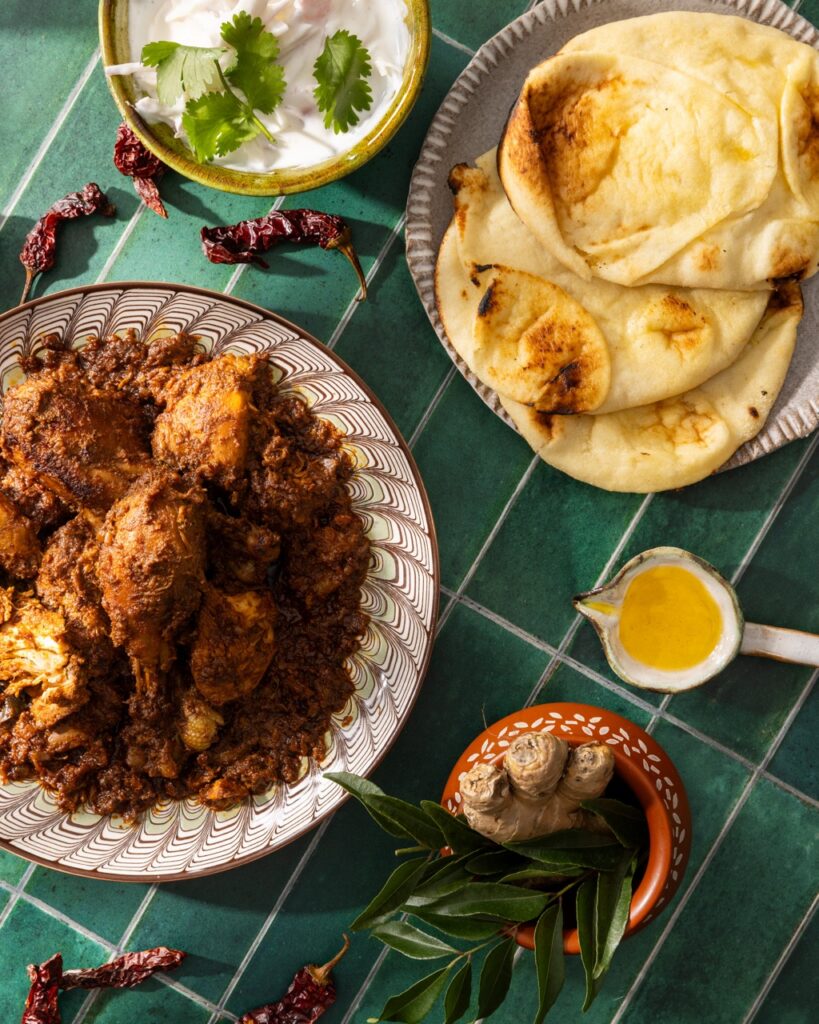
Mangalorean Chicken Roast originates from the South Indian town of Kundapur in Mangalore, Karnataka in the kitchen of the Shetty Lunch Home. It has a signature deep red color and smokiness from the Byadgi chilies, a tanginess from the tamarind, as well as richness from the ghee, or clarified butter.
I hope that this small introduction peaks your interest in learning more about the diversity and history of Indian food, beyond what can be found in your local Indian restaurant.
Story and Recipes by Veda Sankaran Styling by Anna Franklin Photography by Dave Bryce
Have you ever tried Puerto Rican Canoas? Golden, caramelized plantains house a savory, rich filling in this classic and traditional dish. Usually made with sweet ripe plantains (not blackened) split and stuffed with picadillo (a spiced ground meat mixture), Canoas strike a perfect balance between sweet and savory, soft and hearty. The dish reflects the island’s culinary heritage, where different cultural Spanish, African, and Taíno influences come together in comforting ways. Talk about a perfect family dinner or even a dish for celebrations like holiday meals.
The Importance of Plantains
When making Canoas, and many other Puerto Rican recipes, plantains define the dish. In Puerto Rico, ripe plantains are essential due to their sweetness, soft texture, and accessibility around the island. When you bake them, they become tender and even lightly caramelized, creating the perfect contrast to the savory filling inside Canoas.
Beyond function, they bring balance to each dish. The sweetness of the plantain offsets the richness of the filling. It helps to capture the sweet-and-savory interplay that is central to Puerto Rican cuisine and often seen in the country’s most popular dishes.
A Puerto Rican staple using plantains as a canoe for a filling of beef, veggies, and delicious seasonings.
Ingredients
Scale
6 ripe, not blackened plantains (bake for 35 minutes in their skin for preparation)
For the filling:
2 tbsp grapeseed oil
1 lb ground beef
1 onion, minced
3 gloves garlic, minced
½ cup minced red bell, minced
1/2 cup chopped cilantro
2 tsp adobo
2 tsp oregano
1 cup diced tomatoes
¼ cup tomato paste
2 tbsp vinegar
1 envelope sazón
2 bay leaves
Juice and zest of 2 limes
Salt to taste
Instructions
In a big sautéed pan(or Dutch oven), sautéed onions, peppers and garlic for 5 minutes, add beef and all seasonings (adobo, oregano, sazon), brown and break clumps.
Add tomato paste and chopped tomatoes, caramelized for 5-7 minutes.
Deglaze with vinegar and add the bay leaf and lime juice and zest.
Let cook for another 15 minutes and finish with the fresh cilantro.
Assemble the canoas by cutting the middle top of the plantains and filling them with the meat. You can top with cheese if desired.
Recipe and Styling by Jamilka Borges Photography by Dave Bryce
 TABLE Magazine")


 TABLE Magazine")
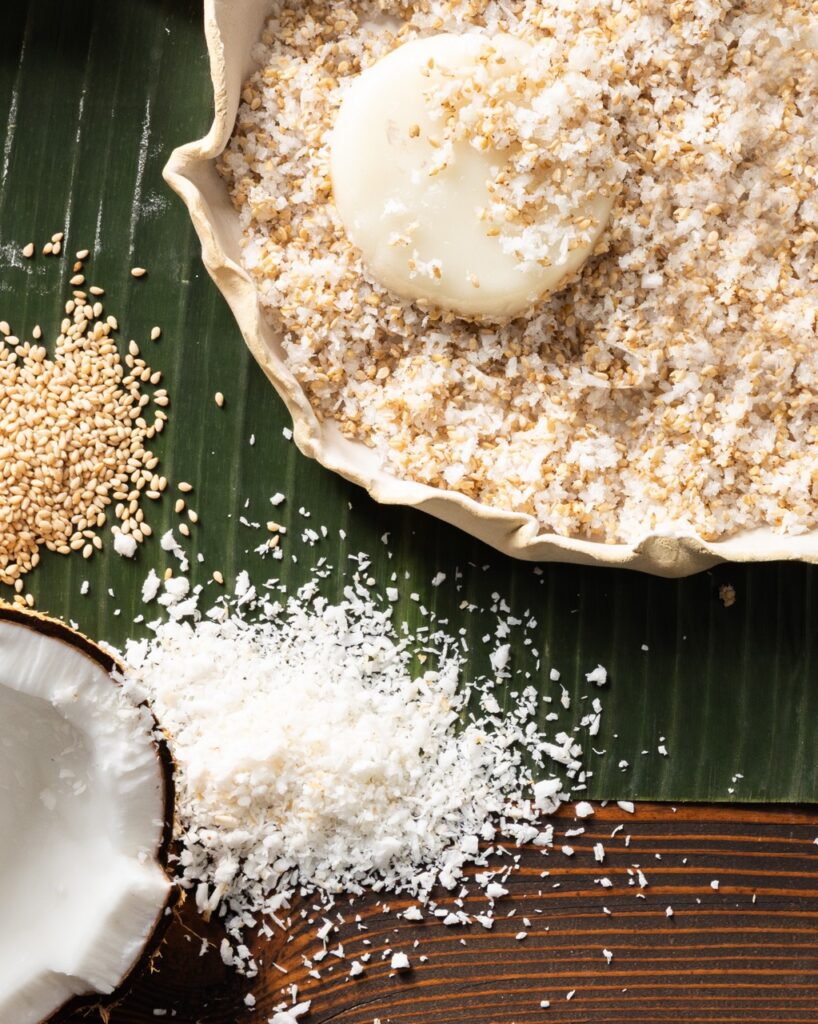

 TABLE Magazine")
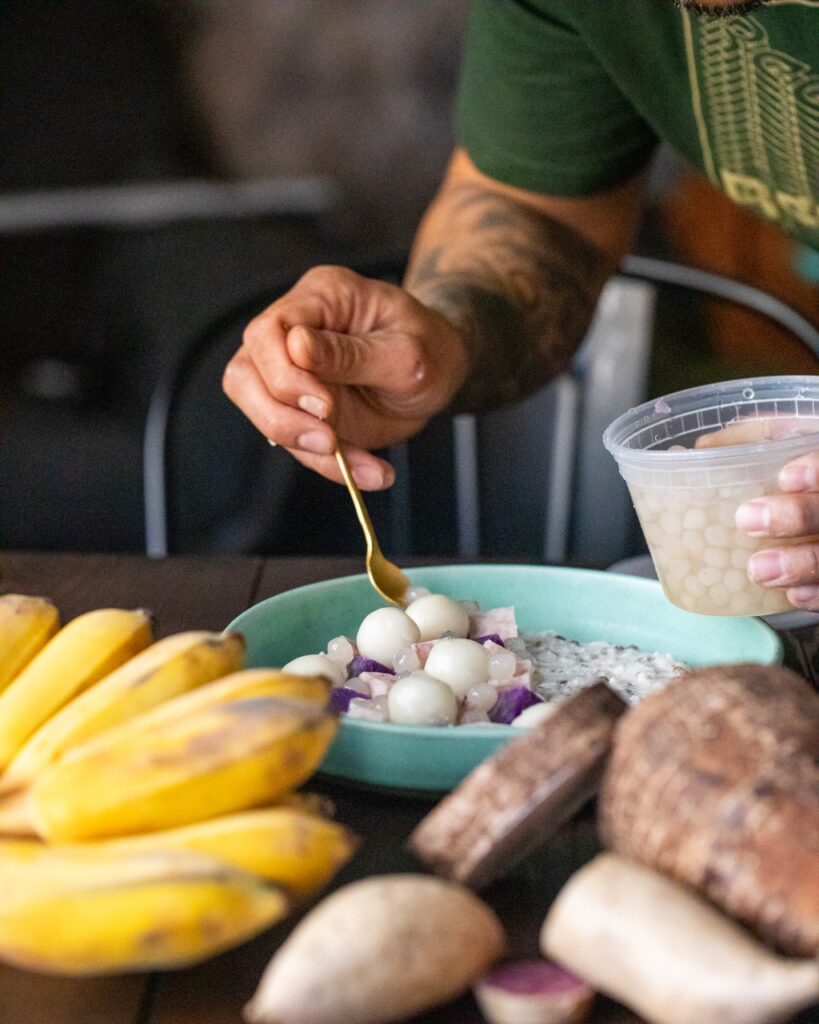
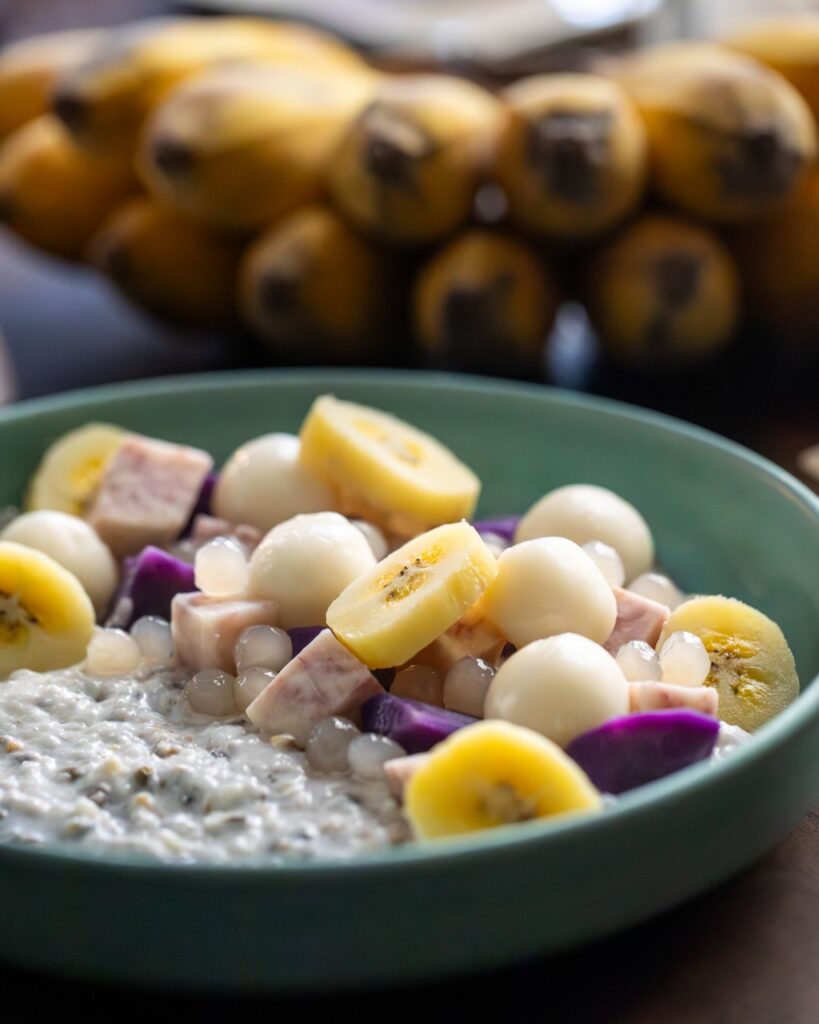

 TABLE Magazine")
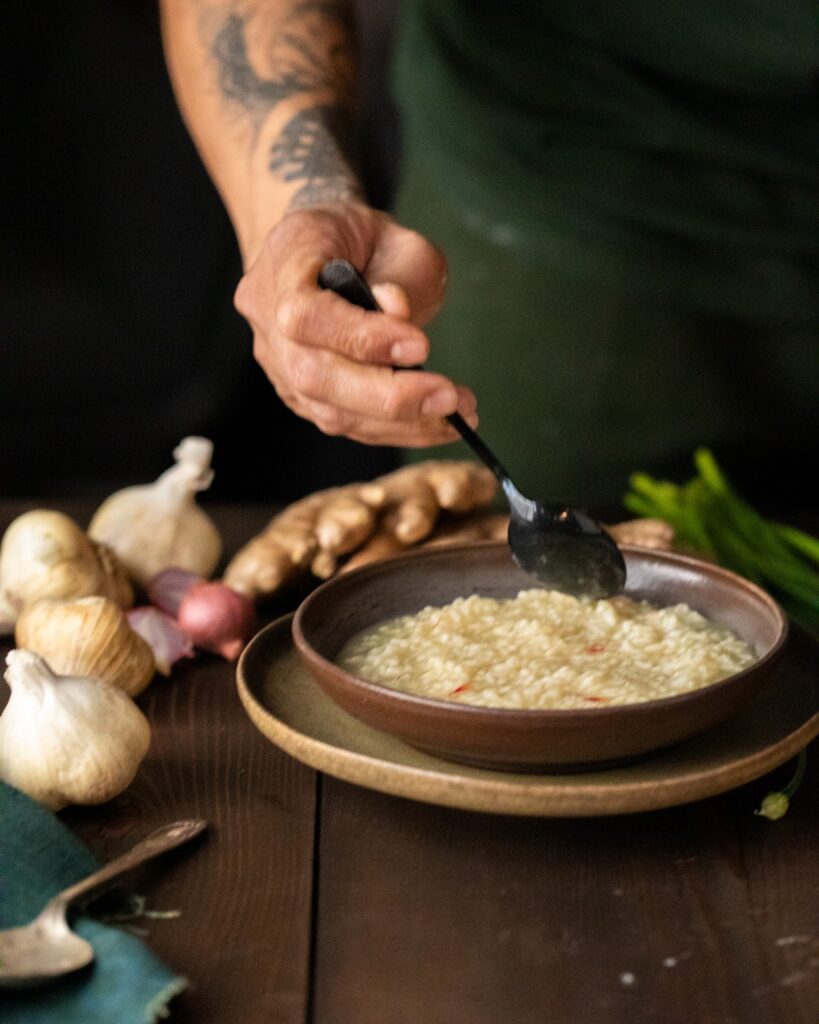
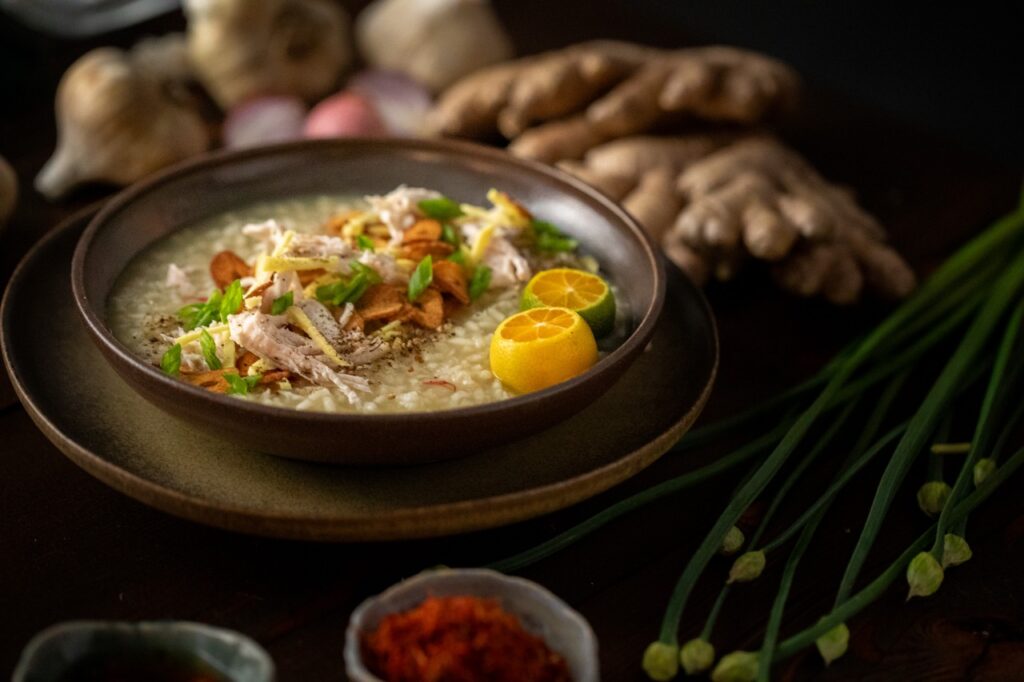

 TABLE Magazine")