Turkey is the star of the show at most Thanksgiving tables, but appetizers are one of the simplest ways to impress your guests and get the party started. Experiment playfully with Thanksgiving “finger foods,” from easy dips and plates to dishes that make for fun projects. What makes a good Thanksgiving dish is something not too flashy (you don’t bring out the big guns, so to speak, until Christmas), and something that’s approachable and hearty. Perhaps even healthy! Bringing an appetizer is a great way to hit all of these notes. Beyond Thanksgiving, you can wow at a potluck-style Friendsgiving any time of year by bringing a big appetizer like these Thanksgiving finger foods. Who needs utensils, anyway?
Thanksgiving Finger Foods
Goat Cheese Stuffed Dates
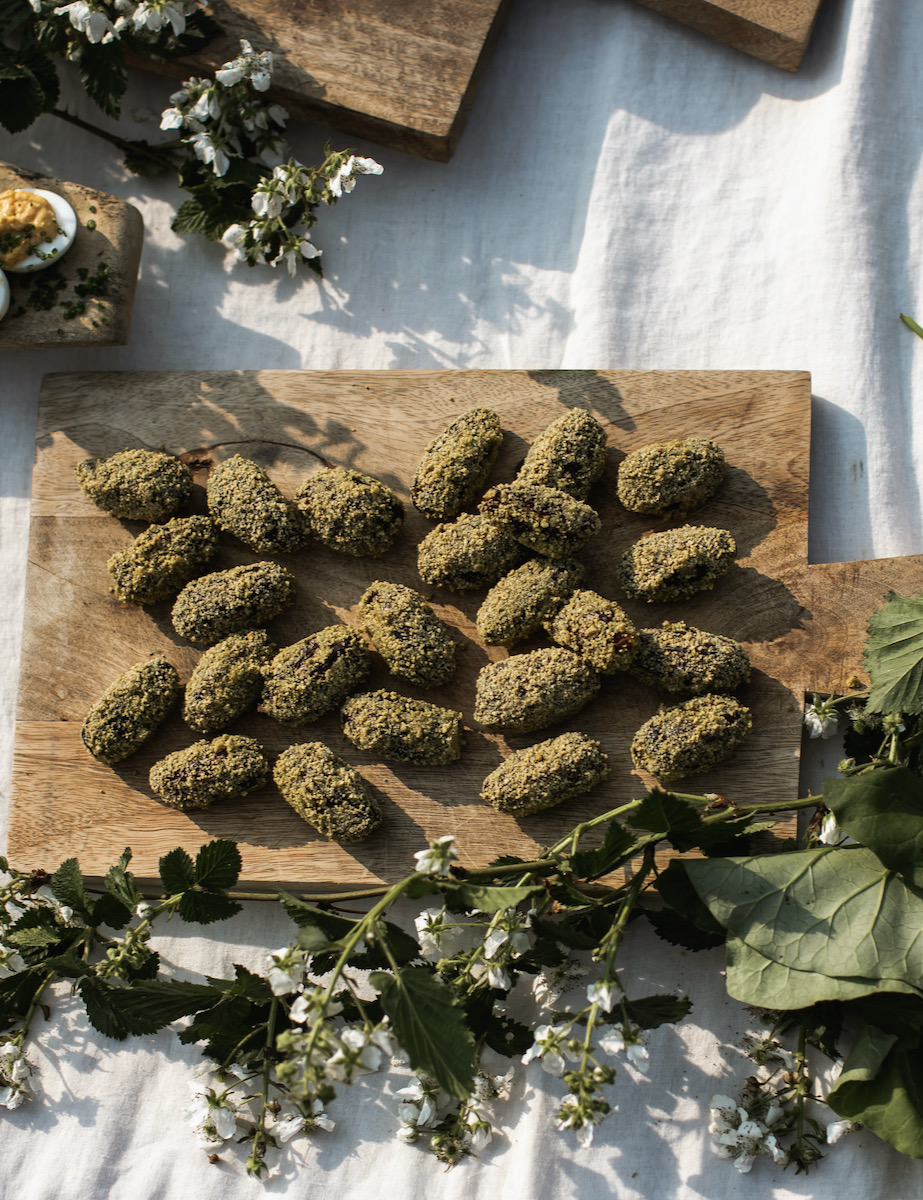
This recipe is fast, easy, and elevated from Chef Aniceto Sousa of Mediterra. Take your appetizer game beyond simple dates and cheese. Why not combine them?
Authentic Italian Bruschetta with Basil-Infused Olive Oil

Bruschetta was destined for greatness as an easy finger food. Not only does it make a great side, it’s also just delicious. Bruschetta is also ripe for customization
Easy Fruit Dip
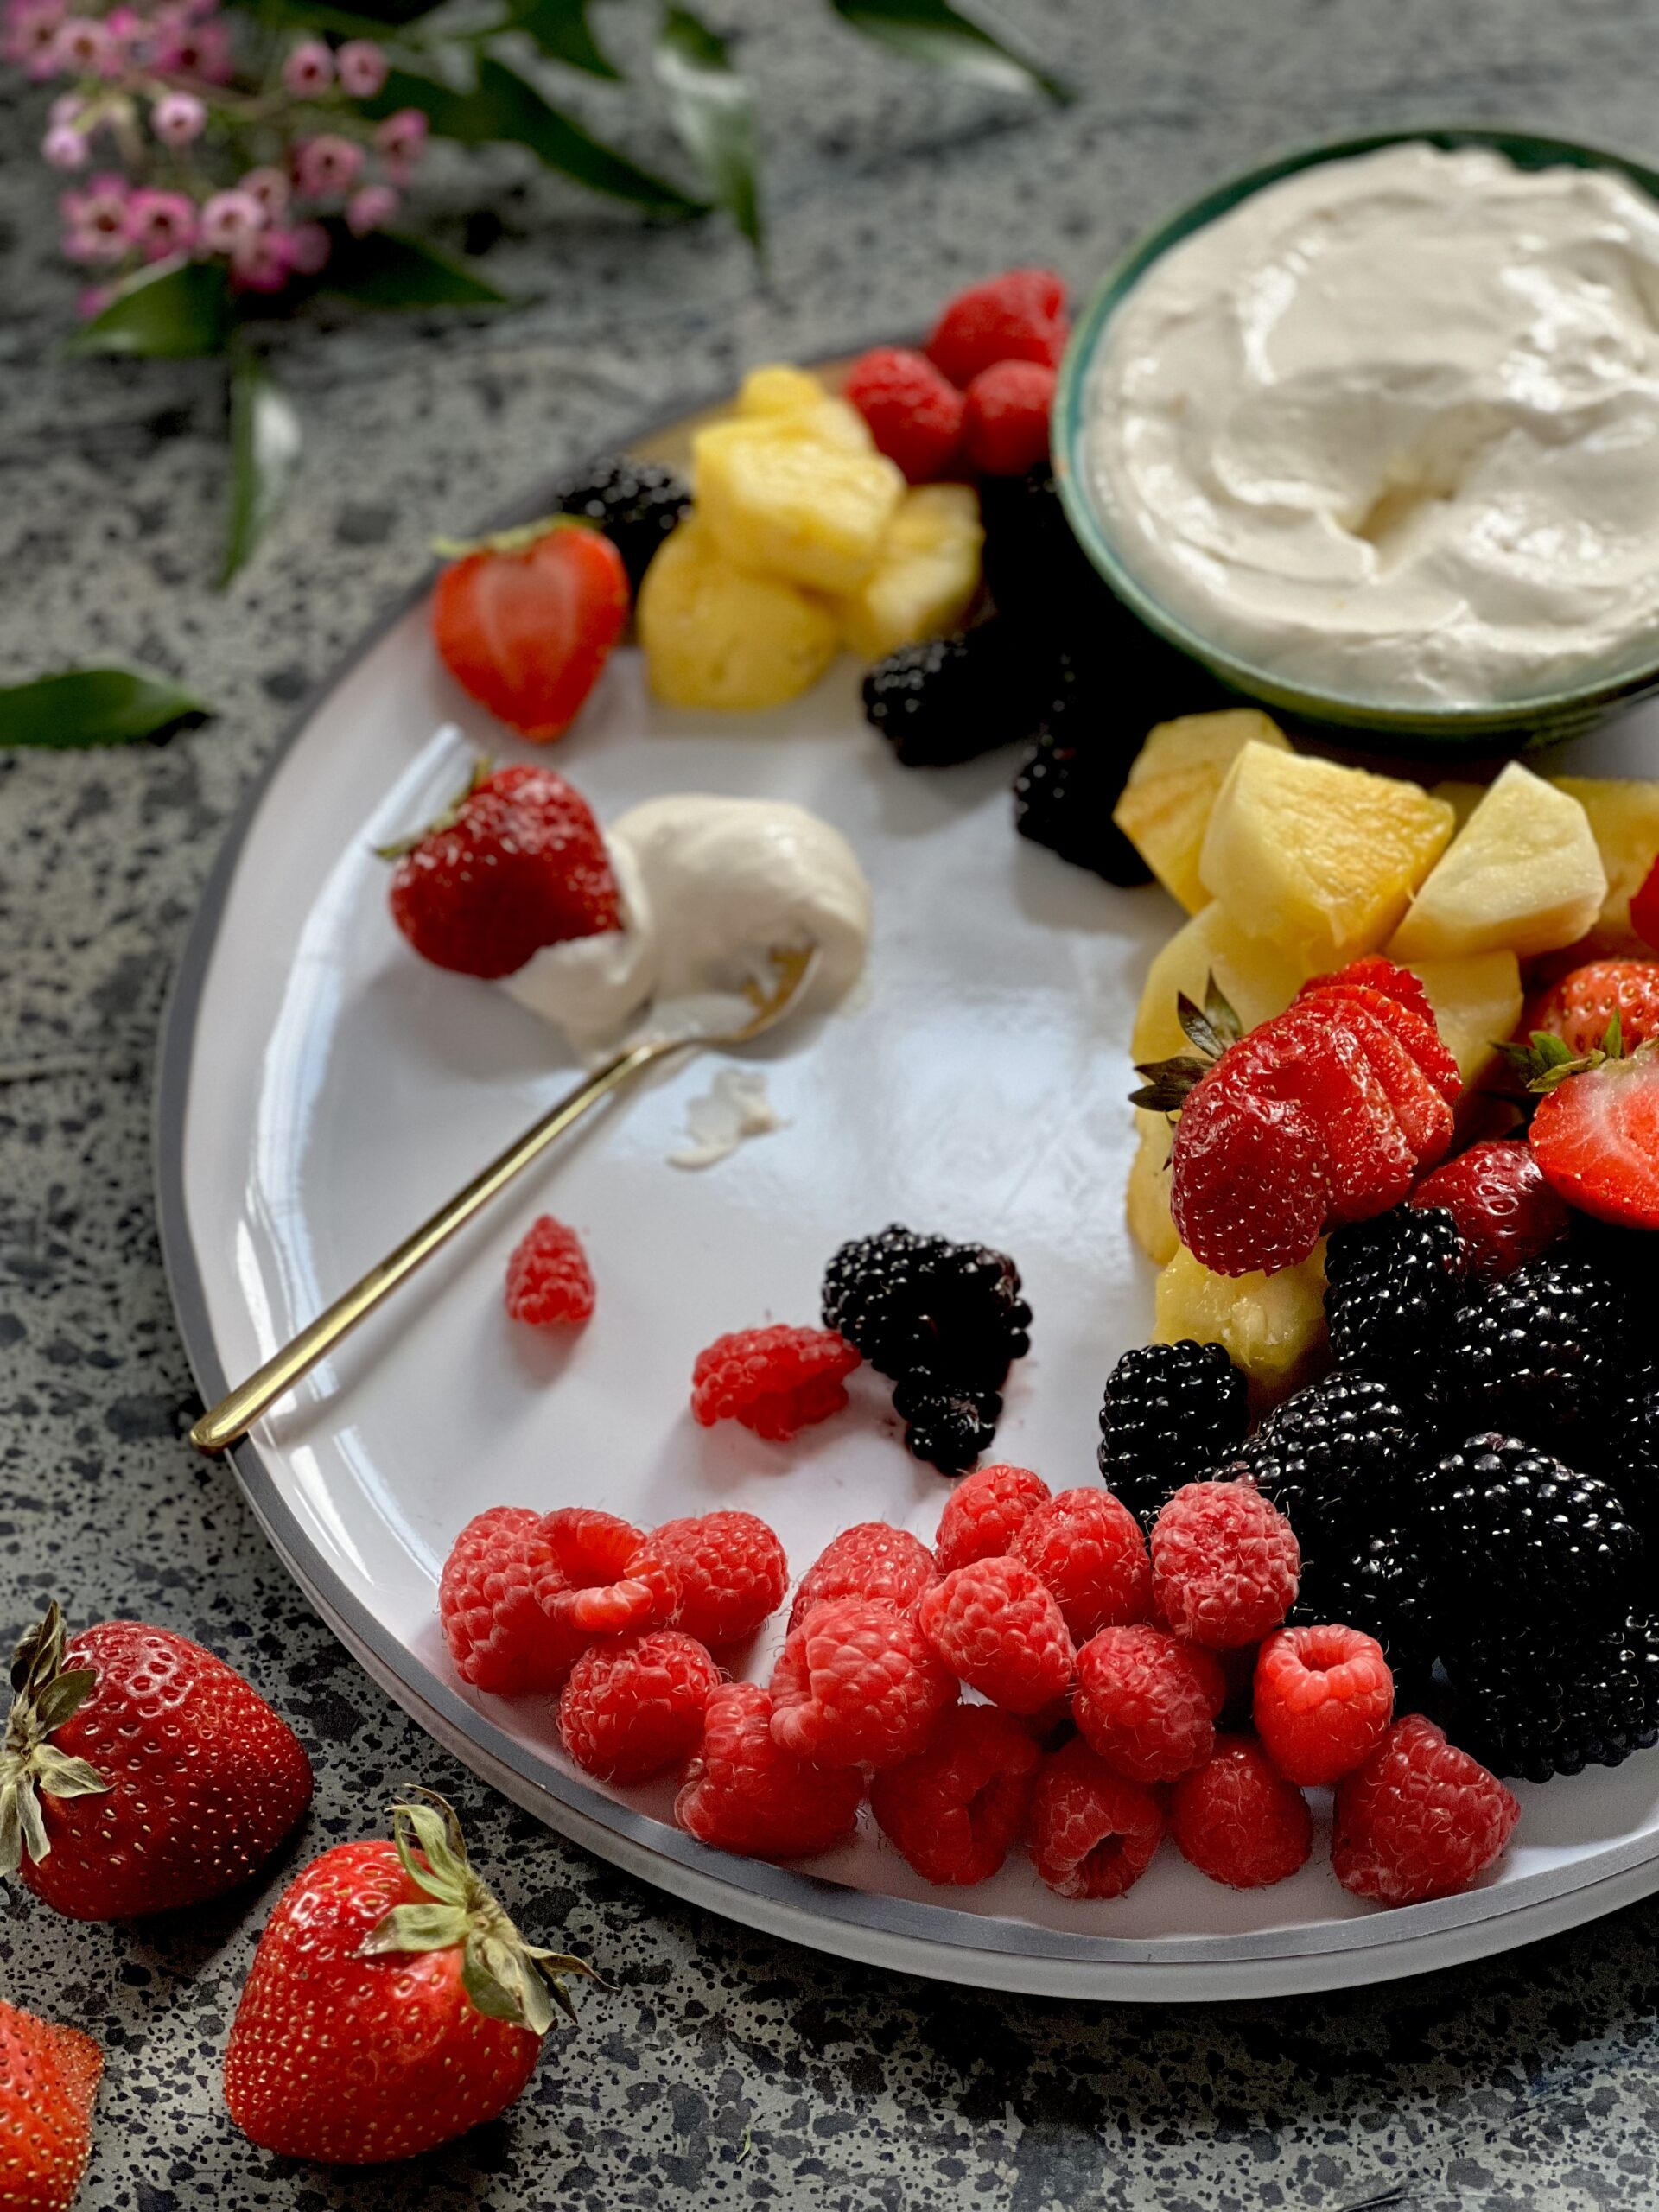
Why veer from a classic? This dip incorporates fruit with cubes of pound cake, pretzels, and graham crackers. Pick a variety of berries to suit your guests’ liking!
Roasted Garlic with Cheesy Bread

It’s not exactly garlic bread, but it’s got the same elements that make garlic bread cozy. The cheese adds an extra layer of flavor and texture to a traditional rustic bread. This makes for a good Thanksgiving finger food because it’s elevated, but also down-to-earth.
Deviled Eggs with Caviar
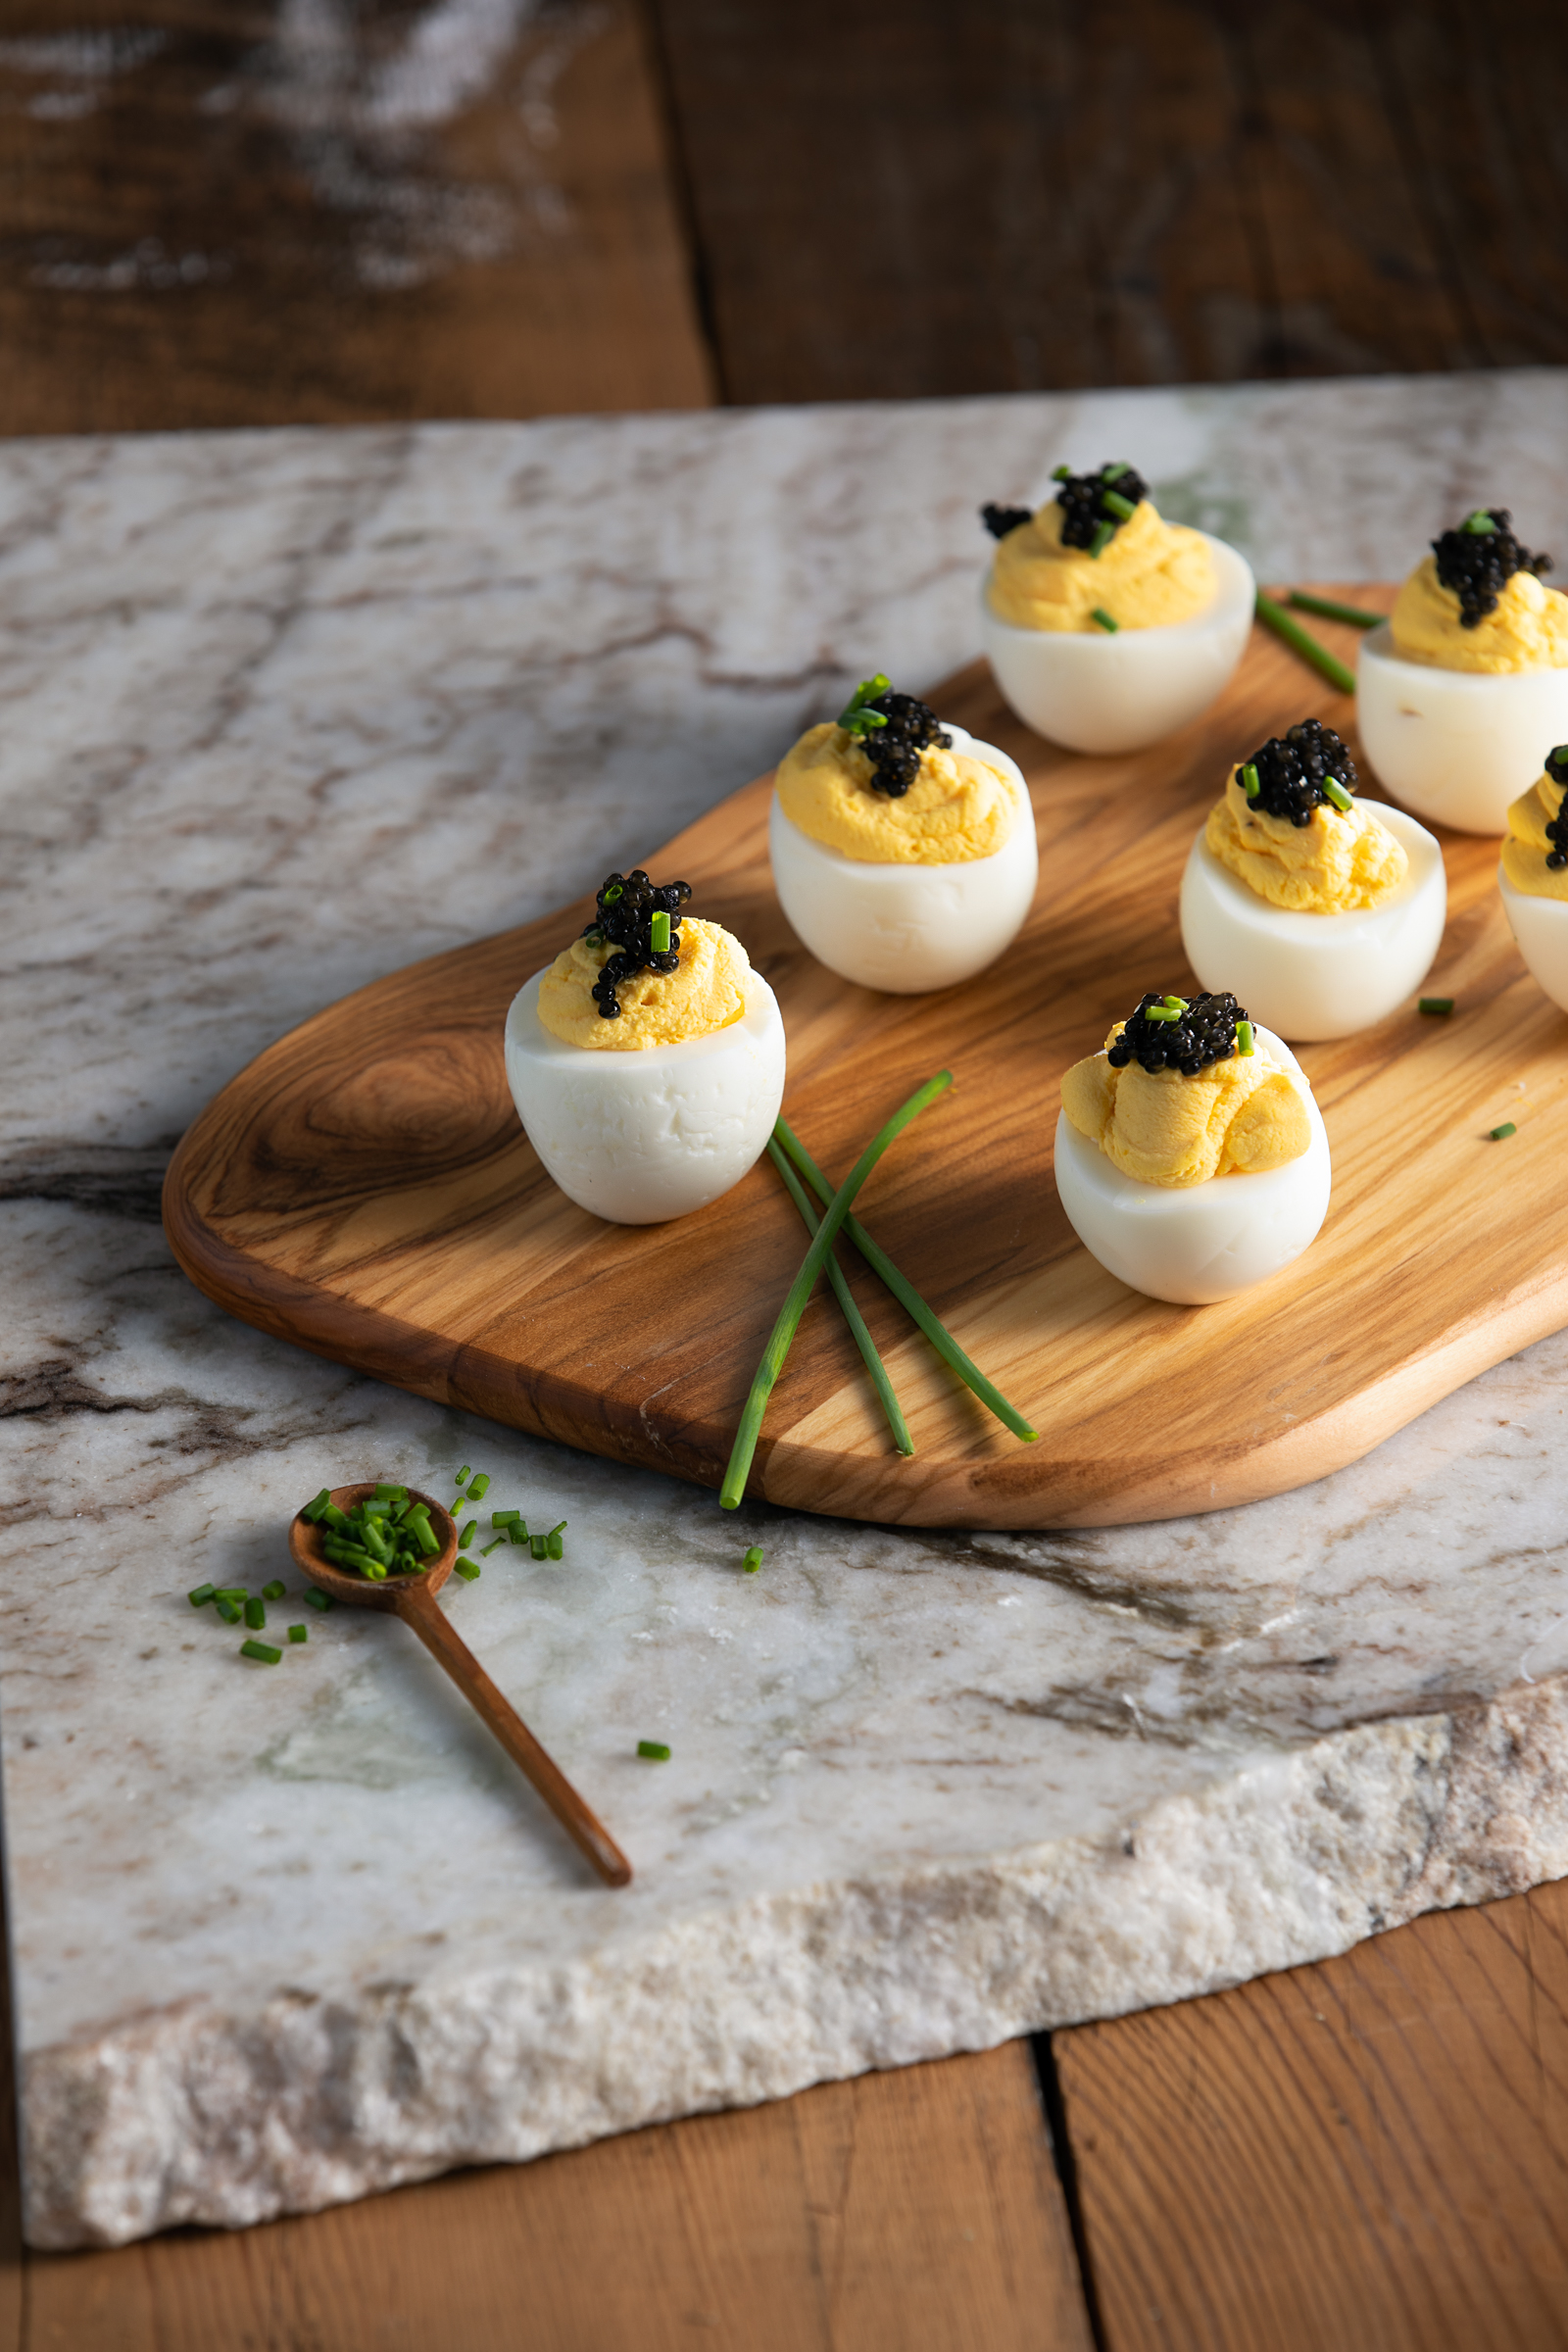
Don’t be afraid of deviled eggs. They aren’t as hard to make as you might think. Once you’ve mastered the basics, they’re a great opportunity to improvise with a pinch of this and a drizzle of that. Plus, no forks or knives needed to enjoy to enjoy this Thanksgiving finger food!
The Ultimate Cheese Board and Charcuterie
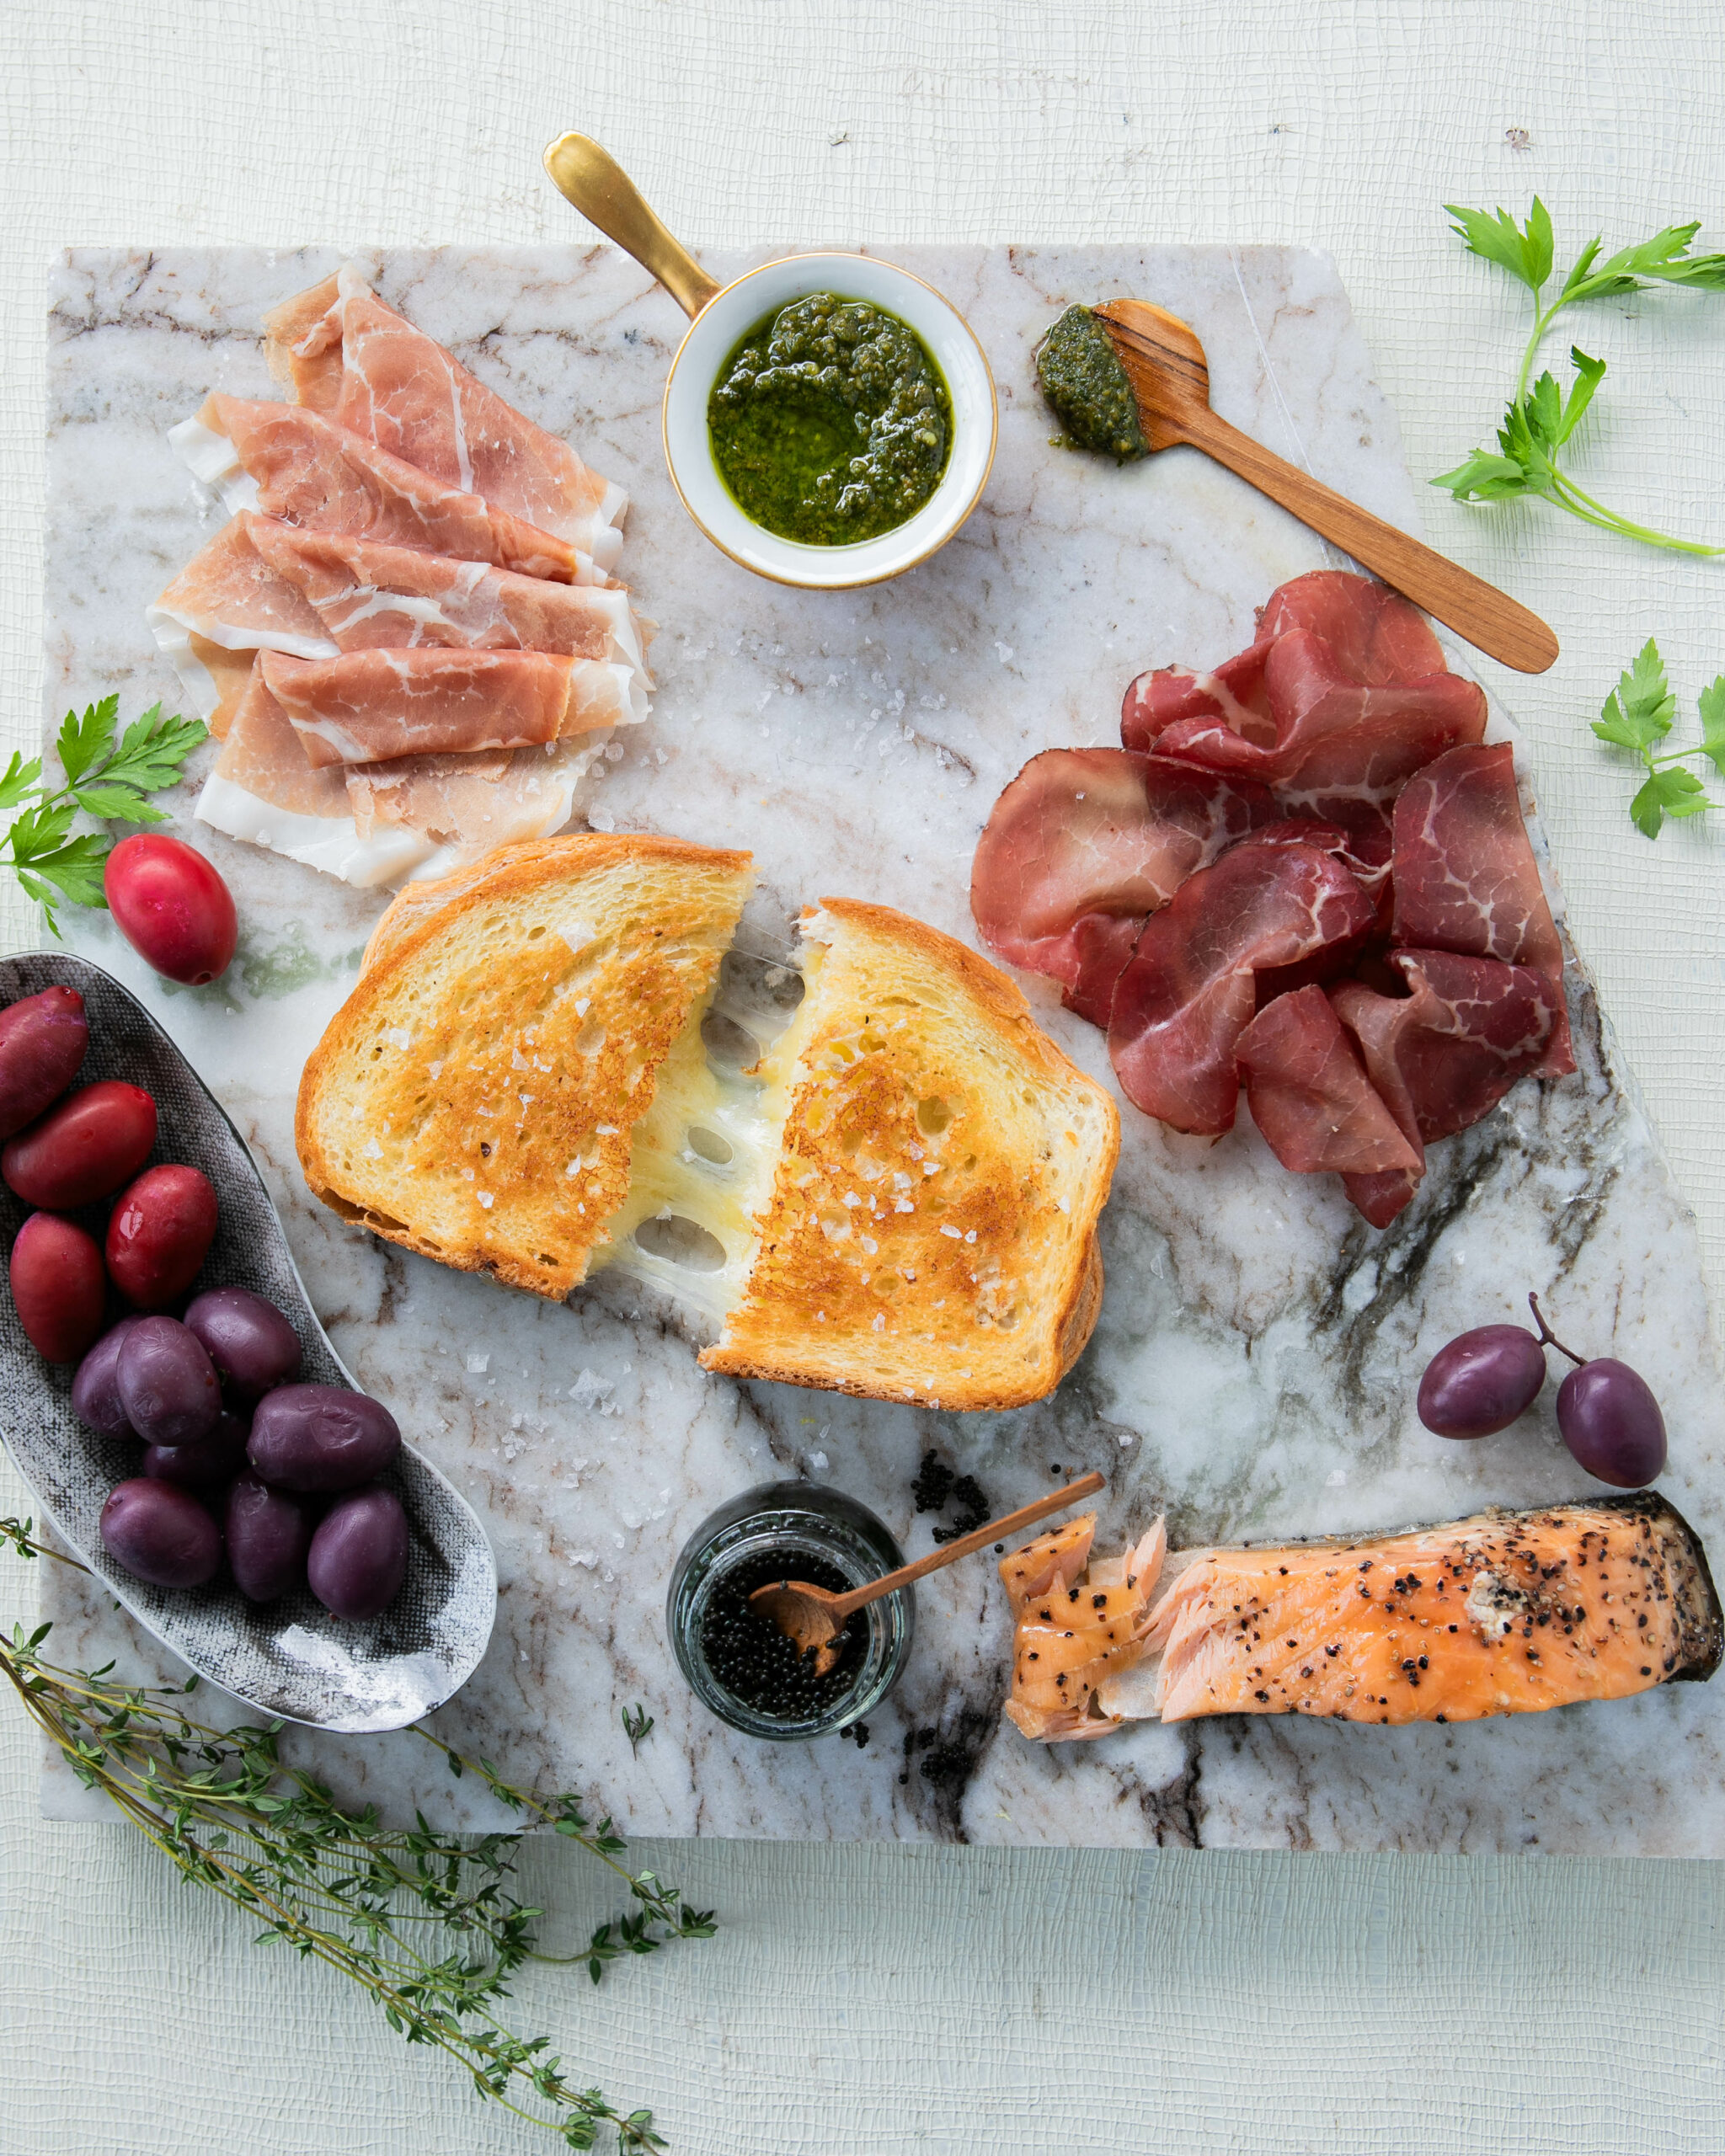
No finger foods recommendation list would be complete without a charcuterie board. Our ideas on this Ultimate Cheese Board let you show off your “quiet luxury,” classy without being ostentatious, delicious without being pretentious.
Pear and Goat Cheese Bites
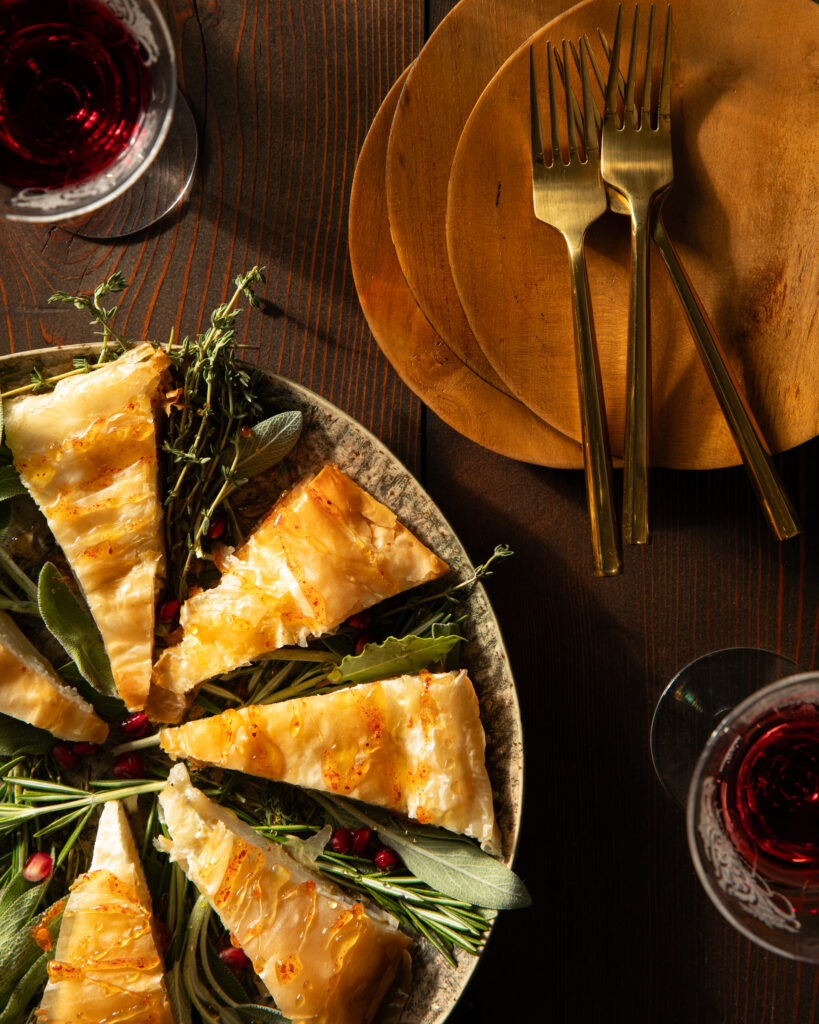
Pears are one of the bountiful fruits of winter so we can’t let the season pass by without using them in a recipe. These Pear and Goat Cheese Bites cushion slices of sweet pears and tangy goat cheese in crispy phyllo dough and featuring a drizzle of hot honey on top.
Bourbon Spiced Nuts

Appetizers should hold your guests over rather than fill them up so these Bourbon Spiced Nuts are perfect. Slow roast your choice of nut in bourbon, cinnamon, brown sugar, paprika, cardamom, and allspice. Or, choose a combination of bourbon, rice wine vinegar, brown sugar, white sesame seeds, black sesame seeds, and a bit of salt.
Story by Emma Riva
Subscribe to TABLE Magazine’s print edition.