Home Blog Page 131

Baked Parmesan Potato Salad

0
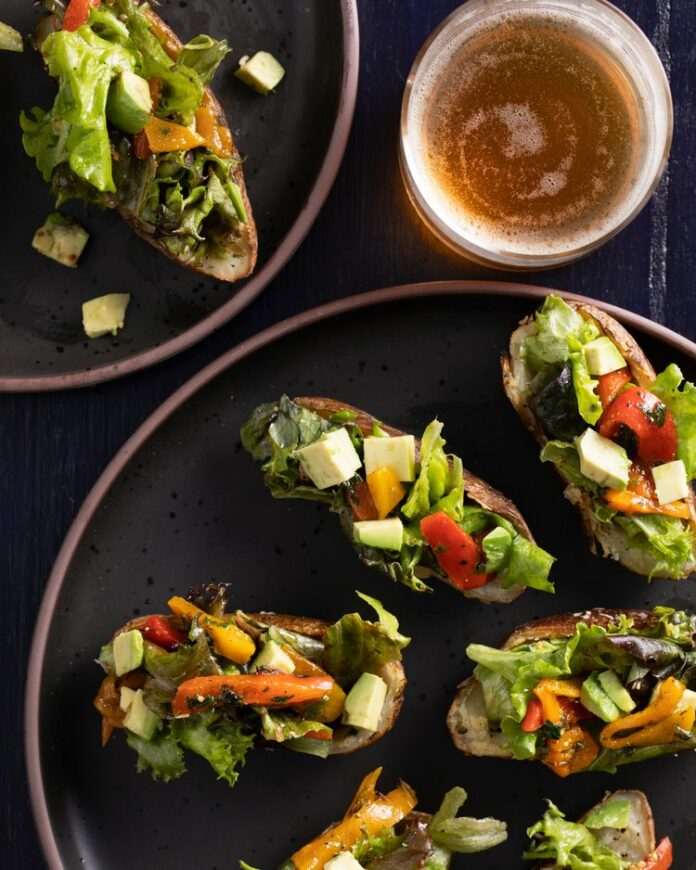
A black plate holds slices of potato skins with salad inside for our Baked Parmesan Potato Salad.

A tangy salad fills baked potato skins with parmesan cheese throughout for a hand-held appetizer. This recipe comes from our series of game day recipes from Chef Kevin Hermann, where he created delectable plates for those football afternoons. Though this recipe also works for just about any other type of gathering you can think of.

Potato Salad Has a Rich History 

The first documented recipes for potato salad appeared in Germany in the 18th century, where warm potato salads were common, often dressed with vinegar and oil. It’s a staple side for Germany during this time. German immigrants brought their potato salad recipes to the United States in the 19th century. In America, the dish evolved to include mayonnaise, which became popular in the late 19th century. This led to the creamy potato salad many are familiar with today. Though, we’re taking this classic dish to an entirely different level with our Baked Parmesan Potato Salad which is a little different than what you’re used to.

Print
clock clock iconcutlery cutlery iconflag flag iconfolder folder iconinstagram instagram iconpinterest pinterest iconfacebook facebook iconprint print iconsquares squares iconheart heart iconheart solid heart solid icon
Small potato boats filled with salad on a black surface with a glass of beer on the side.

Baked Parmesan Potato Salad


  • Author: Kevin Hermann

Description

This potato salad is literally a scrumptious salad inside a potato skin shell.


Ingredients

Scale
  • 6 russet potatoes, smaller size
  • 1 tbsp olive oil
  • 1 tbsp salt
  • 1/2 cup parmesan cheese, grated
  • Salad
  • 3 cup butter lettuce, or soft greens
  • 1/2 roasted red pepper, small dice or short strips
  • 1 tbsp parsley, chopped
  • 1 tbsp chive, chopped
  • 1 tbsp whole grain mustard
  • 1/2 tbsp apple cider vinegar
  • 2 tbsp olive oil
  • 1 tbsp salt
  • 1 tsp black pepper
  • 1 avocado, small dice


Instructions

  1. Preheat oven to 350 degrees.
  2. Clean potatoes and then lightly coat with olive oil and salt. Place in the oven for 30-45 mins/ until tender. Remove from oven and allow to cool to room temperature.
  3. Cut each potato in half and scoop out the potato. Be sure not to rip the skins.
  4. Place the potato skins on a sheet tray, cut side up, top with Parmesan cheese and baked for and addition 15 mins. Remove from the oven and allow to cool to room temperature.
  5. In a medium mixing bowl combine peppers, parsley, chives, mustard, apple vinegar, olive oil and avocado. Gently mix until fully combined.
  6. Fold in lettuce and place a small amount of salad into each potato skin.

Try These Other Game Day Recipes

Recipe by Kevin Hermann
Styling by Kevin Hermann and Anna Franklin
Photography by Dave Bryce 

Subscribe to TABLE Magazine‘s print edition.
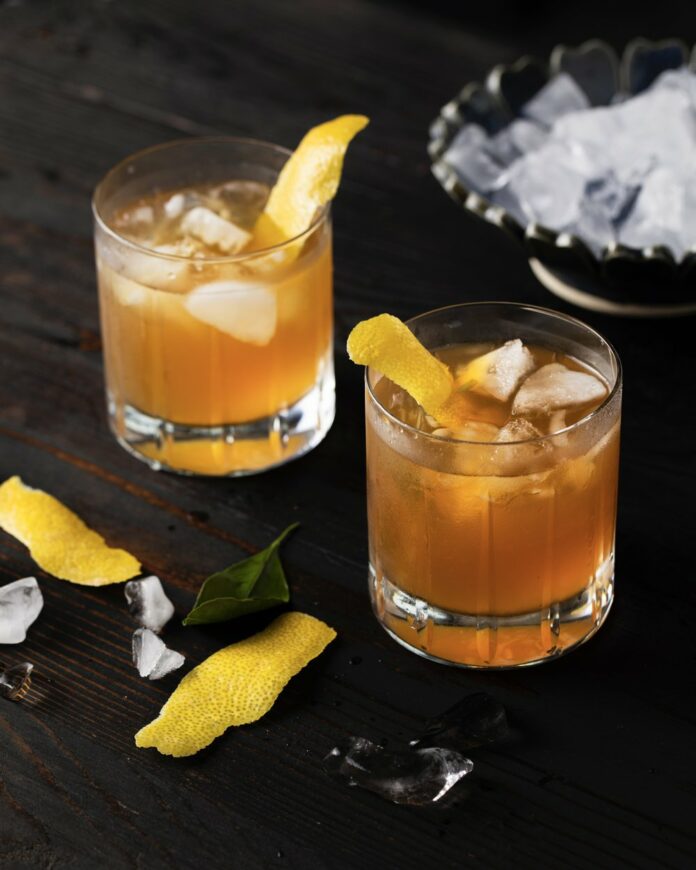
Apple Cider Manhattan Game Day Cocktail

0
The official ruling on the play is a touchdown with this game day cocktail.

The Apple Cider Manhattan makes the ultimate game day cocktail, featuring winter spices and face warming bourbon. The addition of apple cider turns down this drink a bit from the traditional manhattan and allows your guests to enjoy more than one during the time outs and commercial breaks! Supercharge your game day and make this cocktail by the batch! Take all the oz. instructions and switch to cups, and you’ve got a blitz!

The Whiskey We Use for Our Apple Cider Manhattan

We’ve used “Dubliner Steelers Select Irish Whiskey” available in Pittsburgh. It’s crafted for Steeler Nation by the Dublin Liberties Distillery — a proud partner of the Pittsburgh Steelers. This unique, limited-edition blend celebrates 90 seasons of football for the Steelers franchise and is a must-have for any fan. The whiskey is created with a hand-selected blend of perfectly balanced whiskeys and aged up to 10 years in the finest American bourbon casks. Perfect for your game day cocktail!

Print
clock clock iconcutlery cutlery iconflag flag iconfolder folder iconinstagram instagram iconpinterest pinterest iconfacebook facebook iconprint print iconsquares squares iconheart heart iconheart solid heart solid icon
2 identical whisky cocktails in rocks glasses, garnished with lemon peel with a black background

Apple Cider Manhattan Game Day Cocktail


  • Author: Justin Matase

Description

Perfect for calming your nerves as you watch the big game.


Ingredients

Scale
  • 2 oz of Dubliner Whiskey (we used *Dubliner Steelers Select Irish Whiskey available at your local PA Fine Wine and Good Spirits)
  • .5 oz of red vermouth
  • 1.5 oz of fresh apple cider
  • .5 oz of fresh lemon juice
  • 2 dashes of angostura bitters


Instructions

  1. Combine all ingredients in a cocktail shaker and give a light shake to combine and chill ingredients.
  2. Serve over one large ice cube or up in a martini glass.

Feast While You Sip on This Game Day Recipe

Recipe and Story by Justin Matase
Styling by Keith Recker
Photography by Dave Bryce

Subscribe to TABLE Magazine’s print edition.

7 Can’t-Miss NYC Bakeries

0
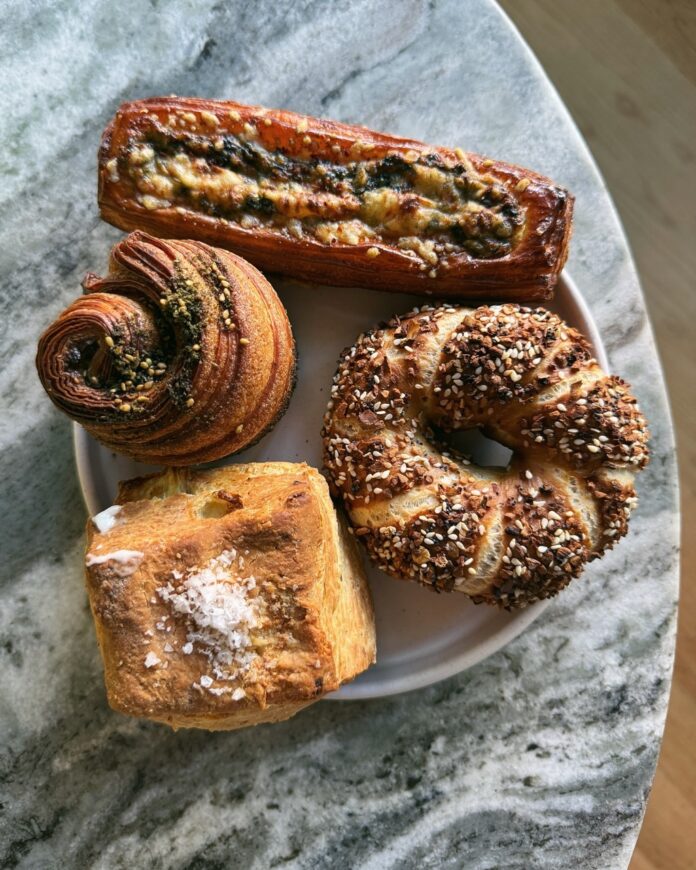
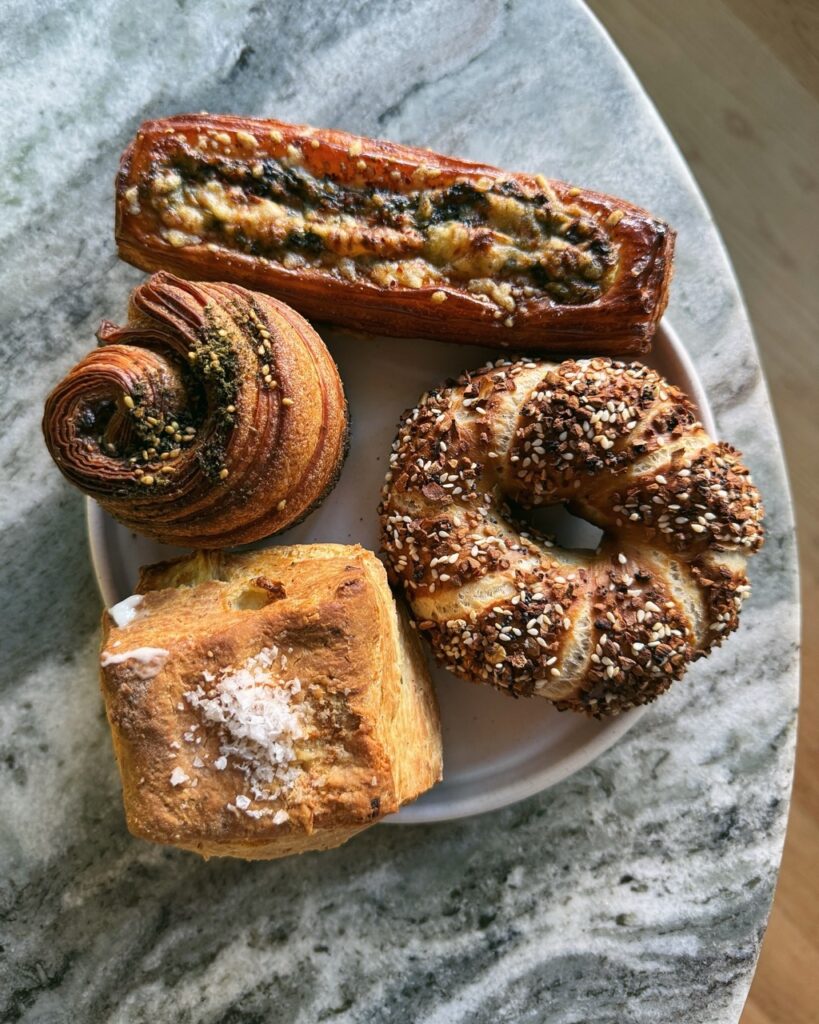
Various baked goods from Librae bakery sit on a marble round table in a small basket.
Photo Courtesy of Librae Bakery

New York City (NYC)’s bakery scene is a wonderland, offering treats that range from ube-pandan ice cream sandwiches to laminated baguettes flaky enough to make a Parisian go cross-eyed. Narrowing the city’s pastry and cake shops down to a few favorites is a frightfully difficult task; so think of this list of seven highlights not as exhaustive, but as scaffolding—the unmissable spots around which to build an unabashedly bakery-focused trip to the city.

7 Can’t-Miss NYC Bakeries

Various baked goods from Librae bakery sit on a marble round table in a small basket.
Photo Courtesy of Librae Bakery

Librae Bakery

35 Cooper Sq (Manhattan)

Named one of the most exciting bakeries in America by Bon Appétit, Librae blends Gulf and Middle Eastern flavors with ultra-buttery Danish technique. Picture the sticky rose-pistachio croissant—the pastry for which Librae is most famous—or the loomi babka, a barely-sweet triumph with the citrusy flavor of black lime suffusing each bite. There are also sourdough loaves in flavors like olive and nigella, a mean tahini-chocolate chip cookie and, on precious occasions, a salty-sweet halva croissant that you shouldn’t skip.

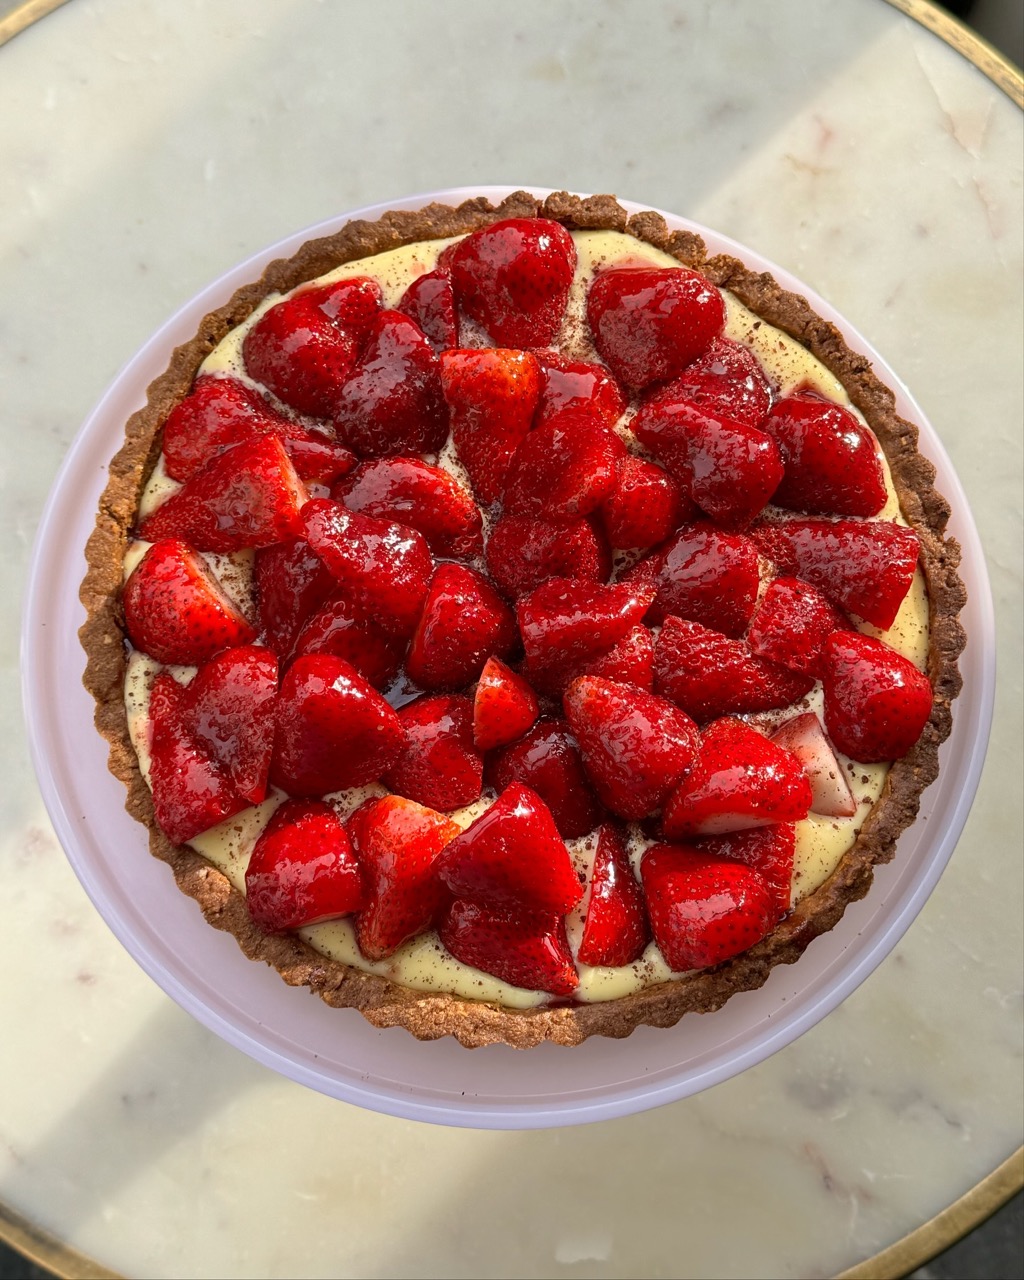
A strawberry tart sits in a round pan on top of a white table.
Photo Courtesy of L’Appartement 4F

L’Appartement 4F

115 Montague St (Brooklyn)

L’Appartement 4F is a French countryside dream inside a Brooklyn Heights loft, complete with a pastry and bread menu starring subtly changed French and American classics. There’s a crisply laminated cinnamon roll draped with tangy cream cheese frosting, a twice-baked, raspberry almond croissant that nearly buckles under the weight of berry frangipane, and—for the first few people in line each morning—a limited number of boxes of the mini croissant cereal that also earned the bakery its TikTok fame.

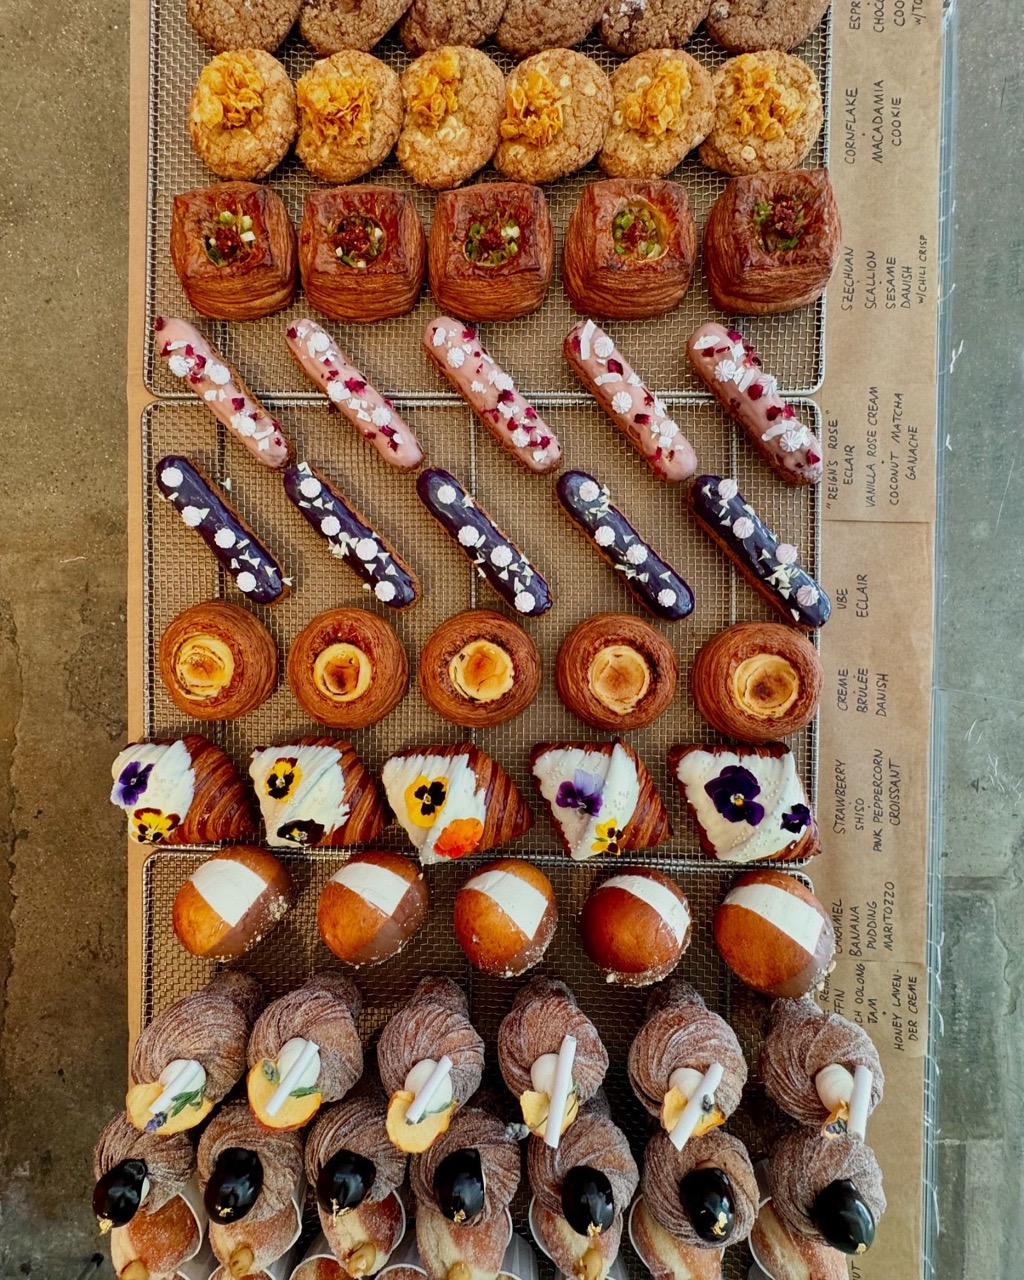
Different selections of Supermoon Bakehouse's pastries sit on a table in lined up rows.
Photo Courtesy of Supermoon Bakehouse

Supermoon Bakehouse

120 Rivington St (Manhattan)

You come to Supermoon Bakehouse for the thrill of the constantly changing flavors (there’s an entirely new menu every month), but you stay for the irreproachable pastry technique. Highlights include the cruffin, which comes in flavors like lemongrass coconut with guava lime, a peanut butter and jelly donut that’s as fluffy as a cloud, and a cornflake cookie that was recently voted one of the city’s best cookies. The ube-pandan ice cream sandwich is also a royal-purple must.

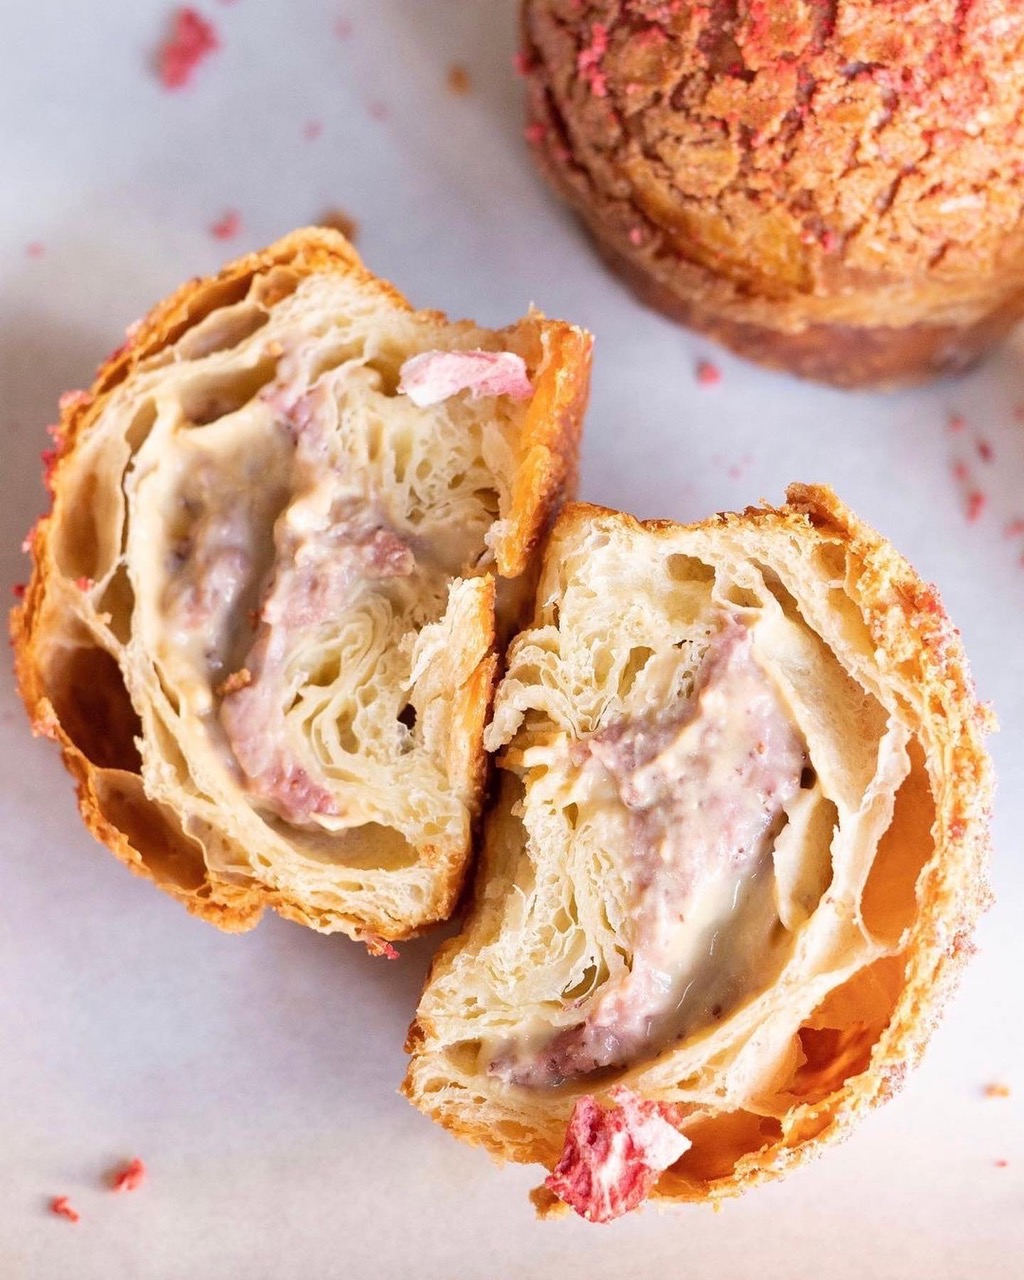
A baked bun from Win Son bakery in NYC is broken open with pink specks throughout on a white table.
Photo Courtesy of Win Son Bakery

Win Son Bakery 

164 Graham Ave (Brooklyn)

This beloved Williamsburg bakery, which sits catty-corner from its sister restaurant of the same name, serves up twists on Taiwanese classics. Brave the inevitable line, then reward yourself with one of their egg sandwiches served on a crispy scallion pancake. Then, tuck into their pastries, the most unmissable of which are the mochi millet donut and the pine nut sun cookie, which tastes like a shortbread that’s been laminated, rolled up pain-aux-raisins style, and filled with nutty caramel.

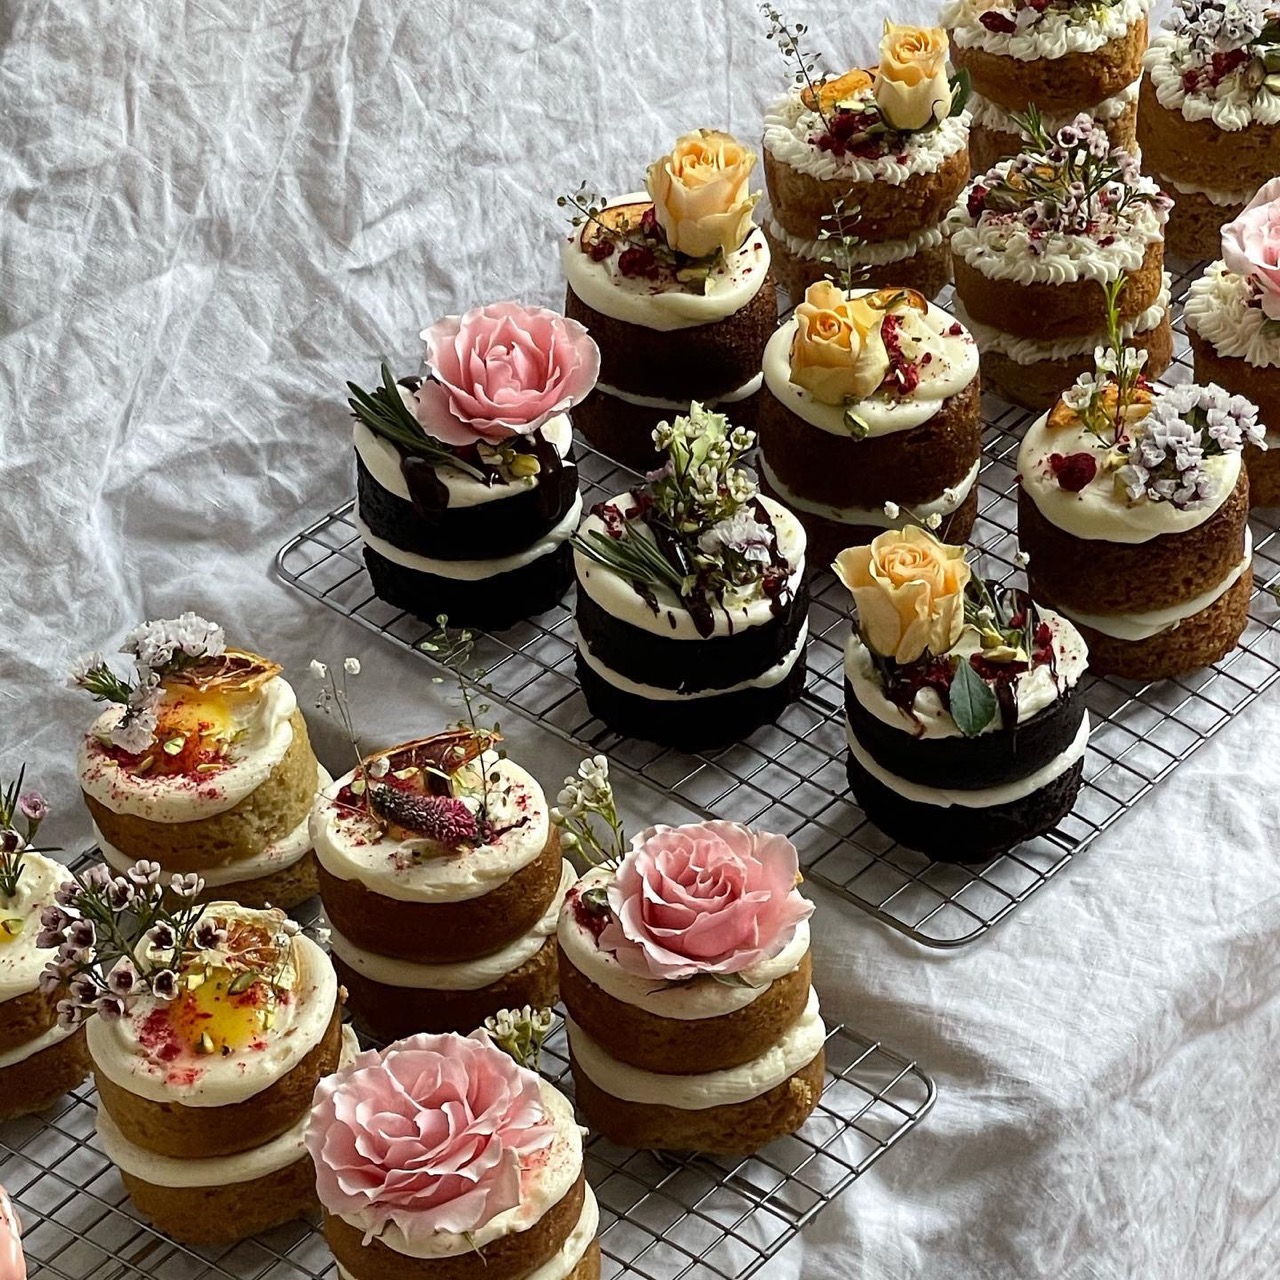
A display of chocolate and cream small layered cakes with flower decorations from From Lucie bakery sit on sheets of paper.
Photo Courtesy of From Lucie

From Lucie

263 E 10th St (Manhattan)

From Lucie is the place for cakes. Here, American layer cakes get the southwestern France treatment. For instance, you’ll see a carrot cake with tangy fromage frais buttercream, rose buds, and dahlia petals. Slices of lemon-olive oil cake sit underneath whorls of lavender frosting—Swiss meringue buttercream, to be exact, because it’s less sweet than American buttercream. Also a must-try is the salted dark chocolate espresso mini-cake, because it takes the French devotion to bold textures to heart, with freeze-dried raspberries and chocolate chips for surprising crunch.

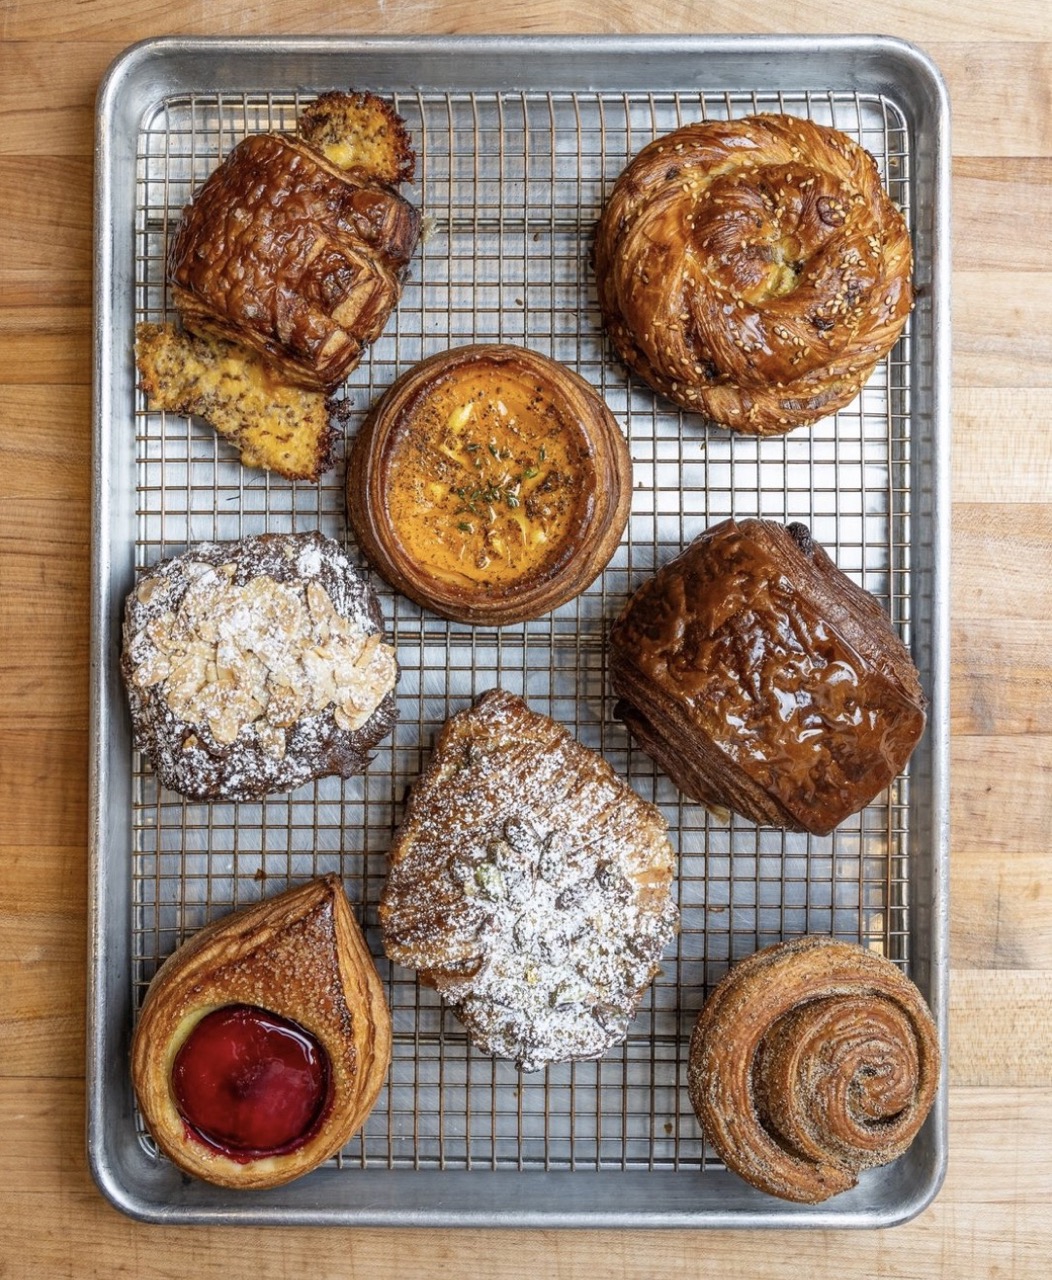
Various baked pastries from Radio Bakery sit on a baking sheet arranged in a single layer.
Photo Courtesy of Radio Bakery

Radio Bakery

135 India St (Brooklyn)

Brooklynites line up early for Radio Bakery’s sweet and savory fare, which channels the flavors of New York. The Earl Grey morning bun, dusted with lemon and Earl Grey sugar, is one such treat; the smoked salmon sandwich—recently named one of the city’s defining sandwiches by The New York Times—is another. Radio has a tasty selection of breads made with locally milled flour; but the real coup de grace is their savory croissants, which come in seasonal flavors like heirloom tomato.

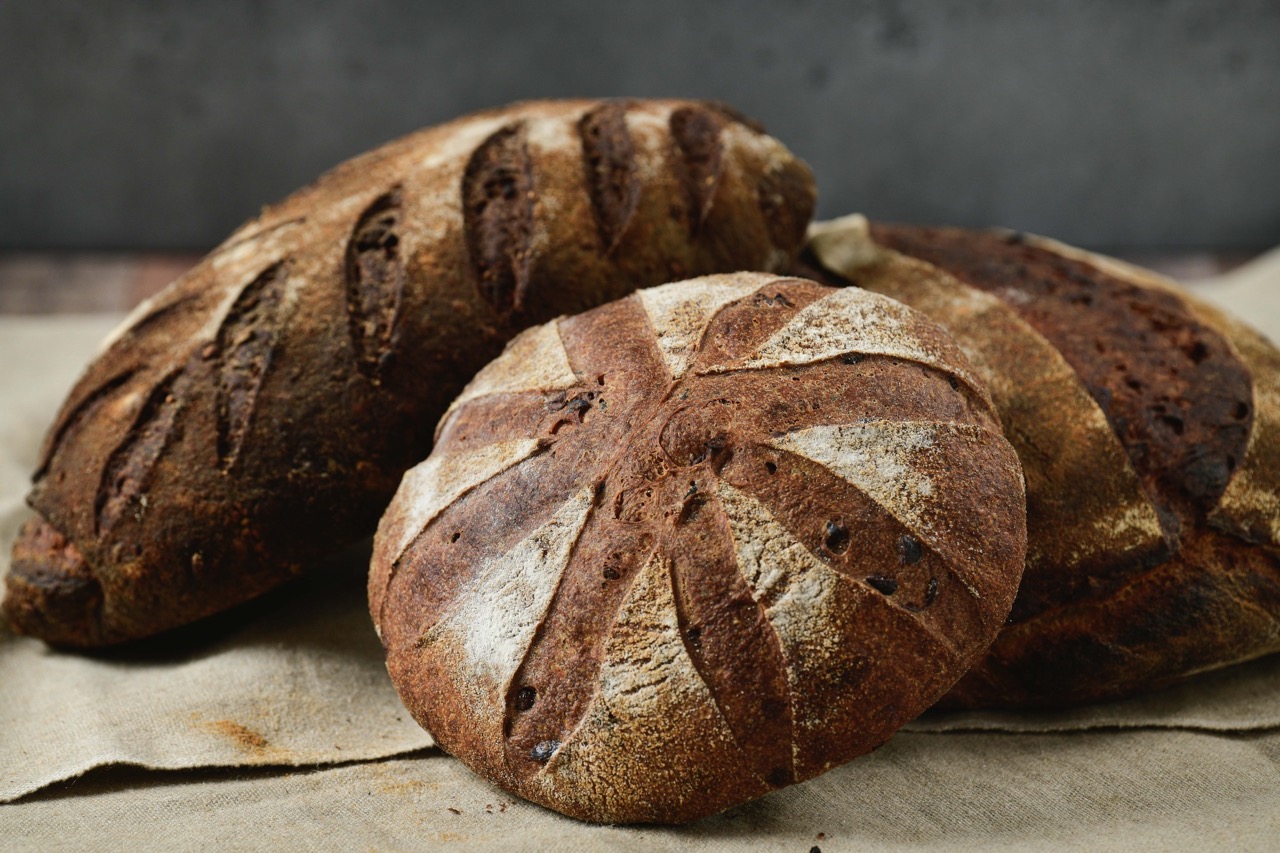
Three of dark, scored bread stack on top of each other in the middle of a wooden table at Alf Bakery.
Photo Courtesy of Alf Bakery

Alf Bakery

Chelsea Market Lower Level, 435 W 15th St (Manhattan)

Alf is the pastry jewel of Chelsea and a consistent nominee for the city’s best bakery. Its claim to fame is its laminated baguette. It comes in salted and seeded varieties and tastes like a loaf that spent time abroad at croissant school. But the rest of the menu is just as extraordinary. The chausson aux pommes (a puff pastry turnover) is filled with vanilla-flecked apples and brushed with simple syrup. The mushroom danish is so flavorful that it can elicit occasional swearing. And the classic, buttery croissant is the perfect snack to grab for a walk along the High Line.

Story by Caroline Saunders

A footer photo with a grey and white marble background, three TABLE Magazines and subscribe info and button

Subscribe to TABLE Magazine‘s print edition.

Baked Apples with Sausage Stuffing

0
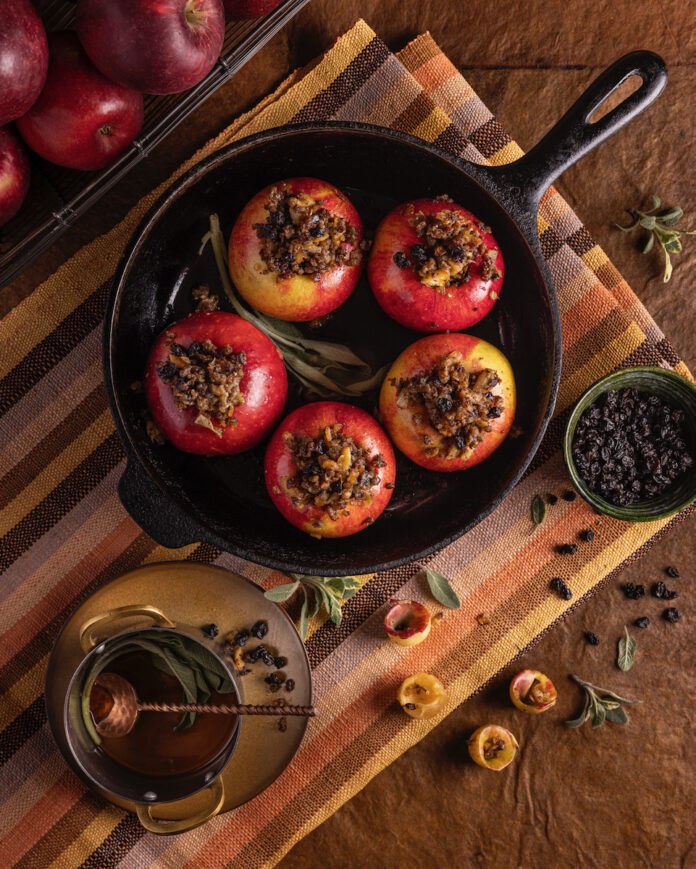
Four baked apples stuffed with sausage plated rustically on a wood background

Throw off that down comforter and feast on these sage-scented baked apples for a warm breakfast on a cool morning (or enjoy any time of day). The sausage stuffing adds an extra bit of savory protein. This is a great recipe for peak apple season in September and October, when apples will have the most flavor packed into each juicy bite.

Tips for Making Baked Apples

You want to pick the right variety of apple for baking. Some of the best “baking apples” are Braeburn, Cortland, Honey Gold, Jonathan, Fuji, Gala, Granny Smith, Haralson, and Newtown Pippin. This is because these apples will get firm and tender without turning to mush when you bake them. Make sure you have an apple corer or a melon baller on hand to core the apples, because you don’t want to cook the core.

Print
clock clock iconcutlery cutlery iconflag flag iconfolder folder iconinstagram instagram iconpinterest pinterest iconfacebook facebook iconprint print iconsquares squares iconheart heart iconheart solid heart solid icon
Four baked apples stuffed with sausage plated rustically on a wood background

Baked Apples with Sausage Stuffing


  • Author: Cheryl Alters Jamison

Description

A new way to try a savory sausage stuffing.


Ingredients

Scale
  • 2 cups apple cider
  • 6 large, well-shaped baking apples, such as Rome Beauty
  • 4 tbsp (½ stick) unsalted butter, at room temperature
  • 1 heaping cup chopped onions
  • 2 tbsp dried currants
  • ½ tsp crumbled dried sage
  • ½ lb raw full-flavored sausage, preferably a smoky or sage-scented variety, crumbled or chopped
  • Fresh sage sprigs, optional


Instructions

  1. Preheat the oven to 375 degrees.
  2. Butter a cast-iron skillet or deep baking dish large enough to hold the apples upright with up to an inch between them.
  3. Pour the cider into a saucepan and reduce it by half over high heat.
  4. While the cider cooks, scoop out the apple cores, leaving the bottoms intact. I find that the small end of a melon baller works better for this than apple-coring gadgets. Scoop a hole in each just a bit bigger than necessary to remove the core. Slice a thin ribbon of peel from around the top of each apple cavity, which helps keep the peel from splitting while baking. Slice off all fruit remaining on the cores and chop it.
  5. Warm the butter in another skillet or sauté pan over medium heat. Stir in the chopped apple pieces, onion, currants, sage, and sausage. Cook until the sausage is brown and, in a few spots, crispy. Remove from the heat and cool briefly.
  6. Pack equal portions of the mixture into each apple cavity, mounding it over the top a bit. Arrange the apples in the prepared skillet. Pour the reduced apple cider over and around the apples. Cover the apples and bake for 30 minutes. Uncover and continue baking for about 15 minutes longer, until the apples can be pierced easily with a knife tip but still hold their shape.
  7. Arrange the apples in a small bowls, pouring the pan juices over them. Serve warm, garnished with sage sprigs, if you wish.

Recipe by Cheryl Alters Jamison
Styling by Keith Recker and Julia Platt Leonard
Photography by Tira Howard 

Subscribe to TABLE Magazine’s print edition

Halloween Coffee Cake

0
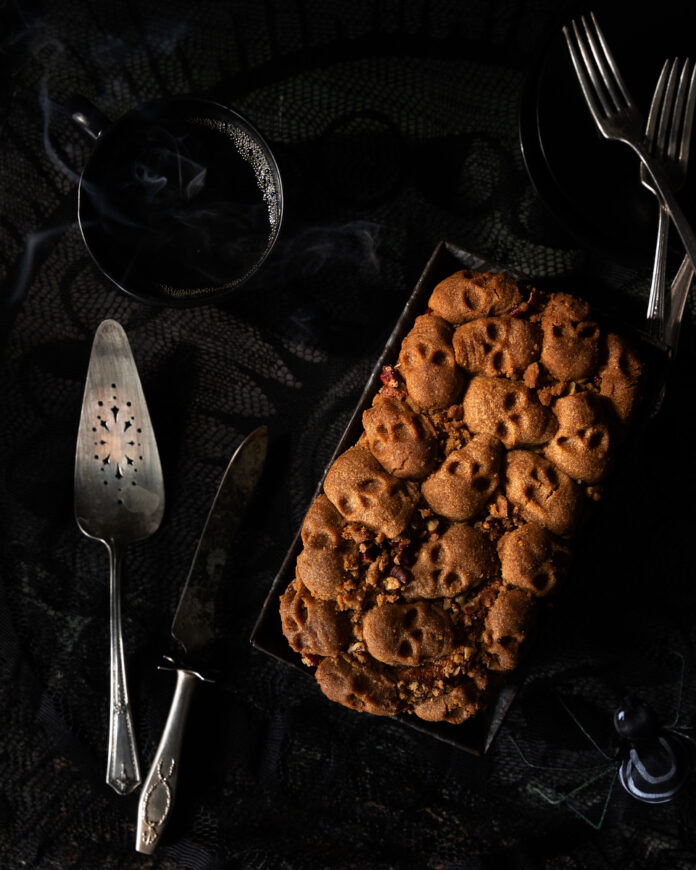
A Halloween-themed coffee cake on a black background.

This is a perfect not too sweet Halloween Coffee Cake. Not only is it delicious, it is easy to double down on Halloween references and modify it into a spooky design. We’ve used skull molds to give it that special Halloween cake touch, but you can also use bats, pumpkins, spider…whatever says Halloween to you. Discover how to create a Coffee Cake that’s as delicious as it is spine-chilling.

Why Does Coffee Cake Not Have Coffee in It?

Coffee cake is to go with coffee, not taste like coffee. You can find coffee in some early versions of the recipe, but over time, water or milk replaced coffee. The exact reasons for this are unclear, but pairing pastries with coffee became popular in European cities like Vienna and Copenhagen as café culture developed. The coffee cake is designed to be light, with a warm cinnamon flavor perfect for pairing along with a cup of espresso in the fall. 

Print
clock clock iconcutlery cutlery iconflag flag iconfolder folder iconinstagram instagram iconpinterest pinterest iconfacebook facebook iconprint print iconsquares squares iconheart heart iconheart solid heart solid icon
A Halloween-themed coffee cake on a black background.

Halloween Coffee Cake


  • Author: Anna Franklin

Description

Don’t forget your cup of coffee on the side!


Ingredients

Scale
  • 1 box yellow cake mix
  • 1/4 cup melted butter
  • 1 cup light brown sugar
  • 1 cup pecans, chopped
  • 1 tbsp cinnamon
  • 3 eggs
  • 1/2 cups sour cream


Instructions

  1. Preheat oven to 350 degrees.
  2. Grease or parchment mine a 9×13 inch baking pan. Set aside.
  3. Remove 2/3 cup of the dry cake mix and combine with 1/4 cup melted butter, brown sugar, cinnamon and chopped pecans. Set aside.
  4. In a large bowl, combine remaining cake mix with the 3 eggs and sour cream, mix until smooth.
  5. Pour half the batter into your prepared pan and top with half of the pecan brown sugar mixture. Top with the remainder of the batter.
  6. For the second layer of the pecan brown sugar mixture, add 1 tablespoon of additional flour to the mixture and press into skull molds. Pop the molds into the freezer for 30 minutes before trying to remove them.
  7. Place the skulls on top of the coffee cake and bake for 45 minutes to 1 hour, or until a toothpick inserted comes out clean. Serve at room temp.

Recipe and Styling by Anna Franklin
Photography by Dave Bryce 

Subscribe to TABLE Magazine’s print edition.

The Huntsman: A Twist on the New York Sour

0
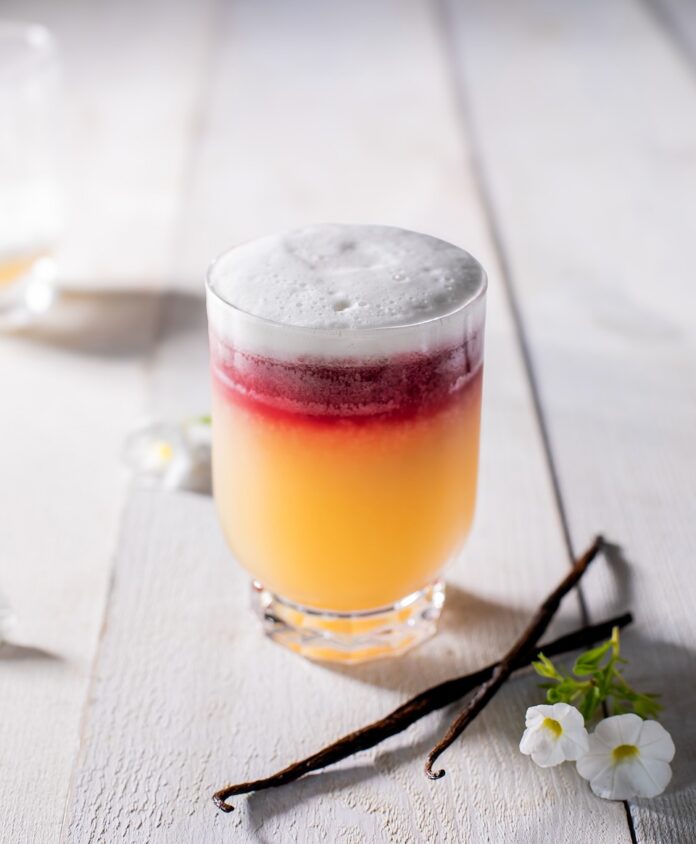
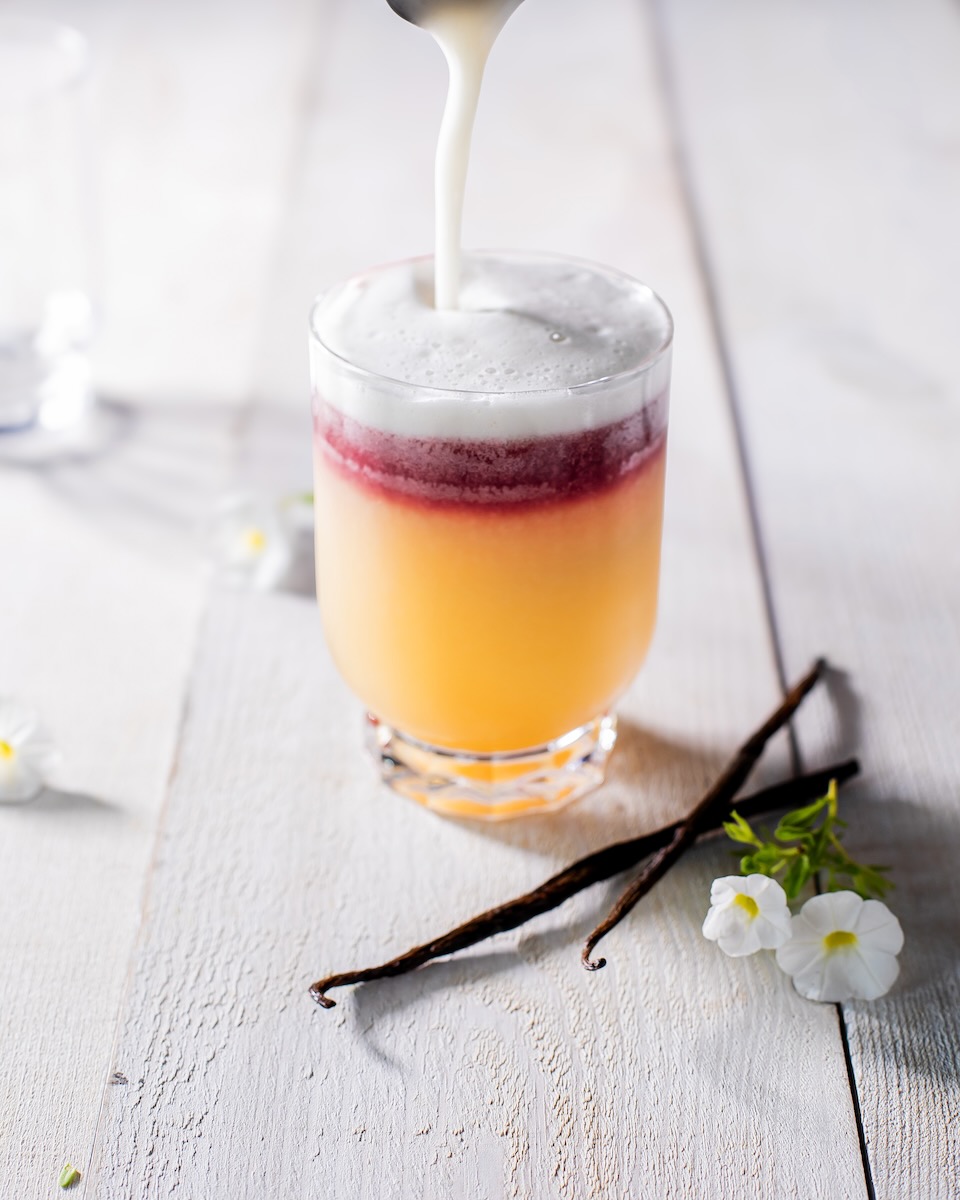
A short cocktail glass with a New York Sour in waves of orange, red, and white foam on top.

The Huntsman is Blackberry Farm’s twist on a New York Sour. It offers the feel of a whiskey sour with dark fruit and vanilla notes. This beautiful winter drink features a red wine float, creating a captivating rim at the top of the cocktail. The Huntsman not only impresses on an aesthetic front but also in its blend of warm, dark, and rustic flavor profiles. The best way to have one is to visit their Wine Cave‘s bar in person. But making it at home and sharing with a loved one is wonderful, too.

What is a New York Sour?

A New York Sour is much like a whiskey sour with a hint of red.  It combines the tartness of whiskey, the tang of lemon juice, a dash of red wine, and a frothy egg white rim. The addition of an egg white foam adds a silky texture and a touch of sweetness in this otherwise strong drink. Finish with a garnish of a cherry or lemon twist and you’ve got a classic cocktail recipe on hand.

A short cocktail glass sits in the center of a white wood table with a New York Sour inside in the colors orange, red, and a white foam.

The Huntsman: A Blackberry New York Sour Recipe

New York Sour Ingredients

  • 1 oz Rittenhouse Rye
  • 1 oz vanilla syrup (We love to use Le Monin vanilla syrup.)
  • 1 oz lemon juice
  • 1 egg white
  • Malbec wine for floating

Cocktail Instructions 

  1. Shake all ingredients in a tin without ice. This is known as a “dry shake” and is an important first step to ensure the egg white gets incorporated fully. 
  2. Then, add ice and shake again. Strain all ingredients in to a rocks glass with fresh ice.
  3. Give the cocktail about 5-10 seconds to form a foamy white layer at the top.
  4. Over the back of a bar spoon, lightly pour about a half ounce of red wine into the cocktail. We recommend a malbec or merlot. You will see a distinct red rim start to form just below the surface of the foam. 

Recipe by Blackberry Farm / Styling by Anna Franklin / Photography by Dave Bryce

A footer photo with a black background and subscribe info and button

Subscribe to TABLE Magazine‘s print edition.
Beet Red Sangria

0
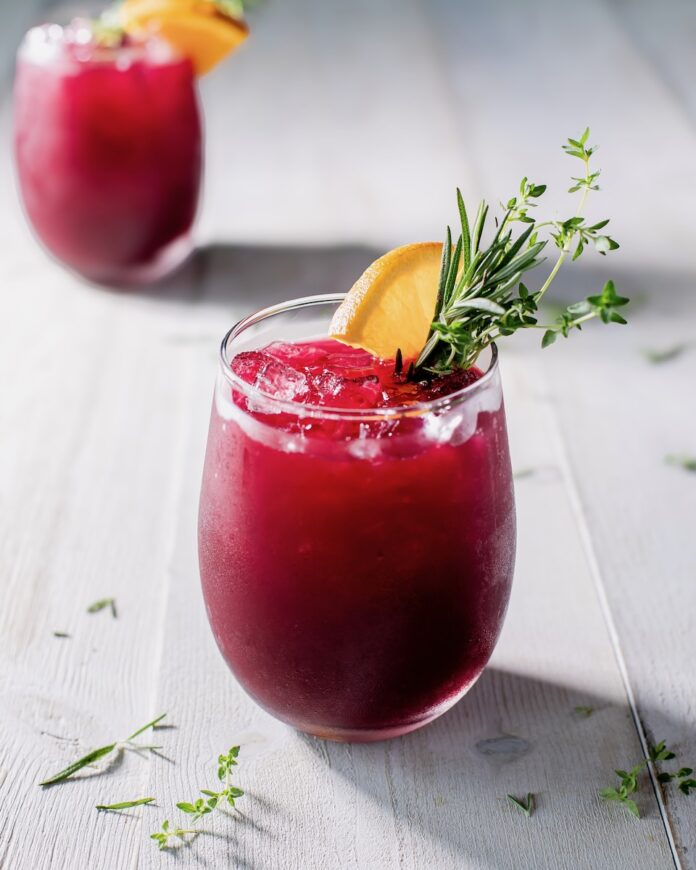
Two cocktail glasses full of beet sangria in a red color sits on a white wood table with orange slices and herb garnishes.

Let our Beet Red Sangria be your introduction to how beets can add a complex flavor that no other ingredient can. With its stunning red color and bold flavor, this sangria is sure to be a hit at your next gathering. The combination of sweet and tart fruits, tangy citrus, and earthy beets creates a taste unlike any other cocktail. Plus, you can dress up this drink in your favorite garnishes like orange and apple slices. Our friends from Blackberry Farm were gracious enough to share it with the readers of TABLE Magazine. It comes from their Wine Cave‘s bar.

How Long Should You Let Sangria Sit Before Drinking?

For the best flavor, it’s recommended to let sangria sit in the refrigerator overnight. This allows the flavors of the wine, fruit, and other ingredients to meld together. If you’re short on time, a few hours (or at least 30 minutes) will still yield delicious results. However, the longer you let it sit, the more complex and flavorful the sangria will become.

Print
clock clock iconcutlery cutlery iconflag flag iconfolder folder iconinstagram instagram iconpinterest pinterest iconfacebook facebook iconprint print iconsquares squares iconheart heart iconheart solid heart solid icon
Two cocktail glasses full of beet sangria in a red color sits on a white wood table with orange slices and herb garnishes.

Beet Red Sangria


  • Author: Kylie Thomas
  • Yield: Serves 5-8 1x

Description

Beets and wine make a sangria you’ll sip on all day long.


Ingredients

Scale
  • 1 bottle red wine – We keep our version bright and fresh by using a richer-style Pinot Noir instead of a darker grape. We use Melville’s Pinot Noir from the Santa Rita Hills.
  • 2 cups beet/herb simple syrup (recipe below)
  • ½ cup orange juice (fresh if you can!)
  • 1 cup water
  • 1 cup lemon juice (also fresh)
  • ½ cup Cointreau

For the beet/herb simple syrup:

  • Fresh herbs (thyme, rosemary and a little bit of mint)
  • 2 cups water
  • 1 cup sugar
  • 2 cups red beets
  • 1/2 lemon


Instructions

  1. Mix all ingredients together and add to an ice-filled wine glass. Garnish with your favorite fruits, we love to use orange slices and Granny Smith apple chunks.

For the beet/herb simple syrup:

  1. Steep your favorite fresh herbs in 2 cups of simmering water for 20 minutes. Strain out the herbs and add a cup of sugar. Stir until the sugar dissolves fully. Remove it from heat and allow your herb syrup to cool.
  2. Juice and strain 2 cups of red beets. We squeeze in half of a lemon to brighten the beet juice and help preserve its freshness.
  3. Add the two together to produce about a quart of the beet/herb simple syrup.

Recipe by Blackberry Farm 
Styling by Anna Franklin
Photography by Dave Bryce

Subscribe to TABLE Magazine‘s print edition.
Apple Crisp

0
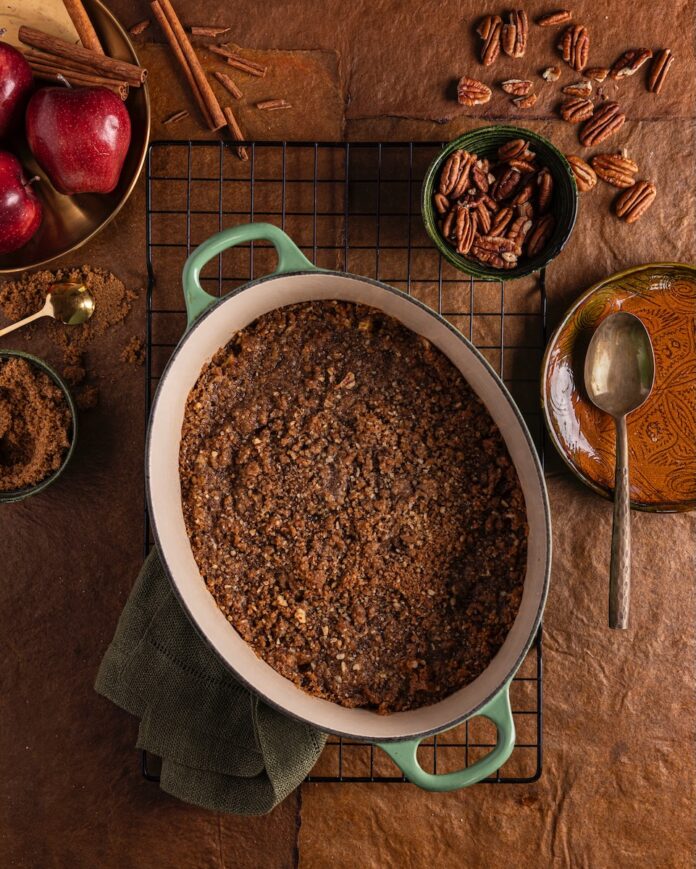
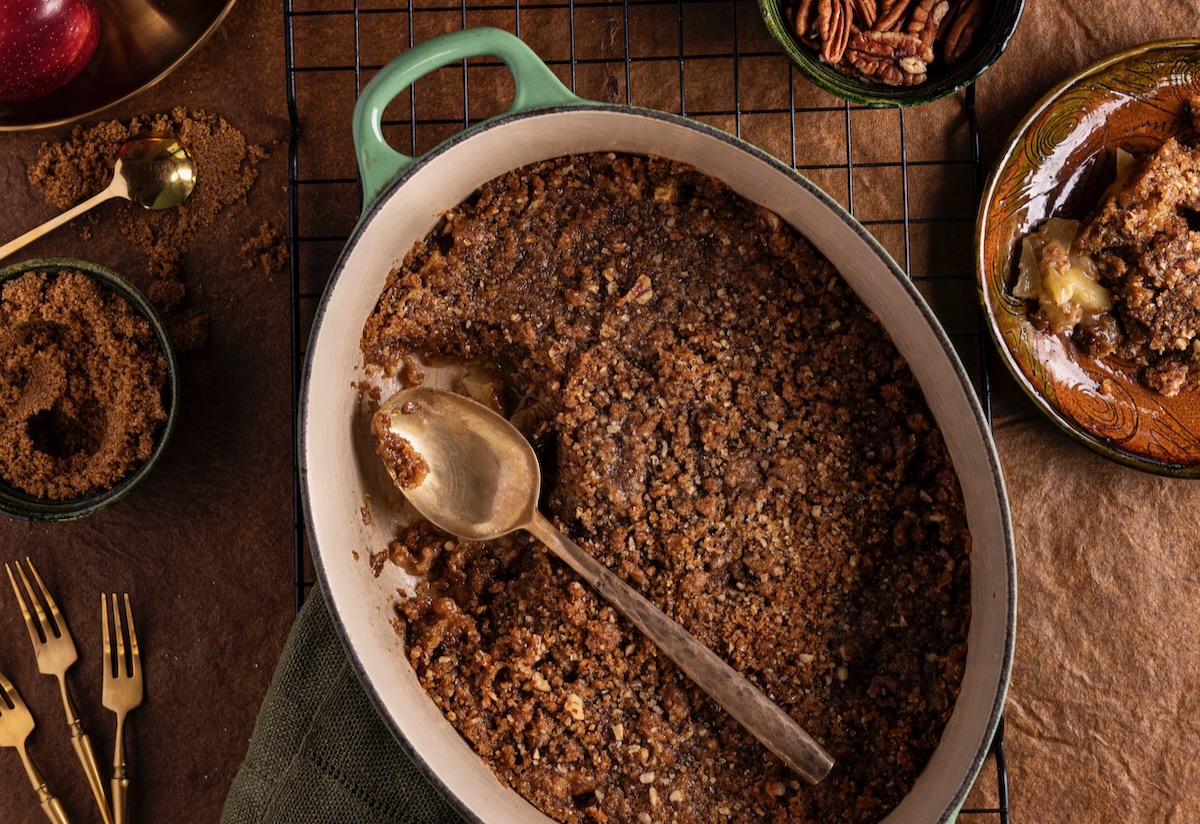
A green pan with apple crisp in it sits on a wood table surrounded by apples, brown sugar, and walnuts, and a spoon.

Apple Crisp is a nostalgic taste of fall.

To me, Apple Crisp is THE dish of fall. It takes me back to childhood, when my mother would search out tangy Jonathan baking apples from area orchards each fall to make it particularly special. 

Apples are so commonly available these days that they’ve lost a bit of their seasonal luster. They are particularly luscious when at their peak of recently picked ripeness. Autumn offers the best possibility of finding locally grown varieties like tangy Jonathan baking apples mentioned above. Make the effort to seek these out from orchards or farm markets to be reminded of how special these tree fruits really can be.

What’s the Difference Between Apple Crisp, Apple Crumble, and Apple Cobbler?

Apple crisp, apple crumble, and apple cobbler are all delicious desserts that feature apples, each with their own distinct characteristics. A crisp is typically made with a topping of oats, brown sugar, and butter, creating a crunchy, golden-brown crust. A crumble is similar to a crisp but has a coarser texture due to larger chunks of butter or even whole nuts within the crumble. Finally, a cobbler is made with a biscuit or pastry dough that is dropped over the apple filling for a soft, flaky topping.

An apple crisp sits in a dish with a spoon taking a piece out of the pan. The piece sits on a plate to the right of the pan.

Apple Crisp Recipe

Serves 6 to 8 

Apple Crisp Ingredients

  • 3 lb tart apples, such as Jonathan or Granny Smith 
  • 1 cup unbleached all-purpose flour 
  • 1 cup packed dark or light brown sugar 
  • ½ cup pecan pieces 
  • 1 tsp ground cinnamon 
  • ½ tsp salt 
  • ½ cup (1 stick) + 2 tbsp unsalted butter 

 Crisp Instructions

  1. Preheat the oven to 375 degrees.   
  2. Butter and 8-to-9-inch skillet or baking dish. 
  3. Peel, core, and slice the apples into small chunks. Pile them into the prepared skillet. Mix about 2 teaspoons of the flour with the apples. 
  4. Combine the remaining flour, brown sugar, pecans, cinnamon, and salt in a food processor, and pulse to combine. Add the butter and pulse until the mixture becomes a crumbly meal.  
  5. Spoon it over the apples evenly, packing it down lightly. Bake the crisp for about 30 minutes, until the topping is crunchy and the apples tender. Serve warm. 

Adapted from American Home Cooking © 2000 by Cheryl Alters Jamison and Bill Jamison 

Story and Recipe by Cheryl Alters Jamison / Photography by Tira Howard / Styling by Keith Recker 

A footer photo with a black background and subscribe info and buttonSubscribe to TABLE Magazine‘s print edition.
Ginger Pear Upside-Down Cake

0
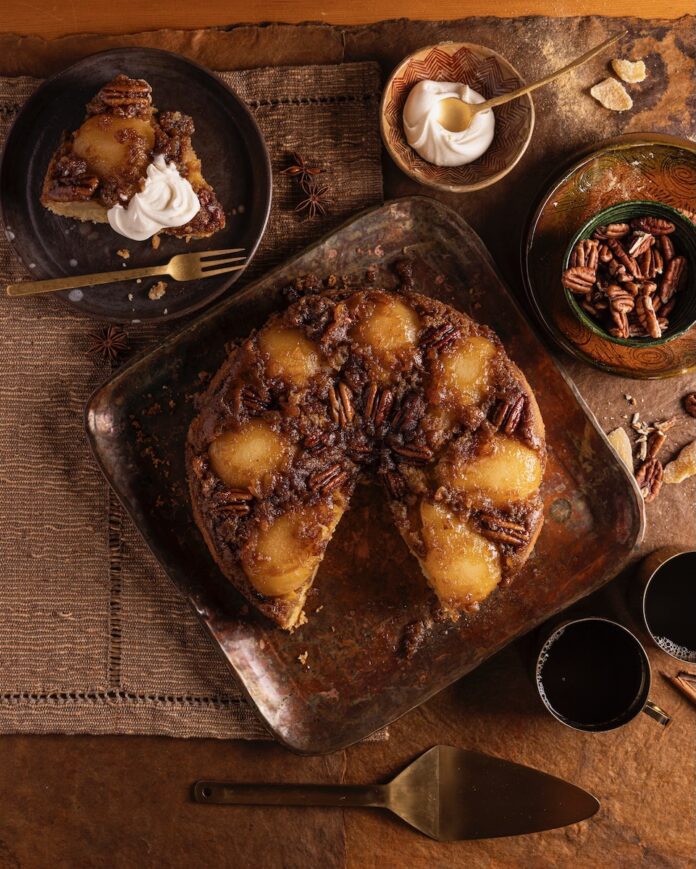
A pear upside down cake sits on a wooden table with a slice taken out of it on a plate to the top left.

Fruit-topped upside-down cakes have a retro hominess. Our recipe turns the pineapple classic on its head, substituting pears, and then lacing both the cake and its gooey topping with a warming flourish of ginger.

Tips for Making an Upside-Down Cake

To ensure a perfect upside-down cake, you always want to start with your desired toppings (like fruit or nuts) at the bottom of the pan. A well-mixed cake batter also goes a long way, creating a smooth texture throughout. When baking, avoid over-baking, as the cake should be slightly moist in the center when you remove it. It’s important that you do not flip the pan right out of the oven! Instead, allow the cake to cool completely before inverting to prevent sticking. To make the cake even easier to release, you can line the pan with parchment paper or grease it generously before building.

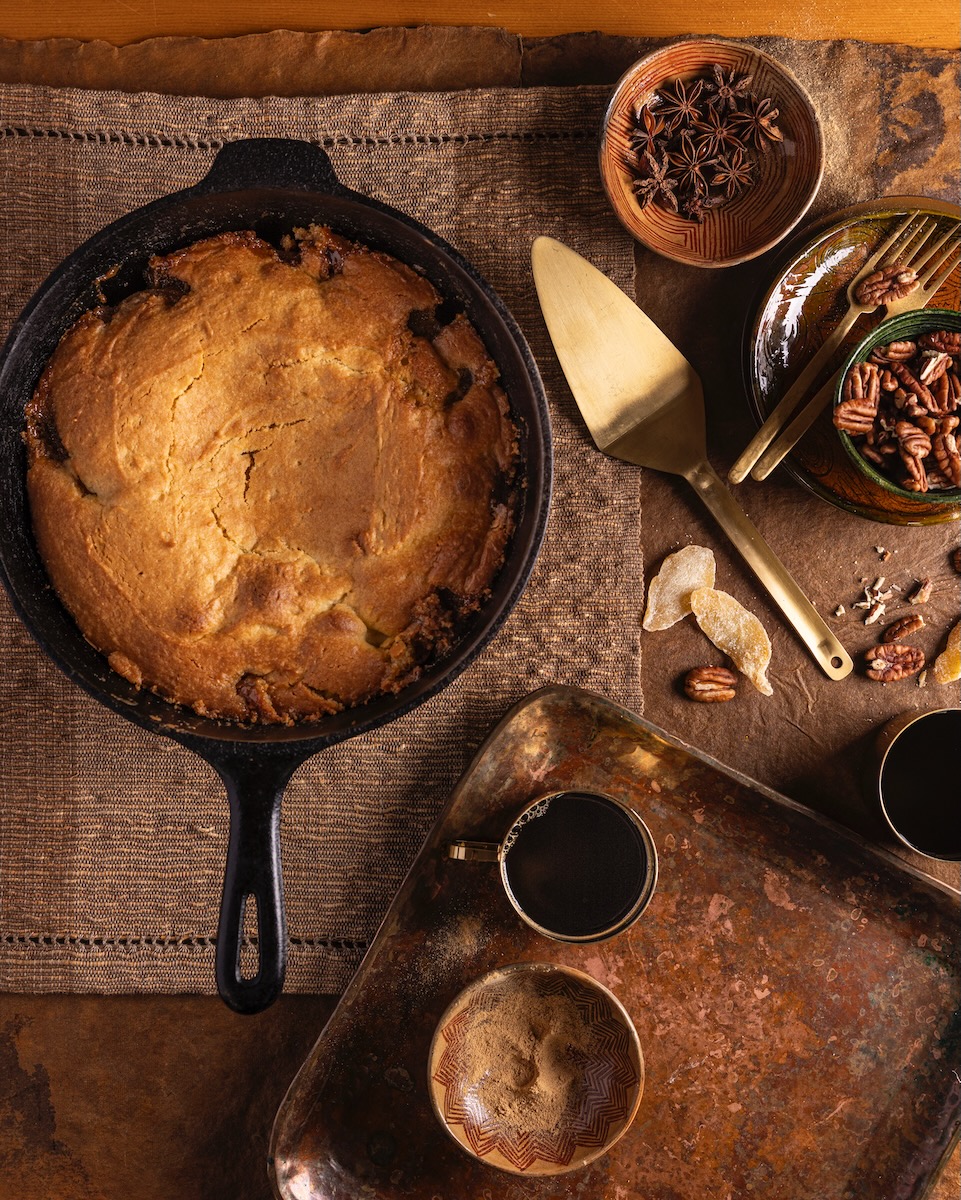
A pear upside down cake sits in a cast iron pan on a wooden table with a pie spatula nearby.

Print

clock clock iconcutlery cutlery iconflag flag iconfolder folder iconinstagram instagram iconpinterest pinterest iconfacebook facebook iconprint print iconsquares squares iconheart heart iconheart solid heart solid icon
A pear upside down cake sits on a wooden table with a slice taken out of it on a plate to the top left.

Ginger Pear Upside-Down Cake


  • Author: Cheryl Alters Jamison

Description

A little sweet and a little warming.


Ingredients

Scale

For the Topping: 

  • 6 tbsp (3/4 stick) unsalted butter 
  • ¾ cup packed dark brown sugar 
  • ½ tsp ground ginger 
  • ¼ cup finely chopped candied crystallized ginger 
  • 5 juicy-ripe medium pears, peeled, halved, and cored 
  • Approximately 1/3 cup pecan halves 

For the Cake: 

  • 1½ cups sifted cake flour 
  • ¾ tsp ground ginger 
  • ¾ tsp baking powder 
  • ¼ tsp baking soda 
  • ½ tsp salt 
  • 3 large egg yolks 
  • ½ cup sour cream 
  • 1 tsp vanilla bean paste or pure vanilla extract 
  • ½ cup (1 stick) + 1 tablespoon unsalted butter, softened 
  • ¾ cup granulated sugar 


Instructions

  1. Melt the butter for the topping in a 8 to 9-inch cast-iron skillet or other heavy skillet over medium heat. 
  2. Stir in the topping ingredients of brown sugar and ginger, and remove the pan from the heat.  
  3. Arrange the pear halves, cut side up, in the skillet. Fit them snugly in concentric circles or in another pattern that pleases you. Tuck pecans in spaces between the pears. 
  4. Preheat the oven to 350 degrees. 
  5. Sift together the flour, ginger, baking powder, baking soda, and salt.  
  6. In a small bowl, lightly whisk the egg yolks with the sour cream and vanilla.  
  7. Cream together the butter and granulated sugar with an electric mixer at medium-high speed until light and fluffy, about 5 minutes. Mix in the egg mixture and flour mixture in thirds, alternating the two. Mix for about 20 seconds following each addition, stopping to scrape down the sides of the bowl as necessary.  
  8. Spoon the batter over the topping in the skillet, smoothing the surface. Bake for about 50 minutes, until nicely brown and a toothpick inserted in the center comes out clean. 
  9. Immediately run a knife around the sides of the cake and invert the skillet onto a serving plate. Leave the skillet in place over the cake for a couple of minutes, then carefully remove the skillet. This gives time for the caramelized topping to release fully from the skillet, but if any clings stubbornly, scrape it out and smooth it onto the cake. Cool for at least 10 additional minutes before slicing into wedges. Serve warm or at room temperature.  

Adapted from American Home Cooking © 2000 by Cheryl Alters Jamison and Bill Jamison 

Story and Recipe by Cheryl Alters Jamison
Photography by Tira Howard
Styling by Keith Recker and Julia Platt Leonard

Special thanks to Brad Furry and Bradyn Furry for their help on this delicious photo shoot.

Subscribe to TABLE Magazine‘s print edition.
Grilled Cheese and Pear Sandwich

0
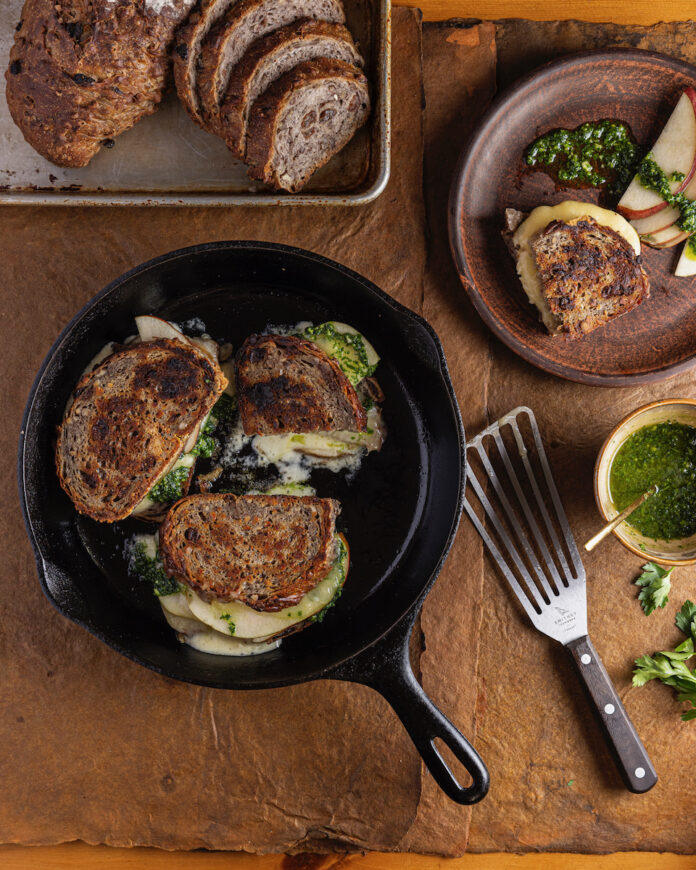
A pear grilled cheese sandwich set on a rustic table with slices of bread beside it

Fruit and cheese makes a worthy finish to a meal, but with this grilled cheese recipe with pear, it IS the meal. And a good one, too. Combine pears with fontina and an herb sauce for a creamy, dreamy, sweet and savory lunch sandwich. Any bread can work, but give this a try with either raisin or rye for something even more special.

Tips for the Best Grilled Cheese

Though we’ve suggest Fontina, Taleggio, brie, or Monterey Jack, you can also combine cheeses. Chose a blend of cheeses for depth of flavor and meltability. Butter the bread generously, and for an extra crispy and flavorful crust, you can even mix a little bit of olive oil into the butter. Also, once you’ve got everything together on the pan, press your sandwich down gently with a spatula to make sure it’s all coagulated.

Print
clock clock iconcutlery cutlery iconflag flag iconfolder folder iconinstagram instagram iconpinterest pinterest iconfacebook facebook iconprint print iconsquares squares iconheart heart iconheart solid heart solid icon
A pear grilled cheese sandwich set on a rustic table with slices of bread beside it

Grilled Cheese and Pear Sandwich


  • Author: Cheryl Alters Jamison

Description

A surprisingly delicious combination.


Ingredients

Scale
  • Parsley Sauce
  • 6 tbsp unsalted butter, softened
  • 8 slices raisin, rye, or soft country bread
  • 2 juicy-ripe pears, about 8 oz each, preferably red-skinned
  • 6 oz grated fontina or Monterey jack, or sliced taleggio or brie cheese

For the parsley sauce:

  • ½ cup packed minced flat-leaf parsley
  • 1 small garlic clove, minced
  • ½ cup extra virgin olive oil
  • Salt


Instructions

  1. Generously spread butter on one side of each bread slice. Cut the skin-on pears into slices, about 1/3 of an inch thick. Warm a large cast-iron skillet or griddle over medium heat.
  2. Spread about 1 teaspoon of parsley sauce on the unbuttered side of half the bread slices.
  3. Arrange the other bread slices in the skillet, buttered side down.
  4. Top each with 1/8th of the cheese, covering the entire exposed surface of the bread slices. Layer pears over the cheese, then sprinkle remaining cheese evenly over the pears. Top with the remaining slices of bread, the ones with the parsley sauce, buttered side up. Cook until the sandwiches are golden brown and crisp, with melted cheese, 8 to 10 minutes, turning once.
  5. Slice into halves and serve each with additional drizzles of the parsley sauce.

For the parsley sauce:

  1. Combine the parsley and garlic in a small bowl. Slowly whisk in the oil. Season with salt. Reserve.

Recipe by Cheryl Alters Jamison
Styling by Keith Recker and Julia Platt Leonard
Photography by Tira Howard

Special thanks to Brad Furry and Bradyn Furry for their help on this delicious photo shoot.

Subscribe to TABLE Magazine’s print edition