This Lamb Croquette recipe was born when Joey Hilty of The Vandal and Keyla Nogueira Cook of Mercearia Brasil joined forces for our Lamb Fest competition. “Both of us thought of making coxinha (chicken croquettes), a popular street food in Brazilian cuisine, so we decided to do a lamb version,” recalls Keyla. “Due to my dietary restrictions with gluten, we decided to use yuca, one of my staple ingredients, as the base instead of flour. Along with Joey’s special sauce it became a great combination of flavors and texture.” The line at their booth proved them right: the combo was compelling indeed.
What are Croquettes?
Croquettes are a delicious way of transforming leftovers or simple ingredients into a mouthwatering deep fried log. The base is a thick, creamy binder, usually a béchamel, which lets you add in whatever flavors you desire. In the case of these Lamb Croquettes ground lamb is finely minced and mixed into the béchamel. We continue to build on the rich, savory flavor of the lamb with aromatic herbs like fennel alongside garlic and onion. After chilling the mixture to firm it up, we shape individual portions into cylinders or ovals, then meticulously coat in breadcrumbs, creating a crispy exterior that contrasts the tender, flavorful inside.
These deep friend bundles of lamb and spices are the perfect balance of crispy and tender.
Ingredients
Scale
For the ground lamb mixture:
1 lb ground lamb
1 tbsp chopped onions
1 tsp minced garlic
1 tsp fennel
1 tbsp kosher salt
1 tsp black pepper
1 tsp chili pepper flakes
1 lime
2 tbsp olive oil
For the yuca:
1 lb ground lamb
2 lb cooked yuca
1 tbsp kosher salt
1 cup chopped green onions
1 tsp turmeric
1 tbsp chili peppers
2 cups all-purpose gluten-free flour
6 cups of oil for frying the croquettes
Instructions
In a mixing bowl, mix all the ingredients for the lamb and let it rest for 10 minutes.
In a large and hot skillet cook the lamb until well-done.
Cook frozen yuca in a large pot with enough water to cover it and 1 tablespoon of kosher salt. Let it cook until it’s falling apart.
Around 30 minutes after it starts boiling, drain the water and carefully remove the yuca strings (it can be easily done with a fork).
In a KitchenAid bowl, add cooked lamb and yuca. Add the salt, green onions, turmeric, and chili peppers. Mix on high speed until it forms a dough.
Divide the mixture into 24 pieces and roll each piece into even-sized log shapes. Roll them in the all-purpose flour.
When the oil is heated to 360 degrees, carefully drop them in several batches into the oil. Fry for about 3-4 minutes each side or until crispy and golden brown.
Transfer to a wire rack or paper towel. Best served warm.
Recipe by Joey Hilty and Keyla Nogueira Cook Styling by Ana Kelly Photography by Laura Petrilla
We’re back with another installment of Cookbook Club featuring Jubilee: Recipes from Two Centuries of African American Cooking by Toni Tipton-Martin. As I touched on in our first cooking adventure from the book, Tipton-Martin combed through over 400 cookbooks dating to 1827 to create a more accurate historical account of African American cooking that goes well beyond “southern” and “soul” cooking. The book also includes original recipes to show launching points for the dishes the author created. To see such skeletal outlines of ingredients and directions speaks to the skills and knowledge previous generations had.
In a mouthwatering analogy, Toni Tipton-Martin expresses this goal for her book, “I hope that by the time you finish cooking your way through Jubilee, you will think of African American cooking like a sultry gumbo: built, perhaps, on a foundation of humble sustenance, but layered with spice, flavors, and aromas embellished by the whim and the skills of the cook, served with grace and richness as well as love.”
All About Toni Tipton-Martin’s Lamb Curry
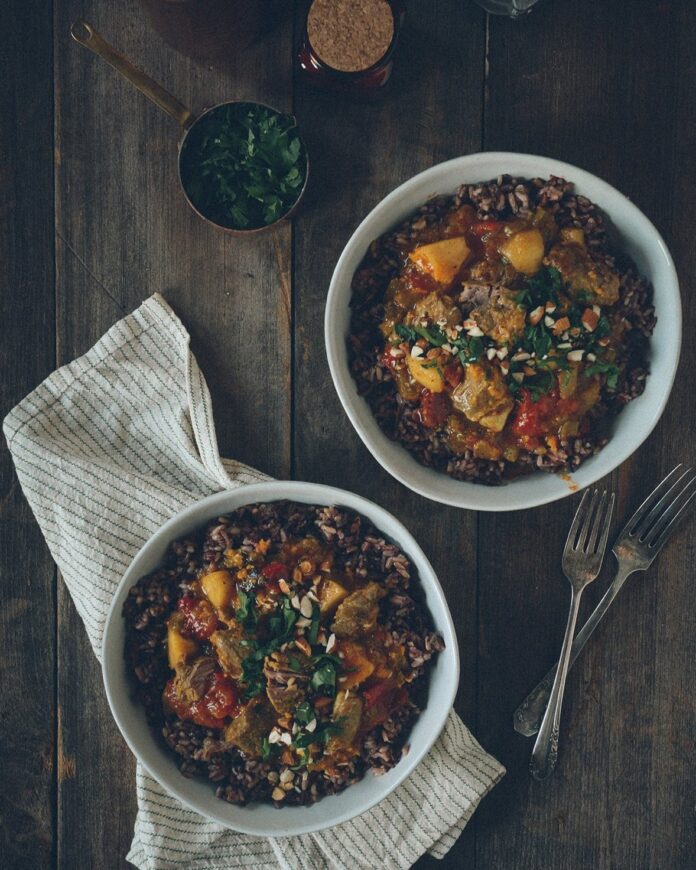
On that note, let’s continue cooking! This Lamb Curry pays homage to South African curries, which themselves blend Malay and Indian influences. From there, curries traveled to the Caribbean, where Jamaicans added gamey mutton or goat. This recipe combines a hearty base of tomatoes with fork-tender lamb, and a few surprise twists: stewed apples, a splash of rum, and a burst of lime. Serve with whole-grain emperor’s rice for the visual contrast of its deep purple hue. Then dog-ear the page, because if you’re anything like me, you’ll want to return to this recipe again and again.
Warm yourself up with a spiced curry featuring tender lamb.
Ingredients
Scale
2 lb lamb shoulder or leg, cut into 1-inch cubes
Salt and black pepper
2 tbsp olive oil
2 tbsp butter
1 cup coarsely chopped onions
2 tbsp minced green bell pepper
2 tbsp minced celery
2 tsp minced garlic
2 tbsp curry powder, to taste
1 tbsp tomato paste
1 ½ cups diced tomatoes (I used canned tomatoes in lieu of sad off-season varieties)
2 cups chicken stock
1 bay leaf
2 medium green apples, peeled and cubed
2 tbsp rum (optional)
1 tbsp fresh lime juice (optional)
Freshly cooked rice
Instructions
Place the lamb on a platter and pat dry with paper towels. Season all over with 1 ½ teaspoons salt and ½ teaspoon pepper. Let stand for 2 hours.
In a large Dutch oven or deep skillet, heat the oil over medium-high heat until sizzling. Working in batches to avoid crowding the pan, add the lamb and sear until browned and crusty, turning to cook on all sides, 5 to 8 minutes. Use a slotted spoon to remove the lamb to a plate.
Add the butter to the pan and saute the onions, bell pepper, celery, and garlic until the onion is translucent, about 5 minutes.
Sprinkle the curry powder over the vegetables and cook, stirring constantly until fragrant, about 30 seconds. Return the lamb to the pan with the tomato paste, tomatoes, chicken stock, and bay leaf.
Reduce the heat to medium-low, cover and simmer until the meat is tender and the sauce is thick, about 1 ½ hours. Add the apples to the pan during the last 30 minutes of cooking time. Remove and discard the bay leaf. Stir in the rum and lime juice, if using, and heat for 1 minute.
Serve with rice.
Recipe by Toni Tipton-Martin Story, Photography, Styling by Quelcy Kogel
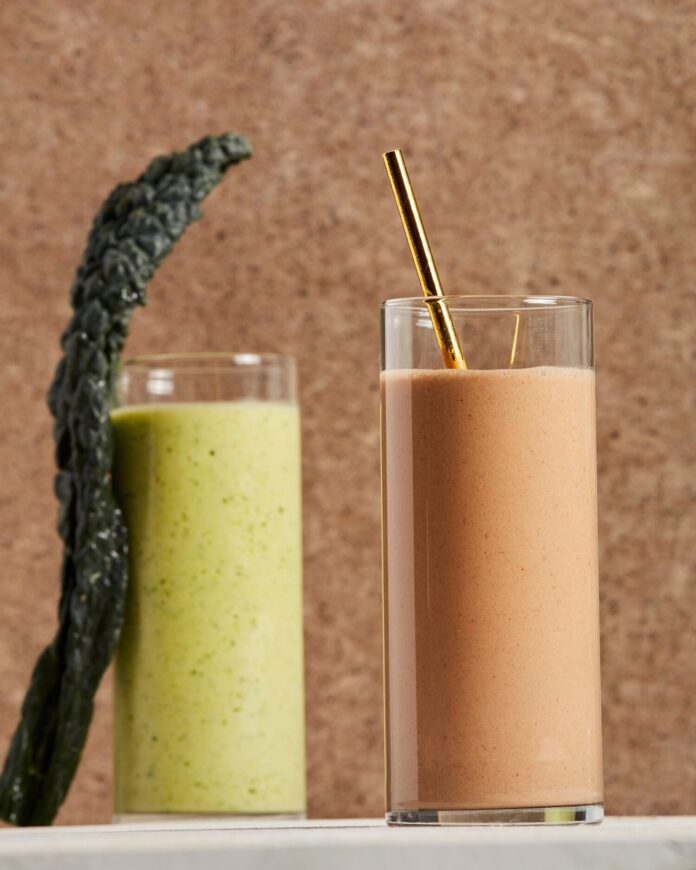
As the former Director of Sports Nutrition and Fueling for the Pittsburgh Pirates, I can assure you that the way the team fuels and hydrates plays a very big role in their performance on the field. But why does all that matter? Eating healthy food is eating healthy food, right? Let’s take a deeper look and learn how the team stays strong with these Pittsburgh Pirates’ Nourishing Smoothies.
(It is important to note that everyone is different. Regardless of what you do for a job or for physical activity – including professional athletes – nutrition needs vary. A football offensive lineman would not fuel the same way a center fielder would, nor would a professional tennis player fuel the same way as a marathon runner.)
Fuel Your Body for Ultimate Success
First of all, let’s change the narrative. Let’s eliminate the term “healthy eating” and replace it with “fueling”.
What’s the difference? Healthy eating can get a bad rap. When people think of eating healthy, they might think of dieting, restricting, missing out on their favorite foods, and generally, being miserable. Nothing that any of us want to feel, especially when we want to enjoy food.
Fueling, on the other hand, is just that – enjoying food.
You need to fuel with a good breakfast for that big meeting today. You need to fuel in order to drive your kids around all weekend. Fueling is the means of keeping your energy levels up by providing your body with what it needs to be your best, not necessarily what is the fastest and most convenient option.
Let’s take a look at some foods that can get you out of the winter slump and “fuel” you for your everyday performance:
Fruits and Vegetables
During the winter, many people struggle to get enough servings of fruits and veggies each day. One reason is the lack of availability of some fresh food during the winter, and what catches our eye in the produce section is usually the bright colors and variety. Starchy-looking strawberries and rows of apples aren’t always appealing.
Fruits and vegetables provide a wide variety of vitamins, minerals, fiber. A general rule of thumb is the darker and brighter the fruit and vegetable, the more nutrients it has.
Fruits and veggies also have a high water content, which can help with hydration. When we aren’t getting enough fruits and veggies – especially in the winter – it can lead to choosing other more calorically dense and nutrient-deficient foods. Here is what you can do to make sure you are getting enough fruits and veggies, even when they might not be in season:
Buy Frozen Fruit
This is a perfect option all year around. Frozen fruit is just that… fruit that has been frozen. There is no added sugar in frozen fruit, and it’s easy-to-use: you can take out only what you want and not have to worry about it sitting in the fridge and getting moldy. You can use frozen fruit in our Pittsburgh Pirates’ Nourishing Smoothies which is a great option for a light, nutrient-dense snack. Or, just let the fruit thaw and eat it!
Pre-Package Your Own Salads
You bought the spinach and had great intentions of eating salads every day. Until you realized you had to get the big container out of the produce drawer in the fridge (which was stacked under three other things) portion it out, add carrots, tomatoes, and more to make it a real salad. So, you decide not to make your salad and one week later, throw away the nearly full container of spinach after it starts smelling and rotting.
Pre-portion your salads before you even put the spinach (or spring mix or romaine) away. Get your carrots, tomatoes, and whatever other veggies you want in your salad and get working. Portion out salads in small containers so each day, all you have to do is grab your greens and add dressing. The hard work is done!
Prep Your Veggies
Most veggies are delicious roasted in the oven. Buy Brussels sprouts, broccoli, baby carrots, or whatever veggies you want. Prep them at once using olive oil, salt, pepper, and garlic powder. Put them in containers and store them in the fridge until you are ready to cook them. Once ready, place your desired amount on a baking sheet and roast them in the oven for 15-20 minutes at 400 degrees, or until they are to your liking.
Whole Grains
Whole grains in foods contain the whole grain. Refined grains contain only the endosperm of the grain, but a whole grain contains the bran, endosperm, and germ.
When you eat whole grains as opposed to refined grains, you are getting fiber, B Vitamins, Vitamin E, and even a little bit of omega-3 fats. Whole grains will make you feel full longer, will keep your blood sugar in check, and help you fuel with good quality carbohydrates. Examples are whole-grain bread, brown rice, whole-grain pasta, oats, and whole-grain cereals.
Hydration
Hydration is important all year round. However, it can be more difficult to stay hydrated during the winter because it is not hot and we don’t feel as thirsty as we do during the summer months. It’s time to get back on the hydration train.
The goal should be to aim for one-half of your body weight in ounces of water. So if you weigh 140 pounds, you should aim for 70 ounces of water each day.
Drinking water will help you feel full and can give you a little boost of energy. Sometimes when we are dehydrated we feel hungry when in reality it could just mean you need to drink more water, so keep that in mind too.
You don’t like the taste of water, you say? Well, don’t depend on those chemical-based, artificially sweetened flavored drops or waters. Stick with the real thing, and try making your own infused water. Put fruit in ice cube trays, fill with water, and once frozen, put them in your water. As the ice cubes melt, your water will get the flavor from the fruit. You can use these methods to make mixed berry, cucumber melon, strawberry mint, and lemon water.
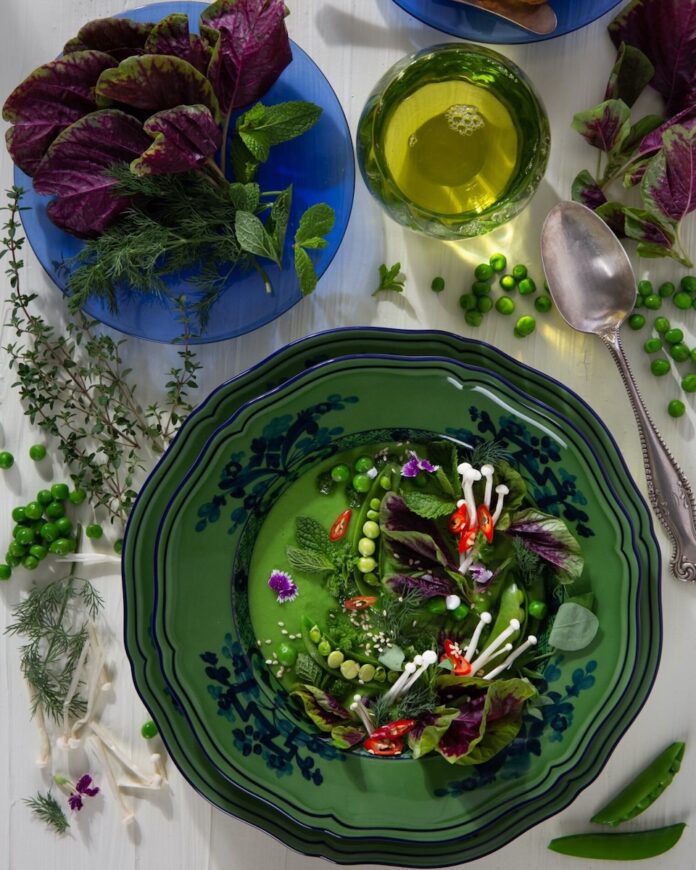
Turning porcelain and stoneware into objects that are not only useful but also beautiful is an art that has been with us for centuries. The world’s great plate makers are not stuck in history, though: they are listening carefully to what we want in terms of ease, functionality, and mood. We explored some of the most stunning plate designs with Rafael Vencio, stylist, cook, urban farmer and TABLE contributor, starting with this pea soup.
Legend has it that Ginori 1735’s Oriente Italiano pattern has its origins in Chinese plates brought back to Italy by Marco Polo in the late 13th century. We know for certain that renowned 20th century Italian design titan Gio Ponti revisited the classic design just after World War II, offering it up in the sort of antidepressant colors that thrill us today.
To celebrate our favorite of Ponti’s color options, malachite, Rafael created a garden-fresh English pea soup that focuses on the growing, glowing color green.
Tips for Garnishing This Pea Soup
The best tip to start with for garnishing your pea soup is to work with ingredients that you have at hand before hunting for unique options. Anything that you might use on a salad can sometimes work well with a pureed soup like this recipe. Texture is another important factor to consider: since the soup is pureed, garnishes generally need to stay firm! Croutons are usually an easy choice, as is anything fried to crispiness, like garlic or shallots. Rendered pork is also a good garnish. Toasted whole or crushed nuts or seeds are also a good textural contrast with additional flavor.
Raw vegetables are also an excellent source of both texture and flavor. They usually go well with other rich garnishes such as cream or cheeses. Shoots or microgreens are good options, as well as shaved raw vegetables or pickles (naturally fermented like kosher dills). Spicy heat is a good way to invigorate the palate in between each bite. Herbs add depth and can create contrasting flavors that also complement.
½ cup crème fraîche (or sour cream, labneh, vegan yogurt)
2 tbsp unsalted butter
2 tbsp olive oil
Optional: ½ cup bacon or any salted pork product like guanciale or pancetta; cut into large strips and render off the fat to replace the olive oil; use the rendered pork for garnish
Potential garnishes:
Sugar snap peas
Fresh shucked peas
Red stem choy
Toasted sesame seeds
Fresh enoki mushrooms
Asparagus tips
Pesto
Dill
Mint
Pea shoots
Fresh Thai chilies
Sour cream or labneh
Instructions
Sauté leeks and garlic in butter and olive oil until tender. Add stock and simmer for 20 minutes. Let cool to room temperature. If peas are frozen, you can toss them into the mixture to thaw them and to cool the broth.
Place all ingredients in a blender or food processor and puree thoroughly. Decant to a bowl. Cover and let rest for an hour or two in refrigerator.
Serve cool in low bowls…and have fun with the garnishing prior to bringing the soup to the table. Or place plates of garnish materials on the table and let everyone create their own garden!
I’m picky about margaritas. Too much juice and the cocktail feels watered down and weak. Too much sugar and the taste of tequila is lost, steamrolled by sweetness. This Classic Margarita recipe has none of those faults. There are lots of other ways to do a margarita, but sometimes simple is best.
About My Classic Margarita Recipe
The recipe I’ve stuck by for years is a basic one: fresh lime juice, triple sec or Cointreau; good, quality tequila; and a touch of simple syrup or agave. There are no crazy flavors – though the recipe easily allows for the addition of berries, pineapple, or grapefruit. The classic cocktail is simple, fresh, citrus-forward, and doesn’t require a blender. If you’re really feeling creative, soak your tequila on jalapeños for a day or two. It’ll throw a nice kick into your celebrations!
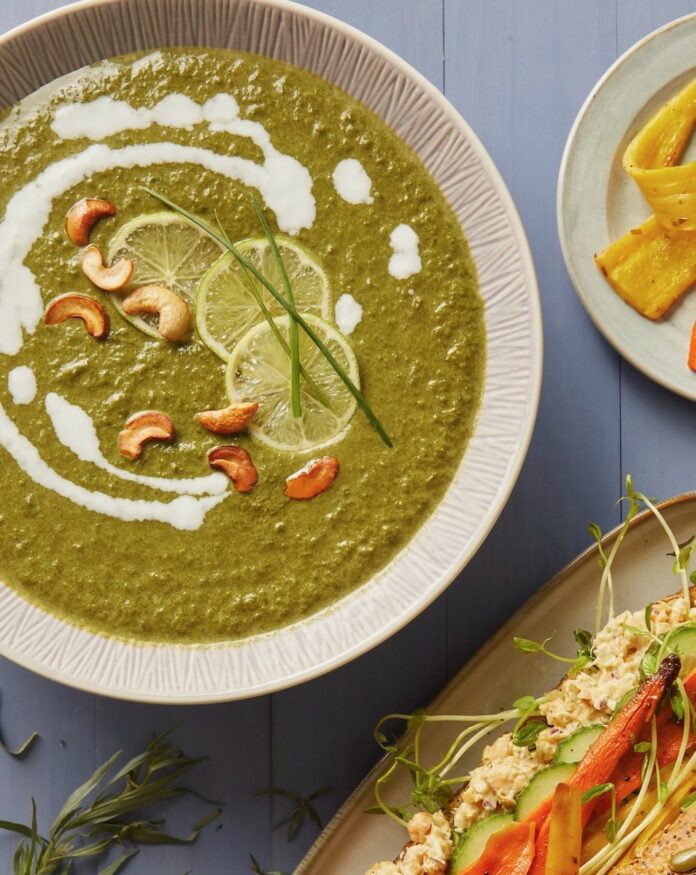
This Spinach Soup with Cashew Cream is the perfect choice for a weeknight dinner when you’re looking for something a little healthier but still filling and flavorful. It’s full of vibrat, leafy greens with the silky texture of cashew cream, combining nourishing earthy flavor with a velvety mouthful. Whether you’re looking for a light meal or a hearty appetizer, this recipe is a fantastic way to incorporate more greens into your diet while enjoying a rich and creamy bowl of goodness. You can customize it to make it vegan, or add different kind of stock.
Health Benefits of Cashew Cream
Cashew cream is a creamy, nutrient-packed substitute that’s becoming a go-to ingredient for those looking to make healthier choices in their diets. Made from blending raw cashews with water, cashew cream is rich in healthy fats, vitamins, and minerals, making it an excellent addition to plant-based meals. But what truly sets cashew cream apart as a healthy alternative is its versatility and impressive nutritional profile.
One of the main benefits of cashew cream is its healthy fat content. Cashews are high in unsaturated fats, particularly monounsaturated fats, which are known to promote heart health by helping to lower bad cholesterol levels. These fats also support brain function, contribute to healthy skin, and help your body absorb essential nutrients. This Spinach Soup with Cashew Cream uses it for its textural qualities within the soup, adding more body.
Place the cashews in a heat safe bowl and pour enough boiling water to cover them. Let sit for 15 minutes, then drain the water.
Add the softened cashews into a small blender container along with as much water as necessary to blend into a smooth paste.
Place the cashew paste into a bowl and then slowly pour in 1 cup boiling water, stirring until it reaches the consistency of milk.
For the soup:
Heat a pot and add the oil. Once it is hot enough, place in the onions, green chilies if you are using, garlic, and ginger. Sprinkle on a little salt and the roasted cumin powder. Sauté, stirring occasionally, until the onions become lightly golden.
At this stage, add the spinach, stirring to combine with the onions. Once the spinach wilts, pour in the broth, coconut milk, and lime juice.
Stir and simmer together for 3 minutes. Taste and adjust the salt. Take off the heat and cool, before blitzing in a regular blender or with an immersion blender until smooth.
Place the blended soup back into the pot along with the cashew milk. Stir and simmer to warm the soup. Serve warm garnished with toasted cashews.
Notes
*Note: To make the soup vegan, simply substitute vegetable broth for the chicken broth
Recipe and Styling by Veda Sankaran Photography by Dave Bryce
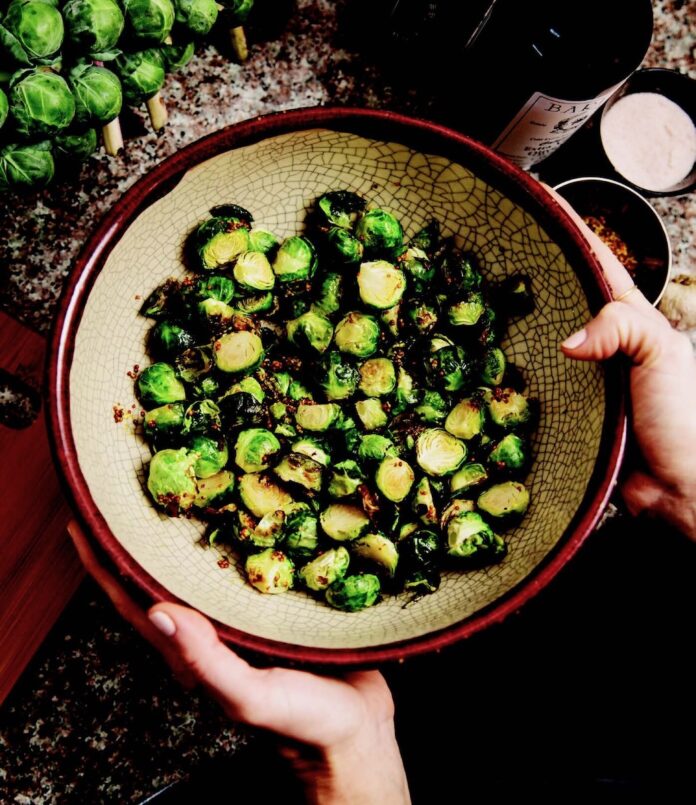
“Brussels sprouts are my favorite food in the universe. We are in a very serious, committed relationship,” Megan Sichieri said. “I host a lot of dinner parties and sprouts are almost always on the menu. I even have a sprout tattoo on my forearm because I love them so hard.” You’ll fall in love with these Simple Mustard Brussels Sprouts. They’re simple, healthy, and delicious: all the best things in life.
Why Love Brussels Sprouts?
Brussels sprouts often get a bad rap, but they’re a vegetable worth celebrating. They’re an excellent source of vitamin C, which helps boost your immune system, and vitamin K, vital for bone health. These tiny veggies are also rich in folate, manganese, and potassium, supporting overall health and vitality. For those watching their calorie intake, Brussels sprouts are an ideal food choice. Low in calories but high in nutrients, they offer a filling and satisfying side dish without packing on the pounds. With their high fiber content, Brussels sprouts help support healthy digestion and can keep things moving in your gut. They also contain compounds that have been shown to help prevent the growth of certain cancer cells, making them a powerful vegetable for cancer protection.
2 tablespoons cooking oil (I use coconut or avocado)
2 cloves garlic
Himalayan pink sea salt
2 tablespoons grainy mustard
Balsamic vinegar
Instructions
Preheat oven to 400 degrees. Trim and halve sprouts. Toss in a bowl with oil, chopped garlic, and a few pinches of sea salt.
Spread onto a pan and roast at 400 for 20 to 30 minutes. When cooked to your desired crunch level, toss back into the bowl, and add mustard. Stir until coated evenly. Finish with a drizzle of balsamic vinegar.
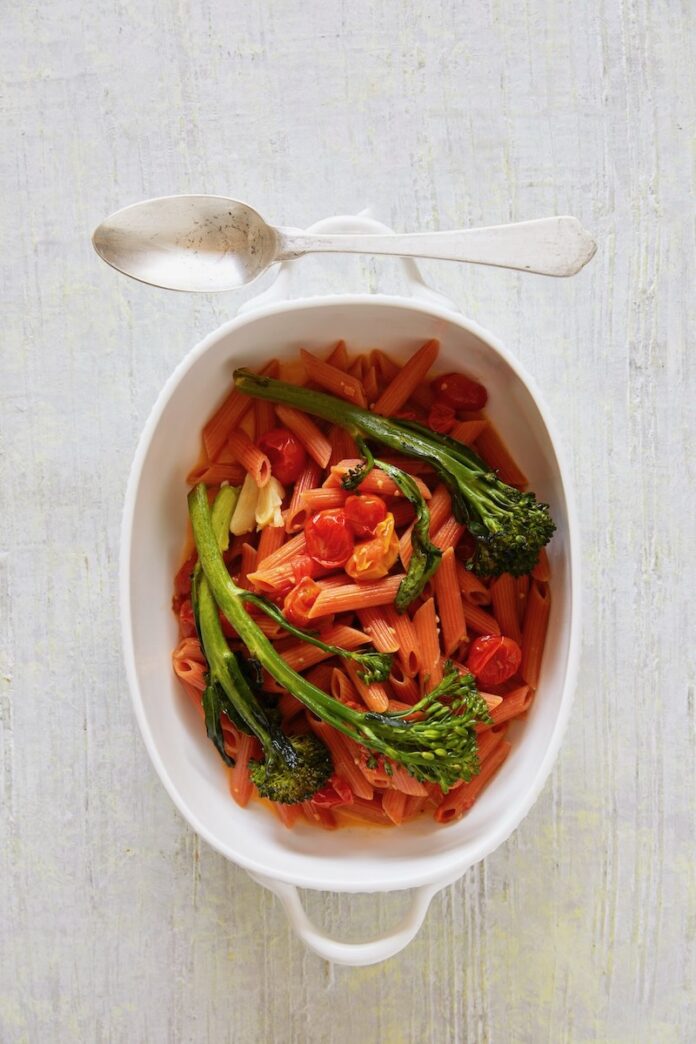
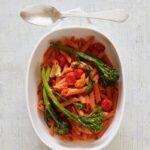
Gluten-free pasta has come a long way, both in terms of texture (al dente and gluten-free are no longer mutually exclusive) and ingredients. While choices were once limited to varieties made from brown rice or corn, it’s now easy to find beautiful and colorful varieties. We tested different shapes and varieties to arrive at this Red Lentil Pasta with Spring Priamvera. It’s accessible to a wider swath of people with food sensitivities. We’d proudly serve the results to any guests—even those without dietary restrictions.
What are Red Lentils?
Red lentils are small, vibrant legumes packed with protein, fiber, and essential nutrients. Known for their mild flavor and quick cooking time, they’re a staple in cuisines all over the world. Red lentil pasta is made by grinding dried red lentils into a flour, which is then used to create pasta shapes like spaghetti, penne, and fusilli. The result is a gluten-free pasta that still retains a satisfying texture and is rich in protein. it’s ideal for maintaining muscle health and keeping you full for longer. Also, its flavor allows it to pair well with various sauces, from creamy Alfredo to tangy marinara, ensuring a satisfying meal every time.
Oil to coat casserole dish (we used olive oil spray)
2 tbsp olive oil, divided
½ tsp each of salt, pepper, and red pepper flakes
2 pints cherry tomatoes
12 stems broccolini
5 garlic cloves, minced
2 bricks of Violife Just Like Feta (or standard feta if lactose doesn’t bother you)
1 lb gluten-free red lentil pasta
Fresh basil or parsley for garnish
Instructions
Preheat oven to 400 degrees.
In a Dutch oven, place 1 tbsp olive oil, salt, pepper, garlic, red pepper flakes, tomatoes, broccolini, and garlic. Toss with fingertips so vegetables are coated in oil.
Place both bricks of Violife Just Like Feta (or real feta) in the center of the Dutch oven. Put in the oven and bake uncovered for 25 minutes.
About halfway through baking, prepare gluten-free red lentil pasta per package instructions.
Remove casserole dish from oven, place on a heat-safe surface. Remove broccolini with tongs and set aside. Stir tomatoes and cheese until a sauce forms.
Add pasta and toss to coat. Place broccolini on top, garnish with basil or parsley, and serve.
Recipe by Liz Fetchin of Octofree Styling by Anna Franklin Photography by Dave Bryce
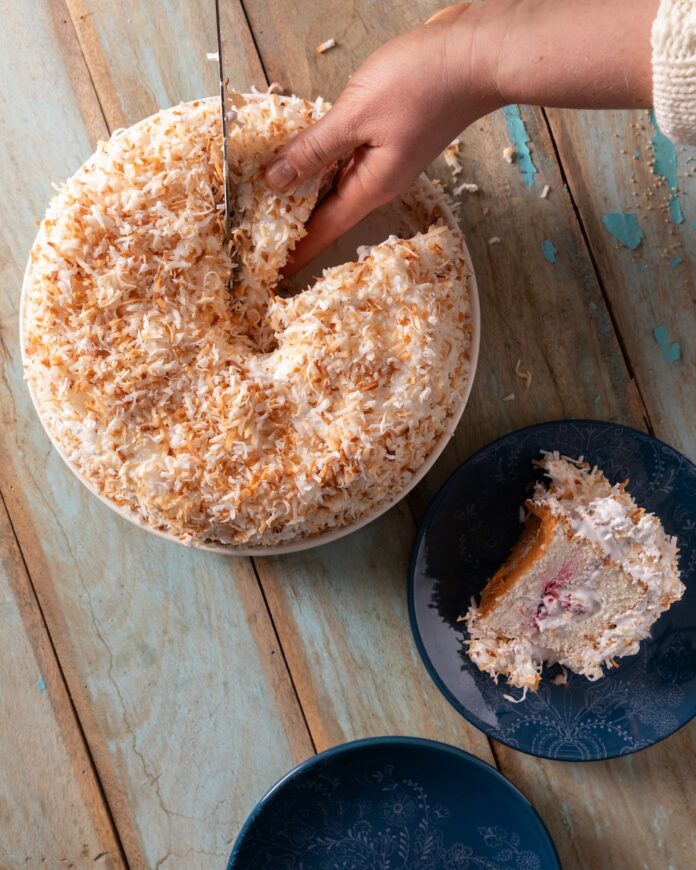
We’re combining two of our favorite Martha Stewart recipes to make an Angel Food Cake that we cover in an Italian meringue and top with shredded coconut. For this Martha Stewart-Inspired recipe we started with her Angel Food Cake as well as her Basic Italian Meringue. This way you get to bake up a pure and simple Angel Food Cake…and make it devilishly decadent, too. Imagine biting into a soft, pillowy cake featuring a thick, sweet meringue and the tropical flavors of coconut. Maybe you’ll enjoy it so much that your next birthday cake will just have to Selina Progar’s lovely adaptation of Martha’s originals.
Where Does Angel Food Cake Originate From?
No matter if you call it angel food cake, cornstarch cake, or sponge cake, it all leads back to the same, airy and delightful recipe. While there is no real answer to where this dessert came from, there is evidence to suggest its history lies in Pennsylvania. The Pennsylvania Dutch introduced us to the uniquely shaped angel food cake pan. Its real commercial success though did not come until cake mixes for angel food cake hit shelves in 1942. History credits EZY Angel Cake Mix as the company to first release this popular product.
A soft and airy Angel Food Cake meets a sweet Italian meringue and shreds of coconut.
Ingredients
Scale
For the cake:
4.7 oz all-purpose flour, sifted
8 oz sugar #1, sifted
4 oz sugar #2, sifted
420 g egg whites (from 14 eggs)
14 g warm water
14 g salt
5 g cream of tartar
12 g vanilla extract
Flaked sweetened coconut
For the Italian meringue:
16 oz sugar
8 oz egg whites
2 oz water
Instructions
For the cake:
Sift together flour and sugar #1.
Sift sugar #2 and set aside with a spoon.
Crack eggs into a mixing bowl. Reserve yolks for another project like ice cream, hollandaise or mayonnaise.
In the bowl fit with the whisk attachment, whip together on 4-6th speed egg whites, warm water, salt, cream of tartar, and vanilla until soft foamy peaks begin to form.
Turn mixer to speed 8, and add sugar #2 one spoonful at a time with about 15 seconds in between each addition. Beat until firm peaks form. Do not allow “cotton balls” to form.
Fold in sifted flour and sugar. Place your spatula at 12 o’clock, pulling down to 6 o’clock, while rotating your bowl 90-degrees then lifting and rotating your spatula back to 12 o’clock.
Continue until your flour is incorporated but not over mixed.
Place batter into the non-greased tube pan and smooth over the top.
Bake for 45 minutes at 350 degrees or until the cake slightly bounces back to the touch and is golden brown. Flip pan over to allow to cool for 1 hour.
Once cooled, press the offset spatula to the sides of the pan and run the spatula along the edges plus the center to release the cake.
Remove the cake and place on a plate. The cake can be cut in half and filled but can also be iced with meringue from below.
For the Italian meringue:
Separate eggs, carton egg whites can also be used, and place in a stand mixer with the whisk attachment.
In a pot, add sugar and water, stir so that the sugar is all wet. If sugar is on the sides of the pot, wet a pastry brush with water and wash down the sides. This will stop the syrup from crystalizing.
Place on high heat and monitor it as it begins to boil. The end temperature will be between 240-degrees and 245-degrees F.
Once your sugar syrup reaches 236-degrees, turn the mixer on high speed to begin whipping the egg whites. The whites should be foamy to medium peaks. At the same time, continue to cook the syrup to 240-245 degrees. Do not stir it.
Once the temperature is reached, remove from heat. Take the pot to the mixer and while the mixer is still on high slowly pour the syrup down the sides of the mixer. Be sure not to go too fast so it doesn’t hit the whisk.
Once all the syrup is added, allow the mixer to mix for at least 10 minutes. Then, touch the side of the mixer with the inside of your wrist. If the bowl is at a neutral temperature, you can use the meringue. If its still warm continue to mix for 5 minutes.
Ice cake in meringue and top with shaved or flaked sweetened coconut.
You can also use toppings like toffee chips or simply torch the outside and serve with berries.
Cook Up the Rest of Selina’s Martha Stewart-Inspired Recipes
Quelcy Kogel has some strong feelings about pie, meaning pie for dinner is totally on the table. In order to make a pie that feels just right for dinner but still reminds us of the dessert pies we love, she bakes up a Sweet and Savory Pie. This recipe uses a puff pastry dough as the base then slathers on top a lemon ricotta mixture, grilled peaches, corn, sweet peas, bleu cheese, and prosciutto. It’s a fun way to get your kiddos to try new foods while still eating their fruits and veggies.
How to Perfectly Grill Peaches for This Sweet and Savory Pie
In order to make your peaches perfectly grilled for the best dinner pie topping, you want to start by halving and pitting your peaches. Then slice them. Preheat your grill (you’re going to want to use an actual grill for those gorgeous grill marks) before adding your slices and leave them on for about 5 minutes. After getting a good char on the one side, do the same for the other side before placing your warm peaches onto the Sweet and Savory Pie.