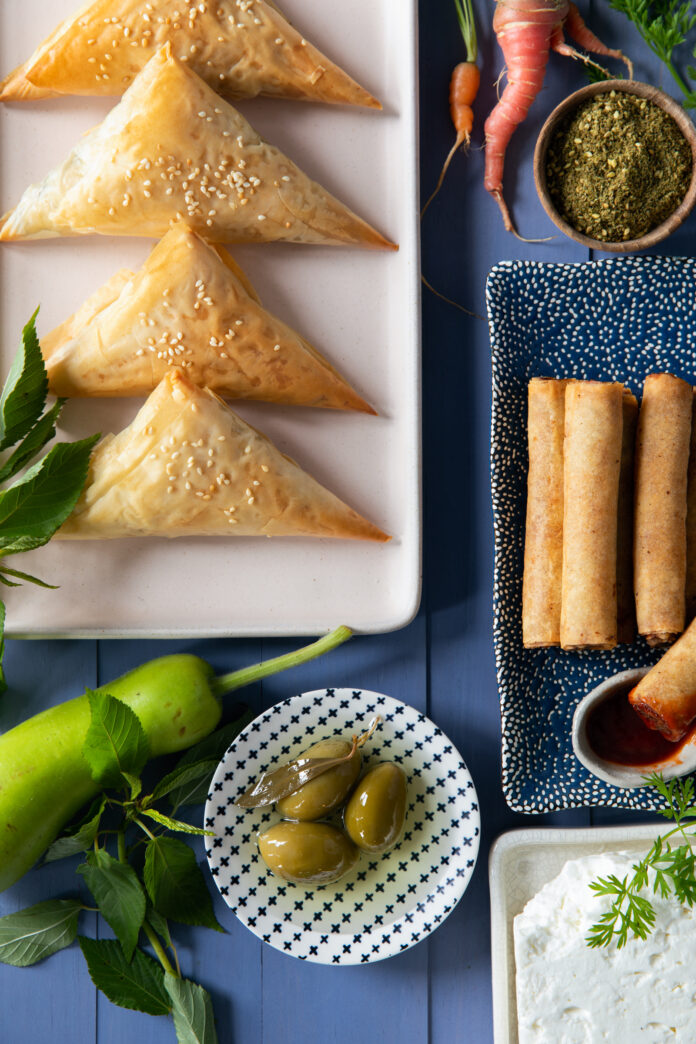
Egyptian spinach is a Middle Eastern leafy green high in vitamin and mineral content. It is also the star of this delectable spanakopita recipe. Spanakopita is a traditional Greek dish with spinach and feta cheese wrapped in phyllo pastry. It is typically served as an appetizer or a main dish and the spinach and cheese filling is seasoned with herbs and spices, giving it a delicious flavor and aroma. Try making them as an appetizer before diving into a pot of Middle Eastern stew or as the best handhelds to bring to a potluck.
What is Egyptian Spinach?
Egyptian spinach, also known as Egyptian Mallow, is a leafy-type of super-green with a mild, slightly sweet flavor. You’ll often find it within Middle Eastern and North African cuisine. While it shares a similar name with spinach, it’s not as closely related as one may think. Instead, it’s more related okra and even cotton. Egyptian spinach is a versatile ingredient that can be used in salads, soups, and stews. Plus, since it’s packed with vitamins and minerals, even more so than spinach, it’s great to substitute in any recipe you normally make with spinach.
For the filling, sauté garlic in olive oil until lightly browned and add onions after. Cook until translucent for about 4-5 minutes. Set aside and let cool.
In a bowl, combine spinach mixture with feta cheese and za’atar spice. Mix thoroughly and taste to adjust seasoning with salt and pepper. Add beaten egg and mix until combined.
Preheat oven to 350 degrees.
Lay out a phyllo sheet with the long end facing you and brush with melted butter. Add another layer and brush again with melted butter. Divide into 3 even wide strips and cut along vertically. Repeat for the remaining phyllo sheets adjusting to the quantity of filling.
Place about a tablespoon or less of filling at the end of a strip. Fold over into a triangle shape covering the filling with enough borders of the phyllo sheet. Repeat folding over until the end of the sheet and brush with melted butter at the end to help keep slightly sealed.
Place spanakopita on a sheet tray lined with parchment paper. Put the last folded side at the bottom to keep it sealed while baking. Sprinkle with sesame seeds and bake in the oven for 18-20 minutes or until deep golden brown. Serve while still hot. The filling can be made ahead and stored in the refrigerator for up to 5 days.
Recipe by Rafe Vencio
Photography by Laura Petrilla
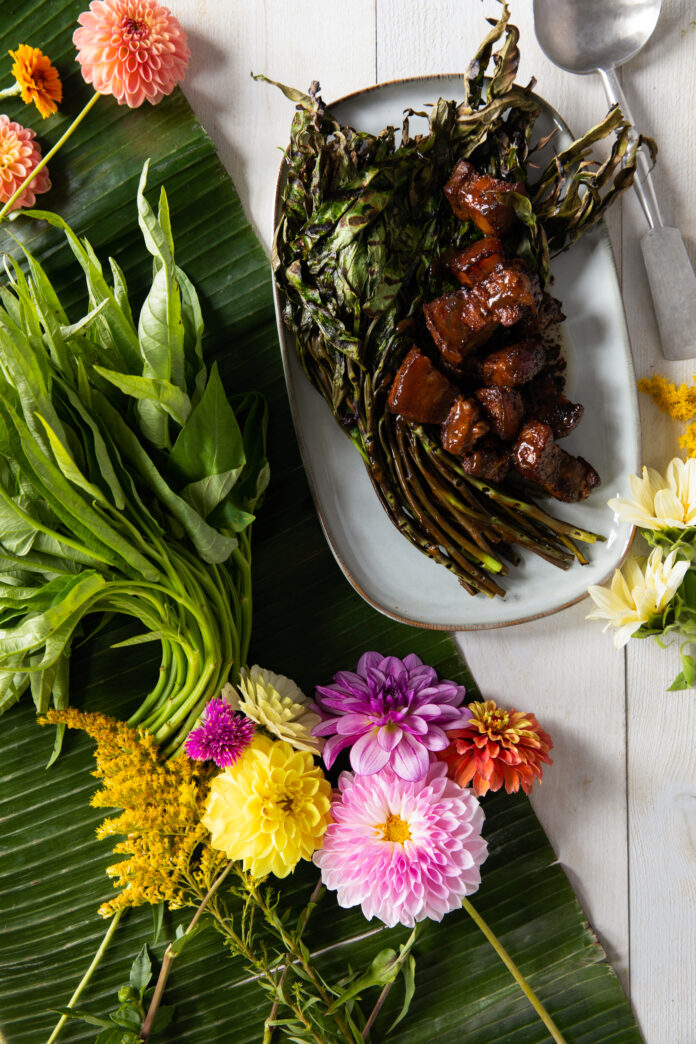
This Grilled-Steamed Water Spinach with Filipino Pork Adobo Sauce is truly a way to choose your own adventure in a recipe. It’s make with comforting pork adobo and nutrient-full water spinach. You can make your own choice to serve it hot or cold, depending on the season. Plus, if you’re not a fan of pork or are abstaining from it, you can use shrimp instead as your protein. Needless to say, once you figure out how you like to make and serve this recipe, you’ll be making it for weeknight dinners more often.
What is Water Spinach?
Water spinach, which also goes by the names kangkong or morning glory, is a leafy green vegetable that is commonly in Asian cuisine. It thrives in water and is also signified by its long, thin stems and broad, arrow-shaped leaves that are slightly crunchy and have a mild, slightly sweet flavor. A popular ingredient in stir-fries, soups, and salads, and is often cooked with garlic, ginger, and other spices for added flavor, it is also packed with vitamins, minerals, and antioxidants, making it a healthy choice for any diet.
A flavorful dish served hot or cold and made with the winter green, water spinach.
Ingredients
Scale
1 bunch (approximately 1/2 lb) water spinach, washed and trimmed
1/2 lb pork belly or shoulder, cut into 1-inch pieces, marinated with adobo
2 cups adobo marinade (Mama Sita’s brand or any equivalent)
1 cup pork/chicken/vegetable broth or water
1/4 cup brown sugar
1/4 or less cornstarch slurry
1/2 cup crispy garlic for garnish
Scallions for garnish
Instructions
Keep water spinach in a bundle and blanch or steam for about 4-5 minutes until slightly tender but still green in color.
Sear pork until evenly browned and add marinade and liquid. Bring to a boil and drop to a simmer. Place a lid slightly cracked and braise until pork is tender, about 15-20 minutes.
Add brown sugar and dissolve. Thicken sauce with slurry, adding gradually until desired consistency. Adjust for seasoning and preference.
Pour sauce over the water spinach and garnish with crispy garlic and shallots. Serve hot immediately and with a side of white rice.
Recipe by Rafe Vencio
Photography by Laura Petrilla
Polenta, a humble staple of the northern Italian kitchen, is essentially porridge made with cornmeal. You can use any cornmeal, but tradition requires meal milled from otto filet corn. There are still polentas made from this flavorful and colorful original, but “polenta” on the label is no guarantee. Artisanal polentas made in the United States are often grown with strains derived from otto filet, but these are often coarsely ground and will take longer to cook. Whichever you choose, it is wise to avoid the instant polenta that will save you time, but at the cost of flavor and texture.
Tips for This Polenta Recipe
Make a basic polenta recipe once for practice, and then go back again and again to experiment and play. Traditionally topped with shavings of Parmigiano-Reggiano or your favorite sauce, a bowl of polenta also welcomes sausage, roasted veggies, shrimp, brown butter – you name it.
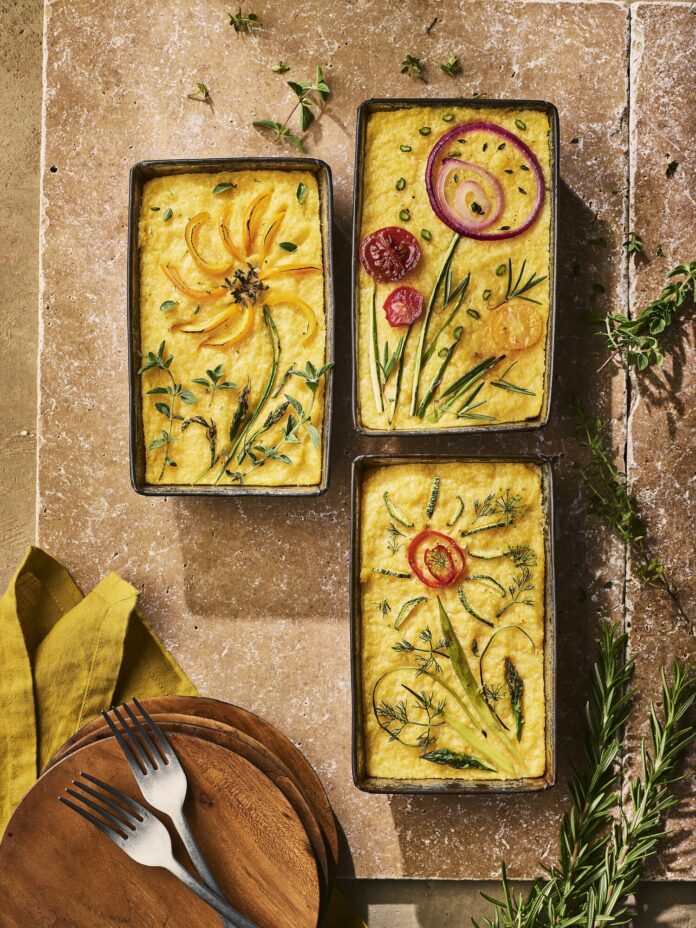
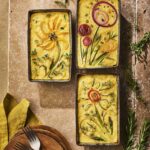
Your choices should please the eyes as well as the taste buds. A painterly approach to polenta can lead to flowers, faces, or perhaps a sun. If you go this route, as pictured here, pour a layer of polenta into the ovenproof serving container of your choice, brush it with a bit of olive oil and decorate with bits of finely sliced vegetables and herbs. Put it under the broiler just long enough to achieve a touch of gold on the veggies, but no longer. Try this recipe for Polenta with Brown Butter-Balsamic Mushrooms and Goat Cheese Topping. You won’t regret it.
A delicious polenta that’s as beautiful to look at as it is to eat.
Ingredients
Scale
For the polenta:
6 cups chicken stock or water
2 cups cornmeal, medium or coarse
4 tbsp butter
2 tsp salt
3/4 cup shaved Parmigiano
For the topping:
8 oz goat cheese
2/3 cup heavy cream or as needed
2 garlic cloves, minced
2 tbsp olive oil
11/2 lb mushrooms white or cremini, stemmed and quartered
Salt and pepper to taste
1/2 cup butter
2 tbsp balsamic vinegar
Fresh chopped basil, oregano, or tarragon
Instructions
Measure the stock or water into a large pot; whisk in the polenta, making sure that there are no lumps. Put the pot onto a medium-high element and whisk until it just comes to a boil. Reduce the heat to very low.
Continue to whisk frequently until polenta just starts to bloom, that is, when it becomes a yellow liquid and not just corn floating in water. This can take up to 10 minutes for coarser grains. Cover with the lid just slightly ajar and cook until finished. The amount of time will depend on the grind of the polenta you use: very coarse can take over an hour; finer grind maybe 25 to 30 minutes. For all grinds, you will continue to whisk frequently until the polenta becomes too stiff to whisk. When this happens, change to a wooden spoon, making sure to whisk/stir the bottom of the pot to prevent sticking. Taste for doneness when it thickens. You do not want the polenta to be al dente.
When you reach this stage, stir in the butter and season with salt to taste. Top with shaved cheese and a drizzle of olive oil or any other topping you choose.
For the mushroom topping:
Using a fork, mash the cheese and blend with enough cream to make a smooth spread. Depending on the cheese that you use, this should take 2/3 cup of cream. It should be creamy and able to be dolloped but not runny. Set aside.
In a large sauté pan over medium heat, sauté minced garlic in olive oil about a minute. Immediately add mushrooms to the pan, then season with salt and pepper. Sauté mushrooms until soft and their liquid has cooked off, stirring often. Turn off heat and leave pan on burner to keep mushrooms warm.
While mushrooms sauté, make brown butter vinaigrette. Melt butter in a small pan over low heat until it turns a deep brown color, about 3 to 5 minutes. Remove butter from heat and cool slightly, about 2 minutes. Put 4 tablespoons of the brown butter in a glass container and add balsamic vinegar. Season to taste with salt and pepper. Pour the vinaigrette over mushrooms and toss.
To serve, put the basic polenta (no toppings) in a bowl, top with mushrooms, and then top the mushrooms with dollops of the creamy goat cheese. Add chopped herbs if desired.
Notes
Do not use corn flour when making polenta.
Most recipes direct you to bring the water to a boil and then add the polenta. Adding it first and whisking as it heats ensures that there will be no lumps..
Story and Recipe by Stephanie Sullivan Photography by Andrew Burkle Food Styling by Clare Vredevoogd Production by Burklehagan
Chef Rafe Vencio's take on ginisang munggo, a classic Filipino comfort dish.
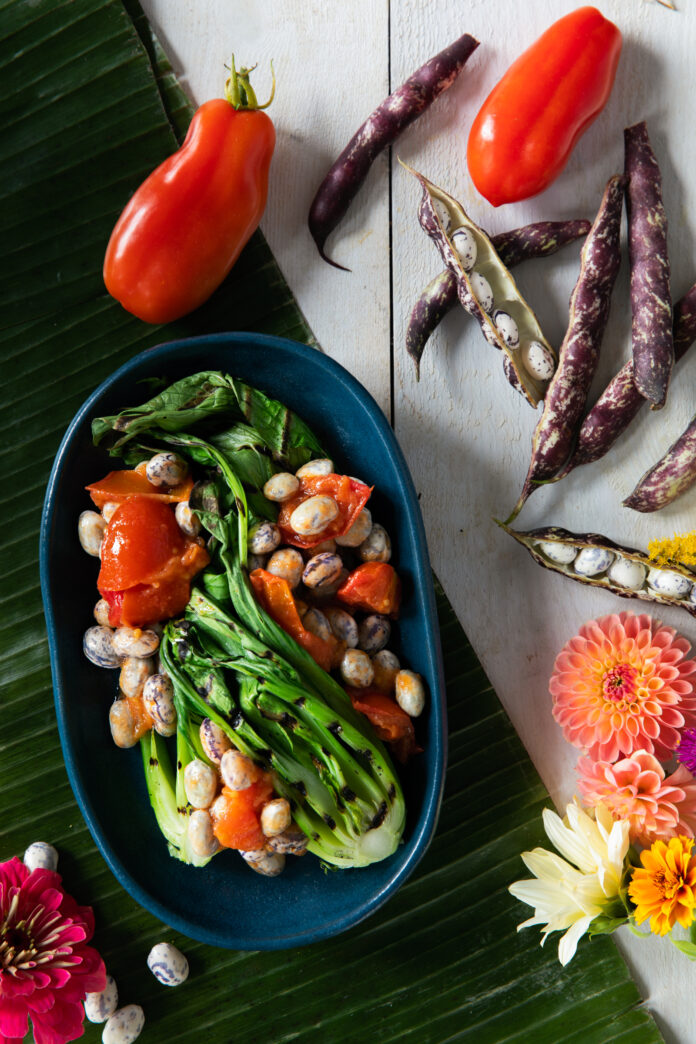
This beans and greens recipe is a take on the Filipino dish ginisang munggo. Shelling beans or peas are used in place of the usual mung beans, and the addition of smoked fish, pork, and bok choy makes this the perfect fall comfort meal.
Beans and Greens Recipe
(Adapted from the Filipino recipe ginisang munggo)
Serves 2-4
INGREDIENTS
1 lb bok choy or pak choi, washed and cut in half
1 tbsp fresh garlic, minced
3 tbsp olive oil
1/2 cup red onion, small-dice
1/2 lb pork belly, cut into ½-inch pieces
4 large Roma tomatoes, medium-dice
2 cups chicken/pork broth or water (substitute meat/vegetable bouillon)
3 cups fresh shelling beans or peas
1/2 cup smoked fish meat (trout/sardine/mackerel/milkfish)
1 large stalk of celery, medium-dice
1 cup bitter melon, optional
1 cup bitter melon leaves if available, optional
Crushed pork rinds for garnish
INSTRUCTIONS
Sear or grill bok choy or pak choi and set aside, seasoning with salt and pepper to taste.
Sauté garlic in olive oil until lightly browned and add onion next, cooking until translucent about 3-4 minutes.
Remove garlic and onion then sear pork until evenly browned.
Add tomatoes and cook until chunky like tomato sauce. Return garlic and onion then add the liquid. Bring to a boil and simmer until liquid has reduced to a sauce consistency and pork is tender, about 15-20 minutes.
Add fresh beans, smoked fish, celery, and bitter melon with leaves if using. Cook covered with the lid slightly open for about 5-8 minutes. Add water if it looks too dry or thick, about 1 cup to adjust with the cooking of the beans.
To plate, spoon over beans on top of the grilled bok choy or pak choi and garnish with crushed pork rinds. Serve while still hot with a side of white rice.
Recipe by Rafe Vencio/ Photography by Laura Petrilla
Lumpia - Filipino spring rolls - make a tasty appetizer any day of the week.
These lumpia (spring rolls) are packed with delectable goodness: ground pork, carrots, and bottle gourd, all rolled into one carry-along snack or light lunch.
Lumpia with Bottle Gourd and Carrots Recipe
Serves 2-4
INGREDIENTS
1 package spring roll wrappers, thin
1 lb ground pork
1/2 cup finely grated bottle gourd, juice squeezed out
1/2 cup finely grated carrots, juice squeezed out
2 tbsp fresh garlic, minced
1/4 cup red onion, minced
2 eggs, lightly beaten
1 tbsp fresh ginger, finely grated
2 tbsp cilantro, finely chopped
1 tbsp Maggi seasoning or Worcestershire sauce
1 tbsp soy sauce
1 tsp salt
1 tsp black pepper
Oil for deep-frying*
Banana ketchup or sweet and sour sauce for dipping
*The ideal temperature for frying is 350-370 degrees. Can be made ahead of time and frozen, pull out to fry anytime.
INSTRUCTIONS
Separate the spring roll wrappers and set aside; put a plastic wrap or towel over it to prevent from drying.
Combine all ingredients and mix thoroughly.
Lay out a spring roll sheet and spoon about 1 ½-2 tablespoons of filling like a log on one end. Roll the sheet over and brush the end with egg wash to seal. Cut in half.
Fry in small batches until golden brown and it starts to float to the surface. Let drain on paper towels for a few minutes and serve while still hot with your choice of dipping sauce.
Recipe by Rafe Vencio/ Photography by Laura Petrilla
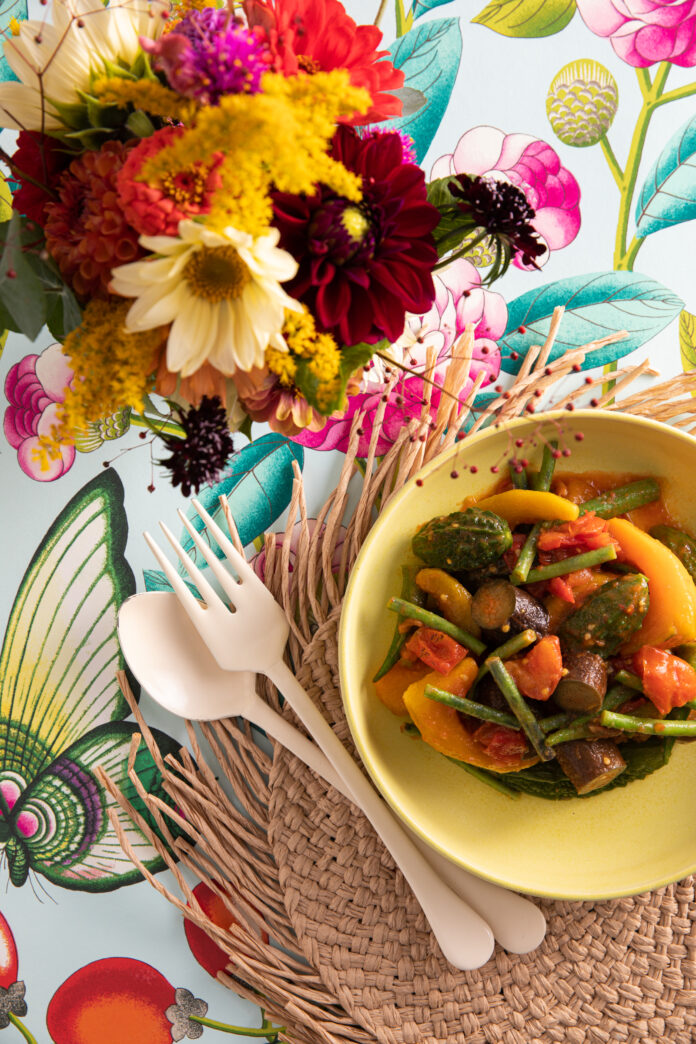
Pinakbet is a regional specialty from Ilocos which has become ubiquitous to a national dish with varying distinctions depending on the ingredients. A key ingredient is either bagoong alamang (fermented shrimp paste, which I prefer since it’s easier to find in any Asian grocery store), or burong isda (fermented fish sauce, akin to fish sauce but different in appearance). Cooking the vegetables in succession at the right doneness and allowing the liquid from each vegetable to cook the dish into a stew is what makes the recipe successful. This dish can be vegan without the addition of either key ingredient.
Pinakbet Recipe
Serves 2-4
INGREDIENTS
4 cloves garlic, minced
1 small red onion, medium-dice
1/2 lb pork belly or shoulder, cut into 1-inch pieces, optional
1 tbsp shrimp paste or red miso*
4 Roma tomatoes, quartered
2 cups vegetable/chicken/pork broth or water
2 cups squash, cut into 1-inch pieces
1 large Japanese or Chinese eggplant, cut 1-inch thick
1 large bitter melon, seed part scooped out and cut into 1-inch pieces
8-12 okra, trim ends and cut in half lengthwise
2 cups long beans, cut into 1-inch pieces
*Shrimp paste and pork can be omitted; substitute white miso paste in replacement of either or both.
INSTRUCTIONS
Heat oil in a casserole or medium saucepan.
Sauté garlic until lightly brown and add red onions next. Cook until translucent about 3-4 minutes on medium-high heat.
Remove garlic and onion then sear pork belly/shoulder until browned on all sides.
Add shrimp paste if using and sauté for about 2-3 minutes.
Return garlic and onion mixture then add tomatoes. Crush the tomatoes while cooking and add broth/liquid once tomatoes are crushed. Place lid slightly cracked and simmer for 15-20 minutes or until pork is slightly tender.
Add squash and cook halfway through: depending on the size of the cut, it may take between 3-5 minutes on medium-high heat. Add the rest of the vegetables and simmer until tender but slightly crisp for another 3-5 minutes.
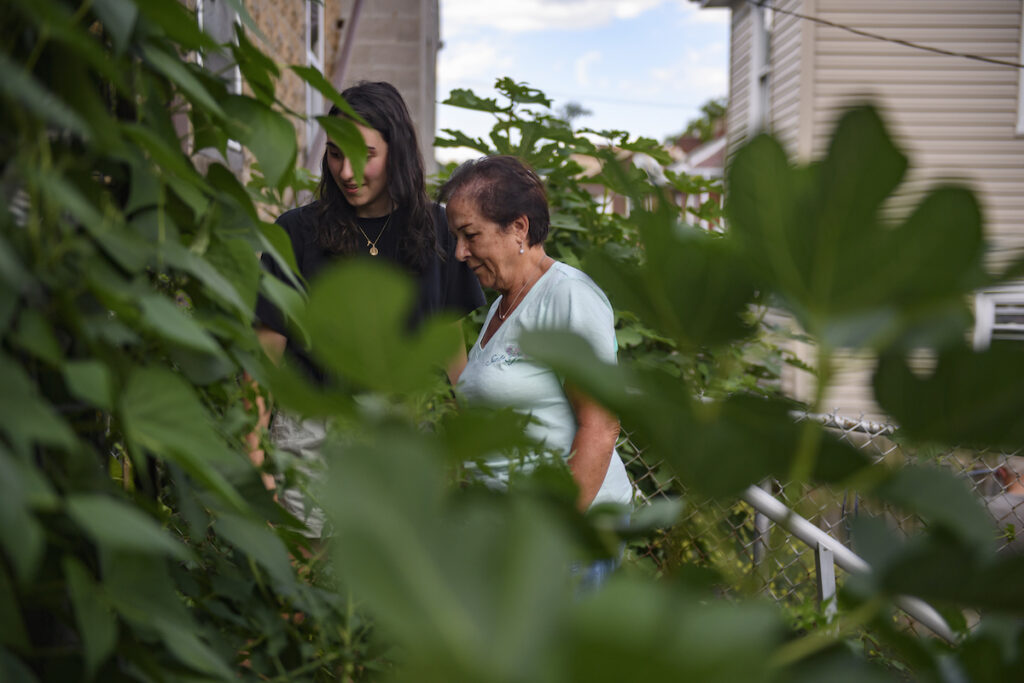
Mary Menniti’s efforts to preserve the wisdom of green-thumbed Italian immigrants living throughout Pittsburgh have nourished many of us with their reminder of the Italian art of living well and “eating good.” Her Italian Garden Project is now over 10 years old, and as many of the gardeners are growing older, sharing their stories and ways of life is more important than ever.
A Summer in the Italian Garden
A few summers ago, while lost in the throes of a research project for school, I found myself spending a significant amount of time in Italian gardens here in Pittsburgh. While I expected to get a decent grade for my hands-on work, I never anticipated what changes in me would come from connecting to these folks and their gardens. By way of that since-forgotten assignment, I was introduced to Mary Menniti, the founder of the Italian Garden Project.
I spent time with Mary and her friends in their gardens, all tucked away in the hills of Pittsburgh. What secrets did I learn from these green-thumbed nonni? How best to store freshly-picked beans and tomatoes. How to serve an entire family from one season’s small harvest. Their knowledge of how to live happily.
Mariano, now 92, snuck me his homemade limoncello (which was delicious), and shared stories of his childhood in Italy. Of course, because eating is more than agricultural research, we dined on cheeses and olives, and Mary’s secret family recipe for biscotti. I felt a connection to something that had long been gone. So focused on assignments and busy worrying about my future, I had forgotten about my past.
Marisa Damico and Great-Aunt Lisa
Looking Back
I was reminded of gardening with my grandmother in the summers as a school-aged child, helping her to pickle and can ripe peppers and tomatoes to keep beyond the growing season. I was reminded of the sense of connectedness that she had to the ground. How she just knew what to do with the earth. I remember her laughter. That is how I feel when I spend time with Mary and the gardens she knows so well.
Mary, too, got her start with gardening through her elders. Her grandfather settled in New Castle after immigrating from Italy in 1912. When Mary was born, he retired to spend his tending to a few acres filled with chickens, sheep, and in Mary’s eyes, “the most amazing garden … he got to spend his retirement days doing exactly what he wanted to be doing. It was so reminiscent of how he grew up before he left his family.”
When Mary would come home from school, she would spend the rest of her day in his presence, helping to harvest ripe vegetables. “As I picked up a hoe and hacked ineffectively at the ground, my grandfather would laugh and say ‘If there was a war, you people would starve.’ Those ‘you people,’ I knew, were my brothers and me and others who were the youth of the 1960s and ‘70s.
He was right. Compared to this hardworking Italian immigrant from the province of Caserta, my generation was a pampered lot,” said Mary. “We had none of the skills and knowledge to grow our own food and survive by our own hands.” Despite his teasing, Mary adored her grandfather. His heavy accent, and calloused hands. His unassuming manner and humble character. “I got to be with someone who shared a sense of homeness,” Mary says with a smile. “That love of gardens and animals and sense of peace influenced me a lot.”
Everything that Mary’s grandfather grew in their garden reflected his childhood in Italy, from unique tomato varieties to Swiss chard and dandelions. He loved his fig trees, to which Mary credits her personal interest in documenting them throughout America. “From his love of gardening grew my own.” Her grandmother would cook all that beautiful bounty into meals for their large family in her classic Italian kitchen.
Pietro Curigliano
Fresh Roots
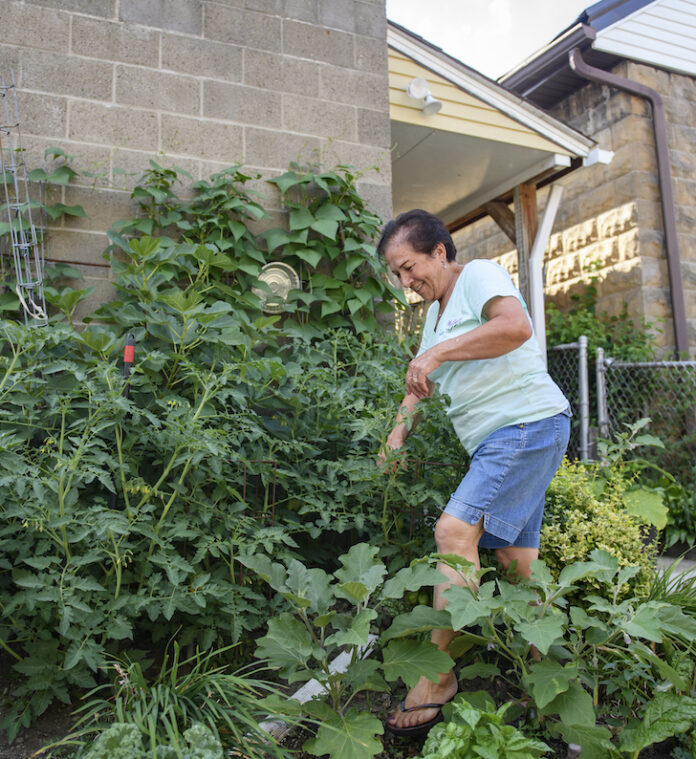
As soon as Mary had her first home, she planted a garden. When spending time in other people’s gardens, she found that her favorites were ones that reminded her of her childhood. “The ones with rows of tomatoes and peppers, pole beans and Swiss chard, garlic and fennel, and of course, fig trees.”
Mary has experienced two vastly different ways of being. Sharing the simple, yet full, life of gardening and homemaking with her grandfather in her childhood juxtaposed with the contemporary American life she experienced as she grew older. “I’ll bet my grandfather didn’t know he was participating in intergenerational learning when he scolded me in the garden. Today I see what is missing. That’s a big focus of my work. Focusing on a way of life.” A life practicing the connection to food, family, and the Earth. To Mary, there is a sense of well-being and contentment that is lost without these three practices. “What is horticultural therapy other than what Italian gardeners do every day where they tend their gardens, strengthening their bodies and souls.”
Branching Out
Since that initial summer, Mary has connected me to so many Italian immigrants and their grandchildren, including Marisa. Marisa grew up in her grandmother’s garden, who is now too sick to tend to it herself. Able to speak Italian, Marisa helped me gather stories of the gardeners she grew up with. Marisa explained to me that she has a lot to learn, too, especially as her family grows older. She sees the act of Italian gardening a way to stay connected to her heritage. Marisa and I are the same age, and it was fascinating to see someone with the same generational desire for continuing education and tradition.
Marisa and I spent an evening gathering stories in the Morningside neighborhood in the heat of July. The gardens were practically bursting with produce. Walking with Marisa, she pointed out that you can tell which ones are younger gardeners and which ones are Italian. “There’s something about the soil in Morningside,” she said with a soft smile on her face. I knew this day was important to her, just as it was to me.
As I walked into Marisa’s Great-Aunt Lisa’s garden, I was welcomed by sprouting eggplant, three kinds of basil, and crawling bean stalks. I sat with them on that warm summer evening, under the shade of overhanging grape vines, listening to stories told in a garden.
Rough Hands
To Lisa, prior to coming to the States in 1966, this was a way of life. “We had a big farm. We worked hard.” She was a wheat farmer as a child, harvesting it all by hand. “Everything is different. It’s not like before, you know. Before we used to work hard for everything with hands. Now, it’s different.” She kept it up when she moved to Pittsburgh.
“Dominic used to have a big garden,” Lisa said of her late husband, whom she moved with from Italy. “He would work all day, and then come here and work on his garden all night.” Dominic would preserve tomatoes and can sauce. “We would roast them. Put them in a jar.” They use these canned goods all throughout the year, for celebrations including San Rocco in August and La Vigilia in December, feeding upwards of 30 friends and family. “We had many, many, many feasts here at that table,” Lisa says of the freshly painted red picnic table we were sitting on together, which she and Dominic built when they first moved in.
She still keeps up the traditions she and Dominic did together, just as she paints the table every year, in preparation of the meals that will be gathered around it. “We make soppressata every year. Still!” Marisa, too, takes part in this yearly tradition, saying, “Yeah, it’s in January. It’s fun!” “Every year, we make 120 pounds,” says Lisa. They would go to the Strip District to get meat from their butcher. “We make the sausage downstairs and hang it in our basement. It’s a lot of work, but we get together with the family. It’s fun.”
When asked if Lisa felt Dominic when she gardened, she said, “Of course.” As happy as she is to keep up the traditions they shared, Lisa also told me that she “missed him in the garden.” She said, not meeting my eyes, “I have so many memories that it makes me upset. He was young.” Still, the garden helps her to remember Dominic despite the heartache. “But I enjoy it. I tell you though, I can’t do much now. But I like to keep doing it because of my husband. To fix the land like we did. Now he’s with God. He works over there.” Marisa also continues her great-aunt’s traditions, saying, “I’m learning. They have such good soil because they’ve been doing this for so long. I’d like to have a garden like this someday.”
A Small Piece of Home
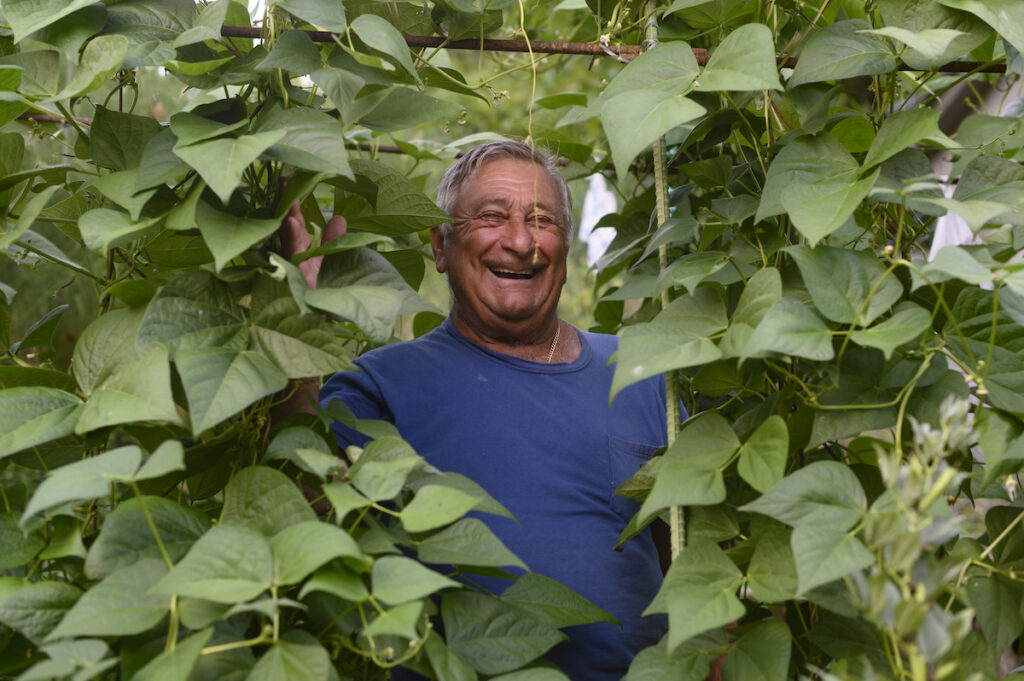
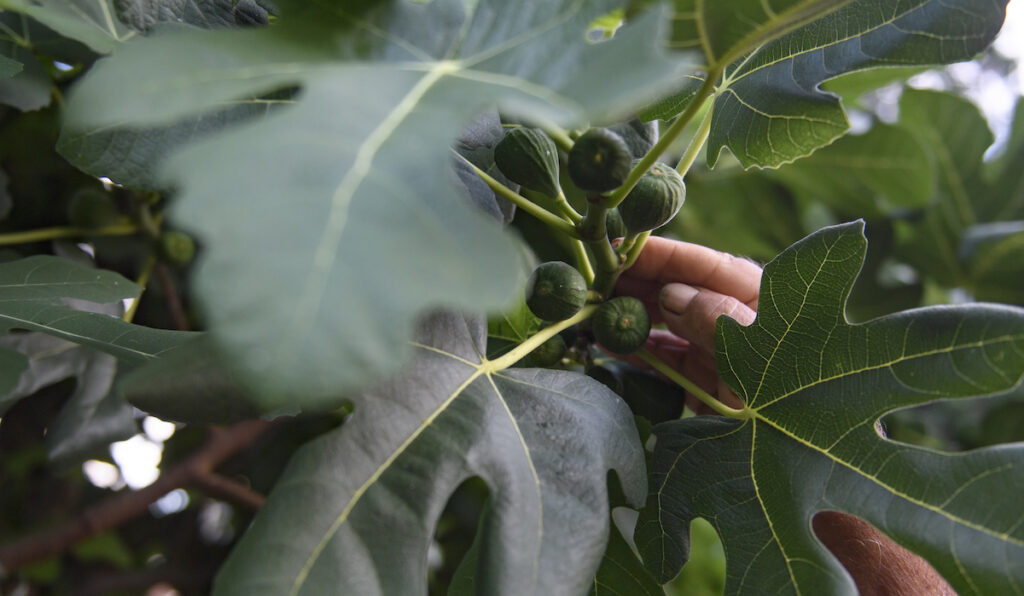
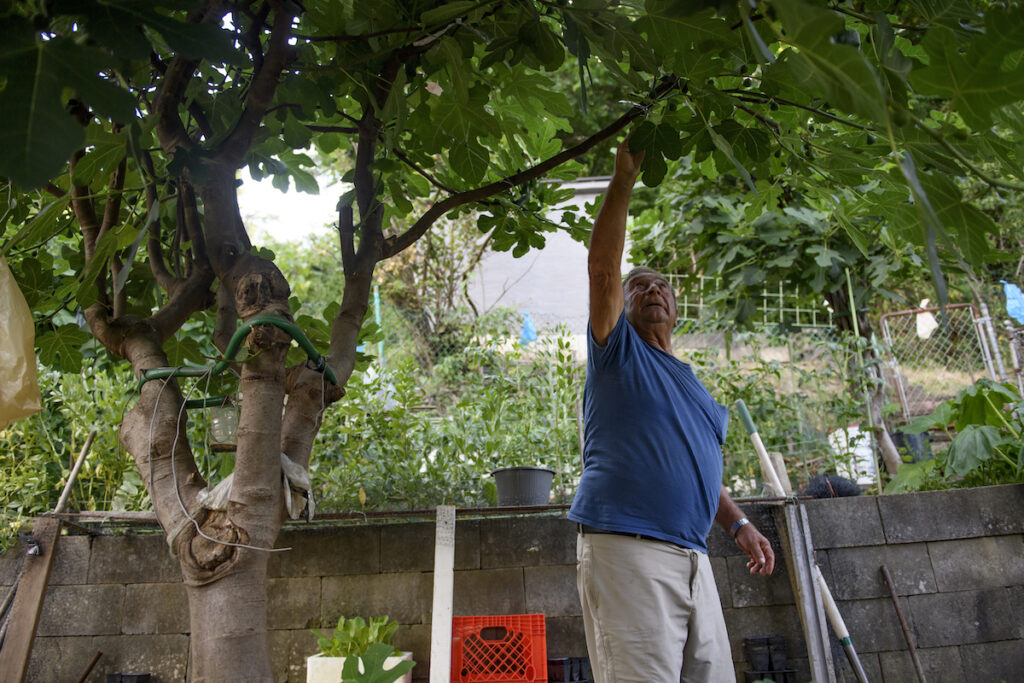
Later that night, we visited Pietro Curigliano’s garden, tucked within three tall brick walls, which he built himself years ago. It was filled to the brim with Roma beans, peppers, tomatoes, and, of course, fig trees. After five decades of working with fig trees in unforgiving Western PA weather, Pietro has become an expert. A revered fruit to Italian Americans, the fig adapts and thrives in a land not its own, much like the initial immigrants who grew them. Many Italian immigrants even carried small fig trees over to the States with them. Growing a fig tree when they arrived in the US was a way to have a small piece of home in the unknown. He excitedly showed us how he grafted two different kinds of fig trees together, and how he was working keeping birds away from eating his bounty.
Because of the harsh winters, he wraps them in tarps to keep them warm. There was only one year, Pietro told me, that he was unable to keep a fig tree alive. It was winter and he had broken his leg. “No one else could wrap it for me.” Pietro gave me two shoots from the trunk of the fig tree so that I could grow them at home myself and continue the legacy.
Deeping the Roots
The Italian Garden Project began 10 years ago, and it’s still growing. “2011 was the start of the project, but I began doing tours in 2009. They became extremely popular and each was filled to capacity.” Mary found that, just like me, other people love being in these gardens, too. Helping her with a tour in 2021, I saw the tour-goers speak with the gardeners and be amazed at their knowledge, at how naturally gardening has come to them. In return, the gardeners are amazed that there is such newfound interest in something that they have done their entire lives.
What started as a way to share gardening tips from long-time Italian gardeners through tours has grown into much more. “All these ideas for me came together: sustainability, family, seed- saving.” The gardens shared by the Italians who have settled in Pittsburgh have become increasingly relevant for people as they’re starting to recognize all the different things that come out of the Italian garden as parts of their lives.
“People are understanding the project more. They see this way of life and want it for themselves.” Italian gardeners have been eco-friendly since they first arrived in Pittsburgh. Rain barrels, composting, seed saving–these forms of conservation have always been an act of continuation despite their existing circumstances. The current emphasis on eating locally and with the seasons is an inherent part of these backyard gardens, including their efficient space. Tucked in small city lots, these Italian gardens can often produce enough to feed large families. They serve as a glimpse into the past that can lead into a brighter, more sustainable future.
Contentment and Connection
As said by Mary, “People see this way of life and when they do, it almost makes them see what is missing from their daily lives. This connection to the Earth. To food, to tradition, and family, and people… So much of what is missing from the contemporary ways of life I know. These folks are role models for contentment and connection, and that’s really become the focus of the project as it has grown. It’s moved from trying to capture the gardening techniques and skills and knowledge that they have, to looking at the way of life as a whole. What it is about them that they have, that is missing from where daily life is going for most of us.”
I will remember my time in the garden with Mary and her friends with great appreciation, and the lessons of life that they have taught me. I’m still tending to that fig tree in hopes that it will grow and continue the legacy. There is much to learn if we are willing to listen, look, and remember.
Story by Lindsay Anne Herring / Photography by Jeff Swensen
What’s right now? Because the world changes so quickly, that question burns in our minds regularly. As humans, we live through our senses, and part of the answer involves art and design that soothes us, supports us, and delights us. We need that nourishment to face the challenges of our time, at home and in society at large. TABLE Magazine looks at fall and winter trends in art, craft, and design that are just right for our lives in 2023, like the following stealth luxury.
Hiding in Plain View
The Burgh’s Gilded Age titans flaunted their wealth at every turn. These days, the ultimate luxury statement is to hide all obvious signs that your wallet is full. No designer logos. No bling. No loud colors. Just stealth luxury: beautiful materials forged by master artisans into designs worth wearing, and keeping, forever.
Time Flies
Designed in the too-cool-for-school 1960s, the Breitling Top Time speaks in a subtle, sleek voice about speed, precision, and quality. Here, the B01 Triumph edition sports a 41mm steel case and racing-style leather strap. Available at Orr’s Jewelers.
Made in Pennsylvania
Soulful, earthy hues in olive, navy, russet, English tan, sienna, and black. Leather goods designed and made only to order in eastern Pennsylvania by Hemlock + Hyde, a husband-and-wife team pursuing their dreams of fine craftsmanship. Available at hemlockandhyde.com.
Photo by Federico Torra
Complex Illumination
The ethereal pendant’s transparent sections are created by pouring glass into a rotating mold to obtain a unique, textured finish. Inside, polished extruded aluminum and linear LED components provide direct and indirect downward (and decidedly moody) lighting. Designed by French brothers Ronan and Erwan Bouroullec, and available in three lengths.
Hushed Tones
The sueded texture of brushed silk. A classic houndstooth pattern rendered in black and camel. The fluid movement of fabric cut skillfully on the bias. Combine for a classic look, or wear as separates with black or blue denim for a casual elegance. From Vince. Available at Larrimor’s.
Story by Stephen Treffinger and Keith Recker / Principle Photography by Dave Bryce
What’s right now? Because the world changes so quickly, that question burns in our minds regularly. As humans, we live through our senses, and part of the answer involves art and design that soothes us, supports us, and delights us. We need that nourishment to face the challenges of our time, at home and in society at large. TABLE Magazine looks at fall and winter trends in art, craft, and design that are just right for our lives in 2023.
At Your Fingertips
Embrace the radical touchability of dramatic faux fur, sensual feathers, crinkled leathers, and exaggerated knits. Part of the appeal of these dramatic textures doubtlessly derives from our continuing evolution out of pandemic caution and back into living fully. But some of the energy that draws us to these assertive and engaging options comes from our desire to be noticed. Clad in these treasures, how could you be overlooked with this 2023 trend?
Fired Up
Make your wardrobe as multidimensional as you are with this colorfully tipped faux fur jacket from Lisa Todd. Black cashmere sleeves touched with a bit of neon pink drama. Available at Carabella in Oakmont.
Birds of a Feather
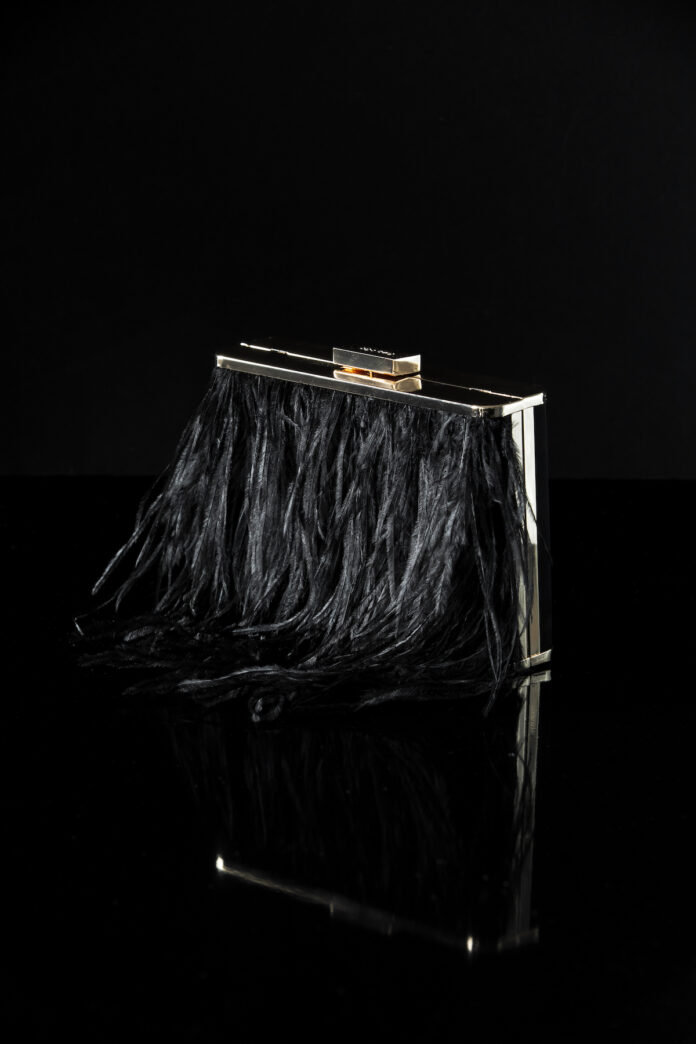
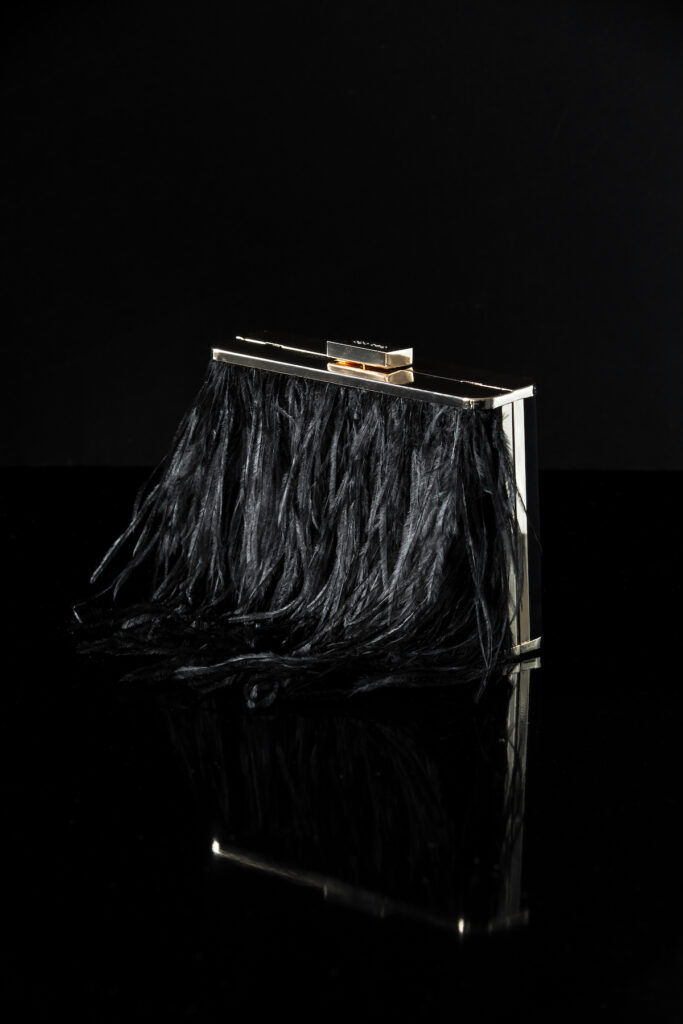
The Estelle Black Feather Clutch by Olga Berg moves with every breath or breeze. Its constant motion brings dynamism and spontaneity to your look. Finished with a gleaming gold frame, clasp and long chain strap, it’s large enough to fit your evening essentials. Available at Kristi Boutique in Aspinwall.
Story by Stephen Treffinger and Keith Recker / Principle Photography by Dave Bryce
Marcel, who hails from Corsica, and is the owner of relatively new — and now must-go — French café and crêperie, Mille, in Santa Fe, was originally a scientist. He made his way to New Mexico to work at Los Alamos National Labs but found himself often yearning to return to his family roots of baking and cooking. His grandparents owned and ran the original Mille in the small Mediterranean village he grew up in. So when the opportunity presented itself to open a café — first in Los Alamos and then in Santa Fe — he jumped at the chance. And he has achieved what he set out to do: create a simple and accessible French food experience with a diversity of offerings for all to enjoy.
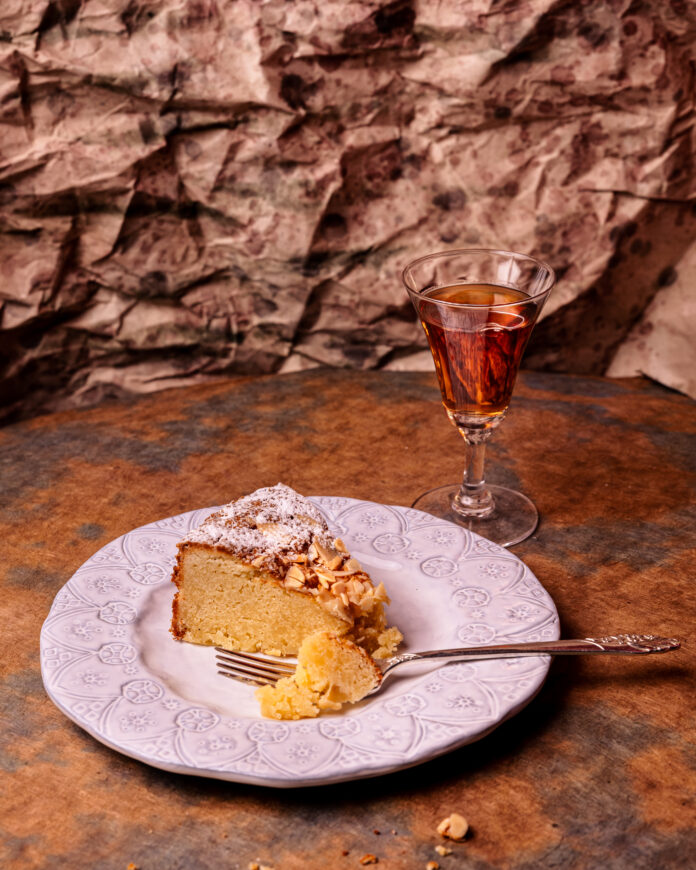
After indulging in a savory crêpe or a salad niçoise, you might be too full for dessert. But don’t let that stop you from taking a slice of this amazing almond and pear cake (Tarte Bourdaloue) with you home for later. There had been high demand for a gluten-free dessert at Mille, but this sumptuous treat won’t disappoint the most gluten-ravenous among us. Marcel brings his scientific mind to bear on this task and uses only a handful of ingredients in the perfect balance and exact baking conditions to create something classic.
Our friends over at Tonic recommended pairing this with some sherry. And they were not wrong. The soft, round nutty and fruity flavors from the sherry further enhance those same flavors in the cake. This is a perfect way to end a New Mexican autumnal day in French style.