Home Blog Page 140

A Menu for the Zodiac Sign Virgo (August 23-September 22)

0
Flat-lay image of Green Chile Braised Oxtail in a cast-iron pan set on a weathered table. Braised Oxtail Recipe

Virgo, the meticulous and analytical sign of the zodiac, deserves a dinner menu featuring all the goodies one needs to keep moving. The sign of Virgo merges the images of a bird and woman in the winged Virgin holding wheat in her hand. This sign is one of reason and meticulous accounting for details. Critical and fastidious Virgo may be, but the sign is also practical, discerning, and capable of running many things simultaneously.

Virgo, the Model of Discernment and Wit

The Sun’s entry into Virgo each year marked the beginning of the harvest season, a time when careful analysis and discernment were crucial for ensuring the community’s survival through the coming winter. This association with harvest and preparation infused Virgo with themes of practicality, skill at counting and administrating, and the ability to distinguish the essential from the superfluous. The seasonality of the sign is also shown in the staff of wheat held in the Virgin’s hands.

Virgo is a sign that thrives on analysis and improvement. Those born under this sign have an innate ability to see the details that others miss and to develop systems for greater efficiency. Virgos are natural problem-solvers, unafraid to roll up their sleeves and do the necessary work, yet also capable of devising innovative solutions to complex issues. Their dedication to improvement and their disdain for waste make them invaluable in any environment that requires precision and care.

In the ancient world, the symbol of the virgin or maiden was associated not with purity in the way we think of it today, but rather with self-sufficiency and potential, and clarity of thought, free from passion.

Virgo & the Seasons

As with the other signs, the sign of Virgo and the constellation of Virgo are not the same thing. Constellations are groups of stars visible in the night sky, while zodiacal signs are equal divisions of the Sun’s apparent path throughout the year. The zodiacal signs are locked to the seasons, not the stars themselves.

As a mutable sign, Virgo stands at the transition between summer and autumn, a season characterized by change and preparation. This adaptable quality is fundamental to your nature, dear Virgo. You thrive in environments that allow you to count and administer, advise, and improve existing systems. Your adaptive nature grants you remarkable flexibility and the ability to navigate change with grace.

The mutable mind may sometimes struggle with decisiveness, as your analytical mind can see multiple possibilities and solutions. This mutable quality can be applied to various aspects of your life, from your problem-solving approach to your personal relationships, where your adaptability and desire for improvement can be both a strength and a challenge.

New Goals for Virgo

  • Be okay with imperfection: The ancients advised earth types to avoid excessive worry and criticism. Set a goal to practice mindfulness or cognitive behavioral techniques to help you accept imperfections in yourself and others.
  • Extend your analytical skills to self-care: The melancholic temperament is associated with a tendency towards anxiety and overthinking. Set goals to use your natural analytical abilities to develop a comprehensive self-care routine, including regular exercise, a balanced diet, and stress-reduction techniques.
  • Build on your communication skills: While Virgos excel at analysis, they sometimes struggle to express their insights effectively to those who aren’t seeing the detailed picture quite as clearly. Set a goal to improve your communication skills, perhaps by taking a public speaking course or practicing writing in different styles.

What Qualities Does Virgo Have?

The zodiac signs are not only divided into elements but also have distinct qualities connected to them. The earth signs (Taurus, Virgo, and Capricorn) are collectively associated with autumn, coolness, and dryness. These signs have a reputation for being practical, grounded, and reliable, though how they express this will be different. Virgo as a sign is middling in terms of its motion (neither too swift nor too slow), and is known for analytical minds, attention to detail, and desire for order and efficiency.

Earth signs tend to be methodical in their approach to life, preferring to think things through carefully before acting. They excel at planning and organization, often able to create order out of chaos. A chief challenge for Virgos can be a tendency towards perfectionism or excessive worry, sometimes getting lost in the details at the expense of the bigger picture.

When it comes to diet, earth signs tend to be drawn to foods that are grounding and nourishing. These include root vegetables, dried meats and lean fish, whole grains, and hearty, well-prepared meals. Virgos might find themselves drawn to foods that are not only nutritious but also prepared with care and attention to detail.

Sometimes, earth sign types can have too much coolness or dryness in the body. This can lead to feelings of stiffness, difficulty digesting, or even emotional ‘stuckness’. In these cases, incorporating warming and moistening foods into your diet can help restore some balance. Soups, stews, and foods rich in healthy fats are often found beneficial.

Best Foods to Balance Virgo

For most seasons, these foods are good for supporting Virgo’s earthy constitution:

  • Land: Beef, lamb, venison, bison.
  • Surf: Salmon, tuna, mackerel, sardines, anchovies.
  • Grains: Rye, barley, oats, quinoa, millet.
  • Vegetation: Root vegetables (carrots, parsnips, beets), leafy greens (kale, spinach, collards), mushrooms, apples, pears, figs, dates.
  • Dairy: Aged cheeses, full-fat yogurt, ghee.
  • Beverages: Herbal teas (especially ginger, cinnamon, and fennel), bone broth.
  • Alcohol: Red wine, dark beers, whiskey.

In the autumn months, when Virgo’s cool and dry tendencies can be exacerbated, it’s advisable to focus more on warming and moistening foods:

  • Land: Slow-cooked meats, stews, and soups made with beef or lamb.
  • Surf: Fatty fish like salmon or mackerel, prepared in warming spices.
  • Grains: Warm oatmeal, barley soup, quinoa porridge.
  • Vegetation: Roasted root vegetables, squash soups, stewed fruits, warming spices (cinnamon, ginger, nutmeg).
  • Dairy: Warm milk with honey and spices, creamy soups.
  • Beverages: Ginger tea, chai, turmeric latte.
  • Alcohol: Mulled wine, hot toddies.

The Perfect Zodiac Sign Menu for Virgo

Cocktail

Gin Martini, A Cocktail for Virgo

A gin Martini cocktail for Virgo on a tabletop with a star topper in the glass and purple amethyst on the table.

It’s only appropriate our Gin Martini for Virgo takes the stage as the drink for this happy occasion. We’re keeping things classic and strong with a blend of Roku Japanese gin, blanc vermouth, and dry vermouth. Add three castelvetrano olives plus a lemon peel twist for something sophisticated yet intriguing, much like Virgo.

Starter

Roasted Beet Salad with French Vinaigrette
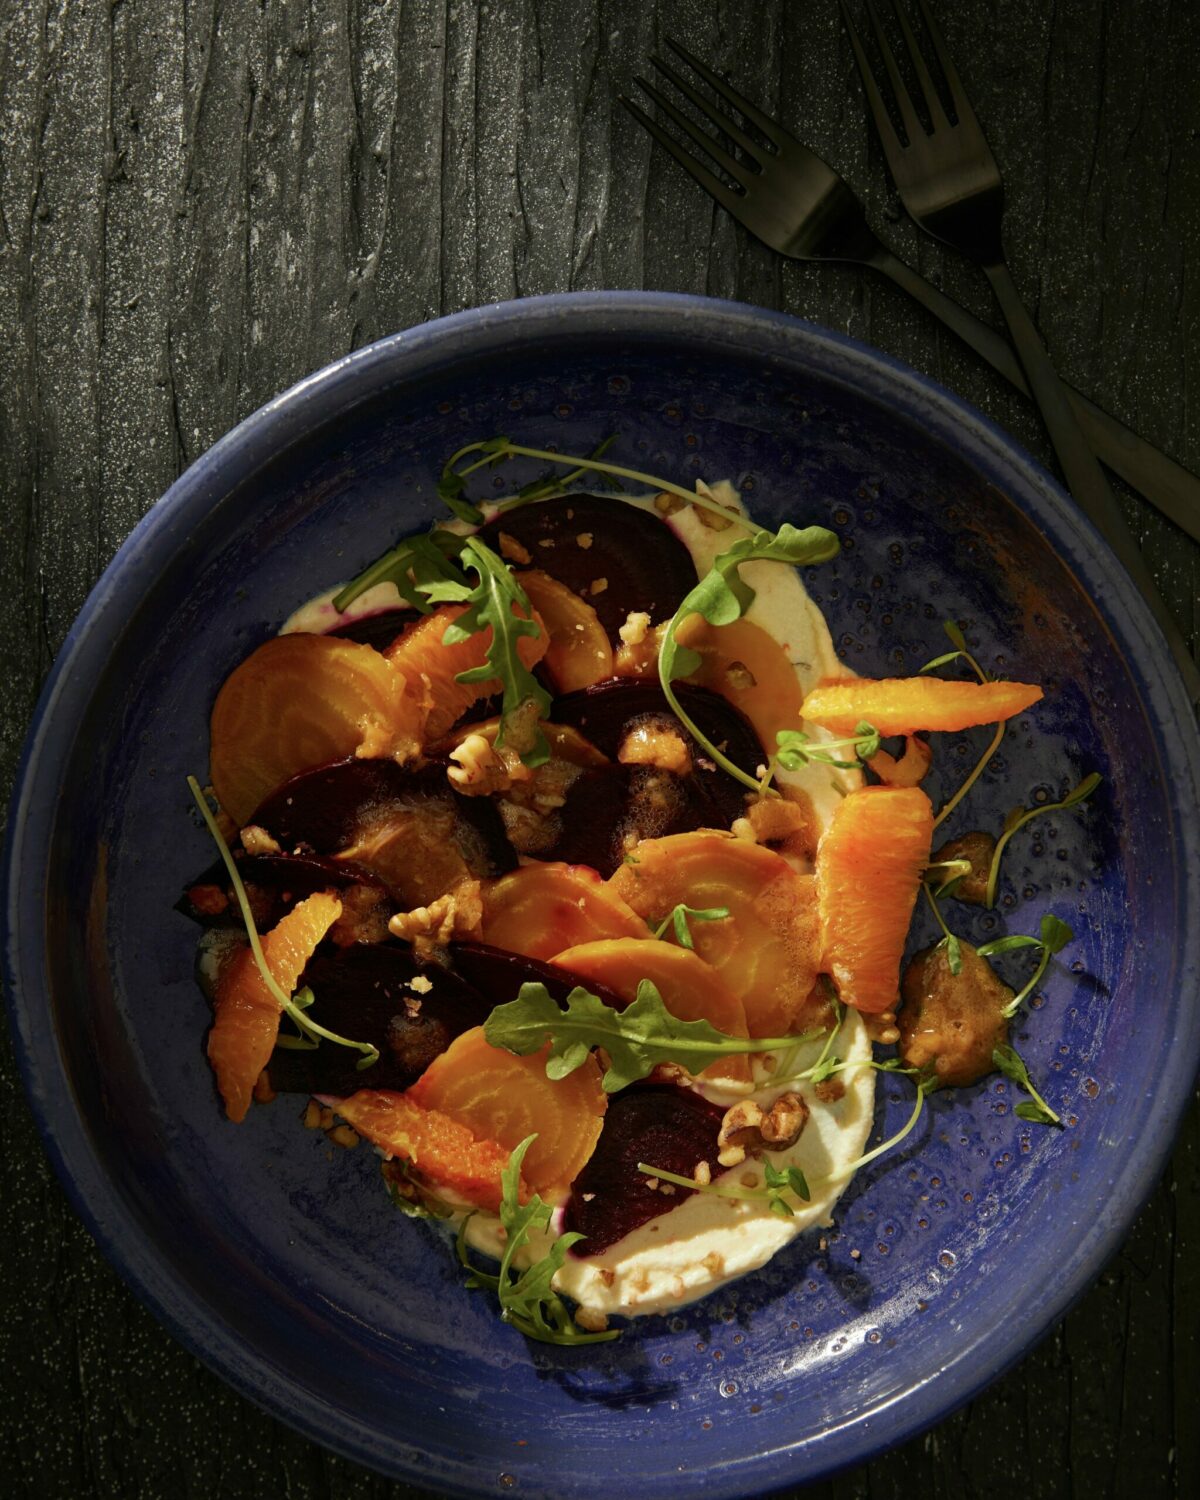
Sliced beets on a blue plant with various greens and nuts throughout.

Root vegetables reflect this Earth sign well so we’re starting off with a Roasted Beet Salad. A bed of whipped ricotta lays the ground for a melody of cooling beets, arugula, pea shoots, navel oranges, and walnuts. Plus, with a homemade French vinaigrette made from walnut oil, you’ll find this dish hard to put down.

Main

Green Chile Braised Oxtail
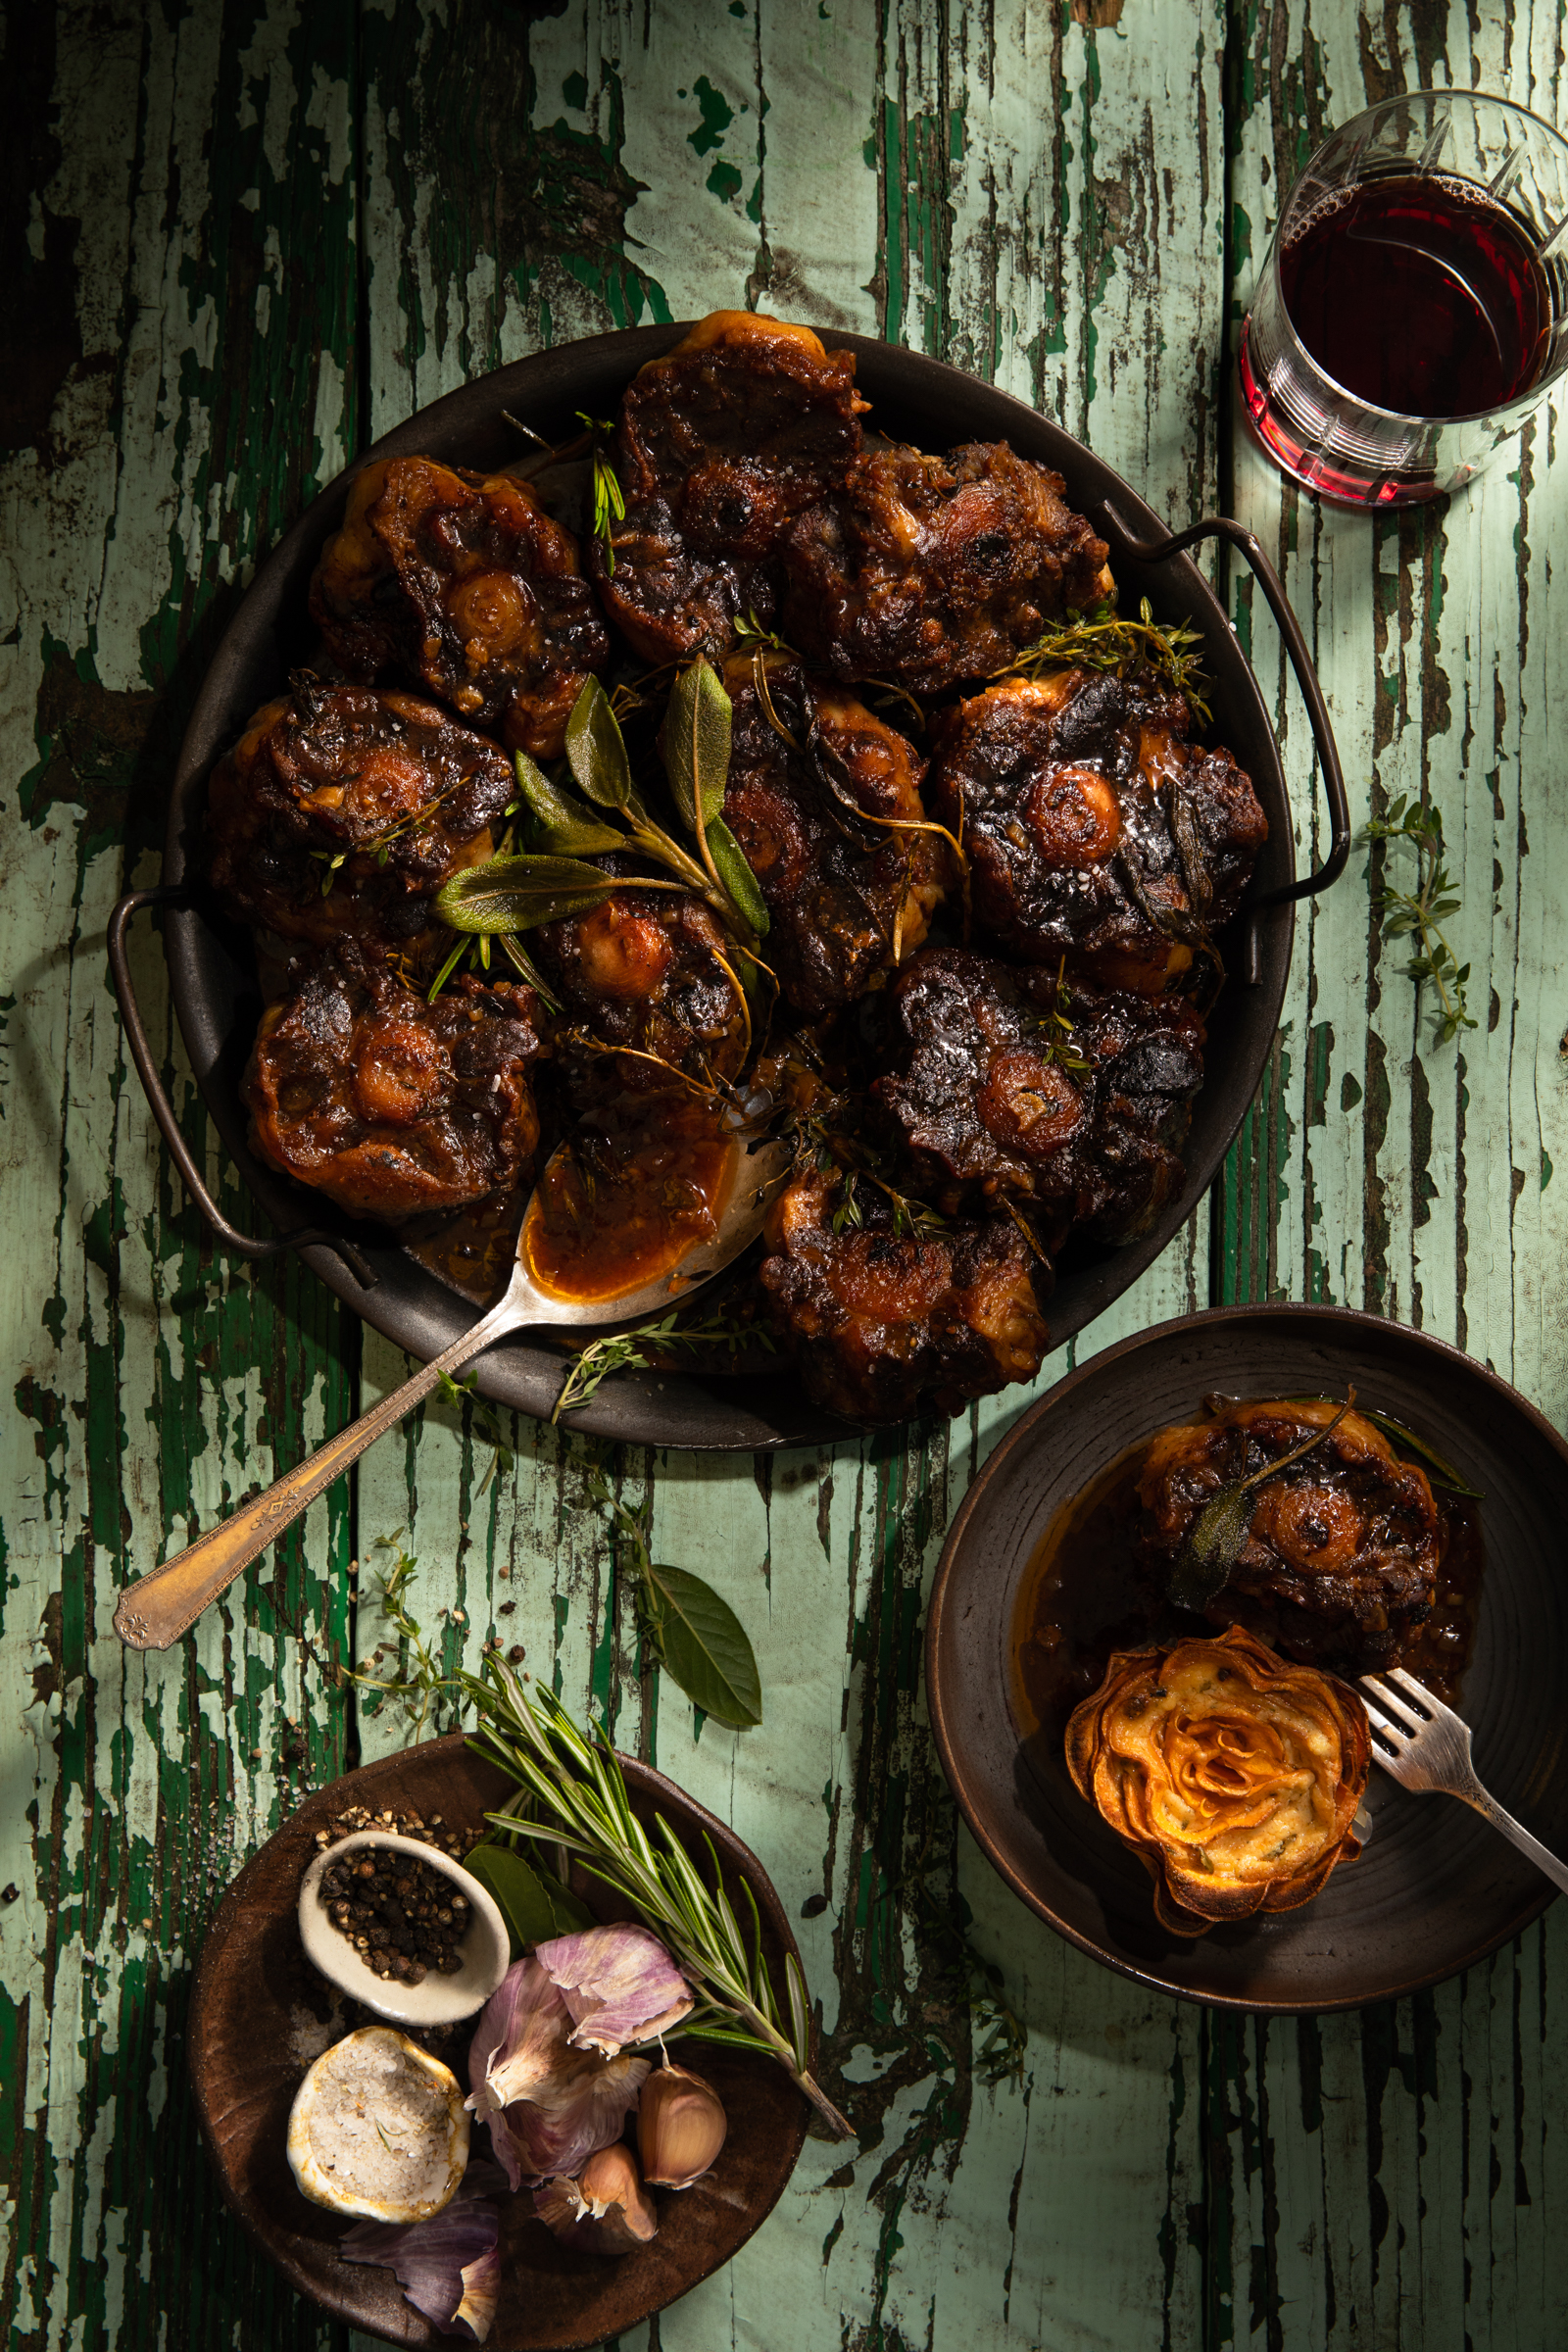
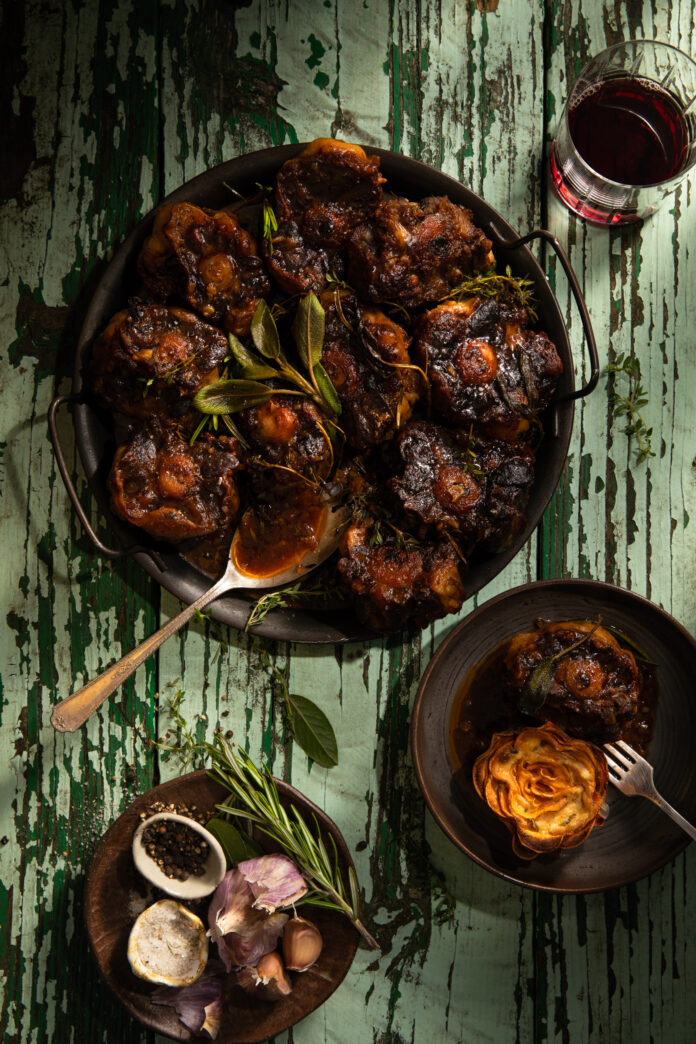
Flat-lay image of Green Chile Braised Oxtail in a cast-iron pan set on a weathered table. Braised Oxtail Recipe

Slowly braised oxtail in a red wine base broth appeals to the grounded aspect of Virgo throughout the summer and winter months. Not to mention, this isn’t your usual oxtail, instead it features the bite of green chile that’s ready to warm Virgo up when we get into the autumn months. This Green Chile Braised Oxtail is the essential main dish with so many integral ingredients to balance Virgo.

Side

Pan-Roasted Carrots with Tahini Sauce
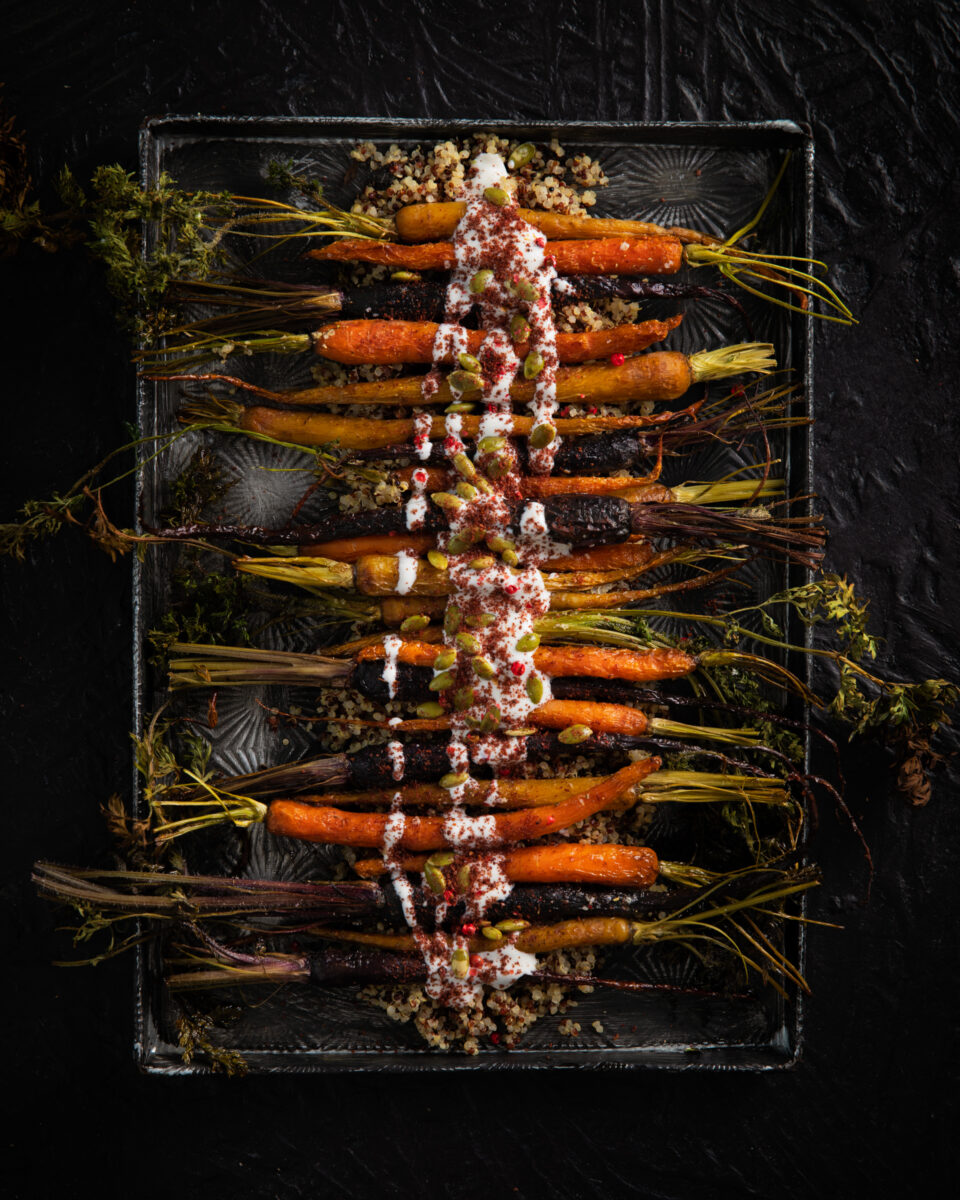
Sheet Pan roasted carrots served on a black tray with Tahini sauce

To properly compliment the main dish, we’ve chosen to go back to root vegetables. Take crispy carrots and cover them in a tangy tahini greek yogurt sauce featuring ground sumac. The best part about this side is you can easily turn it into a main dish by adding quinoa, another supportive ingredient, beneath the layer of carrots.

Dessert

Apple Bourbon Quinoa Cake
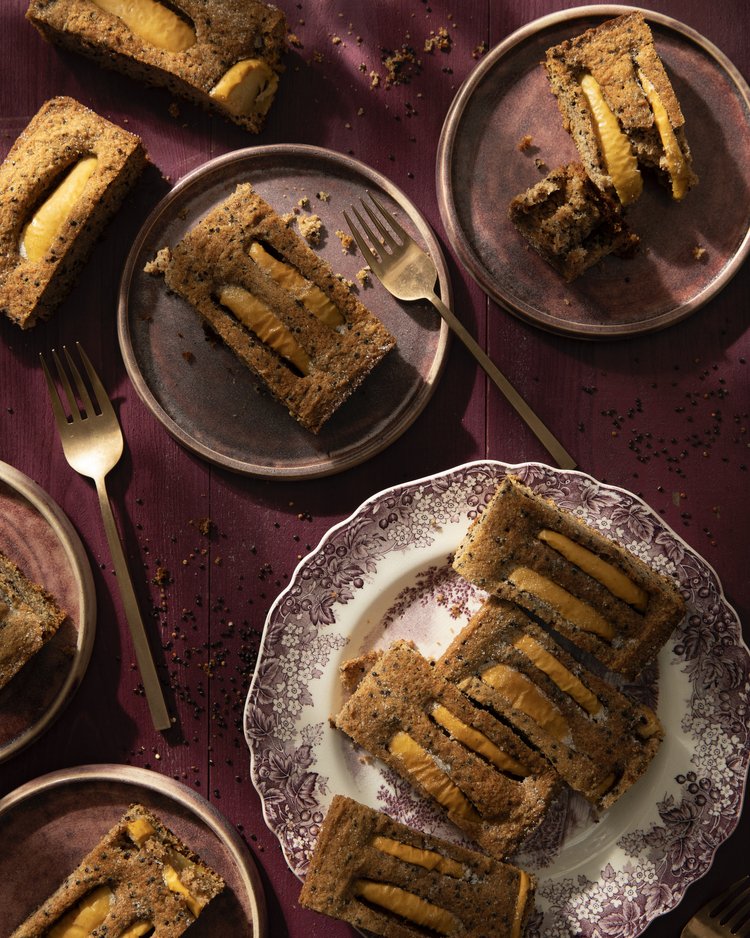
5 maroon plates sit on a deep purple table with slices of Apple Bourbon Quinoa Cake with forks beside each slice.

We had to pull out all the stops for dessert. Apples, whiskey, quinoa, they’re all imperative to helping Virgo be the best they can be. It’s a cake that’s super-moist, dense, and more on the savory side. But, don’t underestimate its burst of flavor thanks to the combination of sweet apples in a sugary glaze and the pang of bourbon. Top with whipped cream laced with bourbon and you’ll have your Virgo feeling beautifully celebrated.

Wade Caves, based in Brooklyn, NY, is an astrological consultant and educator specializing in problem-solving applications of astrology. He teaches astrological divination and astronomy at the School of Traditional Astrology. Wade also publishes his work on world astrology through Skyscript’s In Mundo publishing desk and hosts the World Astrology Summit, a conference dedicated to the advancement of astrology for global problem-solving. Website: wadecaves.com • skyscript.co.uk/inmundo. Email: hello@wadecaves.com.

Story by Wade Caves 

A footer photo with a black background and subscribe info and button

Subscribe to TABLE Magazine‘s print edition.

Wade Weissmann on Homes of Quiet Elegance

0
A home by Wade Weissmann
Photo by Michael Stavaridis

Wade Weissmann Architecture is set to release Homes of Quiet Elegance, a book-length collection of the firm’s recent work, on August 20. The book features 175 color photographs of the homes Weissman’s many clients have trusted him with over the years. In anticipation of the book’s release, Weissman spoke to TABLE about how Homes of Quiet Elegance demonstrates his firm’s commitment to quality homes that stand the test of time.

TABLE: What does “quiet elegance” mean to you” 

Wade Weissmann (WW): The projects within the book, and our work as a whole, reflect a sort of quiet anonymity within the design that centers on legacy, heirloom quality and cherishing the lives lived within these spaces.

It’s a reverence for the individuality of the client’s personal history and the history of the setting coming together. It’s also an appreciation of practicality and function that translates into a thoughtful and gracious way of living. For us, quiet elegance is being at ease with your surroundings in a way that’s a true reflection and representation of the inhabitants.

TABLE: You write in the book’s description that “every place has a unique identity.” Could you expand a little bit on that? What makes a home unique? 

WW: Each project, set of clients and resulting home is much like a treasured family recipe. It’s very unique to them. This recipe includes their specific background, what’s meaningful to them, their culture, family traditions, recreational interests.

All that is combined with the inherent character and setting of the site itself. We look at all of these factors before we even begin designing. We also research and reference historical precedents. Ideally, the identity of a place should have its own unique personality that remains timeless.

TABLE: What do you hope people take away from Quiet Elegance?

WW: I hope that people will take away from our book that working with a boutique architecture firm like ours is in itself a very unique experience and a highly personal one. Also, that thoughtful, next level design is a highly collaborative process.

The collaboration between architect and clients, artisans, trades, general contractors, landscape architects, and interior designers are all integral to the outcome of the project. When the synergy of all of these ingredients melds together it can create a magical unfolding.

Story by Emma Riva / Photo courtesy of Wade Weissmann

A footer photo with a black background and subscribe info and button

Subscribe to TABLE Magazine‘s print edition.

Tips for Parents of College Freshmen

0
Two people carry moving boxes in front of them to move into a college dorm.

Listen up all you parents of college freshmen! We have the tips you need from college students and recent college graduates to make sure your child’s first year goes smoothly. We know it’s hard when your child leaves the nest. There are nerves and anticipation on all sides leading up to the big day. There’s the pressure of move-in day and saying goodbye. Then, finally there is the wait till family weekends and holiday breaks begin. While much is on your brain, let us take a little of the stress away with a guide to preparing for moving, move-in day itself, and what to do after your child has officially started school. Don’t worry, all of these tips are student-, college graduate-, and parent-approved, so you can take comfort in knowing that all will be okay. 

Tips for Parents of College Freshmen 

Preparing for the College Move

Don’t Load Up on Furniture Before Move In

We know there’s a pressure to buy everything you think you’ll need before you actually move into the space but this can lead to overpacking. Next thing you know you’re standing in a small dorm room trying to figure out how to fit a shelf, mini fridge, and desk all into one space. Instead, leave some things to get on move-in day after you’ve seen the space your child will be living in.

Let Your Child Lead the Packing

When your parental instincts take over, you’ll find yourself wanting to pack everything for your student. However, since this is the start of their independence and their transition to adulthood, try to let them take the lead in preparing for their future space. It’s great to keep a list of all the essential things, but leave the details up to them. 

Discuss a Communication Style

The urge to ask for updates throughout the day is bound to happen to all caring parents. It’s important to discuss boundaries and expectations prior to your child leaving for college. Ask them if they would prefer texts or calls. Perhaps you agree to a call every week, supplemented by text updates at intervals between calls. It all depends on what you and your child are comfortable with. Remember, it’s important to give them some freedom during this time so that they can fly, but it’s still reasonable to want some communication about both the joys and the challenges they encounter.

Research Student Discounts

It may not be the first thing on your mind, but student discounts are a huge advantage of being a college student. Many businesses like Amazon, Spotify, Apple, Nike, American Eagle, and Adobe offer anywhere from 10-30 percent discounts. Some of these really pay off in the long run too if you’re having to buy a new laptop or need to renew your Spotify subscription. Outside of the big brands, many local businesses and museums will also give student discounts. It’s good to check out your university’s website for local discounts, or just ask when visiting a businesses.

Pack a Sick Kit for Your College Student

Getting sick for the first time away from home is no fun. There’s no one to take care of you, the dining hall feels way too far away, chances are there’s nowhere to get medicine, and even going to fill up a water bottle can be a lot of work. Creating a small sick kit for your college student can assure they get the love they need even across the country. You can include items like soup or ramen, cough drops, cold medicine, tissues, hand sanitizer, Clorox wipes, their favorite snack, and whatever else they may need. It’s also nice to include some small notes of encouragement and reassurance. 

Tips for Move-In Day

Let Your College Decide the Set Up

It’s great to give suggestions, but, for the most part, let your child choose what should go where. After all, they are the one who will be living in the space. You should help with physical things like building and moving furniture but put the items where they would like. This gives them a bit of trust that you understand they are starting a new, independent chapter. 

Give Some Space 

You’ll want to immediately dive into a conversation with your college student’s roommates and try to make connections, but it’s important not to force these interactions. By focusing  conversation with the parents, you can give a little space for the students to connect. They will be sharing a space, not you! 

Know When to Leave

Saying goodbye is really hard on move-in day. Please try to remember the goodbye is not for forever! When things start to wind down and other parents start to leave, it may be time to go yourself. It’s important to read your child and decide when the time is right. Asking is the best way to get a read on whether they are ready for you to leave or not. Chances are they’re going to want time to settle into their new environment and bond further with their roommates. They’ll be texting you before too long, so don’t worry.

Make Plans for the Next Day

Remember when we said the goodbye isn’t for forever? Even though it’s good to give space on move-in day, sticking around town for the next day is a good way to be accessible to your student. Set up a time to meet your child for brunch or lunch so you can get caught up on their new living situation and run a few last errands before you go. Your kid will without a doubt have a short list of items that were forgotten in the packing stage. 

What to Do After Your Child Starts College

Get Involved in Parent Activities

Usually, after move-in day, there are opportunities for parents to be involved in orientations, parent-week activities, and much more throughout the year. Stay up to date on these events and get involved to help your student thrive. You may pick up on things your child missed, and it shows you have a real investment in their future. Sometimes it’s the small things that go a long way. 

College Care Packages Are a Yes!

Secretly, every child in college wishes for their parents to send them a care package. Whether it’s just a letter with some cash inside, an actual box full of snacks and other goodies, or DoorDashing food randomly, it means more than just the contents of the package. It shows your child that you’re thinking about them and their needs in these moments. Also, don’t forget how over the top finals weeks can be: we’ve seen care packages during finals week actually make students cry tears of joy. They both a reassuring gesture and a push to keep going even at the lowest, most stressful of times. 

Sending Grocery Gift Cards

Let’s face it, being a college student is hard. Classes can be demanding, extracurricular activities and clubs take up a lot of freetime, and adding a job into the equation usually makes food one of the last things on a student’s mind. Give your child a helping hand with a grocery gift card to use at a store near their dorm. Here they can get breakfast bars, snacks, heatable foods, and other items to ensure they get the nutrition they need. After a while, the dining hall gets very repetitive and eating any outside food feels like a small blessing. 

Find a Balance Between Helping and Independence

At the end of the day, this is the first year of your child’s adult life. They’re going to need help. Even when they won’t admit it, they’ll need help. However, there needs to be a balance between helping too much and inviting your student to develop an effective sense of independence. Use your own experiences as a guide, but remember that they’re going to have their own unique experiences. 

Take Time for Yourself

This is a reminder that it’s the first time YOU can do what you please as well! After 18 or so years of caring for your child at home every day, you can now do some of the things you enjoy best. Take this time to make the dinners you want, go on dates with your partner, start a new hobby, join a club, volunteer at an organization you admire, or just simply sleep in. It’ll make a big difference if you focus some of your newfound time and energy into self-care. Your student will most likely let you know when they need you.

Story by Kylie Thomas / Photography Courtesy of Karolina Kaboompics

A footer photo with a black background and subscribe info and button

Subscribe to TABLE Magazine‘s print edition.
Pantry Staples for Your College Dorm

0
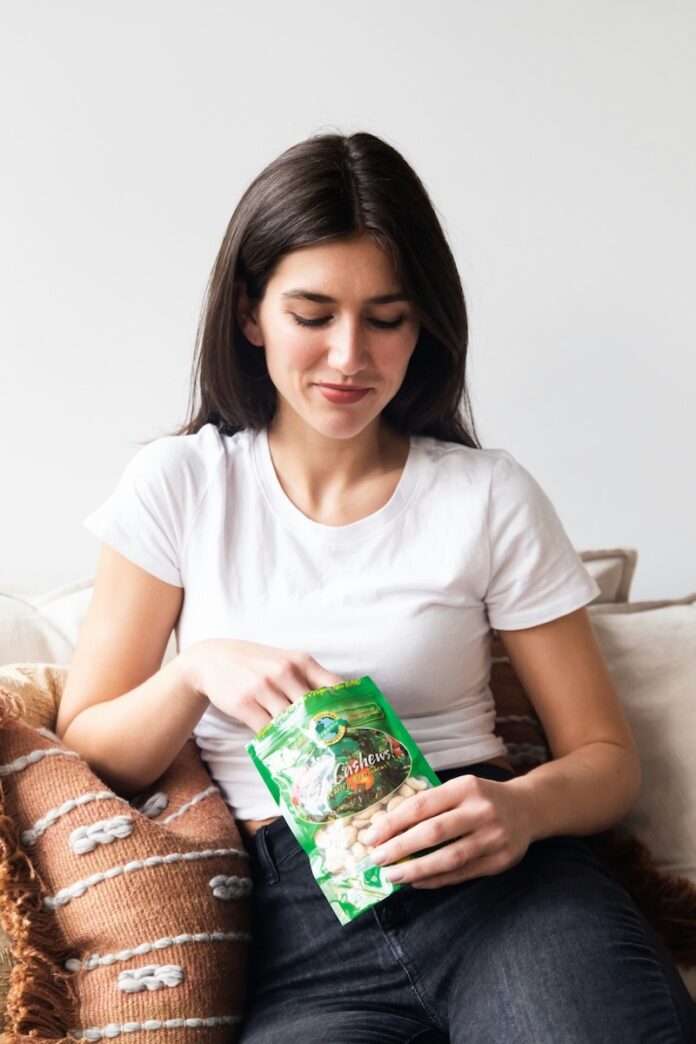
A woman sits on a couch eating a pantry snack bag of cashews.

When you move into your college dorm, you may be at a loss as to what staples to keep in your pantry. With limited access to cooking appliances, it can be difficult to pick out things that are grab-and-go or simple to cook but still provide nutritional value. Thankfully, there are some options that have a long shelf life and can usually be eaten with minimal preparation. Dive into our college pantry essentials list to make sure you have what you need before, after, and in between the chaos of classes. 

College Dorm Pantry Staples

Cup Noodles or Ramen

We had to start out with the essential. On its own, Cup Noodles and ramen may not be the most nutritional options but they are easy to make with the use of a microwave, Keruig, or hot water heater/kettle. Plus, there are small things you can add to increase the nutritional value like fresh vegetables, dried seaweed, or proteins. 

Tea

The stress of college can take a toll on your body but at times a cup of tea can be your savior. There are plenty of herbal varieties out there to help with sleep, focus, energy, or just to enjoy on a cold winter day. Plus, as long as you have a way to get hot water, you’re set to enjoy a cuppa. 

Cereal

Skip the sugary cereals and get a box full of oats, Cheerios, or other whole grain choices. Paying attention to what cereal you buy can help you get that extra energy boost you need in the morning just by taking the extra step to read the packaging. It helps if you have a mini fridge to store milk but dry cereal is also great for snacking during the day or well into the night.

Oatmeal

Just add hot water to your favorite flavor of oatmeal and you’ve got a bowl full of goodness in only a minute. Oatmeal is also always innovating to expand on flavors of savory, fruity, and to even include a bit of spice like cinnamon. 

Granola

Granola is one of those ingredients that you can add to just about anything to make it better. Eat it on its own, make your own granola mix, pour it on top of yogurt…the options are truly endless. A lot of stores even carry granola clusters that are easier to eat than loose granola and some have nuts and dried fruits mixed in. 

Snack/Protein Bars

When you need a little pick-me-up between classes, the ability to eat a small, handheld bar with protein or other nutrients makes all the difference. Brands like Kind, Rise, Quest, and Nature Valley provide a range of products that cover any flavor you could desire. Their products also come in different lines to focus on whatever you need the most like energy, protein, more. 

Dried Fruit

While fruits can quickly go bad, dried fruits carry a lot of the same values with a longer shelf life. You can even combine your dried fruit choice with other pantry staples like cereal, granola, and even oatmeal. Plus, carrying one of these bags in your backpack makes sure you always have a healthy snack available.

Jams/Nut Butters/Bread

A simple go to are different types of sandwiches slathered in jams, jellies, or nut butters. You can even make your meal healthier by opting for a whole grain bread and organic spreads. Add some toppings of fresh fruits, vegetables, and meats if you have a way of storing them and you’ve got a quick lunch or late study snack.

Story by Kylie Thomas / Photo Courtesy of No Revisions

A footer photo with a black background and subscribe info and button

Subscribe to TABLE Magazine‘s print edition.
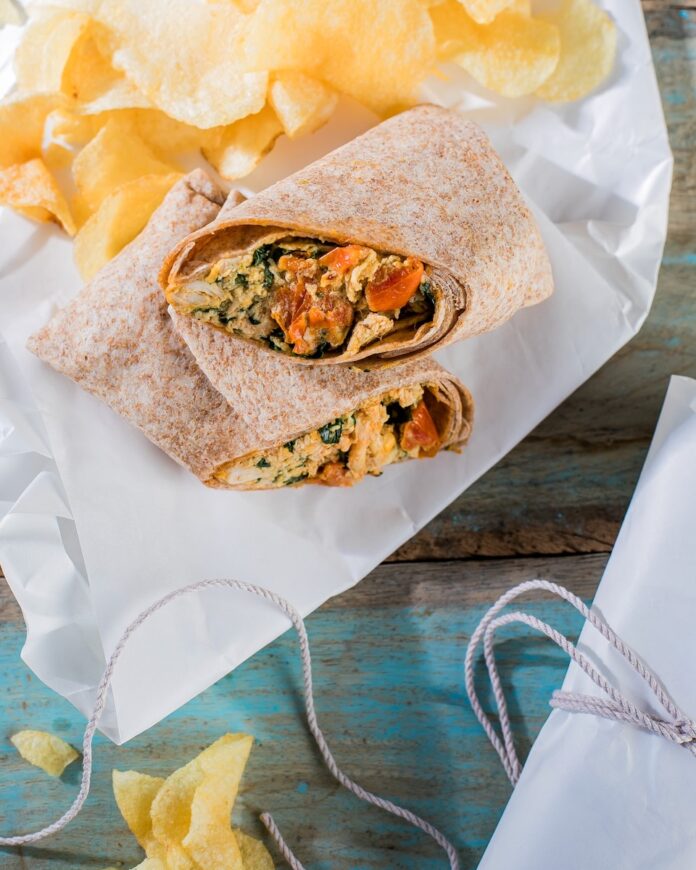
Smoked Chicken Wrap Recipe

0
A broken in half chicken wrap sits on butcher paper with a side of chips above the broken wrap.

Our Smoked Chicken Wrap Recipe will have you looking forward to lunchtime all morning long. This simple chicken mix with plenty of seasoning, spring mix, and tomatoes coats the palate in flavor. Plus, it’s always cute to wrap this meal up in butcher’s paper and leave a little love note to whoever you’re making lunch for (yes this includes yourself!).

How to Fold a Wrap

Achieving the perfect tortilla wrap only takes a simple folding technique. Begin by laying your tortilla flat and adding your filling. Fold the bottom of the tortilla over the filling, then fold in the sides to create a rectangular shape. Finally, tightly roll the tortilla from the bottom up, tucking in the sides as you go. For extra security, you can use a toothpick to secure the seam.

Print
clock clock iconcutlery cutlery iconflag flag iconfolder folder iconinstagram instagram iconpinterest pinterest iconfacebook facebook iconprint print iconsquares squares iconheart heart iconheart solid heart solid icon
A broken in half chicken wrap sits on butcher paper with a side of chips above the broken wrap.

Smoked Chicken Wrap Recipe


  • Author: Kenny Cumberland
  • Yield: Makes 3

Description

Your lunch is calling!


Ingredients

Scale
  • 12 oz cooked, shredded chicken
  • 3 oz shredded cheddar cheese
  • 3 oz roasted tomatoes, diced
  • 6 oz spring mix or mixed greens
  • 1 oz honey
  • 1/2 oz sriracha
  • 2 drops liquid smoke
  • 4 oz olive oil
  • 3 twelve-inch whole wheat flour wraps


Instructions

  1. Make the filling: In a large bowl, whisk together honey, sriracha, liquid smoke, and olive oil. Add shredded chicken, cheddar cheese, roasted tomatoes, and spring mix. Toss to combine.
  2. Assemble the wraps: Lay out a whole wheat wrap on a flat surface. Place a third of the filling on the bottom edge of the wrap.
  3. Roll the wraps: Fold the bottom of the wrap over the filling, then fold in the sides. Continue rolling to form a tight wrap.

Hungry for more? View our article for 7 Healthy Back-to-School Lunch Ideas!

Recipe by Kenny Cumberland of Bistro to Go
Styling by Anna Franklin
Photography by Laura Petrilla

Subscribe to TABLE Magazine‘s print edition.

Homemade Pizza Hot Pockets

0
A pizza roll hot pocket lays on a piece of butcher paper as another lays split open, facing the camera in the upper right hand corner.

While we turn to easy freezer food in times of stress, this simple Pizza Hot Pockets recipe gives you fresh take on this frozen food favorite. It combines the convenience of a hot pocket with the homemade taste of pizza topped with mushrooms, spinach, and pepperoni. If you’re feeling tropical, though, you can always customize the filling to become a Hawaiian Pizza with pineapple and ham or whatever other type your heart desire. You can even have your own family pizza-making party with everyone’s favorite ingredients spread out like a smorgasbord. The next day, send the leftovers out with the kids in brown bags or lunchboxes for a great school.

What is a Hot Pocket?

Hot Pockets are a popular brand of pre-made, frozen sandwiches. These convenient snacks typically contain a mixture of cheese, meat, or vegetables enclosed in a crispy pastry crust. Designed for quick and easy microwave cooking, Hot Pockets have become a staple for busy individuals and late-night cravings. While they offer a convenient meal option, homemade versions like these pizza pockets provide a fresher, more personal alternative.

Print
clock clock iconcutlery cutlery iconflag flag iconfolder folder iconinstagram instagram iconpinterest pinterest iconfacebook facebook iconprint print iconsquares squares iconheart heart iconheart solid heart solid icon
A pizza roll hot pocket lays on a piece of butcher paper as another lays split open, facing the camera in the upper right hand corner.

Homemade Pizza Hot Pockets


  • Author: Kenny Cumberland
  • Yield: Makes 3

Description

Lunch for the whole family.


Ingredients

Scale
  • 12 oz fresh pizza dough
  • 6 oz pepperoni
  • 9 oz mozzarella cheese, shredded
  • 6 oz cooked mushrooms, sliced
  • 3 oz fresh spinach


Instructions

  1. Preheat oven: 350°F (175°C).
  2. Prepare dough: Divide pizza dough into three 4-ounce portions. Roll each portion into a 4-inch square.
  3. Create filling: Combine spinach, mushrooms, and cheese in a bowl. Divide into three equal portions.
  4. Assemble: Place a portion of the filling in the center of each dough square. Top with pepperoni.
  5. Seal: Fold the dough over the filling to create a pocket. Pinch the edges together to seal.
  6. Bake: Place the pizza pockets on a greased baking sheet. Cut three slits in the top of each pocket. Bake for 35 minutes, or until golden brown and the filling is heated through.
  7. Serve: Accompany your Hot Pockets with marinara or ranch dipping sauce.

Hungry for more? View our article for 7 Healthy Back-to-School Lunch Ideas!

Recipe by Kenny Cumberland of Bistro to Go 
Styling by Anna Franklin
Photography by Laura Petrilla

Subscribe to TABLE Magazine‘s print edition.
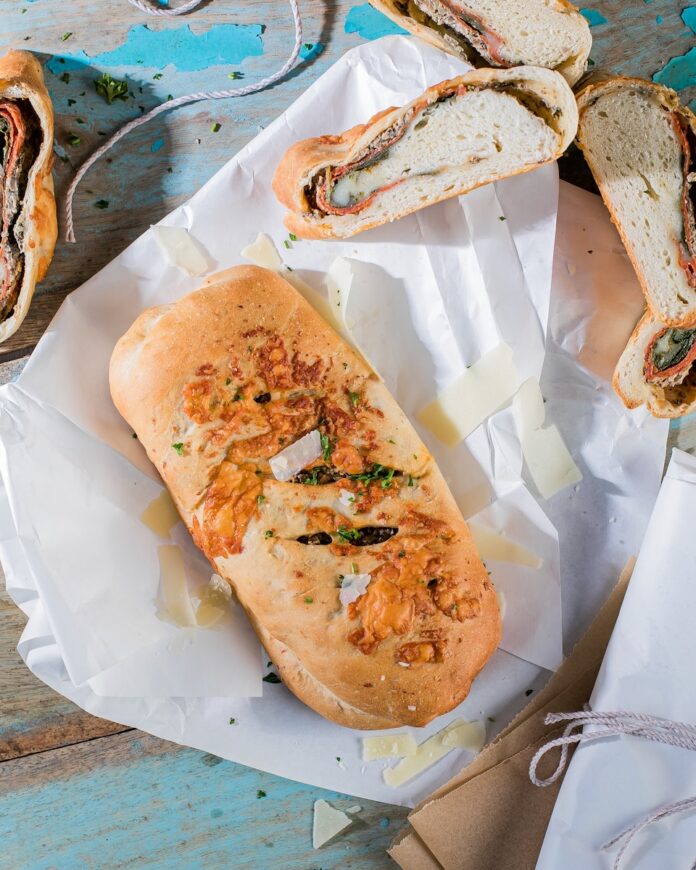
Lunchtime Tamales Recipe

0
An open tamale sits on a table with the filling sitting in a square on the banana leaf accompanied by chips and wrapped tamales.

Everyone could use an adventurous lunch of tamales to take you outside of the normal boring salad or wrap. Packed with flavor and easy to prepare, these tamales are perfect for lunch meal prep ahead of the week or a satisfying, quick weeknight dinner. This recipe combines tender chicken, a flavorful masa dough, and the traditional steaming method for a delicious and authentic taste experience.

How to Eat Tamales

To savor your homemade creation, carefully unwrap the banana leaf casing to reveal the masa and filling. Tamales can be enjoyed hot or cold, making them a versatile meal. For an elevated experience, consider pairing your tamales with a variety of toppings such as salsa, guacamole, sour cream, or crumbled cheese. You can unwrap and eat the filling handheld or use a fork to slowly eat away at the filling.

Print
clock clock iconcutlery cutlery iconflag flag iconfolder folder iconinstagram instagram iconpinterest pinterest iconfacebook facebook iconprint print iconsquares squares iconheart heart iconheart solid heart solid icon
An open tamale sits on a table with the filling sitting in a square on the banana leaf accompanied by chips and wrapped tamales.

Lunchtime Tamales Recipe


  • Author: Kenny Cumberland

Description

A fulfilling and satisfying lunch.


Ingredients

Scale
  • 12 banana leaves (5x5 inch squares)
  • Banana leaf strips (5 inches long by 1/2 inch thick)

For the dough:

  • 2 cups masa harina
  • 1.5 cups chicken stock
  • 1/2 tsp baking powder
  • 1/2 tsp salt
  • 1/2 tsp cumin
  • 3/4 cup unsalted butter

For the filling:

  • 8 oz cooked, shredded chicken breast
  • 3 oz mayonnaise
  • 0.5 oz canned, smashed chipotle peppers
  • 1 oz salsa


Instructions

  1. Prepare the steamer: Fill the Instant Pot with water and insert the steaming tray.
  2. Make the dough: In a stand mixer, cream together the butter and 2 tablespoons of chicken stock until fluffy (about 3-5 minutes). Combine masa harina, baking powder, salt, and cumin in a separate bowl. Gradually add the dry ingredients to the wet ingredients, mixing until combined. Set aside.
  3. Prepare the filling: In a bowl, combine shredded chicken, mayonnaise, chipotle peppers, and salsa. Mix well.
  4. Assemble the tamales: Lay out banana leaves. Place a spoonful of masa dough in the center of each leaf. Add a portion of the chicken filling. Fold the sides of the banana leaf to enclose the filling, then fold the top over to create a tamale. Tie closed with a banana leaf strip.
  5. Steam the tamales: Place the tamales in the Instant Pot steamer, slightly overlapping. Secure the lid and steam for 25 minutes.
  6. Serve: Carefully remove the tamales from the steamer and open your tamale!

Hungry for more? View our article for 7 Healthy Back-to-School Lunch Ideas!

Recipe by Kenny Cumberland of Bistro to Go 
Styling by Anna Franklin
Photography by Laura Petrilla

Subscribe to TABLE Magazine‘s print edition.

Peanut Butter and Jelly Rolls Recipe

0
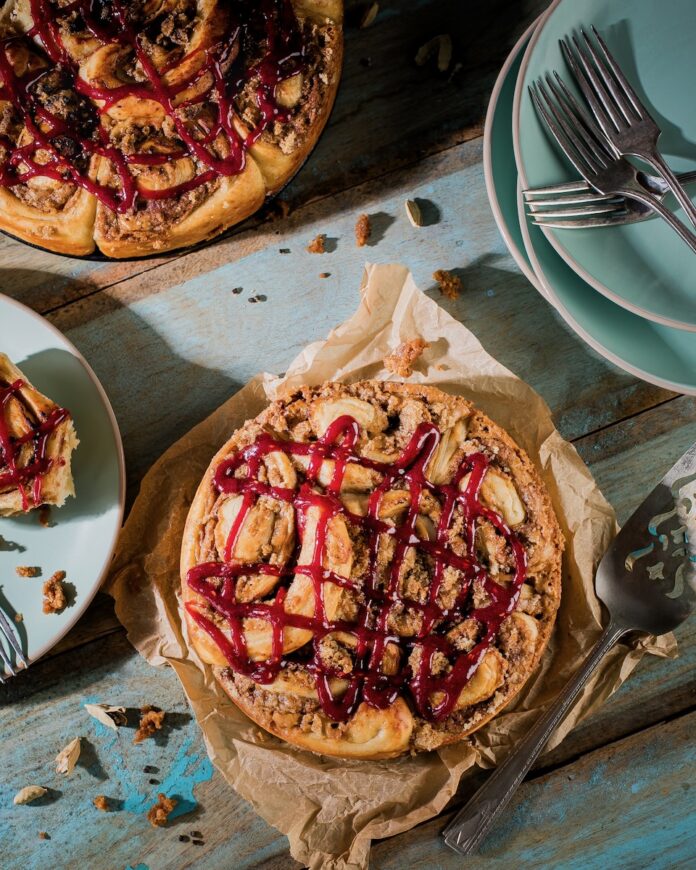
A peanut butter and jelly roll sits on a piece of butcher's paper while another one sits in the upper left hand corner.

If you’re a lover of a classic, creamy, ooey-gooey PB&J, then you need to try our Peanut Butter and Jelly Rolls Recipe. That’s right, we’re taking the lunchroom sandwich staple and turning it into a treat you can’t resist. They do say everything is better in dessert form, so give this a try at home!

Who Invented the Peanut Butter and Jelly (PB&J) Sandwich?

While the exact origins of the beloved peanut butter and jelly sandwich remain a mystery, written history points to Julia Davis Chandler as the first recorder of this combination. In 1901, her recipe appeared in the Boston Cooking School Magazine, marking the earliest known reference to the sandwich. While Chandler may not have been the absolute first to enjoy this delightful pairing, her published recipe solidified the peanut butter and jelly sandwich’s place in culinary history.

Peanut Butter and Jelly Rolls Recipe

Peanut Butter and Jelly Rolls Ingredients

  • 10 oz store-bought pizza dough
  • 10 oz creamy peanut butter
  • 4 oz brown sugar
  • 2 tsp cinnamon
  • 4 oz raspberry jam

PB&J Rolls Instructions

  • Preheat oven: 350°F (175°C).
  • Prepare dough: Roll out pizza dough into a 10×8-inch rectangle on a lightly floured surface.
  • Layer flavors: Spread peanut butter evenly over the dough. Sprinkle with brown sugar and cinnamon.
  • Roll and slice: Starting from the long side, tightly roll the dough into a log. Cut into 2-inch slices.
  • Shape and rise: Place slices in a greased 4-inch springform pan, spiral them upwards. Cover and let rise for 10 minutes.
  • Bake: Bake for 45 minutes, or until golden brown and a toothpick inserted into the center comes out clean.
  • Finish: Let cool for 5 minutes before spreading with raspberry jam on top.

Hungry for more? View our article for 8 Back-to-School Snack Ideas for Kids!

Recipe by Kenny Cumberland of Bistro to Go / Styling by Anna Franklin / Photography by Laura Petrilla

A footer photo with a black background and subscribe info and button

Subscribe to TABLE Magazine‘s print edition.
Overnight Oats Parfait Recipe

0
A cup of overnight oats in parfait form sits on a picnic table with oats, fresh strawberries, blackberries, and whipped cream on top.

Start your day with a burst of flavor and nutrition thanks to our Overnight Oats Parfait recipe! This is the perfect grab-and-go breakfast that’s both delicious and good for you. Packed with protein, fiber, and antioxidants, it’s a satisfying meal that will keep you energized throughout the morning. Customize it with your favorite toppings as a personalized breakfast experience for you and the whole family.

How Long are Overnight Oats Good For?

Overnight oats can typically last in the refrigerator for 3 to 5 days if they’re placed in a clean container with an airtight lid. For optimal freshness and flavor, it’s best to consume them within this timeframe. Always prioritize safety and discard any oats that exhibit signs of spoilage, such as mold, an off odor, or a change in texture. Some ingredients, like those delicious but fragile fresh raspberries we all love, may also spoil quicker than others, so keep an eye on that.

Print
clock clock iconcutlery cutlery iconflag flag iconfolder folder iconinstagram instagram iconpinterest pinterest iconfacebook facebook iconprint print iconsquares squares iconheart heart iconheart solid heart solid icon
A cup of overnight oats in parfait form sits on a picnic table with oats, fresh strawberries, blackberries, and whipped cream on top.

Overnight Oats Parfait Recipe


  • Author: Kenny Cumberland
  • Yield: 4 Servings 1x

Description

Make these oats the night before for the perfect breakfast surprise.


Ingredients

Scale
  • 1.5 cups rolled oats
  • 8 oz whole milk (or your preferred milk alternative)
  • 6 oz jam (apricot or peach recommended)
  • 6 oz granola
  • 4 oz whipped cream
  • 3 cups mixed berries


Instructions

  1. Make the oats: In a large bowl, combine the oats and milk. Stir well to combine.
  2. Chill overnight: Cover the bowl and refrigerate overnight, or for at least 2 hours.
  3. Assemble parfaits: Divide the oat mixture evenly among 4 glasses. Top with a layer of jam, followed by granola, mixed berries, and a dollop of whipped cream.
  4. Enjoy: Serve immediately.

Hungry for more? View our article for 9 Easy Kids Breakfast Recipes!

Recipe by Kenny Cumberland of Bistro to Go
Styling by Anna Franklin
Photography by Laura Petrilla

Subscribe to TABLE Magazine‘s print edition.

Ham, Bacon, and Cheddar Breakfast Pastry Puffs

0
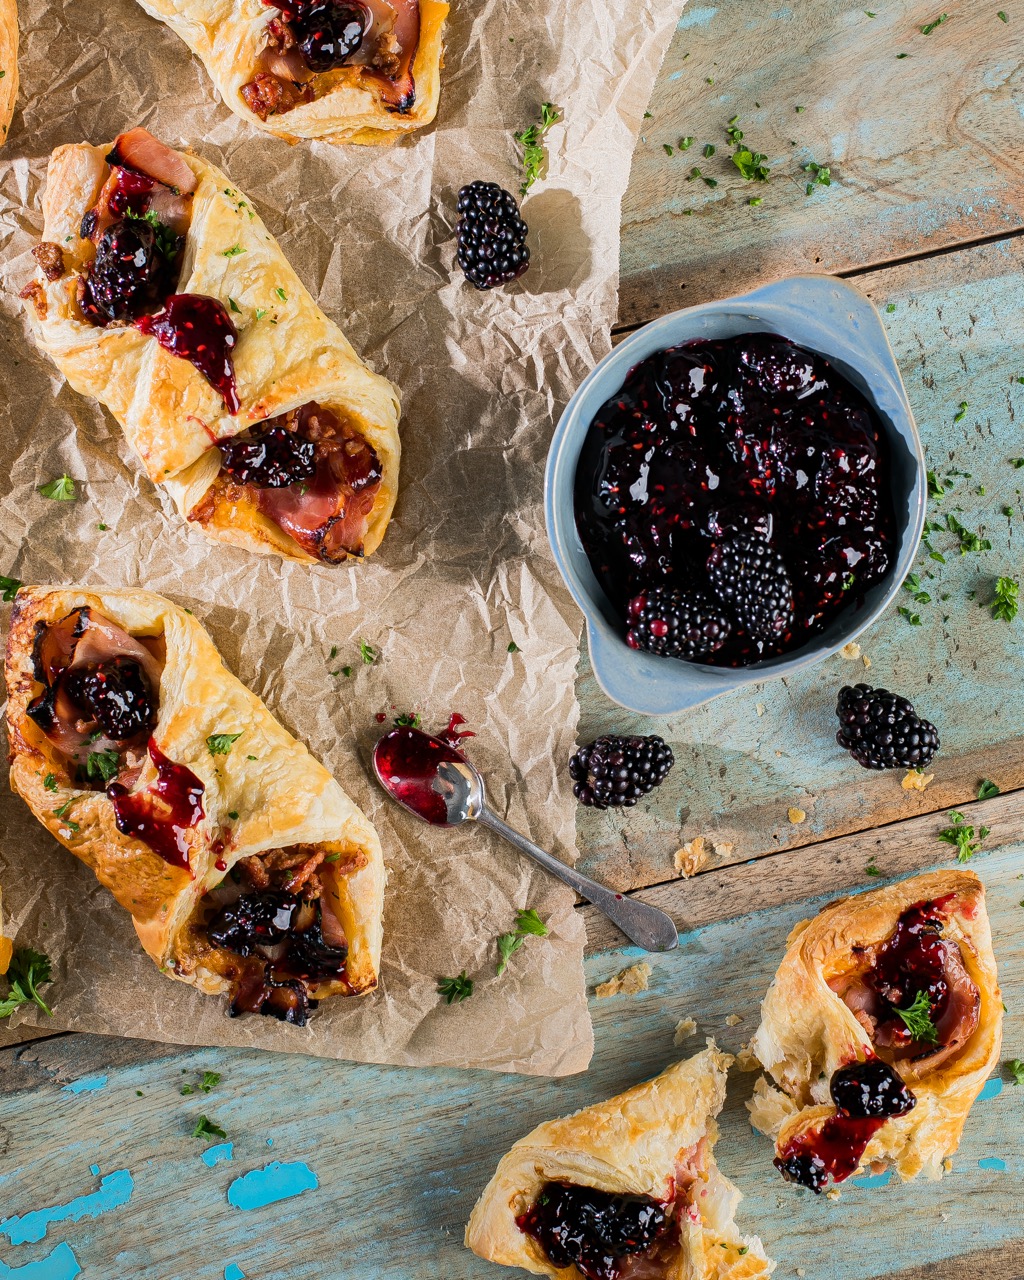
Six Breakfast Pastry Puffs sit on butcher paper as a bit of blackberry topping peaks in from the right side.

Ham, Bacon, and Cheddar Breakfast Pastry Puffs are a delicious and easily prepared breakfast option. This simple yet satisfying recipe combines the flaky perfection of puff pastry with the savory flavors of ham and cheddar cheese. They’re great for busy mornings or as a crowd-pleasing brunch appetizer, impressing taste-testers of all ages.

Three Breakfast pastry puffs sit on butchers paper beside a small bowl of blackberry topping.

What is Puff Pastry?

Puff pastry is a flaky, buttery dough known for its delicate layers. It’s created through a complex process of folding and rolling dough and butter together multiple times, resulting in hundreds of thin layers. As the pastry bakes, the heat causes the butter to melt and steam, separating the layers and creating the characteristic puff and flaky texture. Sure, you can make it at home…but store-bought puff pastry makes many recipes like this Ham, Bacon, and Cheddar Breakfast Pastry Puff fast and easy.

Print
clock clock iconcutlery cutlery iconflag flag iconfolder folder iconinstagram instagram iconpinterest pinterest iconfacebook facebook iconprint print iconsquares squares iconheart heart iconheart solid heart solid icon
Six Breakfast Pastry Puffs sit on butcher paper as a bit of blackberry topping peaks in from the right side.

Ham, Bacon, and Cheddar Breakfast Pastry Puffs


  • Author: Kenny Cumberland

Description

Perfect for busy mornings.


Ingredients

Scale
  • 4 sheets puff pastry (3 inches each)
  • 4 slices cooked ham (2 oz each)
  • 8 slices cooked bacon, crumbled
  • 4 slices cheddar cheese
  • 1 beaten egg


Instructions

  1. Preheat oven: 450°F (230°C).
  2. Assemble: Place a puff pastry square on a baking sheet. Top with a slice of cheddar, followed by a layer of ham and bacon.
  3. Seal: Brush the edges of the pastry with egg wash. Fold the pastry into a triangle, pressing down firmly to seal.
  4. Brush: Brush the top of the strudel with the remaining egg wash.
  5. Bake: Bake for 12-15 minutes or until golden brown and puffed up.

Hungry for more? View our article for 9 Easy Back-to-School Breakfast Recipes!

Recipe by Kenny Cumberland of Bistro to Go
Styling by Anna Franklin
Photography by Laura Petrilla

Subscribe to TABLE Magazine‘s print edition.