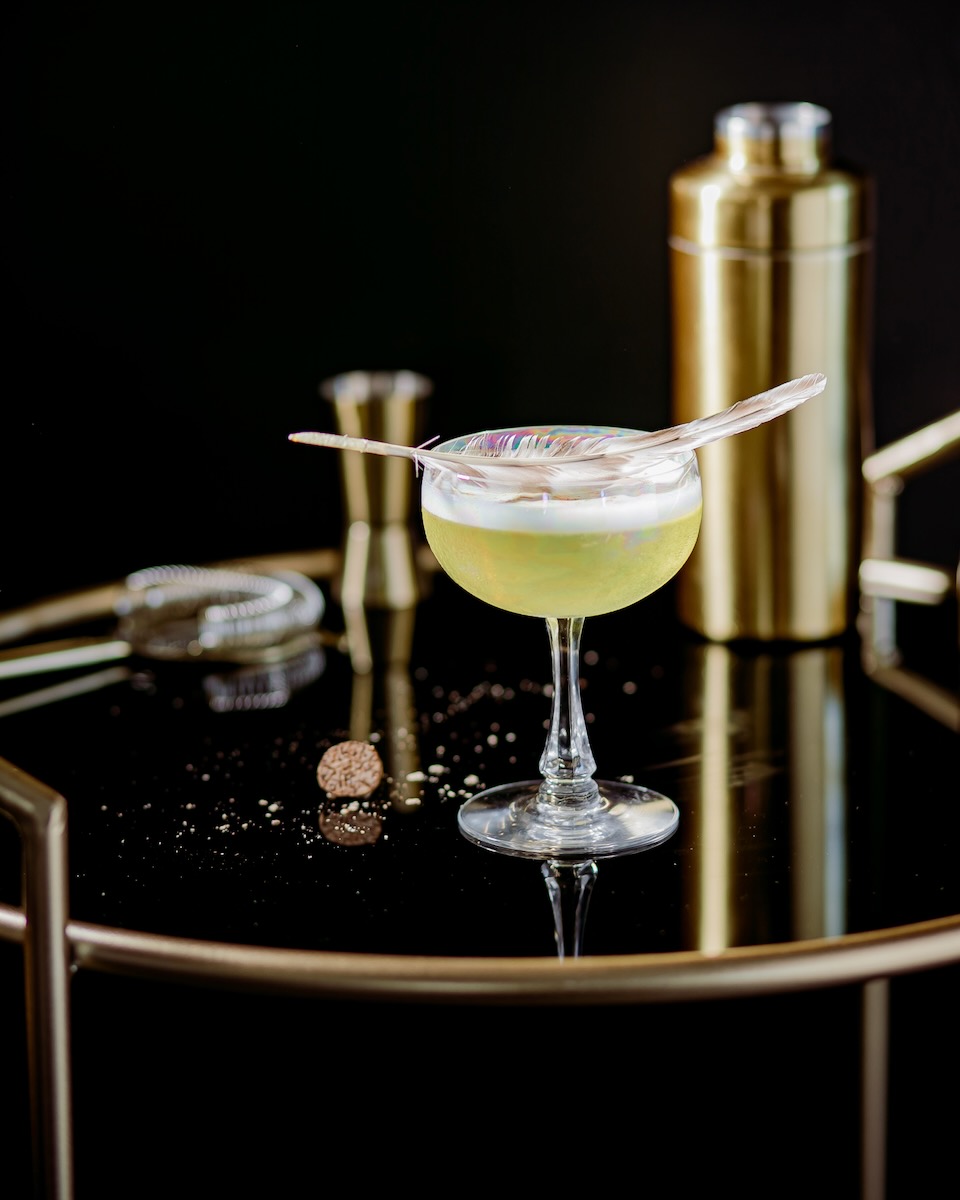
Home Blog Page 103

Whole Grilled Halloumi with Apricots

0
A bowl of grilled halloumi with apricots on a red background

Reprinted with permission from Georgina Hayden’s Greekish: Everyday Recipes with Greek Rootsthis recipe is a delightfully sharable dish for a family-style dinner or the cocktail hour.

I’m not very on top of things like social media. I’m hopeless at jumping on bandwagons, always late to the party, trend-wise. However, one thing I did share on social media several years ago now, was my method for scoring and grilling a whole block of halloumi with apricots — it took off.

Using the Whole Halloumi Block 

I’d never seen halloumi cooked this way before, and now it’s being recreated far and wide and I do feel a bit proud. While the flavor combination is a family standard, I attribute using the whole block to my dear friend Iain, who would eat an entire block of halloumi in one sitting, because “it looked like a chicken breast.” I thought, well, why can’t it be treated like a chicken breast or any other form of protein…? Score, season and grill! Iain, this one’s for you. This recipe is also vegetarian and gluten-free, so anyone can enjoy it. Grilling can be just as fun without the meat when you use halloumi. The apricots also add an extra touch of Mediterranean flair.

Print
clock clock iconcutlery cutlery iconflag flag iconfolder folder iconinstagram instagram iconpinterest pinterest iconfacebook facebook iconprint print iconsquares squares iconheart heart iconheart solid heart solid icon
A bowl of grilled halloumi with apricots on a red background

Whole Grilled Halloumi with Apricots


  • Author: Georgina Hayden
  • Yield: Serves 2-4 1x

Description

Use a whole block of halloumi!


Ingredients

Scale


  • 1 × 8.8 oz piece of halloumi
  • Olive oil
  • 4 apricots
  • 2 tablespoons honey
  • A few sprigs of oregano or thyme


Instructions

  1. Preheat your grill to medium-high. Carefully score the top of your halloumi in a criss-cross pattern — don’t cut too deep; you want to keep it intact. Rub the cheese with olive oil, in between the cuts, too. Halve the apricots, remove the stones, and halve again into quarters. Place the halloumi in a snug dish (ideally metal) and nestle around the apricots, drizzling them with olive oil, too.
  2. Pop under the grill, not too close, and grill for 8–10 minutes, so that the fruit starts to caramelize and the halloumi is tender and charred on top. The success of this recipe depends on having the right distance from the grill and heat, so check a few minutes into cooking and see if you need to raise the temperature or lower the grill rack. It’s quite a forgiving technique, so take your time and see what works with your grill. When the halloumi is ready, drizzle with honey and scatter over the oregano or thyme. Serve immediately.

Recipe by Georgina Hayden from Greekish: Everyday Recipes with Greek Roots (2024) / Photography by Laura Edwards

Subscribe to TABLE Magazine’s print edition

Smoked Clam Carbonara

0
A pan of smoked clam carbonara with a sprinkling of cheese

Reprinted with permission from Rooted Kitchen: Seasonal Recipes, Stories, and Ways to Connect to the Natural World by Ashley Rodriguez. This recipe is an adventure in flavor. Try it: you are sure to love it!

While far from the classic, this version of carbonara is quite possibly the most satisfying meal to put together over an outdoor fire. All the usual and delicious carbonara suspects are here: rich pancetta, toothsome pasta, and a creamy sauce of eggs, Parmesan, and starchy pasta water. The clams are an added touch to elevate and expand a classic dish into an outdoor cooking experience.

Clam Carbonara Over a Campfire: A Smoked Delight

What makes cooking the carbonara over a campfire so worthwhile are the clams: Set over the coals in a pan with the residual pancetta and garlic, the clams slowly steam over the wood fire, taking on its luscious smoke. I’ve also included instructions for making this dish in a home oven, but we really recommend trying this outside, partially for the delight of the experience. The dish is finished with a bit of lemon for brightness, parsley for color and freshness, and even more cheese . . . no explanation needed.

Print
clock clock iconcutlery cutlery iconflag flag iconfolder folder iconinstagram instagram iconpinterest pinterest iconfacebook facebook iconprint print iconsquares squares iconheart heart iconheart solid heart solid icon
A pan of smoked clam carbonara with a sprinkling of cheese

Smoked Clam Carbonara


  • Author: Ashley Rodriguez
  • Yield: Serves 4 to 6 1x

Description

Far from classic, but enjoyable all the same.


Ingredients

Scale
  • 6 oz pancetta or bacon, cut crosswise into strips ½ inch wide
  • 4 garlic cloves, thinly sliced
  • 1 lb Manila clams or small, sweet varieties such as Cherrystones or Littlenecks, scrubbed
  • 1 lb spaghetti or bucatini
  • 3 oz Parmesan cheese, finely grated (about 1 cup), plus more for serving
  • 3 large eggs
  • Freshly ground black pepper, plus more for serving
  • 2 tsp grated lemon zest, plus more for serving
  • 3 tbsp fresh lemon juice
  • ¼ cup coarsely chopped fresh Italian parsley


Instructions

To Cook Over a Fire

  1. Prepare a wood fire, let it burn to hot coals, and set a grill grate over the coals.
  2. Fill a large Dutch oven or soup pot halfway with water and stir in enough salt to make the water taste of the sea. Cover the pot, set on the grate, and bring to a boil.
  3. Meanwhile, in a large cast-iron skillet set over the coals, cook the pancetta until crisp, 5 to 7 minutes. Add the garlic and sauté until golden and crisp, 3 to 4 minutes. Remove the pancetta and garlic to a plate.
  4. In the same skillet, add the clams and set the skillet over the coals for 1 minute, while stirring to coat the clams in the residual fat. Set the skillet off to the side of the coals, yet still close to the fire. The clams will slowly start to open and take on a smoky flavor. Discard any clams that do not open up in the cooking process.
  5. Add the pasta to the boiling water and cook according to the package directions.
  6. In a large bowl, stir together the Parmesan, eggs, and 1 teaspoon pepper until thoroughly combined. Using a pair of tongs, transfer the hot pasta directly to the egg mixture and stir well and quickly so as not to scramble the eggs. Add a bit of the pasta water, as needed, to create a creamy sauce.
  7. Add the pancetta and garlic to the pasta along with the clams, then stir in the lemon zest and juice.
  8. Transfer the pasta to a serving platter. Top with the parsley and more grated Parmesan, lemon zest, and pepper.

To Cook in a Home Oven

  1. Bring a large pot of salted water to a boil.
  2. Meanwhile, in a large skillet, cook the pancetta over medium heat until crisp, 5 to 7 minutes. Add the garlic and sauté until golden and crisp, 3 to 4 minutes. Remove the pancetta and garlic to a plate.
  3. In the same skillet, add the clams and cook for 1 minute while stirring to coat the clams in the residual fat. Add ½ cup water, cover the skillet, and continue to cook until the clams have all opened, about 5 minutes. Discard any clams that do not open up in the cooking process. Uncover and allow the water to evaporate.
  4. Add the pasta to the boiling water and cook according to the package directions.
  5. In a large bowl, stir together the Parmesan, eggs, and pepper until thoroughly combined. Using a pair of tongs, transfer the hot pasta directly to the egg mixture and stir well and quickly so as not to scramble the eggs. Add a bit of the pasta water, as needed, tocreate a creamy sauce.
  6. Add the pancetta, garlic, and clams to the pasta. Stir in the lemon zest and juice.
  7. Transfer the pasta to a serving platter. Top with the parsley and more grated Parmesan, lemon zest, and pepper.


Reprinted with permission from Rooted Kitchen: Seasonal Recipes, Stories, and Ways to Connect to the Natural World by Ashley Rodriguez, 2024. Photographs by Ashley Rodriguez,  2024. Published by Clarkson Potter, an imprint of Penguin Random House.

Subscribe to TABLE Magazine’s print edition

Puy Lentils with Spinach and Pancetta

0
A bowl of puy lentils with spinach and pancetta, generously topped with feta, in a white soup bowl

Reprinted with permission from The Farm Table by Julius Roberts for the delight of TABLE readers, this recipe will up your lentil game deliciously.

I love puy lentils–they’re healthy, packed with protein and an amazing base for all sorts of flavors. I find they’re particularly good with quality sausages and a mustardy aïoli, but equally so with pan-fried fish and salsa verde, or slow-roast lamb and anchovy. Here they’re pictured with pumpkin roasted in a hot oven until sweet and charred, and finished with goat cheese. It’s a great combo, but this recipe is really all about the lentils.

What Are Puy Lentils? 

Le Puy green lentil is a small green lentil from France, typically sold in America as French green lentils or Puy lentils. Puy is a region of southern France, where these lentils are grown. If you can’t get these lentils at your local grocery store, you can substitute them for green lentils. But we recommend try to find Puy lentils if you can. They can be used in a variety of different types of dishes and last a long time. Any leftovers from this recipe make a great pasta sauce when finished with a drizzle of chile oil and Parmesan, or you can water them down a bit, add some curry powder and turn them into curried lentil soup, an old favorite of my granny’s.

Print
clock clock iconcutlery cutlery iconflag flag iconfolder folder iconinstagram instagram iconpinterest pinterest iconfacebook facebook iconprint print iconsquares squares iconheart heart iconheart solid heart solid icon

Puy Lentils with Spinach and Pancetta


  • Author: Julius Roberts

Description

An easy-to-make, delicious soup dish.


Ingredients

Scale
  • 1 large yellow onion
  • 1 leek
  • 2 carrots
  • 3 celery stalks
  • 4 tbsp olive oil
  • 5¼ oz diced pancetta (optional)
  • A generous glass of white wine
  • 2½ cups Puy lentils
  • 5 bay leaves
  • A few sprigs of fresh thyme
  • 5 cups veg stock or water
  • 1 lb spinach
  • 1 heaped tbsp Dijon mustard
  • A big handful of fresh parsley


Reprinted with permission from The Farm Table by Julius Roberts, 2023. Photographs by Elena Heatherwick, 2023. Published by Ten Speed, an imprint of Penguin Random House.

Subscribe to TABLE Magazine’s print edition

Winter Hot Toddy

0
A set of hot toddy cocktails on a white tablecloth background, garnished with cinnamon

The winter hot toddy is a beverage legendary for healing a host of ailments and for lifting the spirits! At the first hint of a cold or toothache, my Irish great-grandmother put a toddy together for family members of all ages. It took her no time at all: just a shot of this and a dash of that. And she served it with love and a kind word. Small wonder that she was beloved by all!

Is A Hot Toddy Actually Good For Your Health?

Okay, alcohol is definitely not the world’s healthiest substance. But granny is not entirely wrong to dole out hot toddies for all members of the family when the noses start to run. This Winter Hot Toddy isn’t exactly juice cleanse-ready, but it does have some health benefits. Honey has soothing and anti-inflammatory properties, and it can help coat and calm an irritated throat, reducing coughing and discomfort. The warmth of the drink helps to loosen mucus and may ease throat irritation, making you feel more comfortable. Certain spices like cinnamon and cloves also have anti-inflammatory and antimicrobial properties that could offer mild support to your immune system.

Print
clock clock iconcutlery cutlery iconflag flag iconfolder folder iconinstagram instagram iconpinterest pinterest iconfacebook facebook iconprint print iconsquares squares iconheart heart iconheart solid heart solid icon

Hot Toddy


  • Author: Keith Recker

Description

An elixir of health.


Ingredients

Scale
  • ¾ cup  Water
  • 1 ½ oz. Kingfly Blended Bourbon Whiskey
  • 2 tbsp. Bumbleberry Farms honey
  • 3 tbsp. Meyer lemon juice
  • Lemon rounds, cinnamon stick, cloves, star anise


Instructions

  1. Warm the water, honey, and lemon juice in a saucepan with cinnamon, cloves and anise to taste. When the mixture begins to bubble, turn off the flame and add whiskey.
  2. Pour into small mugs or teacups and sip like Prohibition is still on! Don’t be shy about letting the spices continue to soak in the mugs: their fragrance and flavor add to the experience.

Recipe by Keith Recker / Styling by Ana Kelly / Photography by Adam Milliron

Subscribe to TABLE Magazine’s print edition

Mulled Wine

0
A glass of mulled wine on a white background, garnished with fruit

Some history books credit the ancient Greeks with the invention of mulled wine as a way to make the dregs of the winemaking process more drinkable. By adding herbs and spices, the flavor improved. As with architecture, sculpture and so much more, the Romans copied the Greeks, bringing it northward with them as they pushed towards what is now Germany and France. Northern winters brought a new urgency to the affair: mulled wine was a perfect drink to ward off the chill and gloom of the dark season.

How to Pick the Right Wine for Mulled Wine

Look for a full-bodied variety like Cabernet Sauvignon, Merlot, Zinfandel, or Syrah. These wines have enough depth to hold up to the spices. And no need to go too crazy at the wine store. Since you’re mulling it, you don’t need anything too high-end. A mid-range bottle will work fine. Consider Chilean winery Frontera‘s Cabernet or Merlot, which also come in higher-volume bottles great for a recipe like this. For a full bodied bargain Primitivo (the Italian-grown regional variety of Zinfandel), consider Zensa.

Print
clock clock iconcutlery cutlery iconflag flag iconfolder folder iconinstagram instagram iconpinterest pinterest iconfacebook facebook iconprint print iconsquares squares iconheart heart iconheart solid heart solid icon
A glass of mulled wine on a white background, garnished with fruit

Mulled Wine


  • Author: Keith Recker

Description

An ancient remedy for cold days.


Ingredients

Scale
  • 1 bottle of red wine (750 ml)
  • ¼ cup  Paul’s Farm maple syrup
  • 1 small red apple
  • 1 small green apple
  • 1 small red pear
  • 1 tsp ground allspice
  • 1 tsp ground cloves
  • 1 tsp ground sumac berries
  • 2 sticks cinnamon


Instructions

  1. In a clean saucepan, combine wine, maple syrup, and spices. The better the wine, the better the results, but inexpensive options work just fine.
  2. Core the fruit and cut into ¼-inch slices. If you have a bit of orange peel or a slice of pineapple or fresh ginger, feel free to add.
  3. Place the fruit in the saucepan and heat until it boils. Lower the heat and simmer gently for 10 minutes.  Drink while still steaming, but cool enough to sip.

Recipe by Keith Recker
Styling by Ana Kelly
Photography by Adam Milliron

Subscribe to TABLE Magazine‘s print edition

The Appalachian Trail, a Cold Weather Cocktail

0
The Appalachian Trail, a cold weather cocktail, sits on a smoked birch log

Taste and fragrance team up to create a unique sensation with this cocktail from Bridges and Bourbon, a restaurant in downtown Pittsburgh. Their mixologists came to the studio to concoct the brew and fire up the woodchips. While this cocktail is chilled, the smoke and fire had us all warmed up, so we had to add it to our hot drinks assortment since it still makes a great cold weather cocktail.

What Makes a Good Cold Weather Cocktail?

A good cold weather cocktail is all about warmth, comfort, and a bit of indulgence. The key ingredients tend to be rich, warming spirits like whiskey, rum, and brandy, which complement the colder months perfectly. Additionally, the use of spices and citrus helps balance the heaviness of the alcohol, while enhancing the cozy, festive vibe. Citrus, spices, and warming spirits like tequila or bourbon make a cocktail better for the colder months. For cold weather, you want cocktails that have depth—drinks that aren’t just refreshing but full of warmth and complexity. Dark rum, bourbon, dark beer, or even sherry can bring layers of flavor that are perfect for sipping slowly on a cold evening.

Print
clock clock iconcutlery cutlery iconflag flag iconfolder folder iconinstagram instagram iconpinterest pinterest iconfacebook facebook iconprint print iconsquares squares iconheart heart iconheart solid heart solid icon
The Appalachian Trail, a cold weather cocktail, sits on a smoked birch log

The Appalachian Trail, a Cold Weather Cocktail


  • Author: Bridges & Bourbon

Description

If you don’t have a birch log, just get creative with the garnish and presentation!


Ingredients

  • Cognac
  • Rye
  • Bourbon
  • Calvados
  • Apple Cinnamon Syrup


Instructions

  1. Mix equal parts cognac, rye, bourbon, calvados, and apple cinnamon syrup. Put 2 ½ ounces of your batch in a mixing glass with ice. Stir until well diluted and roll the contents into a cognac glass.
  2. Fill hollowed birch log with apple woodchips and torch the chips to ignite a little flame and produce a lovely smoke.
  3. Place glass on top of log and serve.

Notes

This recipe calls for “equal parts” of each ingredient, adjust based on how many drinks you’re making.

Recipe courtesy of Bridges and Bourbon / Styling by Ana Kelly / Photography by Adam Milliron

Subscribe to TABLE Magazine’s print edition

Moonshine Hot Chocolate

0
Moonshine hot chocolate full of baked goods and whiskey delights

‘Tis the season for sensory indulgences. Inspired by the ever-grander garnishes on those brunchy Bloody Marys popping up in restaurants across the country, we dreamed up this Moonshine Hot Chocolate bedecked with delicious sweets. Kim McLaughlin of McLaughlin Distillery, whose moonshine we used, says “Moonshine improves small talk and makes you want to spend time with relatives. Or at least it gets you on the right track.” Share it with your beloved in front of a fire or dazzle your guests with a suite of these delivered on a tray. Special thanks to Casey Renee for the brownies, cookies and whoopie pies. For another boozy hot chocolate recipe, try our Spiked Hot Chocolate.

What is Moonshine? Why Use It in Hot Chocolate?

The name “moonshine” originates from the practice of distilling alcohol at night, under the cover of darkness to avoid detection by authorities. In many parts of the world, particularly in the U.S., moonshine was historically associated with bootlegging during Prohibition, when the sale of alcohol was banned. Moonshine is typically high-proof (sometimes 100-proof or more). Hot chocolate is already a comforting, cozy drink, especially in cold weather. Adding moonshine turns it into a more grown-up treat, with the alcohol providing an additional layer of warmth and relaxation. This makes Moonshine Hot Chocolate a winning choice for chilly evenings or as a fun, festive drink for gatherings.


Print
clock clock iconcutlery cutlery iconflag flag iconfolder folder iconinstagram instagram iconpinterest pinterest iconfacebook facebook iconprint print iconsquares squares iconheart heart iconheart solid heart solid icon
Moonshine hot chocolate full of baked goods and whiskey delights

Moonshine Hot Chocolate


  • Author: Keith Recker

Description

Hot chocolate with an extra kick.


Ingredients

Scale
  • 1 cup  Whole milk
  • 2 oz. Callebaut milk chocolate, grated
  • 1 oz. Callebaut semi-sweet chocolate, grated
  • 1 tbsp. Light brown sugar
  • 1/8 tsp. Cinnamon
  • 1/8 tsp. Kosher salt
  • 3 oz. McLaughlin Distillery’s Loca Double Chocolate Moonshine
  • 1 oz Kingfly Spirits Bliss 1895 Spiced Rum


Instructions

  1. Warm the milk and grated chocolate slowly, stirring constantly. Add brown sugar, cinnamon, and salt.
  2. Just before serving, add spirits. Serve in heatproof glass or tall mug. Garnish with sweets to your heart’s content.

Recipe by Keith Recker / Styling by Ana Kelly / Photography by Adam Milliron 

Subscribe to TABLE Magazine‘s print edition

Turnip Gratin

0
A turnip gratin on a table with a white tablecloth, held by Melissa Martin

Excerpted from Bayou by Melissa M. Martin especially for TABLE readers, this recipe is a delightful winter dish to try at home.

Growing up, we ate a lot of potato gratins, but you can use turnips in the same preparation and get all their earthy, spicy flavor. The gratin is inspired by the Acadians, who grew turnips because they are easy to store throughout the winter. During baking, the mixture may bubble over, so place the pan on a sheet pan to catch any spillage and keep your oven clean. I like to serve gratin with a vinegary cabbage salad to cut the richness of the dish.

History of Gratin

Gratin originally comes from the Dauphiné region of France, where it originated as “Gratin Dauphinois.” Like the French language, gratin came to Louisiana during its French occupation in the 1800s, but the Cajun culture that developed then created its own unique spin on it. Though potatoes are the classic French gratin, turnips are an Acadian spin based on seasonal produce. (Plus, it’s often hard to know what to do with turnips). This recipe is reprinted from Bayou, a cookbook that focuses specifically on Cajun cuisine and its history by Melissa Martin. Cajun cooking is meant to be shared, so gather around a table with this gratin in the colder months.

Print
clock clock iconcutlery cutlery iconflag flag iconfolder folder iconinstagram instagram iconpinterest pinterest iconfacebook facebook iconprint print iconsquares squares iconheart heart iconheart solid heart solid icon
A turnip gratin on a table with a white tablecloth, held by Melissa Martin

Turnip Gratin


  • Author: Melissa Martin
  • Yield: Serves 8 as a side 1x

Description

A Cajun recipe to make through the winter.


Ingredients

Scale
  • 2 oz unsalted butter, cut into cubes, plus more for the pan
  • lbs turnips, peeled and cut into ½-inch-thick rounds
  • 2 tsp kosher salt
  • ¼ tsp ground white pepper
  • ¼ tsp mustard powder
  • ¼ cup all-purpose flour
  • 2 cups whole milk
  • 4 oz grated Swiss cheese or Gruyère, plus 2 oz for topping
  • 1 tbsp fresh thyme leaves, plus 3 to 5 sprigs
  • ⅛ tsp cayenne pepper
  • Freshly grated nutmeg


Instructions

  1. Preheat the oven to 350°F. Butter a deep 8-inch (20 cm) round cast-iron pan or deep casserole dish.
  2. In a large bowl, season the turnips with the salt, white pepper, and mustard powder. Arrange the turnips in layers in the prepared pan, spiraling them out from the bottom and layering until all the turnips are used.
  3. Warm a heavy-bottomed 4-quart saucepan over medium heat for 2 minutes, then add the butter and flour simultaneously and cook, stirring continuously, for 2 to 3 minutes to make a blond roux. Slowly stream in the milk while whisking constantly and bringing the mixture to a simmer, then remove the pan from the heat and stir in the 4 ounces grated cheese. Add the thyme leaves, cayenne, and a touch of nutmeg to the cheese mixture and stir well. Pour the mixture over the turnips in the pan.
  4. Place the pan on a rimmed sheet pan and bake for 30 minutes. Sprinkle the remaining 2 ounces cheese evenly on top of the turnips, crown the gratin with the thyme sprigs, and return the pan to the oven. Bake for 20 to 25 minutes more, until the top is golden brown, the turnips are al dente (not mushy), and the liquid has been absorbed. Let the gratin sit at room temperature for 15 minutes before serving.

Excerpted from Bayou by Melissa M. Martin (Artisan Books). Copyright © 2024. Photographs by Denny Culbert.

Subscribe to TABLE Magazine‘s print edition

Praisesong Biscuits

0
A tray of seven biscuits on a blue tile table, made by Crystal Wilkinson

Praisesong for the Kitchen Ghosts: Stories and Recipes from Five Generations of Black Country Cooks by Crystal Wilkinson includes this wonderful recipe. She shares it with TABLE readers.

I have been baking biscuits all my life, in search of the perfect recipe for decades. I tried for years to make them like my grandmother’s, but she never wrote down her recipe (of course). So, this recipe is mine. I think it’s just right—at least it seems to be the one my family likes best.

Tips for the Getting Biscuits Just Right

An ideal biscuit has a slightly crisp crust paired with a tender softness inside and can hold up to jelly or gravy or a small piece of meat for a tasty morsel of a sandwich. The key to tender biscuits is not to mess with the dough too much. I like to see bits of butter in it, so the biscuits bake up with tiny pools of buttery goodness inside. This recipe is from Praisesong for the Kitchen Ghosts, which celebrates Black family recipes throughout history, particularly from the Appalachian region, famous for its biscuits. Though everyone has their own recipe, this is a simple and enjoyable one with something for even the pickiest eater.

Print
clock clock iconcutlery cutlery iconflag flag iconfolder folder iconinstagram instagram iconpinterest pinterest iconfacebook facebook iconprint print iconsquares squares iconheart heart iconheart solid heart solid icon
A tray of seven biscuits on a blue tile table, made by Crystal Wilkinson

Praisesong Biscuits


  • Author: Crystal Wilkinson
  • Yield: Makes eight 3-inch biscuits 1x

Description

Everybody loves biscuits.


Ingredients

Scale
  • 2 to cups self-rising flour, plus more as needed
  • 4 tbsp (¼ cup) vegetable shortening, at room temperature
  • 4 tbsp (½ stick) cold salted butter, plus more for serving
  • 1 cup whole milk


Instructions

  1. Place a rack in the middle position and preheat the oven to 400 degrees.
  2. In a large mixing bowl, combine 2 cups of the flour with the shortening and use a pastry cutter or two forks to blend them into a coarse meal.
  3. Cut the cold butter into pea-size pieces. Add them to the bowl and stir to coat with the flour, then pour in the milk, using a fork to stir the mixture into a soft, shaggy dough. Add a bit more flour, as needed. Do not overmix.
  4. Generously flour your work surface and your 3-inch round biscuit cutter (or inverted glass). Transfer the dough there and knead it six times—only adding a little more flour, as needed, to keep it from being too sticky and just to keep it workable.
  5. Gently pat or roll out the dough to a thickness of about ½ inch. Use the biscuit cutter to cut straight down, without twisting, to form a total of 8 biscuits. Gently reroll the scraps to use all the dough.
  6. Place the biscuit rounds on an ungreased baking sheet, close together but not touching. Brush off any excess flour. Bake on the middle rack until lightly browned on top and bottom, 12 to 15 minutes.
  7. Butter the biscuit tops and serve hot.

Reprinted with permission from Praisesong for the Kitchen Ghosts: Stories and Recipes from Five Generations of Black Country Cooks by Crystal Wilkinson copyright Ó 2024.  / Photographs by Kelly Marshall copyright 2024. Published by Clarkson Potter, an imprint of Penguin Random House.

Subscribe to TABLE Magazine‘s print edition

Greek Zucchini Fritters (Kolokythokeftedes)

0
A plate of Greek Zucchini fritters with a hefty dish of yogurt sauce with capers

This dish from José Andrés’s cookbook Zaytinya might introduce itself as: “The name’s Kolokythokeftedes, but you can just call me zucchini fritters.” The Greek word is a mouthful, and many diners won’t attempt to say the name of this dish, and instead just point to the menu. But take the opportunity to learn a little Greek: “kolokythi” (zucchini) plus “keftedaki” (meatball). No matter how you say it (or not!), it’s one of our favorites—light zucchini fritters with a crunchy exterior and a sweet, creamy inside.

Tips for Gathering Ingredients for Greek Zucchini Fritters (Kolokythokeftedes) 

I first tasted this dish in Santorini, where the rich volcanic soil of the Greek island makes for superb zucchini and tomatoes. If you can use in-season farmers’ market vegetables, the dish will be at its peak, but grocery-store zucchini will get you most of the way there. If you can’t find Kefalograviera cheese at the store, Manchego cheese can be substituted; just add a pinch more salt as Manchego is less salty than Kefalograviera.

Print
clock clock iconcutlery cutlery iconflag flag iconfolder folder iconinstagram instagram iconpinterest pinterest iconfacebook facebook iconprint print iconsquares squares iconheart heart iconheart solid heart solid icon
A plate of Greek Zucchini fritters with a hefty dish of yogurt sauce with capers

Greek Zucchini Fritters (Kolokythokeftedes)


  • Author: José Andrés
  • Yield: 16 fritters 1x

Description

Don’t let the name fool you – they’re easier to make than they are to say.


Ingredients

Scale

For the caper-yogurt sauce

  • 2/3 cup Greek yogurt
  • 1 tsp caper brine, plus 1 tbsp capers
  • ¼ tsp orange blossom water
  • Pinch kosher salt
  • 1/4 tsp dried mint
  • Extra-virgin olive oil

For the fritters

  • 2 cups shredded zucchini
  • 3 scallions, thinly sliced
  • 1 tbsp chopped parsley
  • 2 tsp chopped mint
  • 1 tsp dried oregano
  • 1/3 cup panko bread crumbs
  • 2 ounces Kefalograviera cheese, grated or shredded
  • 2 tbsp all-purpose flour
  • ¼ tsp freshly ground white pepper
  • ½ tsp kosher salt 2 large egg whites
  • 2 tbsp canola oil, plus more if needed


Instructions

For the caper-yogurt sauce

  1. To make the sauce, whisk together the yogurt, caper brine, orange blossom water, 2 teaspoons of water, and a pinch of salt in a mixing bowl until smooth. If the sauce is too thick, add another teaspoon of water. Cover and refrigerate until ready to use.

For the fritters

  1. For the fritters, stir together the zucchini, scallions, parsley, mint, oregano, panko, cheese, flour, pepper, and salt in a large bowl.
  2. Whip the egg whites in a medium bowl until firm peaks form, then fold into the zucchini mixture.
  3. Heat about 2 tablespoons of canola oil in a large nonstick sauté pan over medium-high heat. Spoon 1 heaping tablespoon of zucchini batter onto the hot pan to form each fritter, using a spoon to pat them out to about 2 inches wide, and cook, turning once, until nicely browned, about 1 to 2 minutes per side. Transfer the fritters to a paper-towel-lined plate to drain.
  4. Continue with the remaining batter, being careful not to crowd the pan, until you have 16 fritters. If you need to add a bit more oil to the pan, be sure to let it get hot before adding more batter.
  5. To serve, remove the caper-yogurt sauce from the refrigerator, give it a good stir, then spread it in a shallow serving bowl set on a serving platter. Top the sauce with the whole capers, sprinkle with dried mint, and drizzle with a little olive oil. Arrange the fritters around the sauce.

Zaytinya by José Andrés. Copyright © 2024 by José Andrés Media. Photography © 2024 by Thomas Schauer. Excerpted by permission of Ecco, an imprint of HarperCollins Publishers.

Subscribe to TABLE Magazine’s print edition

Create a free account, or log in.

Gain access to read this content, plus limited free content.

Yes! I would like to receive new content and updates.

Table Magazine wants to know your location.

TABLE Magazine operates regional sites - Knowing your location helps us route you to the appropriate site for the best experience.