Home Blog Page 76

Bruschetta with Crushed Peas and Smoked Salmon

0
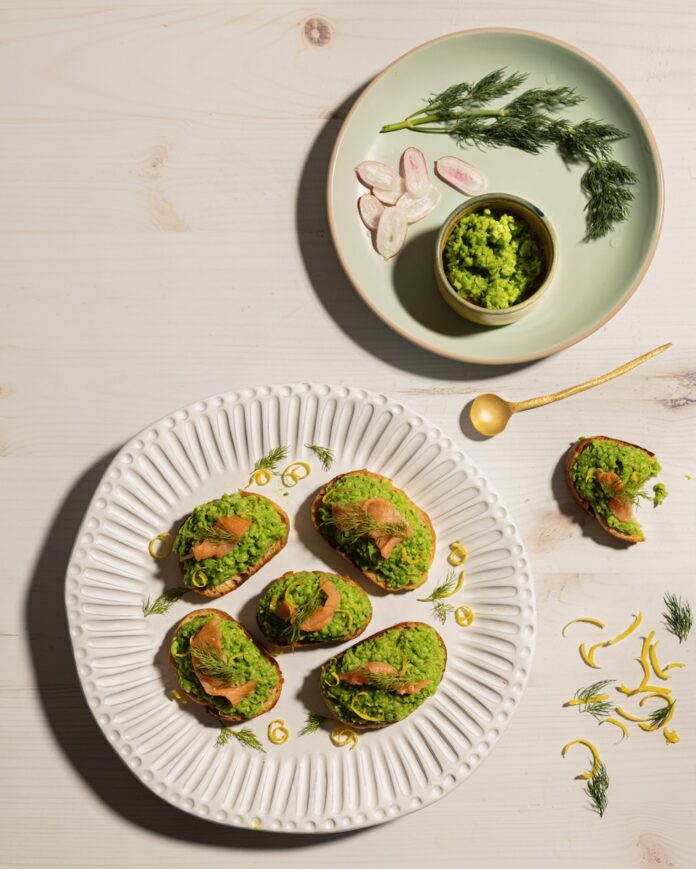
A white plate holds a pea puree bruschetta with smoked salmon on top as a green plate off to the side holds a small bowl of the pea purree.

Whenever the warm weather comes peeking through, this Bruschetta with Crushed Peas and Smoked Salmon is what you’ll want handy. Here’s a lovely little tidbit dressed in green, pink, and white. The hints of dill, lemon, and olive oil really elevate the peas without masking their simple sweetness. The smoked salmon adds a delicious counterpoint to this easy-to-make dish. If you pair these bruschetta with Gruet’s sparkling Brut Rosé and a fresh farmers’ market salad, you have a lovely warm weather dinner.

Why Blanch the Peas for This Bruschetta?

There are two main reasons why we choose to blanch peas in this Bruschetta with Crushed Peas and Smoked Salmon recipe. The first is to preserve their vibrant green color. The process of blanching (cooking vegetables in boiling water before immediately plunging them into cold water) helps them retain the same color you see prior to cooking. The second reason to blanch your peas is to keep a firm texture and natural flavor when in the food processor. Rather than letting your peas turn into a mushy mess, blanching prior makes sure it all blends nicely since it hydrates the starch in them.

Print
clock clock iconcutlery cutlery iconflag flag iconfolder folder iconinstagram instagram iconpinterest pinterest iconfacebook facebook iconprint print iconsquares squares iconheart heart iconheart solid heart solid icon
A white plate holds a pea puree bruschetta with smoked salmon on top as a green plate off to the side holds a small bowl of the pea purree.

Bruschetta with Crushed Peas and Smoked Salmon


  • Author: Cheryl Alters Jamison
  • Yield: About 18 Bruschetta 1x

Description

Bites full of nutritious sweet green peas and savory smoked salmon.


Ingredients

Scale
  • Water 
  • 2 cups peas 
  • 1 tbsp extra-virgin olive oil 
  • 1 tbsp minced fresh dill 
  • Minced zest of 1 small lemon and 1 to 2 tsp lemon juice 
  • Salt and white pepper 
  • 1 baguette, sliced into rounds about 1/3 inch thick, toasted 
  • 2 to 3 oz cold-smoked salmon or nova, sliced in strips about ½ inch thick 
  • Tiny fresh dill sprigs 


Instructions

  1. Prepare a large bowl about half full of icy cold water and reserve it.  
  2. Heat a saucepan with about 1 quart of water over high heat. Add the peas and blanch 1 minute. Drain and transfer peas to the bowl of cold water, adding a handful of ice cubes to it at the same time.  
  3. When cool, drain the peas and transfer them to a food processor. Add the oil, dill, lemon zest and 1 teaspoon of lemon juice. Puree with a few pulses, but leave some texture. Add salt and white pepper to taste, and more lemon juice if needed to balance the flavor. 
  4. Mound about 1 generous rounded tablespoon of the pea mixture on each baguette slice. Roll the salmon slices into curlicues and place one or 2 on top of each bruschetta. Top with a dill sprig and serve right away. 

Story and Recipe by Cheryl Alters Jamison
Styling by Julia Platt Leonard
Photography by Tira Howard

Subscribe to TABLE Magazine’s print edition.
Chilled Pea Soup with Mint

0
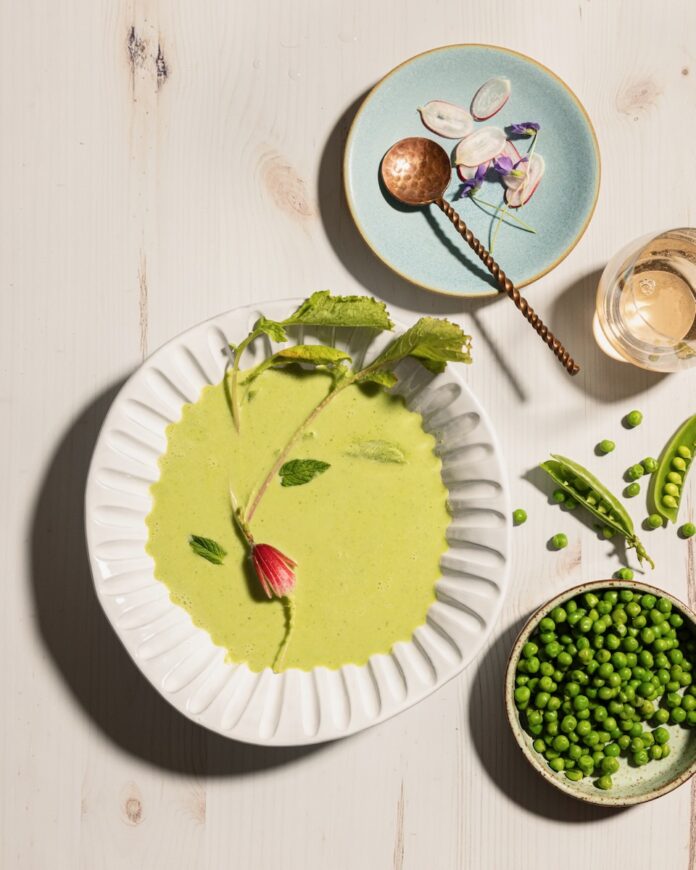
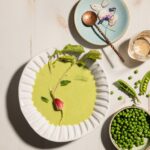
A white bowl holds a Chilled Pea Soup with radish and mint garnishes as a bowl of peas sits off to the right.

Cool soups usher in the warm months ahead and this Chilled Pea Soup with Mint is here to get you through the season. The mint mates well with the peas, as well as reinforces the soup’s striking emerald color that’ll catch anyone’s eye. This recipe is the perfect prepare-ahead starter for spring lunch or dinner. Plus, it’s full of nutrients due to the fiber, vitamin A, and vitamin K within peas.

What’s the Difference Between Sugar Snap Peas and Shelled Peas

Sugar snap peas and shelled peas start to differ when looking at their flavor and texture. Shelled peas usually have a tender, sweet inside. They carry a pure, fresh flavor and soft or yielding texture. Sugar snap peas on the other hand come in a crisp, almost crunchy pod with a slightly sweeter, more vibrant flavor than shelled peas. Once you pop out the sugar snap peas, the tender sweetness immediately sets them apart. Their contrast makes them a great pair for this soup but you can always stick to one or the other as well.

Print
clock clock iconcutlery cutlery iconflag flag iconfolder folder iconinstagram instagram iconpinterest pinterest iconfacebook facebook iconprint print iconsquares squares iconheart heart iconheart solid heart solid icon
A white bowl holds a Chilled Pea Soup with radish and mint garnishes as a bowl of peas sits off to the right.

Chilled Pea Soup with Mint


  • Author: Cheryl Alters Jamison
  • Yield: Serves 4-6 1x

Description

Chilled soup under a bright and shining sun is the best way to welcome spring.


Ingredients

Scale
  • 1 tbsp unsalted butter
  • 3 to 4 green onions, chopped with all white and unwilted green parts
  • 1 lb sugar snap peas in the pod, tipped and stringed, or 2 cups shelled peas, fresh or frozen, or a combination
  • 3 cups vegetable stock or water
  • 1 cup plain full-fat Greek yogurt
  • 2 tbsp minced fresh mint
  • Salt and white pepper
  • 4 long mild radishes, such as French Breakfast radishes, thinly sliced lengthwise, to garnish
  • Fresh mint sprigs or pea shoots or both, to garnish


Instructions

  1. Melt the butter in a medium saucepan over medium heat. Stir in the green onions and sauté just until wilted, about 2 minutes. Add the peas and continue cooking until they just begin to wilt, a couple of additional minutes.
  2. Pour in the stock, cover, and cook until the peas are tender, 5 to 10 additional minutes, depending on whether the peas are in the pod or shelled. Nibble on one to check if done.
  3. Cool the mixture for at least 5 minutes, then spoon it into a blender and add the yogurt and mint. Cover the blender firmly and puree until very smooth.
  4. Refrigerate the soup for at least 30 minutes and up to several hours, covered. (The soup remains tasty later but the verdant green color begins to fade.) Season with salt and white pepper.
  5. Serve chilled, adding dashes of cold water if the soup doesn’t spoon easily. Add curlicues of radish along with mint sprigs or pea tendrils, or both, and serve.

Story and Recipe by Cheryl Alters Jamison
Styling by Julia Platt Leonard
Photography by Tira Howard

Subscribe to TABLE Magazine’s print edition.
Pea Salad with Greens, Strawberries, and Mint Vinaigrette

0
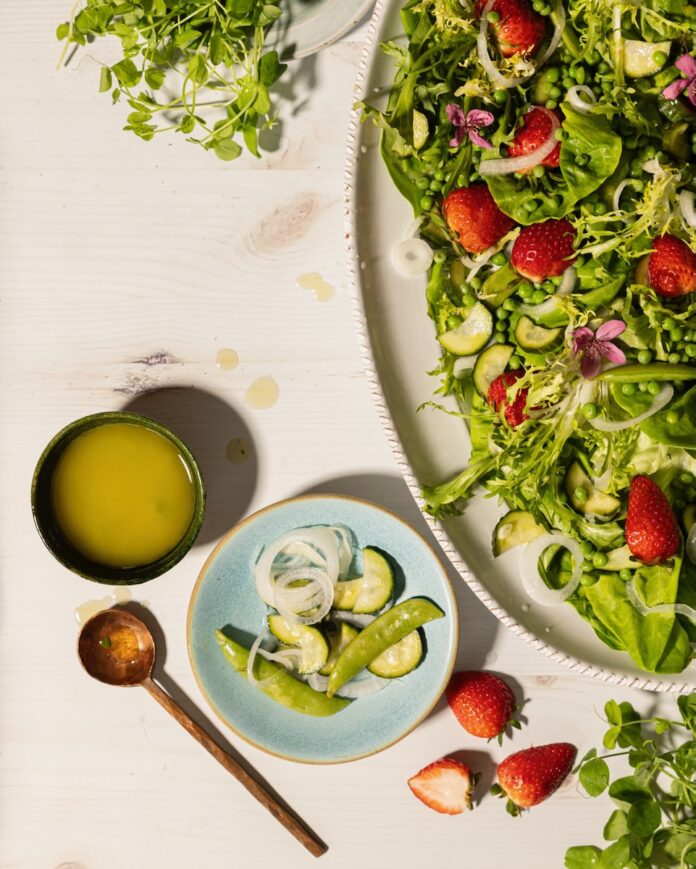
A giant platter of pea salad with strawberries, pickled veggies, and peas sits on a table beside a small bowl of dressing and a blue plate with vegetables on it.

This Pea Salad with Greens, Strawberries, and Mint Vinaigrette is a toss-up of bright tastes and textures. Some of the vegetables — the peas in pods, in particular — get a light pickling, which adds more interest to the final sweet and savory dish. Should some diced carrot, zucchini, or bell pepper make their way into the pickling … you may find some bespoke nuances you’ll want to keep in your pocket for future occasions.

How Long Should You Pickle the Vegetables in This Pea Salad?

For our Pea Salad recipe, you’re only going to want to give your vegetables a quick pickle. Both sugar snap peas and cucumbers are two vegetables that since they’re so delicate, could soften too much and lose their crunch. Therefore, a quick pickle is going to be better for your productivity and your ingredients. You should only leave your veggies in the pickling liquid at room temperature for a few minutes before moving the concoction into the refrigerator. Thankfully, since we’re only doing a quick pickle, you only need to leave the jar of pickled vegetables in the refrigerator for about an hour. This gives your ingredients enough time to get that briney flavor without compromising the texture.

Print
clock clock iconcutlery cutlery iconflag flag iconfolder folder iconinstagram instagram iconpinterest pinterest iconfacebook facebook iconprint print iconsquares squares iconheart heart iconheart solid heart solid icon
A giant platter of pea salad with strawberries, pickled veggies, and peas sits on a table beside a small bowl of dressing and a blue plate with vegetables on it.

Pea Salad with Greens, Strawberries, and Mint Vinaigrette


  • Author: Cheryl Alters Jamison
  • Yield: Serves 6

Description

Pickled vegetables in a salad? We promise it’s more delicious than you think!


Ingredients

Scale

For the pickled vegetables:

  • About 6 oz sugar snap peas in the pod
  • About 6 oz purple-hulled sugar snap peas, snow peas, or additional sugar snap peas in the pod
  • ½ medium cucumber, halved lengthwise, seeded, and cut in thin half moons
  • ½ small sweet onion, sliced very thin
  • 1 cup white vinegar
  • 1 tsp salt
  • ½ cup water
  • ½ cup sugar

For the dressing:

  • ¼ cup vegetable oil
  • ¼ cup extra-virgin olive oil
  • 3 tbsp white wine or champagne vinegar
  • 2 tbsp chopped fresh mint
  • 1 tsp granulated sugar
  • 1 tsp Dijon mustard
  • ½ tsp salt

For the salad:

  • 1 cup shelled fresh peas
  • 2 to 3 large handfuls mâche or torn butter lettuce
  • 1 pint fresh strawberries, hulled and halved
  • Pea tendrils, optional


Instructions

For the pickled vegetables:

  1. About an hour before you plan to serve the salad, combine all of the peas in the pod, onion, and cucumber in a heatproof bowl.
  2. In a small saucepan, bring the vinegar, water, sugar, and salt to a boil. Pour the hot liquid over the vegetables. Let stand a few minutes at room temperature, then refrigerate the mixture.

For the dressing:

  1. Combine the oils, vinegar, mint, sugar, mustard, and salt in a small covered jar.

For the salad:

  1. To assemble the salad, toss the shelled peas with about one-quarter of the dressing. Toss the mâche with another one-quarter of the dressing. Arrange both on a large platter or on individual salad plates.
  2. Drain the pickled vegetables and scatter them over the greens and peas. Tuck strawberries around the other ingredients. Add pea tendrils too, if using. Drizzle the salad with more dressing and serve.

Story and Recipe by Cheryl Alters Jamison
Styling by Julia Platt Leonard
Photography by Tira Howard

Subscribe to TABLE Magazine’s print edition.
Pea Pasta Primavera

0
In a large steel pot sits a Pea Pasta Primavera with peas and other ingredients surrounding the pot on a white table.

Manhattan’s legendary Le Cirque restaurant invented this Pea Pasta Primavera back in the mid-1970s. It’s refreshingly retro, both elegant and easy to assemble, at least after you lightly cook the vegetables, which can also be done ahead. A chilled Viognier or Sancerre would pair well with this delicious pasta. Be sure to invite some friends over because you’re definitely going to have some leftovers.

What is Pasta Primavera?

Pasta primavera is a light but nutritious pasta dish that celebrates the fresh flavors of spring vegetables. Typically, it features seasonal produce like asparagus, peas, zucchini, carrots, and bell peppers, though we put extra emphasis on the peas in our recipe. All these delicious veggies get lightly sautéed and tossed with pasta in a simple sauce. This particular sauce can range from a light olive oil and garlic dressing to a creamy tomato or vegetable broth-based sauce. Often, you’ll see fresh herbs like basil, parsley, or oregano as an extra layer of flavor. The dish really is a fresh, colorful, and healthy approach to pasta, so it’s great as a weeknight dinner or special warm weather meal.

Print
clock clock iconcutlery cutlery iconflag flag iconfolder folder iconinstagram instagram iconpinterest pinterest iconfacebook facebook iconprint print iconsquares squares iconheart heart iconheart solid heart solid icon
In a large steel pot sits a Pea Pasta Primavera with peas and other ingredients surrounding the pot on a white table.

Pea Pasta Primavera


  • Author: Cheryl Alters Jamison
  • Yield: Serves 8

Description

The colors and textures of this pasta dish make it appealing to the eye and the stomach.


Ingredients

Scale
  • lbs mixed spring vegetables, such as sugar snap-pea pods, snow peas, small broccoli florets, and pencil-thin asparagus, cut into 2– to 3-inch lengths
  • ¼ cup olive oil
  • 1 small leek, cut in thin matchsticks
  • 1 garlic clove, minced
  • 6 oz small morel mushrooms, halved, or button mushrooms, sliced thin
  • 1 cup (8 oz) crème fraîche
  • 1 cup (8 oz) mascarpone cheese
  • 1 lb fettucine (a mix of plain fettucine with either a spinach or tomato variety adds even more color)
  • Salt
  • 1 cup fresh shelled peas
  • ½ cup freshly grated Parmesan cheese
  • ¼ cup minced fresh basil
  • ½ cup pine nuts


Instructions

  1. Prepare a large bowl about half full of icy cold water and reserve it.
  2. Over boiling water, steam each of the mixed vegetables separately just until tender. Each will cook only briefly, but the cooking times will vary a bit.
  3. When cooked, plunge each vegetable into the bowl of cold water and let it sit, adding a handful of ice cubes each time you add a new vegetable.
  4. When all the vegetables have been steamed and chilled, drain them well and set them aside at room temperature. These steps can be taken earlier in the day that you plan to serve the pasta, refrigerating the vegetables in the meantime. Let them return to room temperature before proceeding.
  5. Warm the oil in a large saucepan over medium heat. Add the leek and sauté until soft, about 5 minutes. Stir in the garlic and mushrooms, and cook until the mushrooms are limp, about 5 additional minutes.
  6. Stir in the crème fraîche and mascarpone, and when they’ve melted into a smooth sauce, remove the pan from the heat. (The sauce can be made ahead, covered, and refrigerated. Reheat before proceeding.)
  7. Cook the pasta in boiling salted water according to the package directions. Drain it and immediately toss it together in a large bowl with the sauce. When the pasta is well coated, mix it with the steamed vegetables, and the shelled peas (which will cook lightly from the residual heat). Arrange the pasta on a large platter or shallow serving bowl, and scatter with parmesan, basil, and pine nuts. Serve warm.

Story and Recipe by Cheryl Alters Jamison
Styling by Julia Platt Leonard
Photography by Tira Howard

Subscribe to TABLE Magazine’s print edition.
Green Goddess Pea, Bacon, and Cheddar Salad 

0
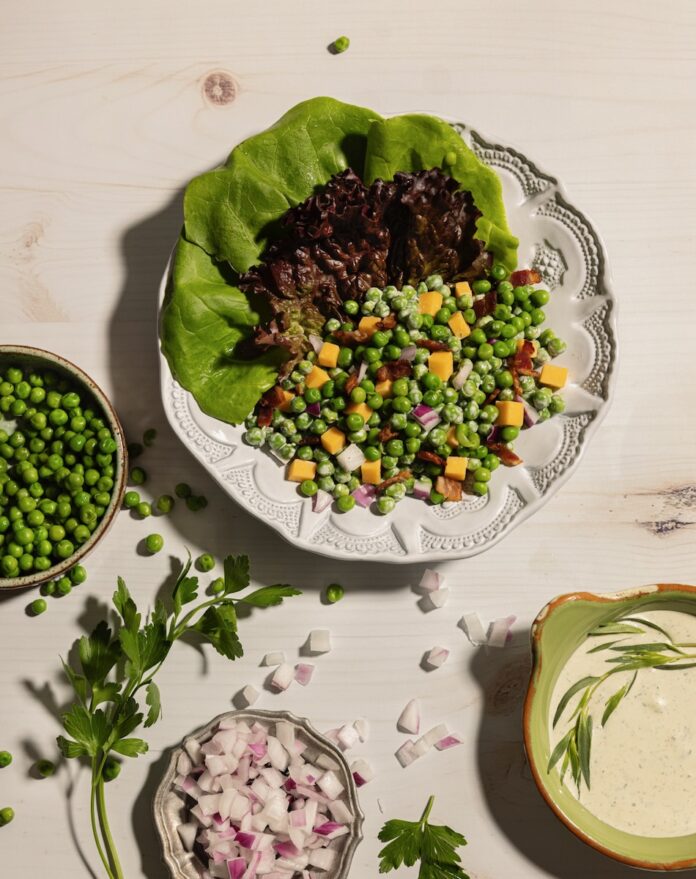
A white bowl holds butter lettuce leaves with plenty of peas, cheddar cheese, and bacon. Off to the bottom right corner sits a bowl of green goddess dressing.

Here’s a hearty Green Goddess Pea, Bacon, and Cheddar Salad that makes a great side with the season’s first grilled steaks, chicken, or burgers. This updates an American classic, which typically tosses the vegetable mixture with mayonnaise and not much else. Substituting an herb-filled green goddess dressing heralds spring and adds more flavor nuances to the salad. Plus, you can save this green goddess dressing recipe for another time with other salads or vegetables. So what are you waiting for? Toss up this Green Goddess Pea Salad the next time you’re trying to upgrade your meal.

What is Green Goddess Dressing in This Pea Salad?

Green goddess dressing is a creamy and herbaceous sauce that comes from the 1920s. It gets its signature green hue from a blend of fresh herbs, typically including parsley, tarragon, chives, and sometimes chervil. These herbs are emulsified with mayonnaise, sour cream, or yogurt. From time to time you will also see anchovy paste, lemon juice, and garlic in the recipe to enhance its depth and tangy brightness. After all the hard work you get a lush, flavorful dressing that’s both rich and refreshing.

Print
clock clock iconcutlery cutlery iconflag flag iconfolder folder iconinstagram instagram iconpinterest pinterest iconfacebook facebook iconprint print iconsquares squares iconheart heart iconheart solid heart solid icon
A white bowl holds butter lettuce leaves with plenty of peas, cheddar cheese, and bacon. Off to the bottom right corner sits a bowl of green goddess dressing.

Green Goddess Pea, Bacon, and Cheddar Salad 


  • Author: Cheryl Alters Jamison
  • Yield: Serves 6

Description

Green goddess dressing and green peas? Talk about a vibrant recipe!


Ingredients

Scale

For the green goddess dressing:

  • ½ cup mayonnaise
  • ½ cup sour cream
  • 1/3 cup chopped flat-leaf parsley
  • 2 tbsp chopped tarragon
  • 1 green onion, white and green parts chopped
  • 1 to 2 anchovy fillets or salt to taste
  • 1 tbsp tarragon vinegar or white wine vinegar
  • 1 tbsp water
  • ½ tsp granulated sugar

For the salad:

  • 4 cups fresh shelled peas
  • 6 oz medium to sharp cheddar cheese, cut into tiny cubes
  • 4 to 5 crisp cooked bacon slices, crumbled
  • ½ cup finely diced red onion, soaked in cold water for 15 minutes, then drained and water discarded
  • Butter lettuce leaves, optional


Instructions

For the green goddess dressing:

  1. Combine the dressing ingredients in a blender. Puree until smooth, adjusting salt if needed.

For the salad:

  1. In a large bowl, stir together peas, cheese, bacon, and onion. Spoon in two-thirds of the dressing and toss lightly. The peas will soften somewhat while sitting in the dressing.
  2. Refrigerate for at least 30 minutes and up to 12 hours before serving. Cover and refrigerate remaining dressing.
  3. Serve chilled, mounded onto lettuce leaves if you wish. Spoon a bit more dressing on each portion if you wish.

Story and Recipe by Cheryl Alters Jamison
Styling by Julia Platt Leonard
Photography by Tira Howard

Subscribe to TABLE Magazine’s print edition.

Haitian Pork Griot

0
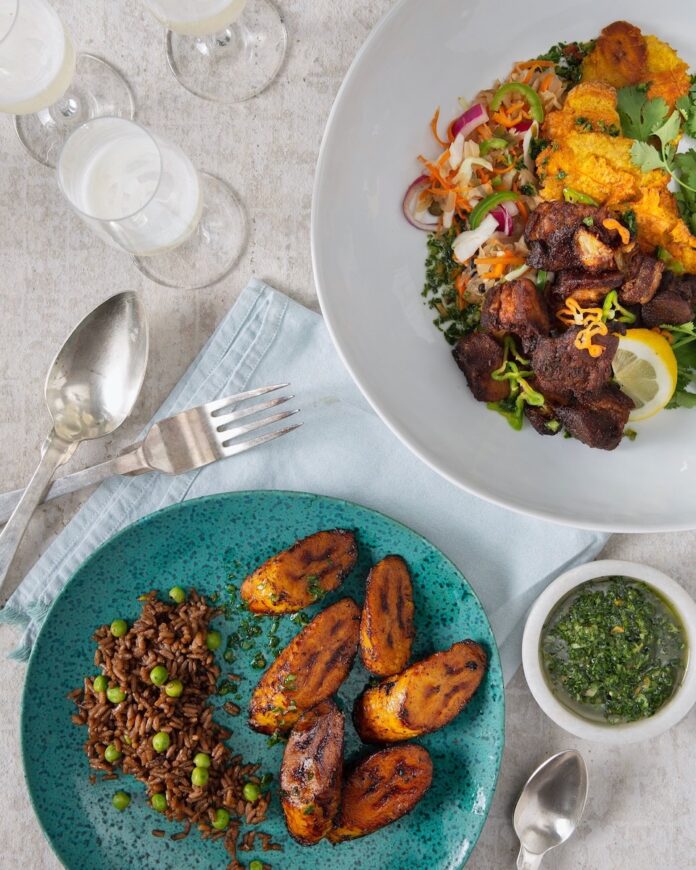
A plate of Haitian pork griot on a white background.

Haitian Pork Griot is a fun family favorite that you find at most gatherings with other delicious fried fritay (finger food) assortments such as plantain, banan péze, goat, or beef. Pork griot is typically deep-fried, but can be broiled for a still-charred, less messy, and always tasty meal. For the non-pork eaters, follow the same routine with goat or turkey. Chef Claudy Pierre’s delectable vision here ensures that not a nite will be left at the end of your party.

History of Haitian Pork Griot

Sometimes you’ll see griot spelled as griyo, but no matter how you spell it, it’s the same delicious dish. A griot is also a name for a traveling poet or storyteller in West African traditions, which is a fitting name for this dish that is a Haitian family tradition. The origins of griot go back to the African diaspora, where enslaved Africans brought their culinary traditions to Haiti. The name “griot” comes from the French word “grillage,” meaning “grilled” or “roasted,” referencing the preparation method used to cook the pork. As Haiti fought for independence, griot became a symbol of the country’s resistance and cultural resilience.

Print
clock clock iconcutlery cutlery iconflag flag iconfolder folder iconinstagram instagram iconpinterest pinterest iconfacebook facebook iconprint print iconsquares squares iconheart heart iconheart solid heart solid icon
A plate of Haitian pork griot on a white background.

Haitian Pork Griot


  • Author: Claudy Pierre

Description

A deliciously shareable Haitian dish.


Ingredients

Scale

For the griot: 

  • 1 Scotch bonnet or habanero chile
  • Epis (Haitian seasoning base, see below)
  • 1 medium onion, diced
  • 1 green pepper, diced
  • ¼ cup parsley + more for serving
  • 1 tbsp salt
  • 1 tbsp ground black pepper
  • 6 sprigs fresh thyme
  • 2 garlic cloves, finely chopped
  • ¼ cup cider vinegar
  • Juice of 1 orange
  • Juice of 1 lemon
  • Juice of ½ lime
  • 1 tbsp Worcestershire sauce
  • 3 lb pork shoulder, cut into 1 1/2-inch chunks
  • 2 tbsp coconut oil or olive oil, more as needed

For the epis:

  • 10 parsley sprigs
  • 2 celery stalks
  • 2 cups cilantro
  • 2 green bell peppers
  • 3 scallions
  • 2 chicken bouillon cubes
  • 5 thyme sprigs
  • 3 garlic heads
  • Juice of 1 lime
  • ¼ cup olive oil
  • 1 tbsp vinegar


Instructions

For the griot:

  1. Quarter and chop the chiles then add epis, onion, bell pepper, parsley, salt, pepper, thyme, and garlic into a heavy pot with a lid. Mix in vinegar, juices, and Worcestershire sauce. Add the pork. Cover pot and refrigerate overnight.
  2. The next day, remove from the fridge at least no more than 3 hours before cooking. Preheat oven to 325 degrees. On stovetop, heat on high and bring to a simmer then cover and transfer to the oven. Cook, stirring occasionally, until meat is very tender, about 1 1/2 to 2 hours.
  3. Remove meat from the pot with slotted spoon, allowing excess liquid to drip back into the pot. Pick any veggies and herbs off the meat, and then transfer meat to a baking sheet. Drizzle meat with 2 tablespoons oil and a pinch of salt and toss to coat. To make a sauce, strain cooking liquid through a mesh sieve to remove solids. Return sauce to pot and simmer over high heat until reduced by half, 25 to 30 minutes.

I love to deep-fry the griot, but it gets pretty messy, so here is the broil method:

  1. Fire-up the broiler and then add the meat, tossing occasionally until meat is evenly browned, about 5 to 10 minutes. To serve, drizzle pork with oil, crown with sauce, and garnish with parsley and thyme. Serve with rice and a side of pikliz.

For the epis:

  1. Blend all ingredients in a blender or food processor. Store in mason jars and refrigerate. Great for marinating and adding life to any savory dish, and also can be used as a dipping sauce.

Recipe by Claudy Pierre
Styling by Rafe Vencio
Photography by Dave Bryce

Subscribe to TABLE Magazine’s print edition.
Haiti’s Famous Soupe Joumou

0
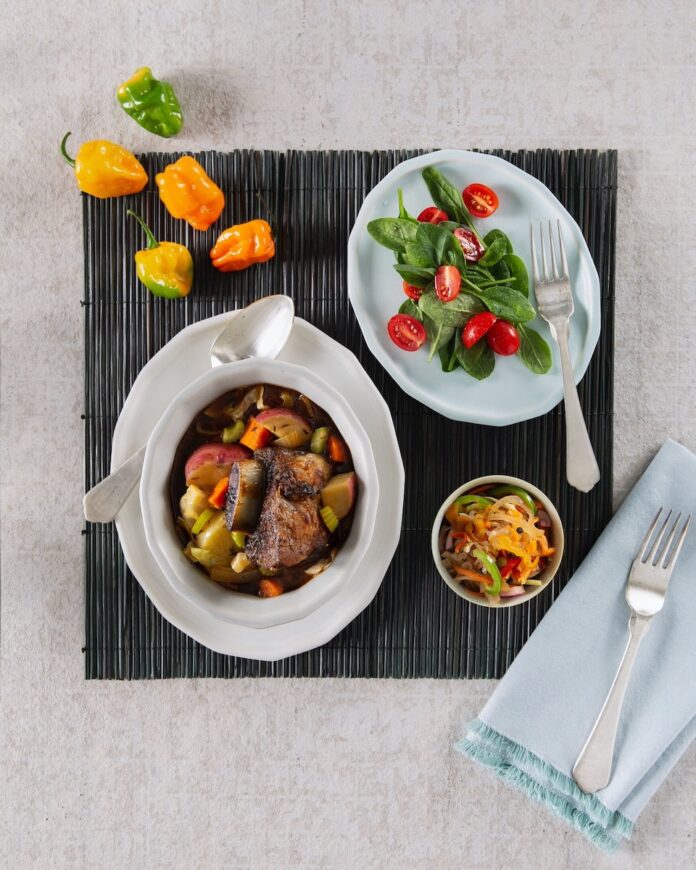
A bowl of soupe joumou on a tablecloth on a white background.

Soupe Joumou is Haiti’s most popular and symbolic soup. The resilient people of Haiti decided to celebrate its independence by eating the soup French deemed “upper class” the very minute Jean-Jacques Dessaline abolished slavery and declared Haiti independent from its French rulers.
The preparation of Soupe Joumou begins with simmering beef, squash, and a medley of fresh vegetables such as carrots, celery, and onions. The result is a comforting, savory broth that’s both nourishing and satisfying. Traditionally, it’s served with pasta, potatoes, and sometimes even dumplings, adding texture and substance to the dish. The flavors of garlic, thyme, and Scotch bonnet peppers enhance the taste, making each spoonful a true taste of Haiti. Sip slowly and savor the flavors that are brought to us by Chef Claudy Pierre.

About Soupe Joumou

Beyond its culinary excellence, Soupe Joumou holds immense cultural and historical significance. It was once a dish reserved for the French colonizers, but after the Haitian Revolution, the newly freed Haitian people adopted it as a symbol of their independence and resilience. The soup represents freedom, strength, and the triumph of Haitian culture over adversity. Whether you’re preparing it for a holiday gathering or just craving a bowl of comforting soup, Soupe Joumou brings people together. This flavorful Haitian classic has earned its place as a symbol of pride and celebration. Make sure to try this rich, flavorful soup, and experience a taste of Haitian heritage in every bite.

Print
clock clock iconcutlery cutlery iconflag flag iconfolder folder iconinstagram instagram iconpinterest pinterest iconfacebook facebook iconprint print iconsquares squares iconheart heart iconheart solid heart solid icon
A bowl of soupe joumou on a tablecloth on a white background.

Haiti’s Famous Soupe Joumou


  • Author: Claudy Pierre

Description

The national dish of Haiti.


Ingredients

Scale
  • 1 lb stew meat (beef, pork, or shrimp)
  • Epis (recipe on tablemagazine.com)
  • ½ to 1 lb butternut squash
  • 2 lb pumpkin
  • Salt and black pepper
  • Olive oil
  • 10 cups vegetable, beef, or chicken stock
  • 2 tbsp tomato paste
  • 1 lb cabbage, finely chopped
  • 2 carrots, peeled
  • 2 celery stalks
  • 1 cup onion, diced
  • 2 turnips, peeled and diced
  • 2 potatoes, cubed
  • 1 cup tomato sauce
  • 5 parsley sprigs
  • 1 Scotch bonnet pepper
  • 1 lb pasta noodles


Instructions

  1. Marinate the stew meat overnight in epis seasoning base.
  2. Season butternut squash and pumpkin in salt, pepper, and olive oil, and roast for 45 minutes at 300 degrees.
  3. Puree the squash and pumpkin in vegetable stock.
  4. In a stockpot, add more oil, tomato paste, and meat and brown on all sides until caramelized. Cover and continue cooking 20 minutes over medium heat.
  5. Next, add 3 cups of water and the pureed squash and pumpkin; bring to a boil.
  6. Add the vegetables, tomato sauce, parsley, and top with the Scotch bonnet pepper, bring to a boil then simmer for 1 hour. (Don’t forget to remove the whole Scotch bonnet before continuing the recipe.) Now add the pasta and cook until soft.
  7. Serve with toasted Haitian bread and share with close family and friends.

Recipe by Claudy Pierre
Styling by Rafe Vencio

Subscribe to TABLE Magazine‘s print edition.

Pasta e Ceci (Pasta with Chickpeas)

0
A bowl of Pasta e Ceci sits on a wood table with a spoon inside the bowl and steam riding upwards.

Pasta e Ceci is a popular dish in many regions of Central and Southern Italy. The name simply translates to pasta with chickpeas. As with many other traditional recipes, there are countless variations, and almost every family has their own. The version I suggest here is characterized by the use of broken fettuccine (or other egg pasta such as tagliatelle), and the aroma of rosemary and extra virgin olive oil. You’ll also commonly find this recipe in many areas of Tuscany.

What’s the History of Pasta e Ceci?

Pasta e Ceci with its humble recipe has a humble history as well in the cucina povera, or “poor kitchen,” traditions of Italy. Its origins trace back to ancient Roman times where chickpeas were a staple food. Because this ingredient was readily available and inexpensive, recipes using chickpeas became a must for the Romans. Over centuries this simple combination of pasta and chickpeas kept evolving. Now it’s seen as a comforting and nourishing meal. Along with its popularity, regional variations came about with some areas adding tomatoes, garlic, or rosemary. Some regions also thickened the broth with a soffritto or a roux to make something like a stew.

Print
clock clock iconcutlery cutlery iconflag flag iconfolder folder iconinstagram instagram iconpinterest pinterest iconfacebook facebook iconprint print iconsquares squares iconheart heart iconheart solid heart solid icon
A grey bowl of Pasta e Ceci sits on a black table with pieces of bread and pasta scattered around the bowl.

Pasta e Ceci (Pasta with Chickpeas)


  • Author: Sara Ghedina
  • Yield: Serves 4

Description

The addition of chickpeas bulks up this pasta dish for a filling dinner.


Ingredients

Scale
  • 1/2 lb dried chickpeas
  • 23 garlic cloves
  • 2 tbsp extra virgin olive oil
  • 2 1/2 cups canned peeled cherry tomatoes
  • 2 rosemary sprigs
  • 1/4 tsp chili flakes (optional)
  • 5 oz egg fettuccine (you can use eggless pasta for a vegan version)
  • Salt and pepper to taste


Instructions

  1. Place the dried chickpeas in a bowl and cover with water. Let sit overnight to soften.
  2. The next day, drain and rinse them thoroughly, then place in a large pot with about 2 qt of water. Add a pinch of salt, cover with a lid, and cook at low heat until chickpeas are tender. It will take 2 to 3 hours. Stir from time to time and discard the foam if necessary.
  3. About halfway through the cooking time, remove 2 cups of chickpeas with a little bit of their cooking water and purée them with a blender. Place the mixture back in the pot and continue cooking.
  4. Meanwhile, heat 2 tbsp olive oil in a pan, add garlic cloves, rosemary sprigs and chili flakes if using. Sauté for 3 minutes, then add the canned cherry tomatoes. Gently crush them with a spoon, stir and cook at medium heat for about 10 minutes.
  5. Now discard the garlic cloves and pour the olive oil mixture into the pot with the chickpeas.
  6. Stir, add salt and pepper if needed, and continue cooking at low heat until chickpeas are tender.
  7. Break the dried fettuccine and place in the pot with the chickpea soup. Cook according to package instructions.
  8. Serve Pasta e Ceci in individual bowls, with a drizzle of olive oil and some grated Parmesan cheese on top.

Recipe, Story, Styling, and Photography by Sara Ghedina

Subscribe to TABLE Magazine’s print edition.
Potato and Sweet Pea Gnocchi 

0
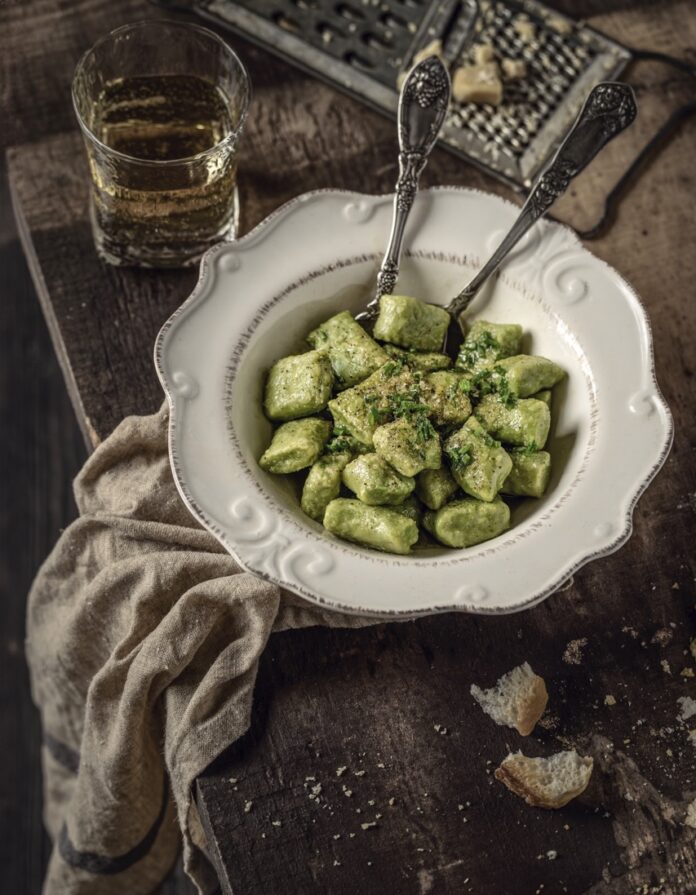
A white bowl of Potato and Pea Gnocchi with two forks in the bowl sits on a wood table.

This Potato and Sweet Pea Gnocchi recipe is a riff on classic gnocchi, with green peas added to the dough for a touch of color and a sweeter taste. The ingredients are simple and inexpensive, but the result is spectacular. These gnocchi are very versatile, and they pair well with any type of sauce, tomato or cream based, but I chose to dress them in the simplest way, using the classic combination of melted butter and grated Parmesan. Everyone will love this dish, both for the taste and for the color!

Tips for Making Potato Gnocchi From Scratch

Making homemade pasta may see like a difficult task but as long as you stick to the recipe and use these tips, your Potato and Sweet Pea Gnocchi will have delicious results. For successful homemade potato gnocchi, you want to prioritize using starchy potatoes. We also recommend cooking them whole to avoid excess moisture. Rice the potatoes through a potato ricer while they’re still warm for a smooth texture before incorporating flour sparingly to prevent a dense, tough result. You want to be careful to handle the dough gently, avoiding overworking it. When it finally comes time to cook your gnocchi, remove them as soon as they float in the boiling water and toss immediately with sauce to prevent sticking.

Print
clock clock iconcutlery cutlery iconflag flag iconfolder folder iconinstagram instagram iconpinterest pinterest iconfacebook facebook iconprint print iconsquares squares iconheart heart iconheart solid heart solid icon
A white bowl holds Potato and Pea Gnocchi in a green color with two forks sitting beside the bowl and bread sitting above it.

Potato and Sweet Pea Gnocchi 


  • Author: Sara Ghedina
  • Yield: Serves 6

Description

Become a homemade pasta expert with this easy gnocchi recipe.


Ingredients

Scale
  • 2 lb russet potato
  • 1 lb frozen sweet peas
  • 2 scallions
  • 1 tbsp extra virgin olive oil
  • 1 medium egg
  • 2 cups all-purpose flour (approx)
  • Salt and pepper to taste
  • 35 tbsp butter
  • Parmesan cheese to serve, as needed


Instructions

  1. Preheat the oven to 400°.
  2. Lightly oil the outside of the potatoes. Prick them a few times with a fork. Sprinkle with salt. Place them on a lined baking sheet and bake until tender, 45 minutes to 1 hour.
  3. While potatoes are baking, heat the olive oil in a pan, add the sliced scallions (white and light parts only), and cook for few minutes until they soften and become translucent.
  4. Add the frozen peas, season with salt and pepper and cook at medium heat until the peas are tender. If needed, add a few tbsp of water to prevent the peas from sticking to the pan.
  5. Place them in a blender and blend on high speed until the mixture is completely smooth, adding a bit more water if needed. Set aside.
  6. Remove the potatoes from the oven. While still hot, peel them and pass them through a potato ricer.
  7. Place riced potatoes in a large bowl and form a well in the center. Add the pea puree and the egg, and season with salt and pepper. Whisk it all together with a fork.
  8. Add the flour, slowly mixing it in until fully incorporated. The amount of flour will vary depending on the potatoes; you may need more or less than 2/3 cup.
  9. Place the dough on a flour-dusted board and knead it a few times. Cover it with a damp cloth to prevent it from drying out. Working with a small portion of dough at a time, roll it into a log about ¾” thick and cut out the gnocchi using a sharp knife.
  10. Place gnocchi on a baking tray or a large plate dusted with flour.
  11. Meanwhile, bring a large pot of salted water to a boil and melt the butter in a large skillet over medium-high.
  12. Add gnocchi to the boiling water and cook until they rise to surface, about 2 to 3 minutes. Using a slotted spoon, transfer cooked gnocchi to the skillet with the melted butter, adding 2-3 tbsp of their cooking water to get a creamier sauce.
  13. Cook for about 1 minute, then transfer the gnocchi to individual serving bowls and generously sprinkle them with freshly grated Parmesan cheese. You may need to cook gnocchi in few batches, repeating the process for the sauce.

Recipe, Story, Styling, and Photography by Sara Ghedina

Subscribe to TABLE Magazine’s print edition.
Peas with Soffritto, Yogurt and Lemon

0
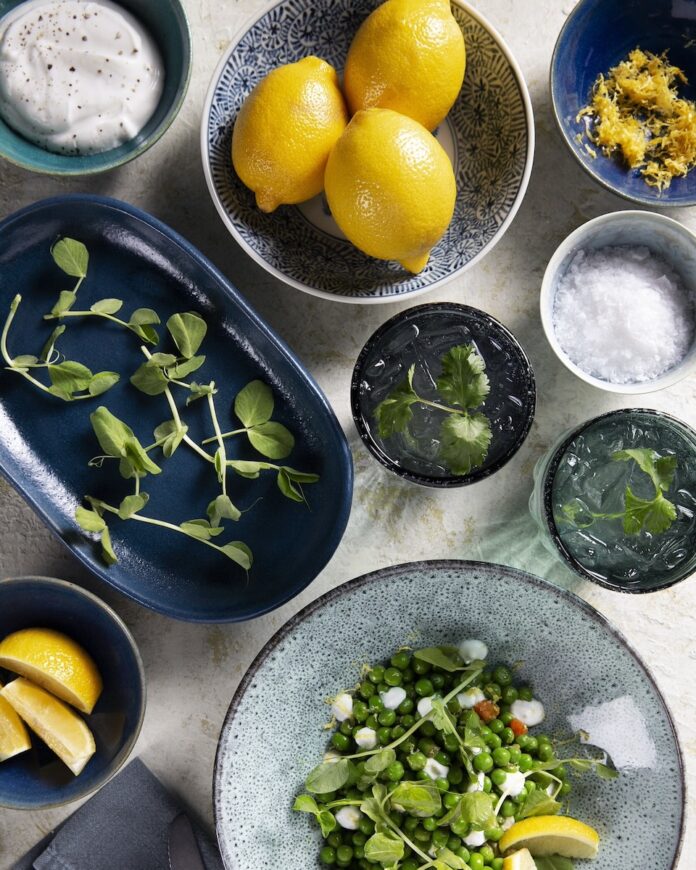
A set of plates of peas with soffritto.

Chef Curtis Gamble dazzled our palate with these English peas with soffritto, yogurt and lemon. They’re shown here with a gorgeous asparagus platter with soft boiled egg, buttermilk dressing, and sourdough croutons tossed in tarragon salsa verde. Maybe pair it with a Sweet Pea cocktail...

What is Soffritto?

The name “soffritto” comes from the Italian verb soffriggere, meaning “to sauté,” referring to the process of cooking the ingredients gently in olive oil or butter. Typically, soffritto is made in Italy from a combination of three key ingredients: onions, carrots, and celery. You finely chop these vegetables and sautée them together until they become tender and aromatic. In some variations, garlic, herbs like bay leaves or thyme, and even pancetta or prosciutto enhance the flavor. Incorporating soffritto into your cooking is an excellent way to add complexity and umami to your meals. Whether you’re making a hearty pasta sauce, a flavorful soup, or this peas with soffritto dish, soffritto is the secret ingredient that can take your cooking to the next level.

Print
clock clock iconcutlery cutlery iconflag flag iconfolder folder iconinstagram instagram iconpinterest pinterest iconfacebook facebook iconprint print iconsquares squares iconheart heart iconheart solid heart solid icon
A set of plates of peas with soffritto.

Peas with Soffritto, Yogurt and Lemon


  • Author: Curtis Gamble

Ingredients

Scale

For the peas:

  • 4 oz of Greek yogurt
  • 8 oz English peas, blanched
  • 2 tbsp soffritto (recipe follows)
  • 4 lemons
  • EVOO
  • Pea tendrils

Soffritto

  • 100 g celery
  • 100 g carrots
  • 200 g Spanish onion
  • 50 g garlic clove
  • EVOO, to cover


Instructions

  1. In small batches, pulse celery, carrots, onions, and garlic to a fine mince in a food processor. Combine in a narrow pot  and cover with olive oil and place over medium low heat.
  2. Gently cook until the olive oil is clean and most of the moisture has cooked off. Cool overnight in the refrigerator.
  3. Spoon several spoonfuls of yogurt on to a serving dish. In a mixing bowl add English peas, soffritto, zest and juice of 2 lemons and extra-virgin olive oil. Salt and pepper to taste and mix well. Spoon over yogurt, top with pea tendrils, and the zest of 2 lemons. Serve.

Recipe by Curtis Gamble
Photography by Dave Bryce

Subscribe to TABLE Magazine‘s print edition.

Create a free account, or log in.

Gain access to read this content, plus limited free content.

Yes! I would like to receive new content and updates.

Table Magazine wants to know your location.

TABLE Magazine operates regional sites - Knowing your location helps us route you to the appropriate site for the best experience.