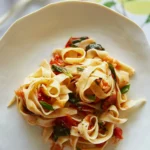
Let your happy hour take you somewhere sweet. This Tropical Mango Smoothie recipe is a fruity, island getaway that’s simple to make and calls for only fresh, ripe mango, a bit of simple syrup, and ice— that’s it! No yogurt, only real fruit, and completely dairy free. It’s a punchy, fun-to-make shake that can work as a smooth, healthy morning pick-me-up, or an evening unwinder enjoyed as a mocktail or cocktail when you add vodka or your favorite NA spirit. Just mix, blend, and you’ll be daydreaming your way into the tropics!
When is Mango Season?
Mango season typically spans across different months depending on the variety and region, but they are most abundant and at their peak sweetness during the spring and summer months. In warmer climates like Florida and Mexico, mango season can even begin as early as March and extend through September. It’s good to keep in mind though that different varieties ripen at different times. Types like Ataulfo (honey mangoes) peak in spring, while others like Tommy Atkins are better in early to mid summer. We also recommend shopping at your local market for the freshest fruit in your Tropical Mango Smoothie.
The texture of the pawpaw in this Sweet Bread recipe leads to a moist, custard-like bread reminiscent of bread pudding. As such, it’s delicious with a dollop of fresh whipped cream or our custard sauce.
What Are Pawpaws?
You may have known that pawpaws are a mango-like fruit native to North America, but did you know that they are also a very nutritious fruit option when it comes to mealtime? They are high in vitamin C, magnesium, iron, copper, and manganese with significant amounts of riboflavin, niacin, calcium, phosphorus, and zinc, and a good source of potassium and several essential amino acids.
Mature pawpaw fruit can grow up to six inches in length and resemble a bean-shaped mango with smooth skin that also changes from green to yellow as it ripens. Similar to bananas, dark flecks may appear and the skin may turn brown or even black when very ripe.
Their soft, mango-like texture make for a perfect ingredient in breads, too. Just make sure you let them ripen. Near-ripe fruit will keep up to two weeks in the refrigerator; let sit at room temperature to fully ripen before using.
This mango-esc fruit melds perfectly with a classic sweet bread recipe.
Ingredients
Scale
3 cups all purpose flour
1 tsp baking soda
¾ tsp salt
½ tsp ground cinnamon
½ tsp freshly ground nutmeg
3 eggs, slightly beaten
¾ cups sugar
1 cup lite unsweetened coconut milk (may substitute with ½ cup vegetable oil)
2 tsp vanilla extract
1½ to 2 cups mashed pawpaw pulp (can use frozen)
For the custard sauce:
1/8 cup sugar
3 egg yolks
1⁄2 cup skim milk
1⁄2 tsp vanilla extract
Instructions
Preheat oven to 350 degrees.
In a large mixing bowl, stir together the flour, baking soda, salt, cinnamon, and nutmeg. Make a well in the middle of the dry ingredients.
In a separate bowl, beat together the eggs and sugar. Stir in remaining ingredients until well mixed and into the center of the dry ingredients. Stir until incorporated and dry ingredients are moistened, but don’t over mix.
Pour batter into two greased medium-size loaf pans. Bake for 60-70 minutes, or until golden brown and set.
Remove and let cool 20 minutes before removing from pans. Slice and serve with fresh whipped cream or custard sauce.
For the custard sauce:
In a medium saucepan whisk together the egg yolks and sugar until creamy. Stir in the milk and vanilla.
Once all ingredients are combined, cook over low heat, stirring constantly, until the custard thickens and coats the back of a wooden spoon (approximately 7 minutes).
Serve warm or let cool, covered with plastic wrap, in the refrigerator.
Recipe by Local Goodness LLC Story by Rhonda Schuldt
“Bolognese Sauce originated in the region of Emilia-Romagna from the small town of Imola which is 21 miles southeast of Bologna. The recipe first appeared in an Italian cookbook in 1891,” says Yvonne Hennigan, creator of this Ragù recipe. This hearty sauce that uses fresh ground chuck creates a savory, meaty flavor that also perfectly suits pasta. Try it with fettuccini pasta or the variety of your choice and don’t forget the extra cheese on top.
Bolognese Sauce vs Ragù
Bolognese sauce is also referred to as ragù because ragù is a general Italian term for a meat-based sauce that is slowly cooked with pasta. The word itself is comes from the French word ragoût, which refers to a stew or dish where you slowly simmer ingredients for rich flavoring. While Bolognese is a very specific type of ragù from the city of Bologna, with its fine mince of beef (and sometimes pork), wine, milk or cream, and long simmering time, it falls under the overarching classification of a ragù. So, every Bolognese is a ragù, but not every ragù is a Bolognese.
Freshly grated Parmigiano-Reggiano cheese at the table
Instructions
For the bolognese:
Place oil, butter and chopped onion in a 5-quart enameled cast iron pot and turn the heat to medium. Cook and stir the onion until it has become translucent, then add the chopped celery and carrot. Cook for about 2 minutes, stirring the vegetables to coat them well. (In Italian, the combination of onion, celery and carrot is called soffritto, which means “to fry slowly.”)
Add the ground beef to the vegetables, add a large pinch of salt, and add a few grindings of pepper. Crumble the meat in the pot with a sharp edge spatula, stir well, and cook until the beef has lost its raw, red color. Add the milk and let it simmer gently, stirring frequently, until it has simmered away completely. Add a tiny grating (about 1/8 tsp.) of nutmeg and stir. Add the wine, let it simmer until it has evaporated, then add the tomatoes and stir through to coat all the ingredients well.
When the tomatoes begin to bubble, turn the heat down so the sauce cooks at a tiny simmer, with just a few bubbles breaking through to the surface. Cook for 3 hours, stirring occasionally.
If the ragu begins to dry out, add 1/2 cup of water when necessary to keep it from sticking. However, no water must be left in the bottom of the pot when the ragu is finished. Keep ragu warm and covered while preparing the pasta.
To prepare the pasta:
In a large 6- to 12-quart pot (do not use the strainer of a pasta pot), bring at least 6 quarts of water to a rapid boil. Add a large handful of salt to the boiling water. Add the fettuccini pasta to the boiling water and time for exactly 2 minutes! Place the ragu in a large serving bowl when you add the pasta to the water. Do NOT strain the pasta.
Using tongs remove the dripping pasta from the boiling water one scoop at a time and place in the serving bowl on top of the ragu. Gently toss the pasta with the ragu after each additional tong full of pasta. If necessary, add 1 tbsp of the hot reserved pasta water to loosen the mixture.
Serve immediately with freshly grated Parmesan cheese on the side. (Adapted from Marcella Hazan)
Recipe by Yvonne Hennigan Styling by Ana Kelly Photography by Adam Milliron
This Masoor Dal recipe from cookbook author Asma Khan yields a generous portion, but don’t try to reduce it, or the quantity of lentils will be too small to cook properly. Instead, Asma suggests the dal recipe can be “adapted to your own taste by adding extra ingredients to the lentils, such as handfuls of chopped spinach or chunks of fresh tomato,” so you can reinvent and reheat for dinner the next night. This recipe even includes an option to make the it vegan to share with anyone regardless of food allergies.
What is Masoor Dal and Where Does It Come From?
Masoor Dal are red lentils, a staple legume widely used in South Asian and Middle Eastern cuisines. A quick cook time turns this vibrant orange-red lentil into a soft, creamy texture. Heating helps the lentils break down easily into that thick, comforting consistency. Originating from the Indian subcontinent, it’s a fundamental ingredient in Indian, Pakistani, Bangladeshi, and Nepali cooking. You’ll commonly find it seasoned with a tempering of spices fried in oil or ghee such as in the Masoor Dal recipe below.
Wash the lentils in cold running water, then place in a bowl and soak for 30 minutes in fresh cold water. (If you do not have time to soak the lentils, then just wash them before adding to the pan – red lentils cook quickly and do not need long soaking.)
In a heavy-based pan that has a solid lid, heat the ghee or oil over medium-high heat. Add the dried red chilis to the pan, followed by the chopped onion and garlic. Cook, stirring, until they just start to color.
Add the soaked lentils to the pan, then the salt and ground turmeric. Add 5 cups (1.2 liters) warm water to the lentils and bring to a boil.
When the surface of the water is bubbling, cover the pan, lower the heat, and simmer gently for 30 minutes. Stir occasionally to ensure the dal is not sticking to the base of the pan.
Once the dal is cooked, place it in a bowl and keep warm while you prepare the tempering.
For the tempering:
Heat the ghee or oil in a small frying pan over high heat. Working very quickly so the tempering does not burn, add the dried red chilis, cumin seeds, garlic slivers, and, finally, the curry leaves. Cook for a few seconds, then pour the tempering oil and spices over the warm dal in the pan.
Next, take a spoonful of the dal and place it in the frying pan to absorb any remaining oil – take care while doing this since the oil may splutter – then tip the spoonful of dal from the frying pan back into the main dal pan.
Serve immediately, ladling the dal into separate serving bowls.
Recipe by Asma Khan from her cookbook, Asma’s Indian Kitchen Story, Photography, Styling by Quelcy Kogel
Cookbook author Asma Khan of Asma’s Indian Kitchen adapts her Gobi Musallam (Spiced Whole Cauliflower) dish from a traditional Mughlai meat recipe. She wanted a stunning dish for vegetarian guests when building her cookbook. The recipe, as do many in the book, relies on lightly frying thinly cut onions for an added sweet flavor. This process is a bit time consuming, and fragrant, but we promise you that it’s worth every step.
What is Gobi Musallam and Where Does it Come From?
Gobi Musallam is a flavorful Indian dish that centers around a whole roasted cauliflower. The name “Gobi” translates to cauliflower, and “Musallam” translates to something prepared whole or complete. Usually “Musallam” also implies a grand, regal preparation in Mughlai cuisine. This vegetarian showstopper originates from the Indian subcontinent and marinates a whole cauliflower in a blend of aromatic spices, yogurt, and sometimes nuts. Then, after marinating, you roast the cauliflower until it’s tender and golden. Sometimes people will serve it with a luxurious, creamy, and spiced gravy.
A flavorful vegetarian dish to make for your next celebration.
Ingredients
Scale
1 tbsp whole milk
6 strands good quality saffron
⅓ cup (80 ml) ghee
1 medium cauliflower, trimmed
2 medium onions, thinly sliced into half moons
1 tbsp garlic paste
2 tbsp fresh ginger paste
2 cups (500 ml) plain whole milk yogurt
1 tsp garam masala
1 tbsp ground coriander
½ tsp cayenne pepper
1 ½ tsp salt (adjust to taste)
1 tsp sugar
Almond and pistachio slivers
Instructions
Gently warm the milk in a pan. Do not boil the milk. It should only be tepid; you do not want to scald the saffron. Touch the surface to check the temperature, then add the saffron strands and set aside to infuse.
In a pan or wok, heat the ghee over medium-high heat. Add the whole cauliflower and fry until brown on all sides. Remove the pan and place on a plate to drain, and set aside.
In the ghee leftover in the pan or wok, fry the onions until golden brown and caramelized. Transfer the onions to a plate to drain. Grind or mash into a paste.
Stir the onion, garlic, and ginger pastes into the yogurt, then add the ground garam masala, coriander, cayenne pepper, slat, sugar, and saffron-infused milk.
Place the whole cauliflower, base down, in a deep Dutch oven or cast iron pot. Pour the yogurt marinade over the cauliflower, then cover loosely with parchment paper and set aside for 20 minutes.
Place the Dutch oven over medium heat to cook the cauliflower, keeping it loosely covered with the parchment paper. Lift the paper and base the cauliflower regularly with the yogurt sauce to make sure it cooks evenly – depending on the size of the cauliflower, this should take 30 – 40 minutes. The cauliflower is cooked when a skewer goes in easily with only a slight resistance.
Do not overcook the cauliflower; bear in mind that the cauliflower will continue to cook a little after you take it off heat.
Before serving, taste to check the seasoning and adjust as necessary.
To serve, place the cauliflower whole on a serving plate or dish, then garnish with almond and pistachio slivers. Slice to serve.
Recipe by Asma Khan from her cookbook, Asma’s Indian Kitchen Story, Photography, Styling by Quelcy Kogel
Peach season runs from July to September, so make use of these peach recipes while the goodness lasts! Head to your local markets and grocery stores to find the farm-fresh stone fruit that makes summer so special. Maybe you enjoy them baked into a decadent dessert. Or maybe you’d rather serve them sliced up in a refreshing salad, or blended into a scrumptious cocktail. To peach their own, after all! Whatever you prefer, you’ll find no shortage of peach recipes here to satisfy your cravings.
Let peaches and prosecco help make your summer a delicious one. Our Peach Bellini Tart is decadent, with a dense tart base and not-too-sweet peaches lining the top. This tart does take a bit of time to make but the product is so worth the wait that you’ll be making it for every picnic.
Who doesn’t love salsa? This kid-friendly recipe is a delicious way to get your kids in the kitchen. The sweet and spicy flavors of the peach and corn salsa are not only deliciously enjoyed as a snack atop tortilla chips, but are also great condiments with grilled fish, chicken, or pork.
One bite of this Peach and Ricotta Pizza, and you’ll be hooked. The unique combination of flavors is both sweet and savory. Juicy peaches add a refreshing twist to the creamy ricotta cheese, while the crispy crust complements the soft texture of the toppings. Impress with this recipe at your next summer gathering.
We take advantage of round, donut peaches to craft a plate full of Peach Donuts. These donuts are soft and fluffy, packed full of peach flavor. Plus, a sweet glaze on top recreates the donut you know and love with a fruity twist.
Late summer peaches, blended with fresh mint and the nutty warmth of bourbon whiskey, take the stage. Leveled out with a smooth, sweet vanilla simple syrup, this peach bourbon cocktail brings out the best flavors of summer and fall, making it perfect for between-season drinking.
A beautiful way to celebrate one of summer’s favorite fruits in a simple yet luxurious way is our Grilled Peaches with Mascarpone and Honey recipe. Once peach season passes, feel free to try grilled plums…or pineapple. Or create your own mix of fruits.
Need a quick and easy dinner option that won’t leave a mess in the kitchen? Our Simple Pork Chops and Peaches take just a sheet pan to make a juicy, succulent product. You’ll even learn to make your own delicious balsamic and orange juice dressing to drizzle over top.
Who knew quinoa could be so good? We did! That’s why we pair it with diced, fresh peaches, chickpeas, cucumber, and red onion for maximum deliciousness. You can even add your own customizations to this salad such as grilled chicken, feta cheese, or your other favorite veggies.
Combine farm-fresh berries and peaches with this easy, crowd-pleasing flatbread recipe. Along with chèvre cheese and prosciutto, feel free to sprinkle in a fresh blackberry or blueberry, too.
Brighten your usual salmon dish with the addition of sweet roasted peaches and a savory tomato sauce. You’ll get the most flavor out of this beloved seafood when you let the peaches infuse into the salmon. It may just become your new weeknight dinner go-to.
Crumbly buttermilk biscuit chunks are layered into this colorful summer salad. Sink your teeth into bites of juicy peaches, radicchio, baby arugula, English cucumber, shredded ricotta salata, and a red wine vinegar dressing.
Who doesn’t love pulled pork at a summer cookout? Upgrade your pork game with a sweet BBQ peach sauce that adds a little kick of spices. Needless to say, you’re never going back to your old recipe.
The combination of naturally sweet peaches and hot honey is simply meant to be. Our Editor-in-Chief Keith Recker makes an Easy Hot Honey Peach Galette that turns anyone into a professional baker.
Gazpacho in the summertime whenever peaches are ripe and ready is a treat for any hot day. Fresh cantaloupe and juicy peaches blend with savory elements of garlic, shallot, balsamic, and chili flakes.
A cocktail that utilizes farm-grown produce basks in a flavorful outcome. This smash uses peaches and blackberries from your local market as well as your favorite bourbon and ginger beer.
For cocktail and mocktail lovers alike, this Peach Basil Bellini can be made with sparkling white wine or sparkling mineral water. Plus, you’ll learn to craft a basil simple syrup that you can use in other beverages.
Fall is in full swing, which means afternoons are sleepier than ever. Add a jolt of caffeine to your happy hour this week, thanks to this Coffee Old Fashioned featuring Maggie’s Farm Rum’s ever-so-potent coffee liquor.
Coffee Cocktails Are Trending!
Perhaps Red Bull and vodka started it all? The combination of buzzy energy and boozy relaxation can fuel a lively night out. The Espresso Martini caps the trend very nicely, and is the #3 drink on most cocktail menus, behind classics like the Margarita and the Moscow Mule. Just for a change, why not try a Coffee Old Fashioned!
A turn-of-the-last-century classic, the Jack Rose brings the flavors of fall apples to a cocktail. As one of the most well-known apple brandy cocktails, this simple drink blends applejack with grenadine and fresh citrus juice. It’s a riff on a traditional sour cocktail.
Where does the Jack Rose Cocktail Get Its Name?
Does the cocktail’s name make you think of Jack and Rose from the Titanic? While that seems logical, there are other more likely sources for this cocktail. The Jack comes from applejack, the starting point of this delicious quaff. Applejack, made from fermenting apples, was one of colonial-era America’s favorite liquors. Rose most likely refers to the rosy pink color of the drink. The pink comes from grenadine, but would originally have been pomegranate syrup.
The cocktail became particularly popular in the early 20th century and is mentioned several times in Ernest Hemingway’s The Sun Also Rises. Many, if not all, of the characters could be accused of having too Many Jack Rose cocktails of an evening.
Jack Rose Cocktail Recipe
Some recipes for the Jack Rose call for lemon juice, some lime; others, a mix of both. Either makes for a delicious cocktail: lime makes the drink a bit more bitter, while the lemon blends nicely into the sweetness of grenadine. Try it any way you like – you can’t go wrong!
Combine two cups of pomegranate juice, two cups of sugar, and 1-2 dashes of orange flower water in a saucepan.
Stir until the sugar is fully dissolved, then reduce the heat, cover, and simmer for about 10-15 minutes. When reduced, pour the syrup into an airtight container.
For the cocktail:
Combine apple brandy or Applejack, lemon or lime juice, and grenadine into a shaker.
Shake with ice and strain into a coupe or martini glass. Garnish with a lemon peel and enjoy!
Notes
Note: It’s worth making grenadine at home for this recipe. The homemade syrup is much milder than its storebought counterpart.
Juniper berries, lemon, and tonic mix in this crafty cocktail created by longtime TABLE contributor Quelcy Kogel. She uses Red Ribbon Tonic Water, which is a bit on the sweeter side (to our benefit!). It’s the perfect tonic to add to any of our favorite spirits, especially when it’s combined with a juniper simple syrup that mimics the flavors of a good, dry gin. Follow the cocktail recipe below and add your favorite gin for a refreshing, fruity happy hour.
How to Have This Juniper Lemonade Tonic as a Mocktail
There are a couple of different ways you can mix up this Juniper Lemonade Tonic to be a mocktail. Simply take out the gin and use only the juniper syrup, lemon juice, and tonic water. Or, another solution is to sub the gin for a zero-proof version, Try adding in Ritual’s Non-Alcoholic Gin Alternative or Monday Zero Alcohol Gin.
In a Collins glass, combine the gin, lemon juice and syrup over ice.
Top with tonic, garnish with juniper berries, and serve.
For the juniper syrup:
Combine sugar, water, juniper berries, and bay leaves in a small saucepan; stir to disolve sugar. Bring to a boil over medium-high heat.
When mixture boils, reduce the heat to medium and simmer until mixture is slightly thickened, about 5 minutes.
Remove from heat and let steep 15 to 20 minutes. Strain syrup to remove herbs, and transfer to a container with a tight-fittting lid. Cover and refrigerate until ready to use.
Recipe and Styling by Quelcy Kogel Photography by Adam Milliron
Mixologist Alex Dando shares some delicious craft mocktail recipes with TABLE readers! No-Alcohol cocktails mean zero-sacrifice of fun and flavor while taking a break from the booze. They’re an easy way to enjoy a crafted beverage even whenever you don’t feel like having a buzz. These four recipes show you what a mocktail can be. They take advantage of non-alcoholic spirits, bitters, loose leaf teas, fruit juices, special reductions, and so much more. Say goodbye to dehydrating alcohol that leaves you groggy on those heat wave-type summer days.
In case you’re looking for ways to spice up your mocktail ingredient collection at home, check out our article on all the mocktail essentials to keep on hand.