Home Blog Page 263

Escargot Risotto

0
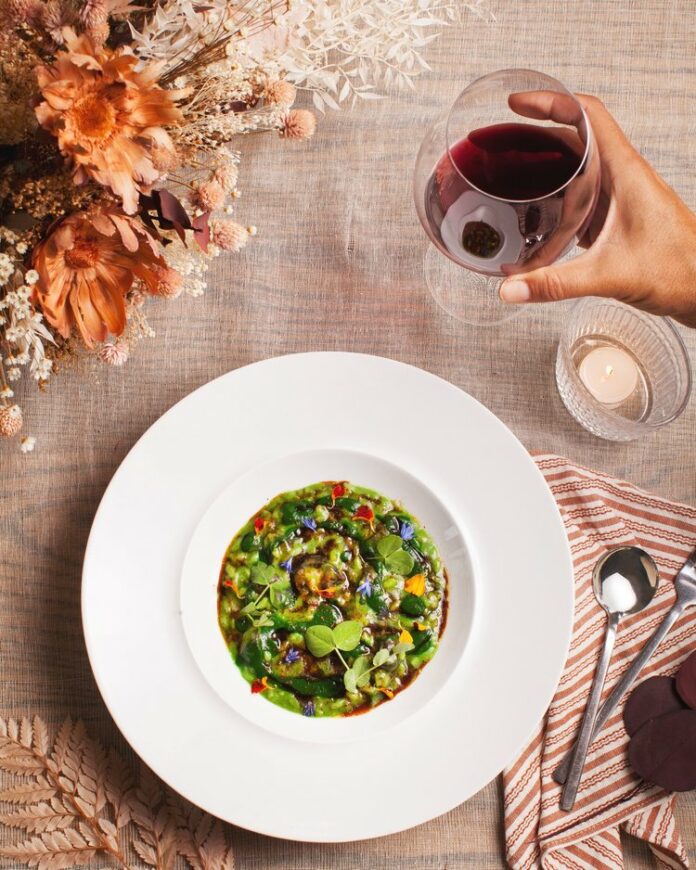
Escargot Risotto, a green looking dish, sits in a white bowl in the center of the photo. A white hand with a glass of red wine comes in from the right.

Les Petites Canailles sits in the heart of Paso Robles. It offers a contemporary French farm-to-table menu with an approachable twist of California seasonality created from the pedigree of Courtney Asseo and her husband, Chef Julien Asseo, who studied culinary arts near Bordeaux.

Translated as “the little rascals,” Les Petites Canailles pays homage to the owners’ children. Valuing the craftsmanship of their family, a section of the wine list is dedicated to bottles made by Chef Julien’s family. The exceptional wines pair to create a perfect union of flavors with each dish, and the modern setting creates an elegant yet casual experience for diners to enjoy an intimate piece of Paso Robles.

Les Petites Canailles’ Escargot Risotto With Parsley Garlic Butter Recipe

INGREDIENTS

4 oz European-style butter + 2 tbsp
1 bunch of flat-leaf parsley
4 garlic cloves, peeled
Salt and black pepper
3 qt chicken stock
1 shallot, peeled
2 cups of Arborio or Carnaroli Rice
1 cup dry white wine
24 large Burgundy escargots from a can
2 tbsp Mascarpone
2 tbsp Parmesan

INSTRUCTIONS

  1. Take 4 ounces of butter to sit at room temperature for 30 minutes before you start cooking to let it soften up. Once it’s soft, put it in a mixing bowl and reserve.
  2. Pick off the parsley leaves and finely chop them with garlic cloves. Add to the butter, and season with a pinch of salt and cracked black pepper. Whisk until everything is incorporated. Reserve to the side.
  3. Heat chicken stock in a pot. Cut the shallots into small dice while the chicken stock is heating up.
  4. Heat a medium-sized saucepan and add 1 tablespoon of butter. Let it melt. Before it starts browning, add the shallots and start sweating them. Once shallots become translucent, add the rice and reduce the heat. Stir the rice until evenly coated with the butter and shallots — deglaze with the white wine.
  5. Cook off the wine until almost entirely reduced; season with 2 pinches of salt and some black pepper.
  6. Start adding the chicken stock a ladle at a time until the rice fully absorbs the chicken stock.
  7. Repeat this process slowly as the rice begins to cook. It is important not to add too much stock at once. Continuously stir the rice with a spatula to get a creamy texture.
  8. After approximately 20 minutes, taste the rice; it should be cooked but still have a little bite (al dente). Make sure you reserve a little chicken stock for later. Once the rice is done, remove it from the heat and reserve it on the side.
  9. Drain the escargots and rinse them under cold water, making sure to drain well.
  10. In a sauté pan, heat 1 tablespoon of butter until it starts to brown, then add the escargot. Sauté until they get a little color and add to the cooked rice.
  11. Bring the rice back to the heat on medium. Stir slowly while adding the final ladle of chicken stock.
  12. Once the rice is loose, add Mascarpone and Parmesan. The texture should be creamy. Keep stirring, and add the butter. Stir until fully incorporated and the risotto smooth with a loose texture. Taste for seasoning. Serve risotto in bowls and enjoy.

Click here for insight and information on how to plan your trip to California’s Central Coast.

Story by Natalya Sutmiller / Photography by Jennifer Olson / Styling by Idlewild Floral

Don’t miss a single delicious thing: Subscribe to TABLE Magazine’s print edition.
Buttermilk Irish Soda Bread with Fennel Pollen

0
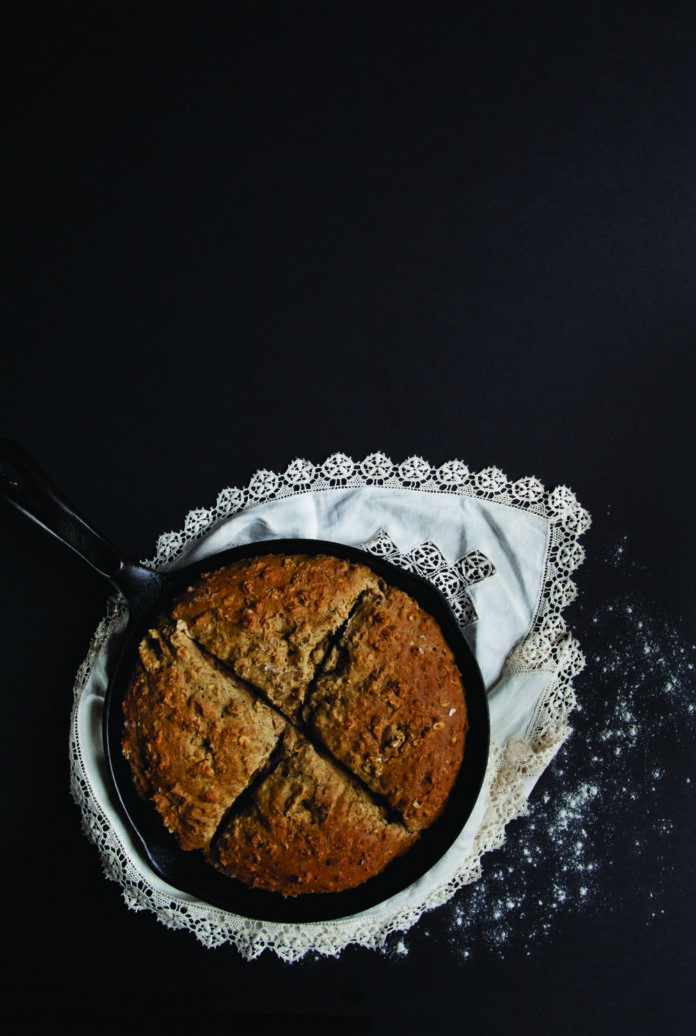
Buttermilk Soda Bread with Fennel Pollen in a frying pan placed on a napkin, which is placed on a dark black surface with sprinkled flour on it

TABLE Magazine loves Irish Soda Bread. Not only is it easy to make, but it’s great with just about any meal for St. Patrick’s Day or really any time of year. We recommend that you enjoy our Buttermilk Irish Soda Bread with Fennel Pollen over breakfast or brunch with butter, preserves, and coffee, or invite it to dinner with lamb stew or your favorite braised meat.

What is Irish Soda Bread?

St. Patrick’s Day is an Irish-American holiday much more than an Irish holiday, but people enjoy it all over the world and is a great way to learn more about Irish culinary traditions. With flour, salt, baking soda, buttermilk, and a hot oven as the only ingredients you need, this is a simple recipe made of things you probably already have in your kitchen. It doesn’t even require any yeast! Many Irish families have their own tips and tricks for making it, so ask a friend or call up your Auntie Bridget if you happen to be Irish yourself. 

Print
clock clock iconcutlery cutlery iconflag flag iconfolder folder iconinstagram instagram iconpinterest pinterest iconfacebook facebook iconprint print iconsquares squares iconheart heart iconheart solid heart solid icon
Buttermilk Soda Bread with Fennel Pollen in a frying pan placed on a napkin, which is placed on a dark black surface with sprinkled flour on it

Buttermilk Irish Soda Bread with Fennel Pollen


  • Author: Stephanie Sullivan

Description

Get the luck of the Irish from this bread!


Ingredients

Scale
  • 4+ cups flour (add more if needed)
  • 1 tbsp sugar
  • 1 tsp salt
  • 1 tsp baking soda
  • 4 tbsp butter
  • 1 large egg, lightly beaten
  • 1¾ cups buttermilk
  • ¼ tsp fennel pollen


Instructions

  1. Preheat oven to 425°F. Whisk together 4 cups of flour, sugar, salt, and baking soda in a food processor.
  2. Cut the butter into pieces and add to the processor. Pulse 10-12 times to incorporate into the flour.
  3. Mix buttermilk and egg; add to processor along with fennel and process until dough comes together and pulls away from sides.
  4. Turn dough onto well-floured and form a dough mound. Dust hands with a little flour, then gently knead the dough just long enough to form a round loaf. If the dough is too sticky to work with, add a little more flour. Do not over-flour or over-knead!
  5. Transfer dough to a medium, lightly greased cast-iron skillet. Using a serrated knife, score top of dough about 1½“ deep in an “X” shape.
  6. Transfer to oven and bake at 425°F until bread is golden and the bottom sounds hollow when tapped about 35-45 minutes. You can check for doneness by listening to the loaf or by inserting a skewer into the center. Best when eaten warm and just baked.

Recipe by Stephanie Sullivan 
Photography by Heather Mull

Subscribe to TABLE Magazine’s print edition.

Going Green

0
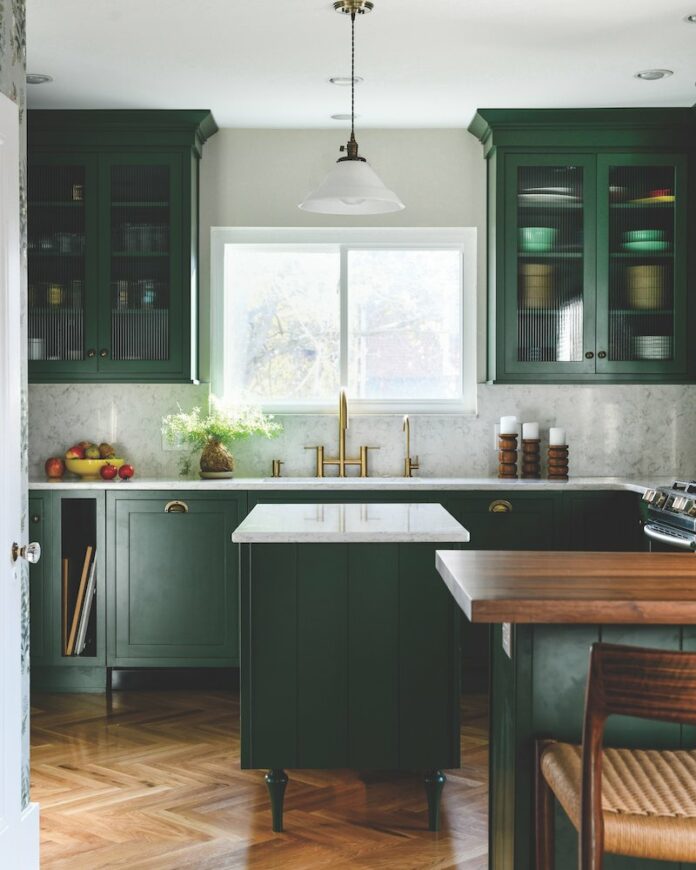
Green cabinets adorn this kitchen redesign alongside wooden floors.
From a ‘no fun” kitchen to a lovely place to linger, this space was transformed by A. Shapiro Design and Marino Kitchen & Bath. | Photography by Erin Kelly.

“It was a no-fun kitchen.”

That’s how the owners of this Highland Park home described their space before the team of Alison Shapiro, owner of A. Shapiro Design, and Amanda Johnson, general contractor and project manager with Marino Kitchen & Bath, got their hands on it.

No longer. This renovation is effortlessly unique, joyful, and welcoming.

Shapiro, an interior design and remodeling specialist, recalls, “[The homeowners] had a very clear vision of what they wanted.” They brought her images of bespoke French kitchens and farmhouse-style cottages to the table. “They wanted my help to educate them on how to accomplish that visual. It was a creative problem-solving process for all of us.”

Step one: removing the wall between the kitchen and dining room. This freed up the previously cramped area and invited flow. To create a transitional moment, Shapiro inserted a walnut-topped bar. Complete with three J.L. Møllers stools, it is now the homeowners’ favorite place in the house.

The kitchen’s U-shape means “it’s really tight in the two corners,” say Shapiro. Working with custom cabinetry allowed the team to get it just right, with much fine-tuning in the process. In the end, some spaces were simply too small for cabinets and doors. Instead, the designer created “little custom moments that are utilitarian but also look good and are personal,” like mini shelves displaying the spines of colorful cookbooks, and an easily accessible nook used for storing cutting boards.

Thoughtful details continue in the antique brass hardware and reeded glass on select cabinets. The original exposed brick chimney pairs perfectly with the intentionally simple backsplash. “I treated it as a way to smooth out the horizon line in the kitchen and create a moment of rest for your eyes,” says Shapiro.

The cabinets feature a custom paint color, the appropriately named Sherwin-Williams Vogue Green. “This project was so fun because they were willing to take a risk, and this color was special,” says Johnson. “Green is everywhere in nature, so it’s one of the few colors that stays classic.” And, it beautifully complements the plant collection throughout.

Some might also consider bold wallpaper a risk, but — as one of the homeowners’ main sources of inspiration—it majorly paid off. The print chosen for the kitchen “is not a William Morris wallpaper, but it’s very much in the style,” says Shapiro. (British Victorian-era Morris designed over 50 papers and was known for exacting patterns drawn from nature.) She notes that the large repeat and the color density “take you back to these different eras and moments that are appropriate to the architecture in this turn-of-the-century home.”

Shapiro’s biggest aha moment was finding a way to blend existing hardwood with a new floor. While the team was able to source the same species of white oak, it would be impossible to create a perfectly seamless match. The solution? Laying the floor in a herringbone pattern.

The resulting room, from top to bottom, is perfection.


Appliance list by DON’S APPLIANCES 

Bosch 800 Series Dishwasher

Faber Inca Lux Custom Insert Range Hood

Maytag Fingerprint Resistant Stainless Steel French Door Refrigerator

Samsung Smart Slide-In Gas Range with Smart Dial & Air Fry

Soul Searching

0
Photo by Dave Bryce. Styling by Keith Recker and Charlie Marshall.

“I just fell in love with the textures, the food, the colors, the people,” says Bass & Bennett Trading Co. owner Matt Bass. “And I wanted to figure out a way to share it with people here. Bass & Bennett is the embodiment of that vision.”

It started out as an idea to pick a few favorite pieces and bring them home. Over time and multiple return trips, a few pieces became one fully loaded shipping container after another, which then evolved into a sprawling shop at Rosela Farm in Coraopolis, meticulously curated with authentic, handcrafted home furnishings and décor, all thoughtfully repurposed and reclaimed.

“You feel connected to the people that preserve these items,” says his wife and business partner, Michele. “There’s a history. There’s a story behind every piece and there’s a sense of warmth that you don’t get from manufactured things. There’s a soul to it. The wear, the patina… it all tells a story.”

That story has also been unfolding in their contemporary Sewickley Heights home. Natural light from floor to ceiling windows dances across the open space, where earthy metals and naturally weathered wood is spiked with punchy, hand-embroidered silk and cotton Kantha textiles that were once worn as saris and have been repurposed into throws, table coverings, and cushions.

“It’s really about having these pieces complement what you already own. Most people don’t have households of globally purchased items,” says Michele. “We can work with what you already have and add that special piece to give your space a hit of extra interest. We love to do that. Even in this house. It has a modern aesthetic, but we’ve added warmth. It just shows that you can have a linear space and add things that bring color, life, depth, and texture. What you see here is a living diary of our lives.”

It’s also a testimony to the hunt. “You pull that thread and try to trace each piece back to the origins,” says Matt.  It’s finding intricate, hand-carved blocks used for printing textiles, identifying the village they originated from, and paying a visit on the next trip. It’s repurposing bamboo into decorative ladders, intricately carved grinder tables into ottomans, and treating centuries-old, 20-foot tall solid teakwood doors that were salvaged from sprawling havelis as art. Because they deserve it.

“None of these pieces are manufactured,” he adds. “All are made by hand from wood that can be over 100 years old. You can see the wear marks from people having used each piece for specific purposes. They have incredible value, history, and culture. We are preserving all of that, giving them new life in a new form in a new way.”

bassbennett.com

St. Patrick’s Day Punch Shamrock Shake

0
green punch
St. Patrick's Day green punch

Celebrate St. Patrick’s Day with Acacia’s St. Patrick’s Day Punch. This year, I decided to take my St. Patrick’s Day celebrations out of the drive-through and into the bar, thanks to Acacia</a>.

<h3>What is a Shamrock Shake? 

Shamrock Shakes, McDonald’s version of a mint milkshake, are a St. Patrick’s Day tradition in my household. An image of the almost sickeningly vibrant green shake makes an appearance on the family group chat at least once during the season. Trust me, one is all you need.

This year, I decided to take my St. Patrick’s Day celebrations out of the drive-through and into the bar, thanks to Acacia. Thecocktail bar provided TABLE with the recipe to their signature green punch, a much tastier alternative to the Shamrock Shake. Yes, the punch is still green, but the Irish whiskey packs a punch the shake just can’t replicate.

ST. PATRICK’S DAY PUNCH

INGREDIENTS

Irish Whiskey (This year, Acacia is featuring Slane Irish Whiskey.)
White Creme de Cacao
Green Creme de Menthe
Heavy cream

INSTRUCTIONS

ass=””>STORY BY MAGGIE WEAVER / PHOTOGRAPHY BY LAURA PETRILLA

Citrus Curd Cups

0
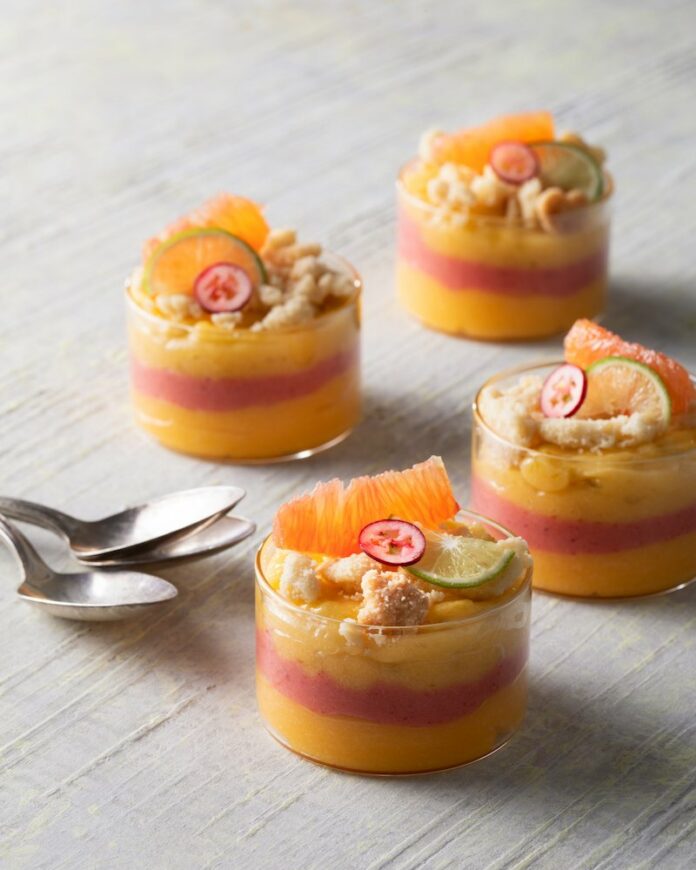
lemon lime and grapefruit curd dessert
A tasty citrus curd layered dessert lightens gloomy winter days.

Citrus Curd Cups are a refreshing way to incorporate bright flavors into your dessert. TABLE Magazine Contributing Editor Anna Franklin rounds up some of the tastiest winter citrus and creates a deliciously tart layered dessert to lighten the gloomy season.

Zest vs. Juice of a Citrus Fruit: Which is Better for a Citrus Dessert? 

In the winter months, not a lot ripens. For these citrus curd cups, you’re taking advantage of the fact that one thing does: citrus fruits. You can pick yourself which one you want to use in the recipe, but the image uses orange, lime, and cranberry. Whichever citrus you use, the recipe deploys a combination of zest and juice of a citrus, but what’s the difference? While both zest and juice come from citrus fruits, zest comes from out when you grate the colorful portion of the fruit’s rind. Richly flavored oils reside in the citrus zest. Juice is the liquid inside the fruit, and it provides both flavor and acidity, and a sizable percentage of water. For desserts, zest is more of a flavor driver than juice, as its strength and tang dances a beautiful dance with sugars and other typical dessert ingredients. Think of it this way: Lemon zest flavor dissolves in fat, and lemon juice dissolves in water. Lemon zest is aroma, lemon juice is flavor. 

Print

clock clock iconcutlery cutlery iconflag flag iconfolder folder iconinstagram instagram iconpinterest pinterest iconfacebook facebook iconprint print iconsquares squares iconheart heart iconheart solid heart solid icon
lemon lime and grapefruit curd dessert

Citrus Curd Cups


  • Author: Anna Franklin

Description

A balance of zesty and sweet.


Ingredients

Scale
  • ½ cup sugar
  • 1½ tbsp of cornstarch
  • 4 large egg yolks
  • 2 tsp of citrus zest (lemon, lime, grapefruit or another citrus of your choice)
  • 6 tbsp of freshly squeezed citrus juice (lemon, lime, grapefruit)
  • 3 tbsp of unsalted butter at room temperature
  • ½ tsp sea salt


Instructions

  1. In a small saucepan whisk together the sugar and cornstarch
  2. Place on medium heat and add your yolks, citrus zest, citrus juice, butter, and salt and whisk continuously until thickened. Do not be tempted to increase the heat. Keep it to medium and just keep whisking. Increasing the heat with scald or cook the yolks and your curd will tasty eggy, so just be patient!
  3. Press plastic wrap directly on the surface of the curd to prevent skin from forming and refrigerate until needed.
  4. Once cool, pipe into serving dishes and garnish with crumbled shortbread cookies.

Recipe and Styling by Anna Franklin
Photography by Dave Bryce

Subscribe to TABLE Magazine‘s print edition.

Ritual House: A Love Letter To Pittsburgh

0

A brand-new, modern American eatery brings style and whimsy to a light-filled corner in downtown’s historic Union Trust Building. The much-anticipated restaurant was created by Pittsburgh natives Herky and Lisa Pollock. With globally-inspired design elements, and a menu that features reimagined takes on familiar favorites, a refreshing air of playfulness dominates the venue’s airy spaces — and memorable dishes, too.

Ritual House: A Love Letter To Pittsburgh

colorful fruity pebbles cover four slices of French toast on a white plate

Entering from William Penn Place, guests find a cluster of nest chairs dangling from the ceiling beneath faux wisteria. Here, they can sip a cocktail (with smile-inducing names like “Pittsburgh Shines Again”) before moving onto the main event. A middle section showcases dining tables and modern, geometric light fixtures. In the central bar, visitors cozy into sleek booths or belly up to the rail below 18 grand chandeliers. On the walls, cheeky monkeys tucking into bottles of booze set a festive tone. Expansive windows in this soaring space peer out onto the Omni William Penn Hotel, while the panes themselves reveal moon-cycle artwork that speak to the venue’s desire to become a part of residents’ everyday lives.

a sliced new york strip steak with green chimichurri on a black plate

Brunch delights include fluffy stacks of lemon meringue pancakes, pineapple upside-down pancakes and Fruity Pebbles French toast, plus savory options like fried chicken sliders with blueberry jalapeño jam. While lighter lunch and dinner offerings range from salads to seafood creations (don’t miss the crudo or triple-stacked salmon club), Pittsburgh natives will get a kick out of spins on regional classics. Take for example, the elevated version of chipped chopped ham barbecue, or the Turkey Devonshire featuring four pieces of candied pepper bacon hanging from clips above the hearty dish. And for the ultimate spectacle to bring instant joy? Order the seven-layer cake that comes with a poof of cotton candy and some sparkler flair.

colorful margarita cocktail made garnished with a purple flower

Story by Corinne Whiting
Photography by Adam Milliron

Subscribe to TABLE Magazine’s print edition.
Gambas al Ajillo (Garlic Shrimp)

0
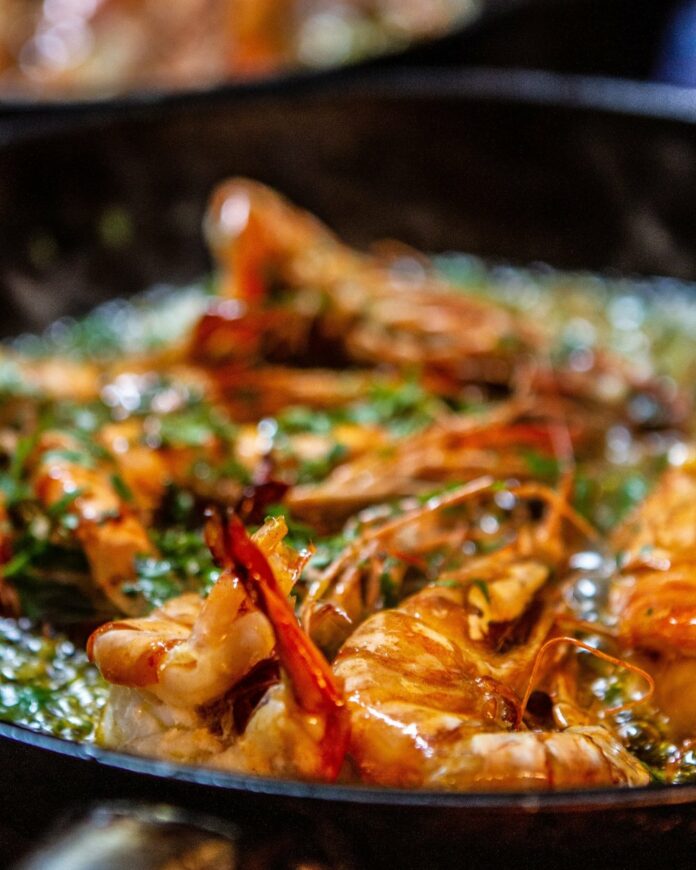
Gambas al Ajillo, aka Garlic Shrimp, in a deep black dish.
Gambas al Ajillo will anchor your tapas repertoire.

Small plates may be all the current sharable rage, but they have a long and rich history across the pond in bars, eateries, and otherwise causal digs, meant to compliment the peckish day drinker. Gambas al Ajillo is a classic Spanish tapas dish of the hot variety and ubiquitous as Patatas Bravas. Compliment with artisanal bread to soak up the goodness and a crispy Albariño to round the profiles into perfect bites.

Gambas Al Ajillo (Garlic Shrimp)

Ingredients

2 pounds large fresh shrimp with tails in shells
8 cloves of garlic, minced
1/3 cup of Spanish sherry
1 cup extra virgin olive oil
1 dried chile guajillo, chopped
1 large bunch of parsley, minced
1 large lemon, juice and zest
Kosher salt

Directions

  1. Peel and de-vain shrimp, set aside.
  2. Add shells to a pan with olive oil, half the garlic, sherry, chile guajillo, lemon juice, and zest.
  3. Over low heat, cover and occasionally stir for 10 minutes
  4. Add the remaining oil and garlic to a fresh pan on medium-low heat. After two minutes, strain the shrimp stock into the pan and stir
  5. Add shrimp and cook until the shrimp turns light pink. Add parsley. Remove from heat. Do not overcook shrimp. Serve immediately.

Recipe by Gabe Gomez / Photography by Pim Myten

Subscribe to TABLE Magazine’s print edition.

Easy Sour Cream Cookies

0
Sour Cream Cookies - A delightful and light Valentine’s treat. Decorate with fresh raspberry meringues for added sweetness.

These delicious cookies are excellent love offerings. They’re fresh and pretty, and not too heavy… just like a perfect rom-com! Bake them up as a meet-cute treat and you’ll definitely get a kiss at the end of the picture. No movie couple ever started with cookies, you say? Technically, you are correct…with the possible exception of The Wedding Planner, where Jennifer Lopez and Matthew McConaughey meet because of a runaway dumpster but fall in love because of a cookie. We think it’s time for a rewrite: get your own love story going with a cookie and keep us posted.

Sour Cream Cookies Recipe

INGREDIENTS

2¼ cups flour
¼ teaspoon salt
1 cup unsalted butter, cold
2 tbsp sour cream
2 eggs yolks
½ tsp vanilla extract
¼ cup sugar

INSTRUCTIONS

  1. In a food processor, whisk together the flour and salt. Cut the butter into the flour until the mixture resembles fine crumbs. Mix in the sour cream, egg yolks, vanilla, and sugar until dough forms.
  2. Turn the dough out onto a lightly floured surface or piece of parchment and knead lightly to bring it together. Roll out between sheets of waxed paper and chill.
  3. Remove wax paper from chilled dough. Cut the dough into desired shapes and place on parchment or Silpat lined baking sheets. Bake in preheated 350°F oven for 10 to 12 minutes or just until lightly browned. Remove from the oven and cool on a rack; sprinkle with powdered sugar or decorate with little raspberry meringues (recipe below), or whipped cream, and fresh fruits before serving.

Fresh Raspberry Meringues Recipe

INGREDIENTS

1 cup fresh raspberries (or frozen)
1/2 cup sugar
1/8 teaspoon cream of tartar
2 egg whites, room temp

INSTRUCTIONS

  1. Cook raspberries and sugar over medium-high heat, stirring often and crushing the berries as they cook. A potato masher or muddler works well for this. Remove from the heat when the mixture is syrupy. Strain it through a sieve into a measuring cup, pressing down on the berries to get as much juice as possible. Cool sauce completely.
  2. Put egg whites in the bowl of a stand mixer and sprinkle the cream of tartar over top. Beat the egg whites til they hold stiff peaks. Carefully fold the raspberry sauce into the egg whites.
  3. Spoon meringue into a frosting bag or ziplock bag, forcing the mixture to one corner of the bag. Snip 1/4″ from the corner of the bag and pipe onto the prepared pan, using a decorative topi if desired. Pipe out circles onto baking sheet at least 1” apart.
  4. Preheat oven to 170°F, or the lowest setting on your oven. Place oven rack in the top of the oven. Line a cookie sheet with parchment paper.
  5. Bake for 2 hours at 170°F, rotating the baking sheet after 1 hour so they will dry evenly. The meringues should not brown at all. Turn off the oven and leave meringues
    in the oven for 2-3 hours to finish drying.
  6. Meringues can be frozen for up to one month. If frozen, allow to thaw to room temp before serving.

Recipe by Stephanie Sullivan / Photography by Brooke Lark

A footer photo with a black background and subscribe info and button

Subscribe to TABLE Magazine‘s print edition.
Ravioli with Sautéed Veggies & Scallops

0
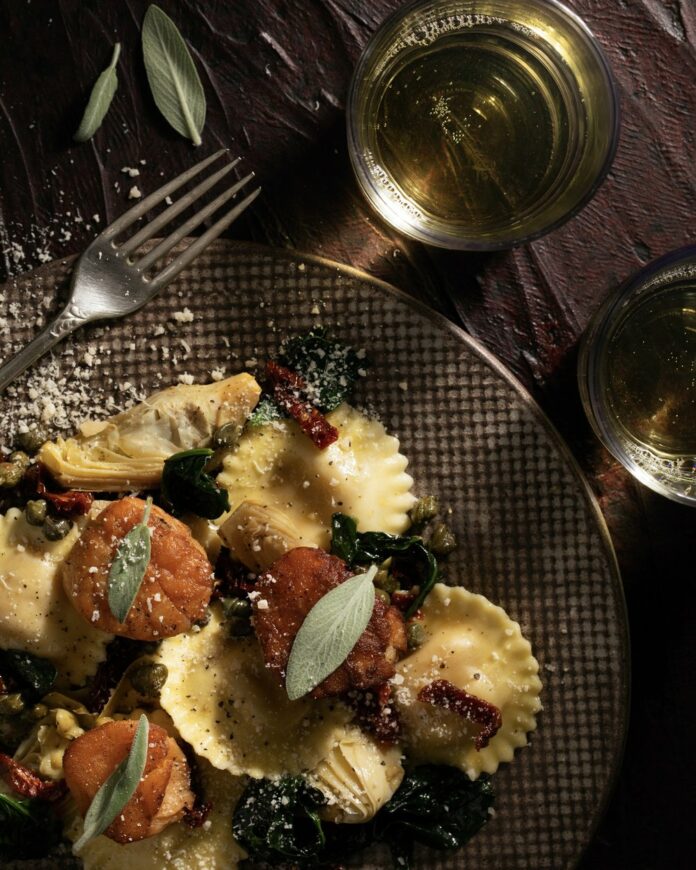
Ravioli with sautéed vegetables and scallops served on a fine dining plate
Ravioli, vegetables, and scallops make an exciting weeknight trio.

Ravioli, vegetables, and scallops make an exciting weeknight trio in this dinner recipe by Jackie Page. Jackie’s recipes are full of heart, cooked with a real sense of love and care that comes through in the rich flavors and decadent seasoning. This recipe uses things you most likely already have in your kitchen (with the exception of scallops, unless you’re a real seafood buff). But once you try it, this Ravioli with Veggies & Scallops will become a weeknight staple in your household. 

Tips for Cooking Scallops

Intimidated by cooking scallops? You’re not alone. If you also just aren’t into seafood, you can leave them out of and just make ravioli with sautéed veggies. But it’s a fun new challenge if you’re up for it. You’ll want to pat them dry before using them, even those labeled “dry scallops.” Once you put them in the pan to sear, don’t overcrowd the pan with them: make sure they’re spaced out. Combine this with the ravioli, and you’ll have a restaurant-worthy meal in no time. For another take on this recipe, try our Summer Vegetable Sauté with Ravioli. 

Print
clock clock iconcutlery cutlery iconflag flag iconfolder folder iconinstagram instagram iconpinterest pinterest iconfacebook facebook iconprint print iconsquares squares iconheart heart iconheart solid heart solid icon
Ravioli with sautéed vegetables and scallops served on a fine dining plate

Ravioli with Sautéed Veggies & Scallops


  • Author: Jackie Page

Description

An easy meal with all your favorite ingredients.


Ingredients

Scale
  • 1/8 cup olive oil
  • 68 scallops
  • 16 oz package ravioli, your choice
  • 1 package of fresh spinach
  • 1 jar marinated artichoke hearts
  • 1/4 cup sun-dried tomatoes
  • Salt and pepper to taste


Instructions

  1. Bring a skillet up to high heat and add a little bit of the olive oil.
  2. Sear scallops on both sides. Do not try to move the scallops until they release some liquid, since that’s how you’ll know that side is done, and you can move them without tearing them.
  3. Following directions on the package, boil the ravioli and drain.
  4. In a skillet with the remaining olive oil, add spinach, artichoke hearts, and sun-dried tomatoes. Sauté until spinach is wilted. Add ravioli and carefully toss.

Recipe by Jackie Page
Styling by Anna Franklin
Photography by Dave Bryce

Subscribe to TABLE Magazine‘s print edition.