Home Blog Page 221

Poetry Lounge Gives a Second Life to Millvale’s Whisper Nest

0
A white male stands behind a bar surrounded by bottles and mixed drinks.

Whisper Nest devotees need not fear that the former Millvale bar will be transformed into something entirely new under the direction of Pittsburgh craft cocktail connoisseur Sean Enright.

In fact, when Enright opens the bar, now known as Poetry Lounge, this September, visitors can expect a very similar experience and environment.

“I don’t really want to change much of anything,” Enright explains to TABLE Magazine. “[Whisper Nest] had such a great ambiance, such a great atmosphere, and the customer base was so supportive there. We wanted to really capture what they already had.”

The Same, But Different

Enright isn’t doing any remodeling, and any changes, like decorations, will be minimal.

“We’re making some small adjustments, upping the cocktail program a little bit, adding some wine to the menu,” Enright says, “but we’re not looking for [Poetry Lounge] to be a cocktail bar. We want it to be as accessible to everyone as possible, as [Whisper Nest] was.”

The upgraded cocktail program will reflect Enright’s longstanding background and influence in the craft cocktail industry, which started in London in 1992 after graduating from the Harvard Student Agencies School of Bartending.

“One of the things I’ve always been known for is my Sazerac,” Enright says. “We will definitely have a Sazerac and will be making the best Sazerac in town.”

Also on the cocktail menu: Ramos Gin Fizz, Frozen Irish Coffee, and classics like daiquiris and caipirinhas.

Turn Up the Music

And Enright didn’t forget about Whisper Nest’s commitment to music. Musical programming will be offered regularly, with themed nights taking place each week.

Sundays, for example, will be Surfs Up Sundays, featuring everything from surf rock to reggae. (An optimal time to sip on Poetry Lounge’s Galeophobia cocktail, served in a shark mug.) Meanwhile, Wednesdays will highlight punk rock. They aim to have local bands play in those slots as well, alongside DJs. Already in the works is local surf rock band The Yeggs to perform on a Sunday.

“We just want to be a neighborhood bar that offers great cocktails, good wine,” Enright says. “We’re trying to maintain what the Whisper Nest started.”

Story by Jordan Snowden / Photography by Jeff Swenson

Subscribe to TABLE Magazine’s print edition.
Summer Veggie en Croute

0
A summer veggie en croute, puff pastry filled with chopped vegetables in a cast iron skillet

Summer Veggie en Croute will surely become a seasonal go-to. Summer veggies are versatile ingredients. Thank heavens for that: during the weeks of peak harvest, we need to change up what we do with them. This simple recipe invites you to chop up two cups of your favorite garden vegetables and pop them into a puff pastry galette… resting on a creamy bed of mascarpone and seasonings. The results will make you look like a French chef, but the process couldn’t be easier.

Summer Veggie en Croute Recipe

INGREDIENTS 
1 sheet puff pastry
1/4 cup olive oil divided
1/2 cup mascarpone
2 cloves garlic, grated on a microplane
2 cups chopped fresh veggies (a mix of zucchini, summer squash, bell peppers, corn)
1/2 tsp Ground cumin
1/2 tsp black pepper
1/2 tsp salt
INSTRUCTIONS
  1. Preheat oven to 350.
  2. Grease a 9” cast iron skillet with olive oil. Place puff pastry in the middle. Press gently with fingers to spread the dough out a bit.
  3. Mix mascarpone, garlic, and all but a teaspoon of the olive oil. Spread it around in a circle in the middle of the pastry, leaving the corners clear.
  4. Mix chopped veggies and spices and place over the mascarpone.
  5. Fold the corners of the pastry into the middle of the pan. Press the tips together. Place in oven for 20-30 minutes until the pastry is golden brown. Eat immediately.
Recipe by Keith Recker / Styling by Star Laliberte and Jordan Snowden / Photography by Star Laliberte
Subscribe to TABLE Magazine’s print edition.
Simple Chicken Marbella

0
An arial view of a round white baking dish with chicken thighs, olives, prunes, and capers, and two yellow dishes with single servings of the same with gold forks

Chicken Marbella is an easy choice when you know you’re going to be limited on time. The recipe calls for marinating the chicken overnight, but the preparation is ultra simple, and the outcome is packed full of the kind of flavors one would expect from a meal you’ve slaved over to prepare. The result is tender and juicy meat with a briny and sweet tang. Olives, capers and prunes play so deliciously well together that this will become a staple in your kitchen. Health-conscious cooks may consider skipping the brown sugar: the dish is still wonderful without it.

What is Chicken Marbella? 

Chicken Marbella gets it name from Marbella, a Spanish coastal city just across the Mediterranean from North Africa. It likely got its spices from that cuisine. It became popular among Americans in the ’80s as a party dish, likely from the Silver Palate Cookbook. Ina Garten also then took inspiration from that recipe for a later version of the dish. Our version of Chicken Marbella is easy, no matter what level of chef you are. 

Print
clock clock iconcutlery cutlery iconflag flag iconfolder folder iconinstagram instagram iconpinterest pinterest iconfacebook facebook iconprint print iconsquares squares iconheart heart iconheart solid heart solid icon
An arial view of a round white baking dish with chicken thighs, olives, prunes, and capers, and two yellow dishes with single servings of the same with gold forks

Simple Chicken Marbella


  • Author: Star Laliberte

Description

A simple recipe for weeknights when you just can’t seem to find the time…


Ingredients

Scale
  • 2 lbs chicken thighs (about 6)
  • 1/4 c extra virgin olive oil
  • 1/4 c red wine vinegar
  • 20 prunes
  • 3 bay leaves
  • 1/3 c capers plus 2 tsp juice
  • 3/4 c large green olives, pitted, such as Castelvetrano, or Cerignola
  • 1 small garlic head, minced
  • 2 tbsp dried oregano
  • 1 tbsp salt
  • 1 tsp fresh cracked pepper
  • 2/3 cups dry white wine
  • 1/3 cups light brown sugar, packed


Instructions

  1. Mix olive oil, vinegar, prunes, bay leaves, capers & juice, olives, garlic, oregano, salt and pepper in a medium bowl for the marinade.
  2. Add chicken to the marinade, making sure to coat the thighs.
  3. Cover or transfer to a gallon sized ziplock bag, and marinate overnight.
  4. Preheat the oven to 350 degrees.
  5. Transfer the the chicken thighs and marinade to a roasting pan, skin side up.
  6. Season with 1 tsp of salt and 1/2 tsp of pepper.
  7. Evenly distribute the brown sugar on top of the thighs.
  8. Pour wine around the chicken (not on top).
  9. Roast for 45-55 minutes.
  10. Remove from the oven, cover with foil, and allow to rest for 15 minutes.
  11. Remove bay leaves, transfer to a platter, and serve.

Recipe by Star Laliberte
Styling and Photography by Keith Recker

Subscribe to TABLE Magazine’s print edition.
Easy One Pan Salmon and Tomatoes

0
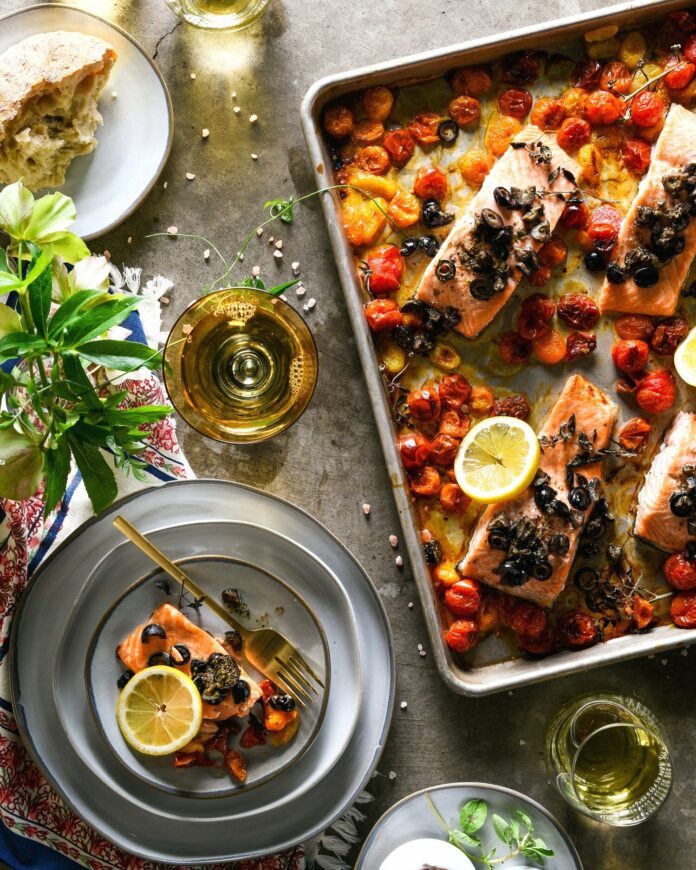
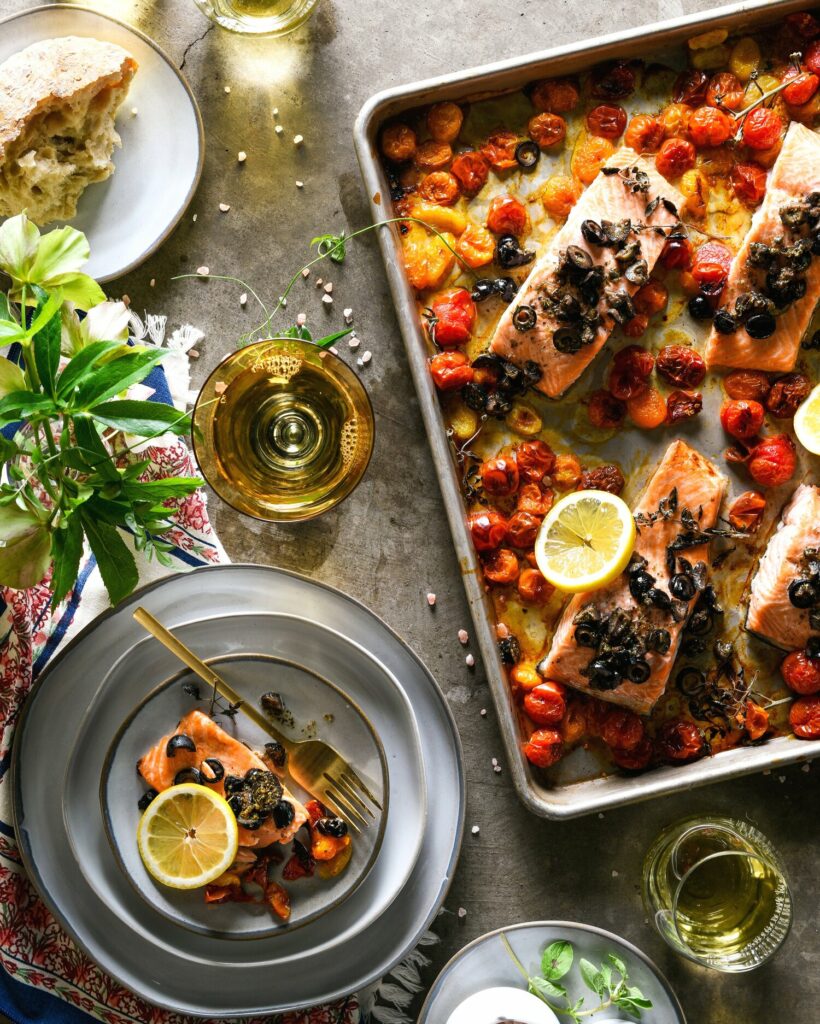
A vibrant and nutritious pan salmon and tomato meal featuring perfectly roasted salmon fillets accompanied by a colorful assortment of ripe tomatoes.

Our Easy One Pan Salmon and Tomatoes is inspired by author and chef Melissa Clark’s wonderful book, Dinner: Changing the Game: A Cookbook, and maybe by a tiny bit of overexposure to our kitchen these last few months. From her ideas, we decided to chart a simple course for everyday meals this summer. Sheet pan dinners are a great way to help you get through the weekdays. Each pan carries plenty of fresh ingredients ingredients and loads of flavor. Plus, one pan cooking makes a no-mess, easy dinner option. The quick succession from oven to plate is simply delicious!

Cook up this one pan salmon and tomato recipe for a delicious, no-fuss seafood dinner. Just season, roast, and enjoy!

Print

clock clock iconcutlery cutlery iconflag flag iconfolder folder iconinstagram instagram iconpinterest pinterest iconfacebook facebook iconprint print iconsquares squares iconheart heart iconheart solid heart solid icon
A vibrant and nutritious pan salmon and tomato meal featuring perfectly roasted salmon fillets accompanied by a colorful assortment of ripe tomatoes.

Easy One Pan Salmon and Tomatoes


  • Author: Keith Recker

Description

Making a healthy dinner has never been so simple and quick.


Ingredients

Scale
  • 2 pieces of salmon
  • 50 halved cherry tomatoes
  • 2 tbsp fresh oregano leaves
  • 1/4 tsp lemon zest
  • 1/4 tsp salt
  • 1 cup pitted Kalamata olives
  • 1/4 tsp pepper
  • 1/4 cup olive oil


Instructions

  1. First, prepare a simple tapenade by blending 2 tbsp fresh oregano leaves, 1 cup pitted Kalamata olives, ¼ tsp lemon zest, salt, pepper, and ¼ cup olive oil.
  2. Roast 50 halved cherry tomatoes at 400 degrees for 20 minutes.
  3. Brush 2 pieces of salmon with oregano-olive tapenade. Add salmon to the pan, along with sliced olives and fresh oregano stems. Cook everything for another 10 minutes.
  4. Squeeze fresh lemon on top before serving.

We gratefully acknowledge the wonderful author and chef Melissa Clark, who set us on this flavorful path! Please order her very helpful and delicious book: Dinner: Changing the Game: A Cook Book.

Story by Keith Recker
Photography and Styling by Erin Kelly
Recipes Inspired by Melissa Clark

Subscribe to TABLE Magazine’s print edition.
Turkey and Black Bean Burger with Sweet Potato Fries

0
An aerial view of a Turkey and Black Bean Burger, Sweet Potato Fries, blueberrys, and kiwi slices sitting on a light green plate against a green background.

Healthy but hardy — turkey and black bean burgers are a delicious and healthy alternative to traditional burgers. Made with lean ground turkey and fiber-rich black beans, they are packed with protein and nutrients. Bonus points for anyone watching their waistline: These burgers are lower in fat than those made with beef. Plus, the flavor of turkey showcases the handful of spices you. This way your end product is juicy, savory, and just as delicious as a regular burger would be.

Why Sweet Potato Fries Are Still Healthier Than Regular Fries

When baked instead of fried, sweet potato fries are a salty and nutritious companion. The side dish is a great source of complex carbohydrates, vitamins, and minerals. Even more, sweet potatoes are also lower in calories than regular potatoes and contain more fiber.

Together, this burger and fry combo makes for a satisfying and healthy meal that the whole family will love.

Print
clock clock iconcutlery cutlery iconflag flag iconfolder folder iconinstagram instagram iconpinterest pinterest iconfacebook facebook iconprint print iconsquares squares iconheart heart iconheart solid heart solid icon
An aerial view of a Turkey and Black Bean Burger, Sweet Potato Fries, blueberrys, and kiwi slices sitting on a light green plate against a green background.

Turkey and Black Bean Burger


  • Author: Alekka Sweeney

Description

A healthy upgrade for your favorite burger.


Ingredients

Scale
  • 115 oz can black beans
  • 3 green onions
  • 1/2 tbsp chili powder
  • 1/2 tsp ground cumin
  • 1/2 tsp garlic powder
  • 1/8 tsp cayenne pepper
  • 1/2 tsp salt
  • 19 oz lean ground turkey
  • Whole wheat hamburger buns


Instructions

  1. Preheat the oven to 375ºF.
  2. Drain and rinse the black beans. Place the black beans in a large bowl and mash them slightly with your hands or a potato masher.
  3. Slice the green onions and add them to the bowl along with the chili powder, cumin, garlic powder, cayenne pepper, and salt. Stir until the beans are evenly seasoned.
  4. Add the ground turkey to the seasoned black beans. Mix well using your hands. Form 4 patties (about 2-2.5 inches diameter, 1/2 inch thick). Place the patties on a roasting pan or a baking sheet covered with foil and wire cooling racks.
  5. Bake the patties in the preheated oven for 20 minutes, or until browned on the outside and no longer pink in the center.
Print
clock clock iconcutlery cutlery iconflag flag iconfolder folder iconinstagram instagram iconpinterest pinterest iconfacebook facebook iconprint print iconsquares squares iconheart heart iconheart solid heart solid icon

Baked Sweet Potato Fries


  • Author: Alekka Sweeney, Adapted from Cookie and Kate

Description

A crispy side dish that gets rid of the guilt of regular french fries.


Ingredients

Scale
  • 2 lb sweet potatoes (about 2 medium-large or 3 medium)
  • 1 tbsp cornstarch
  • ½ tsp fine sea salt
  • 2 tbsp extra-virgin olive oil
  • Optional spices: freshly ground black pepper, cayenne pepper and/or garlic powder


Instructions

  1. Preheat the oven to 425 degrees fahrenheit with racks in the lower and upper thirds of the oven (make sure the top rack is about 6″ from the heat source and no closer).
  2. Line two large, rimmed baking sheets with parchment paper so the fries don’t get stuck to the pans.
  3. Peel the sweet potatoes and cut them into fry-shaped pieces about 1/4″ wide and 1/4″ thick. Try to cut them into similarly sized pieces so the fries will bake evenly. Transfer half of the uncooked fries to one baking sheet, and the other half to the other baking sheet.
  4. Sprinkle the sweet potato fries with the cornstarch (use 1 1/2 teaspoons per pan) and salt (1/4 teaspoon per pan).
  5. Toss until the fries are lightly coated in powder. Drizzle the olive oil over the fries (1 tablespoon per pan) and toss until the fries are lightly and evenly coated in oil, and no powdery spots remain (use your fingers to rub visible cornstarch into the fries as necessary).
  6. Arrange your fries in a single layer and don’t overcrowd; otherwise, they will never crisp up. Bake for 20 minutes, then flip the fries so they can cook on all sides. (The easiest way to flip them is with a metal spatula. Section by section, scoop up about ten fries and flip them with a quick wrist turn.)

Start your meal with a refreshing salad. Try one of the following recipes:

Watermelon Salad
Summer Salad
Strawberry Salad and Rhubarb Balsamic Vinaigrette
Citrus and Seed Salad with Basil Vinaigrette

Sweet Potato Fries Recipe Adapted from Cookie and Kate
Recipes by Alekka Sweeney
Photography by Dave Bryce

Subscribe to TABLE Magazine‘s print edition.

White Bean Tuna Salad Wraps

0
White Bean Tuna Salad Wraps sit on a green plate with two orange slices, and a few pieces of kiwi.

Small in size, these White Bean Tuna Salad Wraps are not only delicious but are loaded with nutrients perfect for midday pick-me-ups. You may just beat that two o’clock feeling after eating these for lunch!

Pack one for the kiddo’s lunch, too — these White Bean Tuna Salad Wraps don’t get soggy, provide an balance of protein, carbohydrates, and healthy fats, and are just all around visually appealing. Help your little ones stay energized and focused throughout the school day.

What Makes These Wraps So Healthy?

Our White Bean Tuna Salad Wraps recipe calls for tuna in olive oil, rather than water, which, while a bit more on the calorie side, is much higher in vitamin D and selenium — helping your body fight infections. Plus, is excellent for your bones!

Meanwhile, the central star, white beans, provides a plethora of marvelous nutrients and vitamins, like protein, fiber, folate, iron, and magnesium. You have the option to use either cannellini or Great Northern white beans. The difference is that cannellini beans are a bit larger and creamier, while Great Northern beans are firmer and smaller in size. But you can’t go wrong with either!

Print
clock clock iconcutlery cutlery iconflag flag iconfolder folder iconinstagram instagram iconpinterest pinterest iconfacebook facebook iconprint print iconsquares squares iconheart heart iconheart solid heart solid icon
White Bean Tuna Salad Wraps sit on a green plate with two orange slices, and a few pieces of kiwi.

White Bean Tuna Salad Wraps


  • Author: Alekka Sweeney
  • Yield: Makes 4

Description

A simple lunch that comes together easily and provides a filling meal.


Ingredients

Scale
  • 1 cup chopped red onions or shallots
  • Zest and juice of 1 lemon or 2 limes (can sub a tbsp or two of cider vinegar)
  • 2 (5- to 6-oz) cans of tuna packed in olive oil
  • 2 (15-oz) cans of cannellini or Great Northern white beans, rinsed and drained
  • 1/2 cup (loosely packed) chopped parsley or arugula, or 2 tablespoons thinly sliced mint
  • 1/2 tsp freshly ground black pepper
  • Salt and more extra virgin olive oil, to taste
  • 1 package of whole wheat tortillas
  • 1 cup spring salad mix


Instructions

  1. Sprinkle some of the lemon juice over the chopped onions while you prepare the other ingredients. This will take some of the oniony edge off the onions.
  2. Combine ingredients in a bowl. Drain the oil from the tuna and put the tuna into a large bowl. Add the beans to the tuna and gently stir to combine.
  3. Add the onions, herbs, black pepper, lemon zest and lemon juice and mix to combine. Add Tabasco or chili to taste.
  4. If the salad needs more acid, add a little more lemon juice. If the salad seems a little dry, add a little bit of extra virgin olive oil. Add salt to taste.
  5. Chill before serving.
  6. Lay tortillas on a clean work surface. Lay salad mix over tortilla. Spread ½ cup of tuna salad over greens. Fold top and bottom half of tortilla into the middle, turn the tortilla to the open edges and fold over like a burrito.

This salad will last several days in the fridge, tightly covered.

Recipe by Alekka Sweeney
Photography by Dave Bryce

Subscribe to TABLE Magazine’s print edition.
Second Act: Turkey Leftovers

0
Gluten-Free Turkey Enchiladas Verde sits on a clear casserole dish. leftover recipes

We are inspired by TABLE Magazine contributor Rhonda Schuldt and the leftover transformations of her classic Roasted Chicken recipe. These four leftover recipes will please the palate without the turkey overload. Turkey doesn’t have to run the show, however. You can swap in any leftover meat you have on hand.

Gluten-Free Turkey Enchiladas Verde

This recipe can be made with leftover roasted turkey and homemade Salsa Verde (recipe below), but this super easy version uses either canned green enchilada sauce or jarred Salsa Verde. Ingredients are layered between tortillas, so there are no pesky rolling individual enchiladas!

INGREDIENTS

1 large can green enchilada sauce*
12 6-inch corn tortillas**
4-6 cups shredded turkey***
½ yellow or red onion, chopped
1 can black beans, drained
1 cup roasted corn (canned or frozen corn works equally well)
Shredded cheddar or Mexican blend cheese (3-4 cups)

INSTRUCTIONS

  1. Heat oven to 375°. Spray a 9×13 baking dish with non-stick cooking spray.
  2. Pour a thin layer of enchilada sauce over the bottom of the dish. Lay six corn tortillas on the bottom, overlapping the tortillas to cover the bottom of the pan. Top with the shredded turkey, onion, beans, and corn. Add 1-2 cups of the cheese depending on how cheesy you want the enchiladas. Pour 1/3 of the enchilada sauce over the filling ingredients. Top with the remaining six tortillas, overlapping, to cover the filling. Top with remaining enchilada sauce; spread the sauce evenly over the tops of the tortillas. Top with additional cheese…adding as much cheese as you wish.
  3. Cover with foil and bake for 20-30 minutes until bubbly and heated through.
  4. Let sit for 10 minutes before serving.
  5. Serve with sour cream, scallions, your favorite hot sauce, and/or cilantro if desired.

*If you can’t find gluten-free green enchilada sauce, I’ve used green salsa, which is usually gluten-free.

**Flour tortillas make a delicious non-gluten-free version, as well.

The recipe works equally well with red enchilada sauce if that’s preferred!

Roasted Tomatillo and Sweet Onion Salsa Verde

INGREDIENTS

1 ½ pounds fresh tomatillos, husks removed and rinsed*
2 medium sweet onions
2 poblano peppers (substitute jalapeno or Serrano peppers for more heat)
4 cloves garlic, peeled
Juice of 1 lime
½ teaspoon cumin
1 teaspoon salt
½ teaspoon pepper
½ cup fresh cilantro, chopped

INSTRUCTIONS

  1. Preheat grill to medium-high.
  2. Leaving root end intact, peel onions and halve from root to tip.
  3. Place whole tomatillos, onions, and peppers on oiled grill grate. Cook, turning occasionally until all are slightly charred. Remove from grill. Seed and stem the peppers.
  4. Place charred vegetables in a blender or food processor along with garlic, lime juice, cumin, salt and pepper. Pulse until blended. Stir in cilantro.
  5. Serve simply with chips, as a condiment, or as a delicious base for chicken enchiladas. Stir into two chopped avocados for a guacamole to remember!

Turkey and Vegetable Soup

INSTRUCTIONS

  1. Heat 1 tablespoon olive oil in a stockpot. Add 1 diced carrot, 1 diced celery rib, ½ cup diced onion, 1 clove chopped garlic. Cook for 5 minutes until softened.
  2. Add 1 14-ounce can of diced tomatoes (fire-roasted, if you can find them), 1-quart turkey stock*, and 2 cups shredded leftover turkey. Season with salt, pepper to taste. Let simmer until heated through.

*It’s easy to make your own turkey stock from the leftover carcass of your turkey.

Buffalo Turkey Sliders

Sauce: In a saucepan, add equal parts butter and your favorite hot wing sauce, such as Frank’s®, adding a little more hot sauce if desired to up the heat. Season with garlic powder and black pepper to taste. Make plenty of this sauce… it keeps in the well in the fridge!

Per Slider: Toss 2 tablespoons of sauce with ½ cup of warmed leftover shredded roast turkey. Place on a slider bun and garnish with blue cheese dressing and top with finely diced celery if desired.

Turkey Salad Sandwiches

The options here are endless! Serve on tomato slices, salad greens, toasted bread, crackers, or enjoy each of these ideas on its own.

Classic version: Stir together shredded turkey, diced celery, chopped hard-boiled eggs, mayonnaise (or plain Greek yogurt), a little mustard of your choice. Season with salt and pepper.

Curried version: Mix together Greek yogurt, curry powder, garlic powder, salt, and pepper. Stir in shredded turkey, finely diced cucumber, chopped green apple.

Forever Young Cocktail, Inspired by Rod Stewart

0
Two layered cocktails, orange on the bottom and red on the top, in clear square glasses with citrus flames as garnish and 2 lemon wedges to the right of the glasses.

British rock and pop singer-songwriter, Rod Stewart, is the inspiration for the 15th cocktail, Forever Young, in our 2023 Summer Concert Cocktail series. With a career that’s still going after over 60 years, one might suggest this icon is, himself, forever young.

Forever Young Cocktail Recipe

INGREDIENTS

2 oz Old Overholt Rye Whiskey
1 oz Justin Cabernet Sauvignon
1 ½ oz lemon simple syrup (recipe below)
“Wild” lemon twist, for garnish

INSTRUCTIONS

  1. Add ice to a cocktail shaker and pour in whiskey and lemon simple syrup. Shake until chilled and a frost forms on the shaker.
  2. Strain into your rocks glass.
  3. Gently and slowly pour the wine over the back of a spoon held just at the top of the cocktail, allowing the wine to float to the top.
  4. Add your lemon twist to the glass rim.

Lemon Simple Syrup Recipe

INGREDIENTS

2 lemons (medium/large in size)
1 cup water
1 cup sugar

INSTRUCTIONS

  1. In a small saucepan, bring the water and sugar to a boil, stirring until the sugar is dissolved.
  2. Remove the saucepan from the heat, add the zest from 1 lemon, then the juice from both lemons, and then add 2 halves of the non-zested lemons into the liquid.
  3. Allow the syrup to come to room temperature.
  4. Strain using a fine mesh strainer into a container. While straining, do not press on the lemons. Refrigerate. This Lemon Simple Syrup will last up to 2 weeks as is in the refrigerator or if you add a tablespoon of vodka or rum it will last longer.

Recipe by Sarah Cascone / Styling by Anna Calabrese / Photography by Dave Bryce / Story by Star Laliberte

Try these other cocktails in our Summer Concert Series:
Sunrise, Sunburn, Sunset Cocktail, Inspired by Luke Bryan
Appetite for Destruction, Inspired by Guns N’ Roses
Like a Virgin and Material Girl: 2 Cocktails Inspired by Madonna
Prickly Pear Lemonade and Queen B: 2 Cocktails Inspired by Beyoncé
So What Cocktail, Inspired by Pink
Baker’s Dozen Cocktail, Inspired by Phish
Man, I Feel Like a Women Cocktail, Inspired by Shania Twain
Sunflower Cocktail, Inspired by Post Malone
Typical Average Cocktail, Inspired by Ed Sheeran
Crush Cocktail, Inspired by Dave Matthews Band
Summer’s In Your Blood Cocktail, Inspired by Boygenius
Lover Cocktail, Inspired by Taylor Swift

Subscribe to TABLE Magazine’s print edition.
Sunrise, Sunburn, Sunset Cocktail, Inspired by Luke Bryan

0
Two orange colored cocktails in rocks glasses with peach fan garnish and a dark background

Luke Bryan’s “Sunrise, Sunburn, Sunset” tells the story of a summer romance. We’ve been romancing all summer long with our 2023 Summer Concert Cocktail series. This is the 14th drink in our lineup of artist-inspired cocktails to kick off a few pregame celebrations before the live music begins. A tasty Bourbon base nip is for more than just the country music fans. Enjoy the Sunrise, Sunburn, Sunset cocktail on a hot evening with your summer crush.

Sunrise, Sunburn, Sunset Cocktail Recipe

INGREDIENTS

2 oz Woodford Reserve Bourbon
1 tsp granulated sugar
2 tsp soda water
1 Luxardo Cherry
1 orange twist
2 tbsp diced white peach
White peach fan, for garnish

INSTRUCTIONS

  1. In a rocks glass, muddle sugar, soda water, cherry, and orange twist.
  2. Then add diced peaches and muddle.
  3. Add ice to the glass, pour in bourbon, and stir.
  4. Garnish with a peach fan. 

Recipe by Sarah Cascone / Styling by Anna Calabrese / Photography by Dave Bryce / Story by Star Laliberte

Try these other cocktails in our Summer Concert Series:
Appetite for Destruction, Inspired by Guns N’ Roses
Like a Virgin and Material Girl: 2 Cocktails Inspired by Madonna
Prickly Pear Lemonade and Queen B: 2 Cocktails Inspired by Beyoncé
So What Cocktail, Inspired by Pink
Baker’s Dozen Cocktail, Inspired by Phish
Man, I Feel Like a Women Cocktail, Inspired by Shania Twain
Sunflower Cocktail, Inspired by Post Malone
Typical Average Cocktail, Inspired by Ed Sheeran
Crush Cocktail, Inspired by Dave Matthews Band
Summer’s In Your Blood Cocktail, Inspired by Boygenius
Lover Cocktail, Inspired by Taylor Swift

Subscribe to TABLE Magazine’s print edition.
Blueberry Pancakes

0
A stack of blueberry pancakes on a green plate. A forkful is taken out of the stack, with the fork sitting to the top right of the pancakes. Blueberry Pancakes Recipe

The secret to this fluffy homemade blueberry pancake recipe is milk and vinegar. By letting the two ingredients sit together to create “buttermilk,” you’ll end up with soft, airy pancakes no one will be able to resist.

Can I Freeze These Blueberry Pancakes?

Absolutely! To Freeze, first let the pancakes cool completely. Then, layer your pancakes between sheets of parchment paper and place them in a freezer bag. These pancakes will keep for up to two months in the freezer.

Print
clock clock iconcutlery cutlery iconflag flag iconfolder folder iconinstagram instagram iconpinterest pinterest iconfacebook facebook iconprint print iconsquares squares iconheart heart iconheart solid heart solid icon
A stack of blueberry pancakes on a green plate. A forkful is taken out of the stack, with the fork sitting to the top right of the pancakes. Blueberry Pancakes Recipe

Blueberry Pancakes


  • Author: Alekka Sweeney
  • Yield: Serves 4-6 1x

Description

Your dream pancakes await!


Ingredients

Scale
  • 3/4 cup milk
  • 2 tbsp white vinegar
  • 1 cup flour
  • 2 tbsp sugar
  • 1 tsp baking powder
  • 1/2 tsp baking soda
  • 1/2 tsp salt
  • 1 egg
  • 2 tbsp melted butter
  • 1+ cup fresh blueberries
  • More butter for the pan


Instructions

  1. Mix the milk and vinegar and let it sit for a minute or two (you’re making “buttermilk” here).
  2. Whisk the dry ingredients together. Whisk the egg, milk, and melted butter into the dry ingredients until just combined.
  3. Heat a nonstick pan over medium heat. Melt a little smear of butter in the pan.
  4. Pour about 1/3 cup of batter into the hot skillet and spread it flat-like (it will be pretty thick). Arrange a few blueberries on top. Cook until you see little bubbles on top and the edges starting to firm up.
  5. Flip and cook for another 1-2 minutes until the pancakes are sky-high fluffy and cooked through.
  6. Serve with butter and maple syrup.

Recipe by Alekka Sweeney
Photography by Dave Bryce

Subscribe to TABLE Magazine‘s print edition.
Create a free account, or log in.

Gain access to read this content, plus limited free content.

Yes! I would like to receive new content and updates.

Table Magazine wants to know your location.

TABLE Magazine operates regional sites - Knowing your location helps us route you to the appropriate site for the best experience.